
Hello to you all.
Another show and tell featuring the amazing Blazing Poppy Collection.
Another show and tell featuring the amazing Blazing Poppy Collection.
Today, triple delights on the blog.....to start, a Tag Duo called
"For You" and "With Love"
"For You" and "With Love"

Heartfelt Creations Products and Products Carried by Heartfelt Creations:
Other Products: Paper: Watercolor paper, Brick Bazzill, SUP A4 natural white card stock
Ranger: Diamond stickles, Water mister, Watercolor brush, Paper distressing tool, Black embossing powder, Heat gun, Stickles diamond. Glimmer-mist: Olive Vine, Brick, Juneberry wine, Patina. Other: Cream Seam binding ribbon, Black brads x 4.
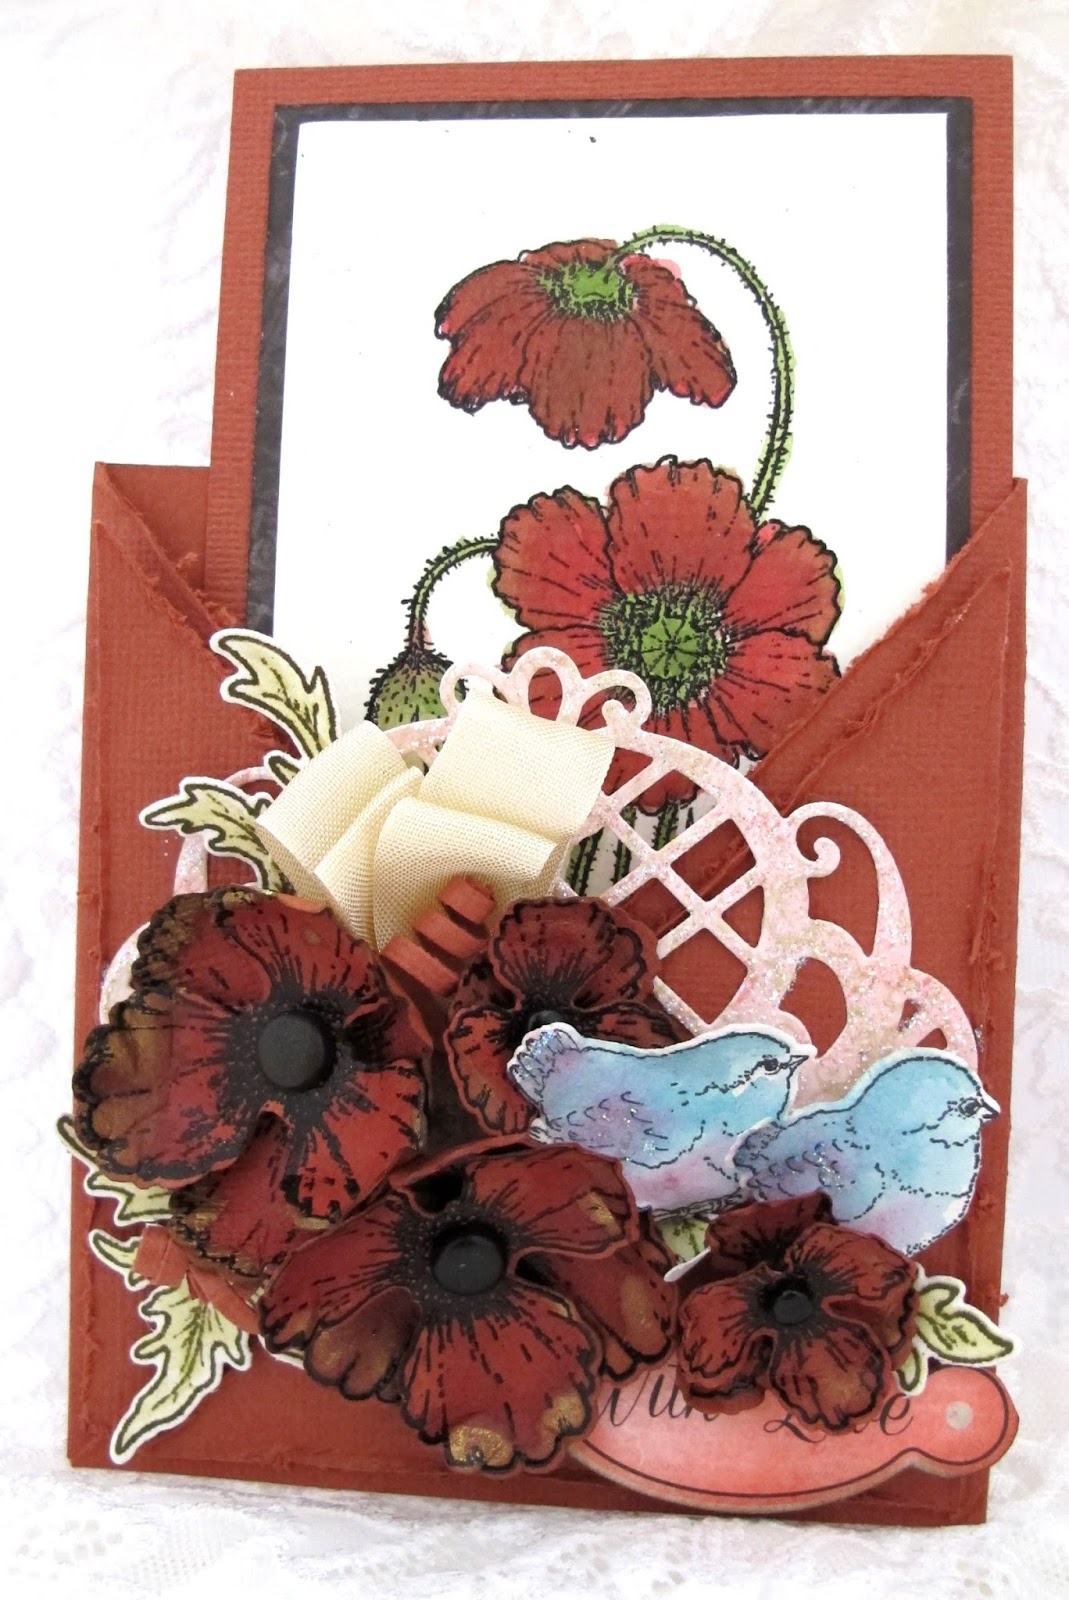

Directions: Each of the finished envelope cards measure15.5 cm x 10 cm.
From the Bazzill, cut 30 cm x 11 cm. Score at 10 cm and 20 cm. Sharpen the folds with the bone folder. Cut away a triangle on both sides of front. From the fold to outer opposite lower edge. Making a slant. Distress this edge. From the cut away card stock trim .5 cm from the squared edges to form a mat for the card front. Distress all the edges of this triangle. Adhere to the card fronts. Using wet glue thinly along the edges, close the card to make a open envelope.

Stamp the Poppy flowers with embossing powder on the bazzill card stock, then die cut with the matching die set. Color with the glimmer mists and watercolor brush.

Stamp the Delightful Daisies leaves and the birds with black ink onto the SUP A4 card stock, color with the glimmer-mists and watercolor brush, as you would water colour.

Taking the Deluxe Flower Shaping Kit, shape the Poppies and leaves. Adhere the Poppies together with a brad. Make the screw swirls from a 1.5 mm strip of bazzill and the quilling tool from the Deluxe Flower Shaping Kit. Make a double bow from the seam binding ribbon.

Find the sentiment in the paper collection. Using the Timeless Amour die set, die cut the frame from paper found in the paper collection. The order of placement of embellishments: Adhere the frame to the center of envelope front. Adhere the leaves in place, add the ribbon, flowers, sentiment, birds, screw swirls and lastly add the stickles to the birds and frame.

The Tag: The tag base is cut from the bazzill 15.3 cm x 8 5 cm. The matting paper is found in the paper collection and is cut 13.5 cm x 7 5 cm. The tag front water color paper is cut 13 cm x 7 cm. Stamp the Poppy image with black ink and color with the Glimmer-mist and water color brush as you would water colors. Adhere together.

NOTE: The two cards are made with the same products. They show different ways of arranging.
A lot of yummy close ups for you to enjoy. The tag card looks a lot harder to make than what it really is, so give it a go...a warning, it will become addictive...LOL
*****
Now we have the third card treat... the ezel card. Softer in colour and trimmed with lace and ribbon.
“Best wishes”

Heartfelt Creations Products and Products Sold on our Website:
Other Products Used: Card stock:
SUP A4 Natural white, Bazzill green. Candy striped ribbon 16 cm x .6 cm Lace braid 22 cm x 1.5 cm, Archival jet black ink, Double sided 3d foam tape, double sided tape, Glimmer mist: Olive Vine, Brick. Star dust stickles, Fussy cutting scissors, Distressing tool. Bone folder.

Instructions: The finished Ezel card size, 14.8 cm x 13.8 cm.
Taking the A4 card stock, cut 13.8 cm x 29.8 cm. Fold in half and in half again to make the Ezel-card base. Cut from the green card stock 13.4 cm x 6.8 cm, this is your Ezel-card base front matting. Adhere to the front fold in the Ezel-card. Find the pink colored design paper from the Blazing Poppy Collection, cut this to, 6.5 cm x 13.1 cm. With the distressing tool, distress the edges. Adhere to the green matting.

For the Ezel-card front stop, cut from the green card stock, 4.4 cm x 13.4 cm. From the pink design paper, cut 4 cm x 13.1 cm. Distress the edges. Adhere to the Ezel-card so it will become the front stop. For the card front stamped front add on: Cut from the green card stock, 9 cm x 11.6 cm, and 10.3 cm x 7.8 cm. From the pink paper cut 11.3 cm x 8.8 cm. Distress the edges of the pink paper. Adhere all these papers together.

For the stamped front cut from the A4 card stock, 10.3 cm x 7.8 cm. Taking the stamp from the Blazing Poppy Vase set. Stamp with the jet black ink and color with the glimmer mist as you would using watercolors. Distress the edges. Adhere to the other paper layers. Wrap and adhere the lace braid, candy striped ribbon across the bottom of the paper layers. Adhere the completed add on card front to the Ezel-card front.

Find the sentiment from the paper collection and cut to size. Distress the edges. Adhere the sentiment to the stop on the top right hand side. (By adding the foam tape to the top of the sentiment only, this will give it a slant when placed.)

To make the fussy cut Poppy boarders: Stamp with the Poppy corner image x 2 on the A4 card stock and jet black ink. Color the images with the glimmer mist as you did before. Fussy cut the boarders. Cut parts away as needed to layer on the card front stop. Place and adhere with wet glue and double sided foam tape. To finish, add stickles to the Poppy centers and seeds heads.

******
I love this Poppy corner stamp. I have been using this a lot. You can imagine me fussy cutting all the detailed leaves...yes that was real fun! I was secreatly hoping Heartfelt Creations would bring out a die for the stamp image....I can keep dreaming....and keep cutting....LOL...because it is not going to happen!
I hope you are all inspired and fired up ready to get cracking to create for the coming weekend now that you have had another slant on the Blazing Poppy Collection......get moving ....because next week there is a new release!....YES it is that time again....another must have for the list.
Poor us...when are we ever going to catch up with all these new toys....
NEVER!
Don't forget to spend some time checking out all the other creative projects posted this week and plan the time in for next Wednesday so you are up on the know with the new Collection coming out....always a must visit place each week,
so much to learn.
*****
This is a message for all the Dutch Scrappies visiting my place....
I dropped in to Scrap-delight yesterday, got a bit lost on my way home from the doctor.......hahaha...She said...any stamps and dies from Heartfelt Creations you will be wanting...she can get them in for you....
may be for a Susan price....be nice....who knows??????
I have planned a few samples for the store so you can have, a look see in real life....
always into a great scrappy idea.
I have been cleaning and sorting my cave (scrap room) and came across a big box tucked away at the back...wait for it!...full of extra energy...now that was a great find...LOL. Therefore, I will be looking to prick some dates in the planner for a few WS later in the year.
Location, Scrap-delight...so keep tuned.
In the mean time till next week, have a scrappy day/evening, inky hugs to you all...
Sussipoppins
both of these are gorgeous, love the designs!!!
ReplyDeleteOh my goodness! It's a triple dip of poppylicious beauty! That first card is just over the top! So many amazing details, and the colors are so regal! The poppies are just lifelike and gorgeous! Wow, Sussi..you really knocked my socks off this week!
ReplyDeleteBeautiful projects this week Sussi. I love the design & the dramatic colors of the first two, and the last one is so super sweet. It makes me want to have a Tea Party! Hugs
ReplyDeleteWOW, WOW and WOW! Your projects this week Sussi are simply gorgeous! My visit to your blog has been an absolute feast for the eyes! Hugs xx
ReplyDelete