HEARTFELT
CREATIONS PRODUCTS AND PRODUCTS CARRIED IN THEIR ON LINE STORE:
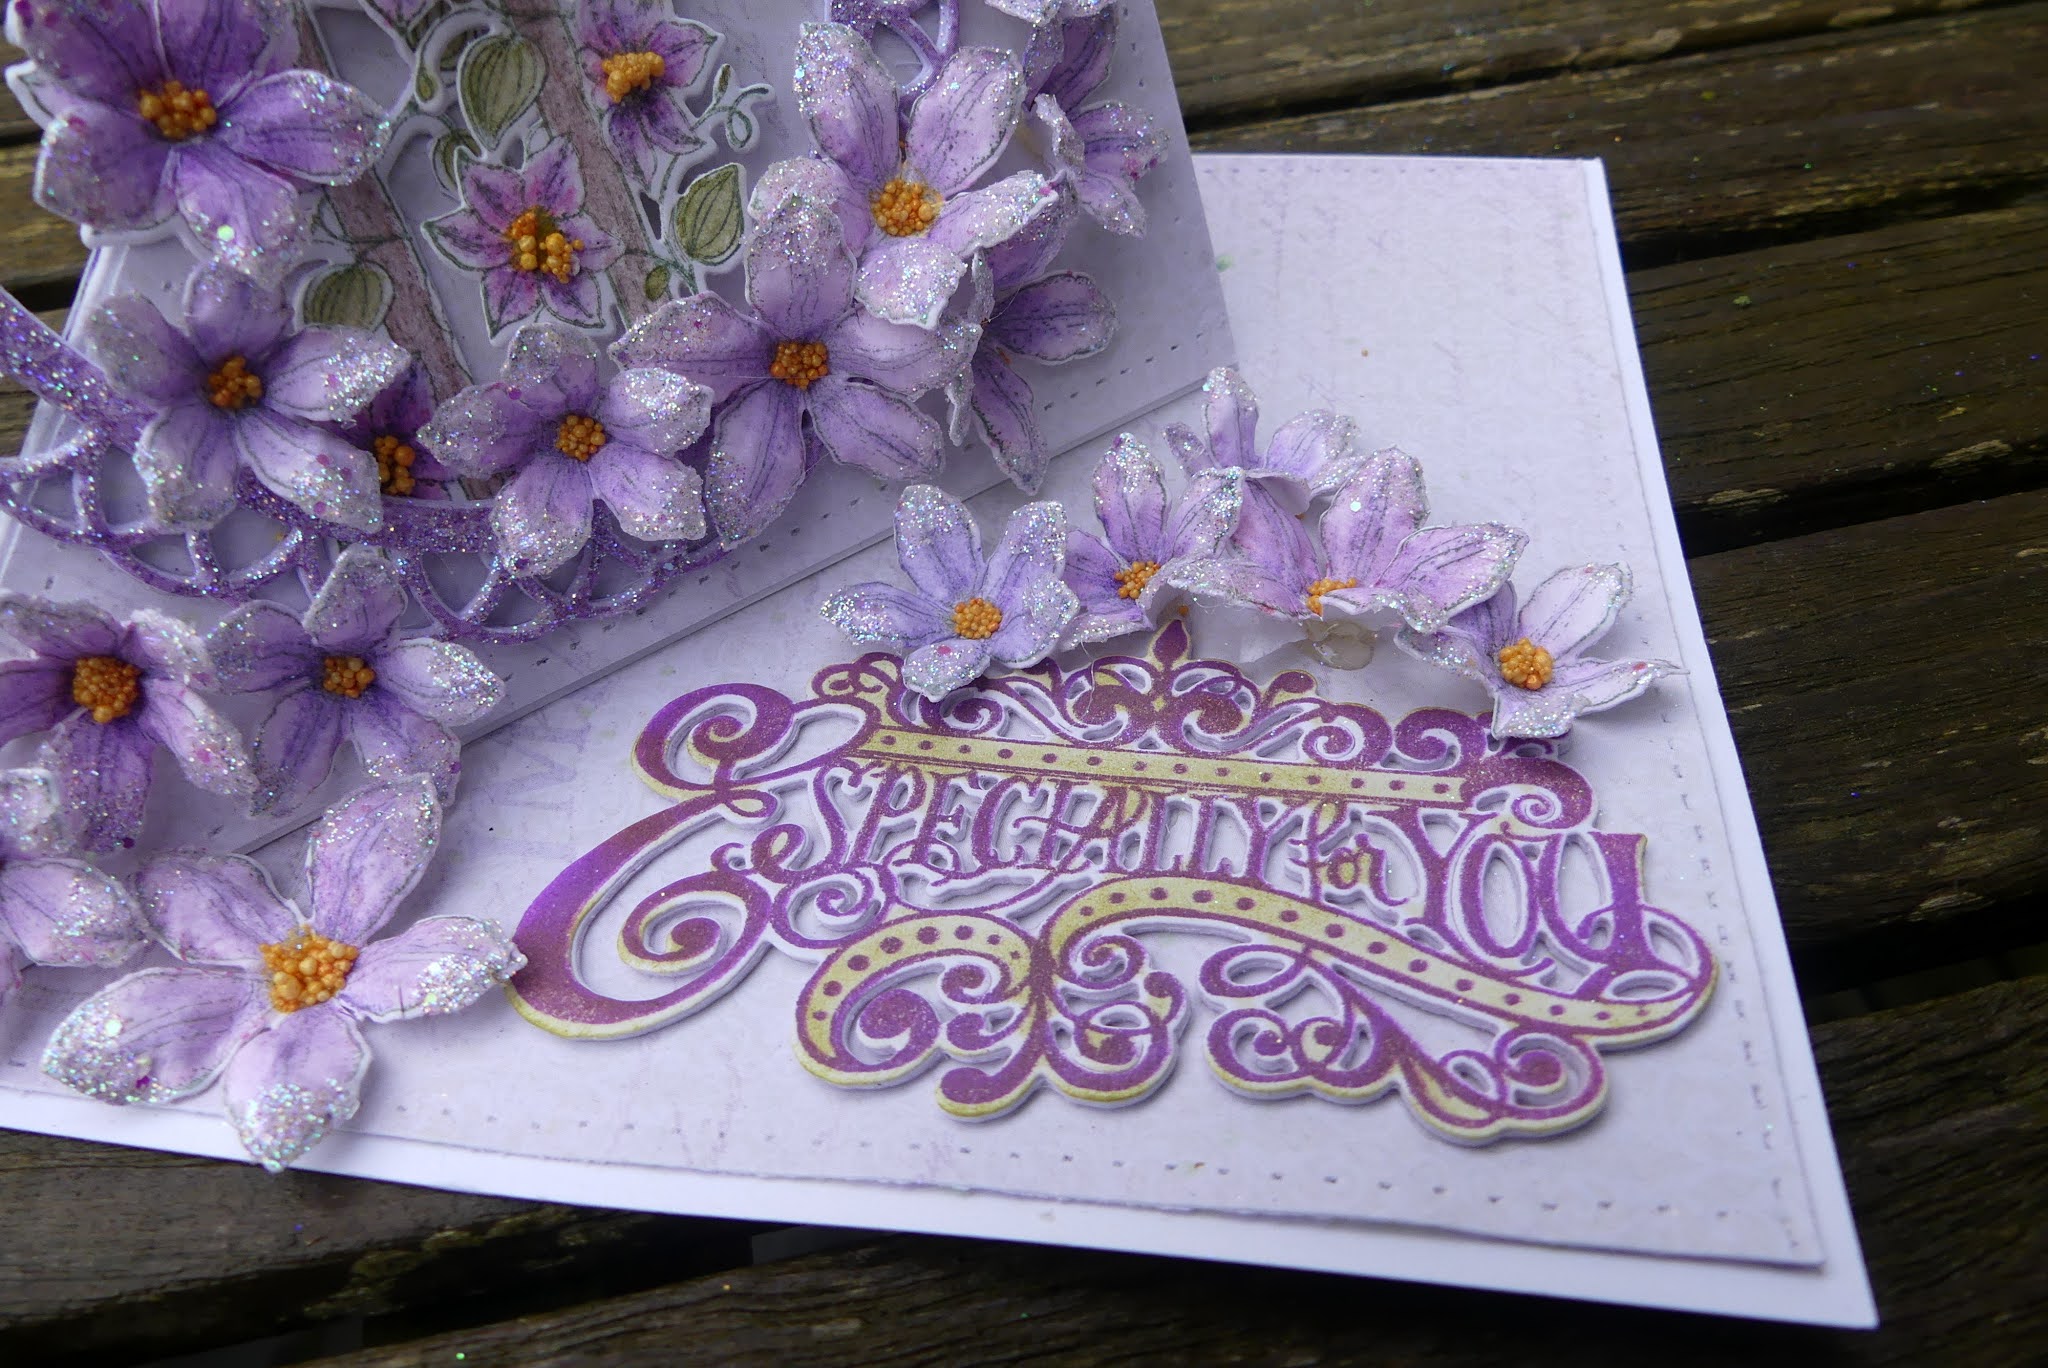
HCFB1-5006 3D Climbing Clematis Shaping Mold
HCDP1-2128
Climbing Clematis paper pad
HCPC-3954
Clematis cling stamp
HCD1-7355 Clematis
die set
HCPC-3956
Clematis Birdhouse cling stamp set
HCD1-7357
Clematis Birdhouse die set
HCPC-3848
Cheerful Note Sentiments cling stamp set
HCST1-401
Deluxe Flower Shaping Kit
HCPP1-475
Deluxe Flower Shaping Paper Pad
OTHER:
159723 Designer
Dries Clear Adhesive
352854
Metal Tip For Adhesive Bottles
DMCT4185
Groove Golf Tool Set
359848
Spellbinders Tool N’ One
RACP505 Ranger Archival Ink Sepia
RACP475 Ranger
Archival Ink Library Green
RLHS100 Hydra Sponges
409311
Color In Water Brush-fine
DDOT 3D Double
Sided Foam Dots
173842
Scor-Pal measuring & scoring board
409311
Color in watercolor brush-fine
901
Krystallos shard glass
D110305
Stamp mat pad
WT4027
Beautiful bling boarders-fancy waves
OTHER PRODUCTS USED: Coloring:-Glimmer Mist: Blitzen, English Ivy, Marigold, Mel’s Dinner, Fully Purple, Olive Vine. Stamping Up water colour pencil - Early Espresso. Other: Double sided tape, Double sided 3D foam Tape, Water color/paint palette (to use with the inks) or small china saucer’s, Hot glue Gun, Fussy cutting scissors, Glitter, Water spritzer, Pattern making tracing tool, Ruler, crafting tray to catch glitter

Taking the white card stock, cut this to 8 “ x 8 1 / 4 “ Fold in half so it measures the above measurement for the card base. Cut a card front that is a little smaller than the card front, adhere this to the card front with the 3D foam tape. Cut a card front matting from the design paper sheet 5A, this will measure 3 2 / 8 “ x 7 1 / 2 “. Taking the pattern making tool, the ruler and the stamping foam mat, make the holes in the paper about 2-3 / 8 “ from the edge on all sides. Adhere this to the card front also with the 3D foam tape.
Make the embellishments for the card by stamping with the library green ink the , birdhouse, the birds and the clematises. 5 x medium and 6 x the small sized clematis petals. Bring color to all that is stamped. The early espresso is used for the wooden part of the bird house, the rest is colored with the glimmer mists. ( spray a little of the mist on to the pallet or dishes, leave to dry a while so the color incenses and the micro color shows more. If needed spritz water to this to be able to paint as you would with water color inks. You could also use a white plastic sheet or bag for this. Bring the glimmer mist on to your work with the water coloring pen / brush ). With this method of coloring, it would be best to first die cut then color as the inks are very wet and will warp the card stock. Use the shaping mold for this collection to bring shape to the clematises then use the shaping tools in the flower centres to raise the petals more. Apply the clear drying adhesive to the petal ends with a hydra sponge or the paint brush then sprinkle the glitter over the flowers. Using the tray to catch all the excess glitter.
Adhere the birdhouse to the card front then arrange and adhere the flowers using the hot glue gun. Place and adhere the birds in place using the 3D foam dots. Taking the bling strip and cut away the leaf shaped blind a adhere to the card as seen in the photo. Apply a little clear drying adhesive to the flower centres then sprinkle the diamond dust so it settles in the adhesive. When dry tap off the excess. Taking the sentiment stamp and a scrap paper from the sheet 5A, stamp twice so you can cut the word love away. Fussy cut this. Using the pattern making tool make holes along the edge of the sentiment pieces. Adhere to the card front.
To finish your card, cut a panel from the same design paper for the inside of the card. Finish the edge of this paper using the pattern making tool again for this.