
Hi, wlecome to my place

‘YOU ARE FINTASTIC’
Heartfelt Creations Products and Products Carried by Heartfelt Creations:
DDOTS -Double Dots/3d foam squares
159723- Art Institute Glue
359760-Gold Embossing powder
Other Products Used:
Ranger products: Icicles’ stickles, Distressing tool, Water mister, Water coloring brush Heat gun. Tonic: Paper cutter, Die cutting machine. White A4 foam sheet. Water Aquarelle paper, Yellow ribbon. Pearl beads. Cardboard box. Gesso. Crop-a-dile. Foam tape. White A4 foam sheets, Hot glue gun
Derwent Ink-tense pencils72: Cadmium yellow- 0210, Red oxide- 1910, Vivid green- 1330, Dark aquamarine- 1210, Sherbet lemon- 0100, Scarlet pink -1320, Deep violet 0880, Hot red 0410, Red violet 0610, Apple green 1400, Dark aquamarine- 1210, Apple green 1400, Beech green 1510, Chilli red 0500, Iris blue 0900, Sea blue 1200, Field green 1500, Tangerine 0300, Deep violet- 0760, Violet 0800, Mauve 0740, Carmine pink 0520, Med vermilion 0310, Lagoon 0810, Teal green 1300, Cherry 0510
Instructions:
Click HERE to see the flower shaping tool kit in use
Click HERE to see the introduction of this collection.
Please note: All the stamping is done with gold embossing powder.
The size of the photos used, 2 x 6.5 cm x 4.9 cm and 2 x 3.8 cm circles.
#Step 1: Make the 3 tags from the cardboard box. Cut to 26.3 cm x 13.2 cm. Tear away a little of the top layer.

I use the Tonic guillotine to cut my cardboard...this works for me.

You can see the measurements of the tag. I used the Dutch Doobadoo tag as a base for this tag.

Cut x3
#Step 2: Apply gesso and leave to dry.
You can see I have taken away some of the cardboard top. I used a small knife with a pointed tip to tear the layer away.

I cut a cleaning sponge in 1/2 to apply the gesso...it's a throw away...

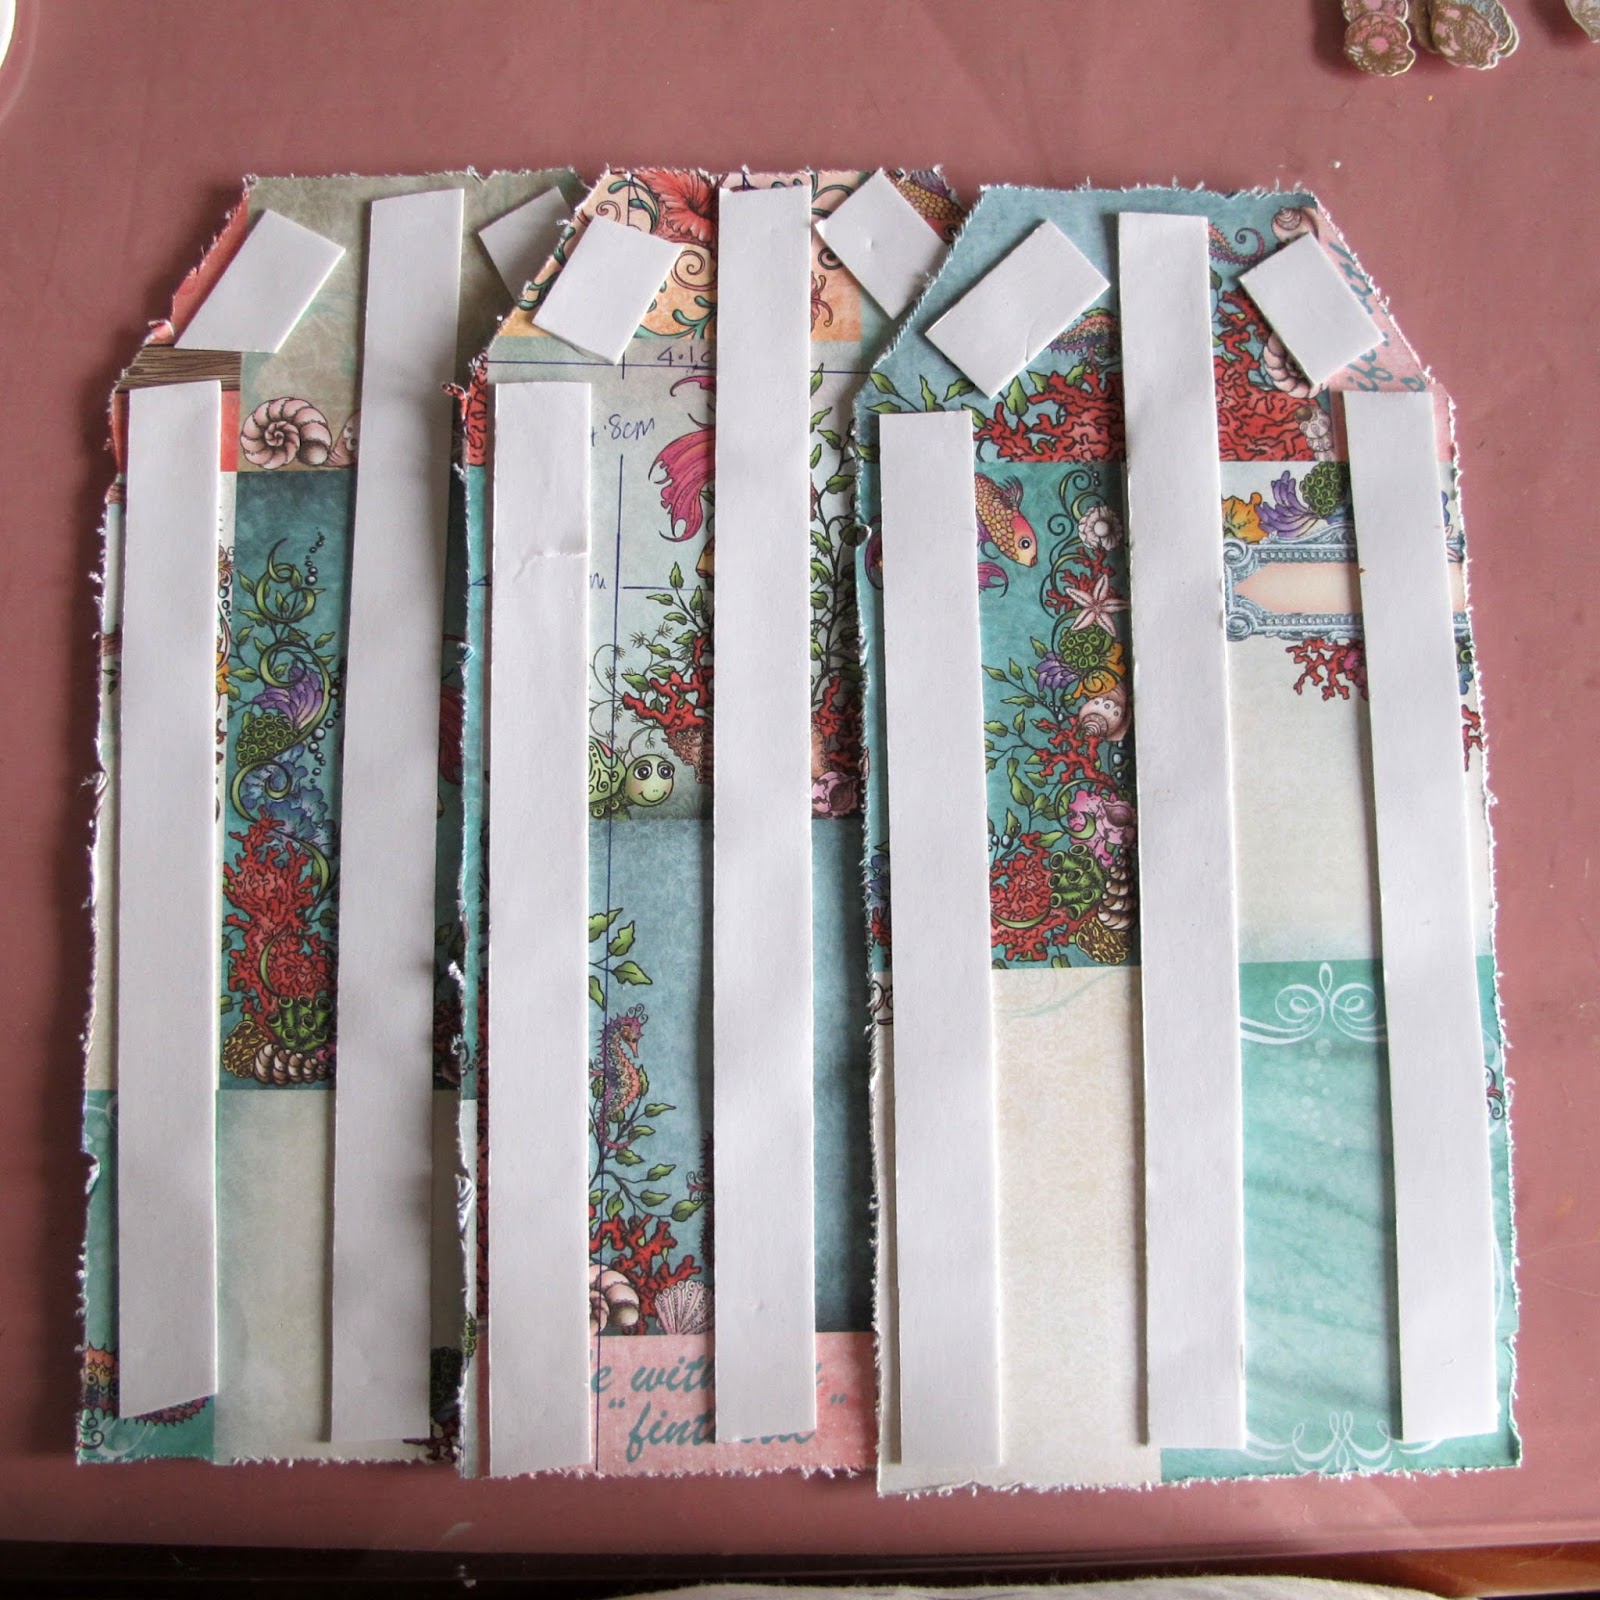
#Step 3: Cut the 2 matting paper layers to 1 cm smaller than the tag base. Distress the edges.


Below is what it will look like when you put it all together. But first do step 4

#Step 4: Taking the top matting layer, gold emboss in places with the coral boarder stamp.

#Step 5: Adhere all layers to the tag base with foam glue dots or tape.
Backing all the layers with the foam tape before adhering to the cardboard tag base.
#Step 6: Cut the photos to size and back with smaller sized cardboard to give them height when gluing down.

Make the porthole by cutting extras from the foam sheet. I used 2 layers. If you do not have foam sheet, you can cut extra shapes from cardstock (you need to cut at least 4-6 extra layers) Adhere together.


#Step 7: Stamp, color and die cut all the flowers and elements. Note: the pink sea urchins on the bottom left tag have been made using the jellyfish stamp and die set. The tentacles have been trimmed off and used upside down., these can be used as sea grass else where or on another project. The same die has been used to cut the sentiment, cutting away the tentacles. Use the flower shaping kit to bring shape to all the elements.


#Step 8: Make 2 holes in the side of the tags for the ribbon. Adhere first the porthole then the photos to the tags. Then you can begin to have fun arranging all the elements already made. All has been adhered with foam dots or the hot glue gun.


To finish add the pearls to the flower centers and here and there where needed. When all is secure and dry, tie together with the ribbon and add stickles to the flowers and the elements.

See hoe the flowers are arranged between and under the porthole...so you must m,ale this high enough to carry this.Use extra cardboard pieces to give the flowers hight if needed.

Use the jellyfish die to cut the sentiment / title, just cut away the tentacle port of the die cut.


***UNDER THE SEA***
Derwent Ink-tense pencils used
Cadmium yellow- 0210, Red oxide- 1910, Vivid green- 1330, Dark aquamarine- 1210, Sherbet lemon- 0100, Scarlet pink -1320, Deep violet 0880, Hot red 0410, Red violet 0610, Apple green 1400,
Dark aquamarine- 1210, Apple green 1400, Beech green 1510, Chilli red 0500, Iris blue 0900, Sea blue 1200, Field green 1500, Tangerine 0300, Deep violet- 0760, Violet 0800, Mauve 0740, Carmine pink 0520, Med vermilion 0310, Lagoon 0810, Teal green 1300, Cherry 0510

I am so happy you took the time to visit....
Inky hugs and scrappy times to all.
Sussi! I am squealing with delight! This is magical and probably my favorite project you've ever shared. It has such great depth and dimension and movement and is filled with wonder, delight and whimsy. I love the way you altered the octopus to make the sea urchins...genius! Every element is so perfectly placed and with such loving attention to detail. The whole concept is wonderful. Gorgeous, gorgeous work!
ReplyDeleteThis comment has been removed by the author.
ReplyDeleteOh wow! I love this, it is just BEAUTIFUL!!
ReplyDeleteStonkingly beautiful! Can't wait for my kit to arrive.
ReplyDeleteThanks for the fabulous detailed tutorial too
Lin xx
This is gorgeous! Thank you for explaining all the steps. I can only hope I can achieve what you have here.
ReplyDeleteAmazing project! Thanks so much for all these instructions and detail photos...much appreciated! This is a gorgeous project with delightful use of images. Well done!
ReplyDeleteWow! Your tri-fold project is just stunning! I love all the details! You are amazing!
ReplyDeleteMarie