
A complement the last months timeless 'Classic Rose ' collection......
Imagine a pristinely decorated, old fashioned parlor filled with charming antiques, vintage wallpaper and the finest assembling of handsome rose patterned china offering up delectable treats and deliciously fragrant tea! Amidst the refreshments, and scattered throughout the quarters you are drawn to lavish rose bouquets in every color imaginable, plucked from the pristine rose garden just outside the elegantly draped garden doors. As you glance around it is clear that this exquisite sitting room has been adorned for a very special occasion! Heartfelt Creations invites you to sit, relax and indulge as they unveil the new Blushing Rose Collection! Soft in hues and striking in patterns, this newest rose themed release will have you reminiscing of old fine bone china, lace tablecloths, and elegantly wallpapered sitting rooms. Delicate images of swirling roses, fluttering butterflies and vintage scripted postcards nestled among old fashioned wallpaper like stripes, beautiful brocades and decorative lace accents have been gently set against calming tones of pale yellows, mixed blends of greenish blues, and soft lilacs. The delicate, illustrations of rose clusters and single stemmed roses found within the cling stamp sets will bring back memories of the ravishing patterns on Grandma’s finest tableware that were kept behind glass and only made an appearance for the grandest of occasions. Paired together with the coordinating stamps, the ornate dies in this collection will allow you to create enamoring rose motif die cuts perfect for all of your paper crafting needs. A large focal background stamp, along with a full assembling of all occasion sentiments are the perfect window dressings to complete your soft and romantic vintage style rose themed creations. We invite you to enjoy the finest in paper crafting as we present the Blushing Rose Collection!BEAUTIFUL card

Heartfelt Creations Products And Products Carried By Heartfelt Creations:
HCPC-3752 Classic Rose cling stamp
HCD1-7113 Blushing Rose Stem die
HCD1-7110 Classic Rose die
HCST1-401 Deluxe Flower Shaping Tool Kit
159723-Clear Drying Glue
Other Products Used:
Cross Promotion: ‘Want-2-Scrap’ Self adhesive bling half pearls. INKS: Distress inks: Peeled paint, Forest moss, Barn door. PAPERS: Cardstock: Winter white, Red. OTHER: Heat gun, Versa-mark, Water coloring brush, Fussy cutting scissors, Diamond stickles
Foam tape, Hot glue gun.
Directions:
Check this YOU TUBE out to learn how to make the Heartfelt Creation roses
Further, cut from the base card stock, 13 cm x 10 cm (card front) and 11.5 cm x 4.5 cm (card front slide). This can now be matted with the red contrasting card stock. All matting and design papers are trimmed 2mm smaller each side for each layer used.
Once the card background and the slider card piece is completed, the slider can be adhered to the top center of the card background. NOTE: When the card front is being put together, remember to leave the top of the card between the base and the matting layers open. This is so you can slide the slider between the layers. This part of the card holds it all upright and works as a stand. Adhere the card front to the card foot, making sure you have enough room for the slider to slide into the card front opening. To make this card, please note, all the stamping is done with the gold embossing powder. Make the card base then, adhere the red matting to the card fronts. Stamp the background image to the winter white card stock twice. The second, so you can fussy cut the lower banner and die cut the sentiment banner. Color both backgrounds as seen in the photo. Stamp the rose with the red cardstock. Shape. Stamp the leaf swirls onto the winter white cardstock then color and die cut. Trim the background to fit the card front. Adhere to the front with double side foam tape. Adhere the sentiment banner also with foam tape. Adhere the fussy cut banner in place. Arrange the leaf swirls, trimming as you go. Adhere the roses in place with the glue gun. To finish the card apply a little stickles to give the roses a bit of bling.
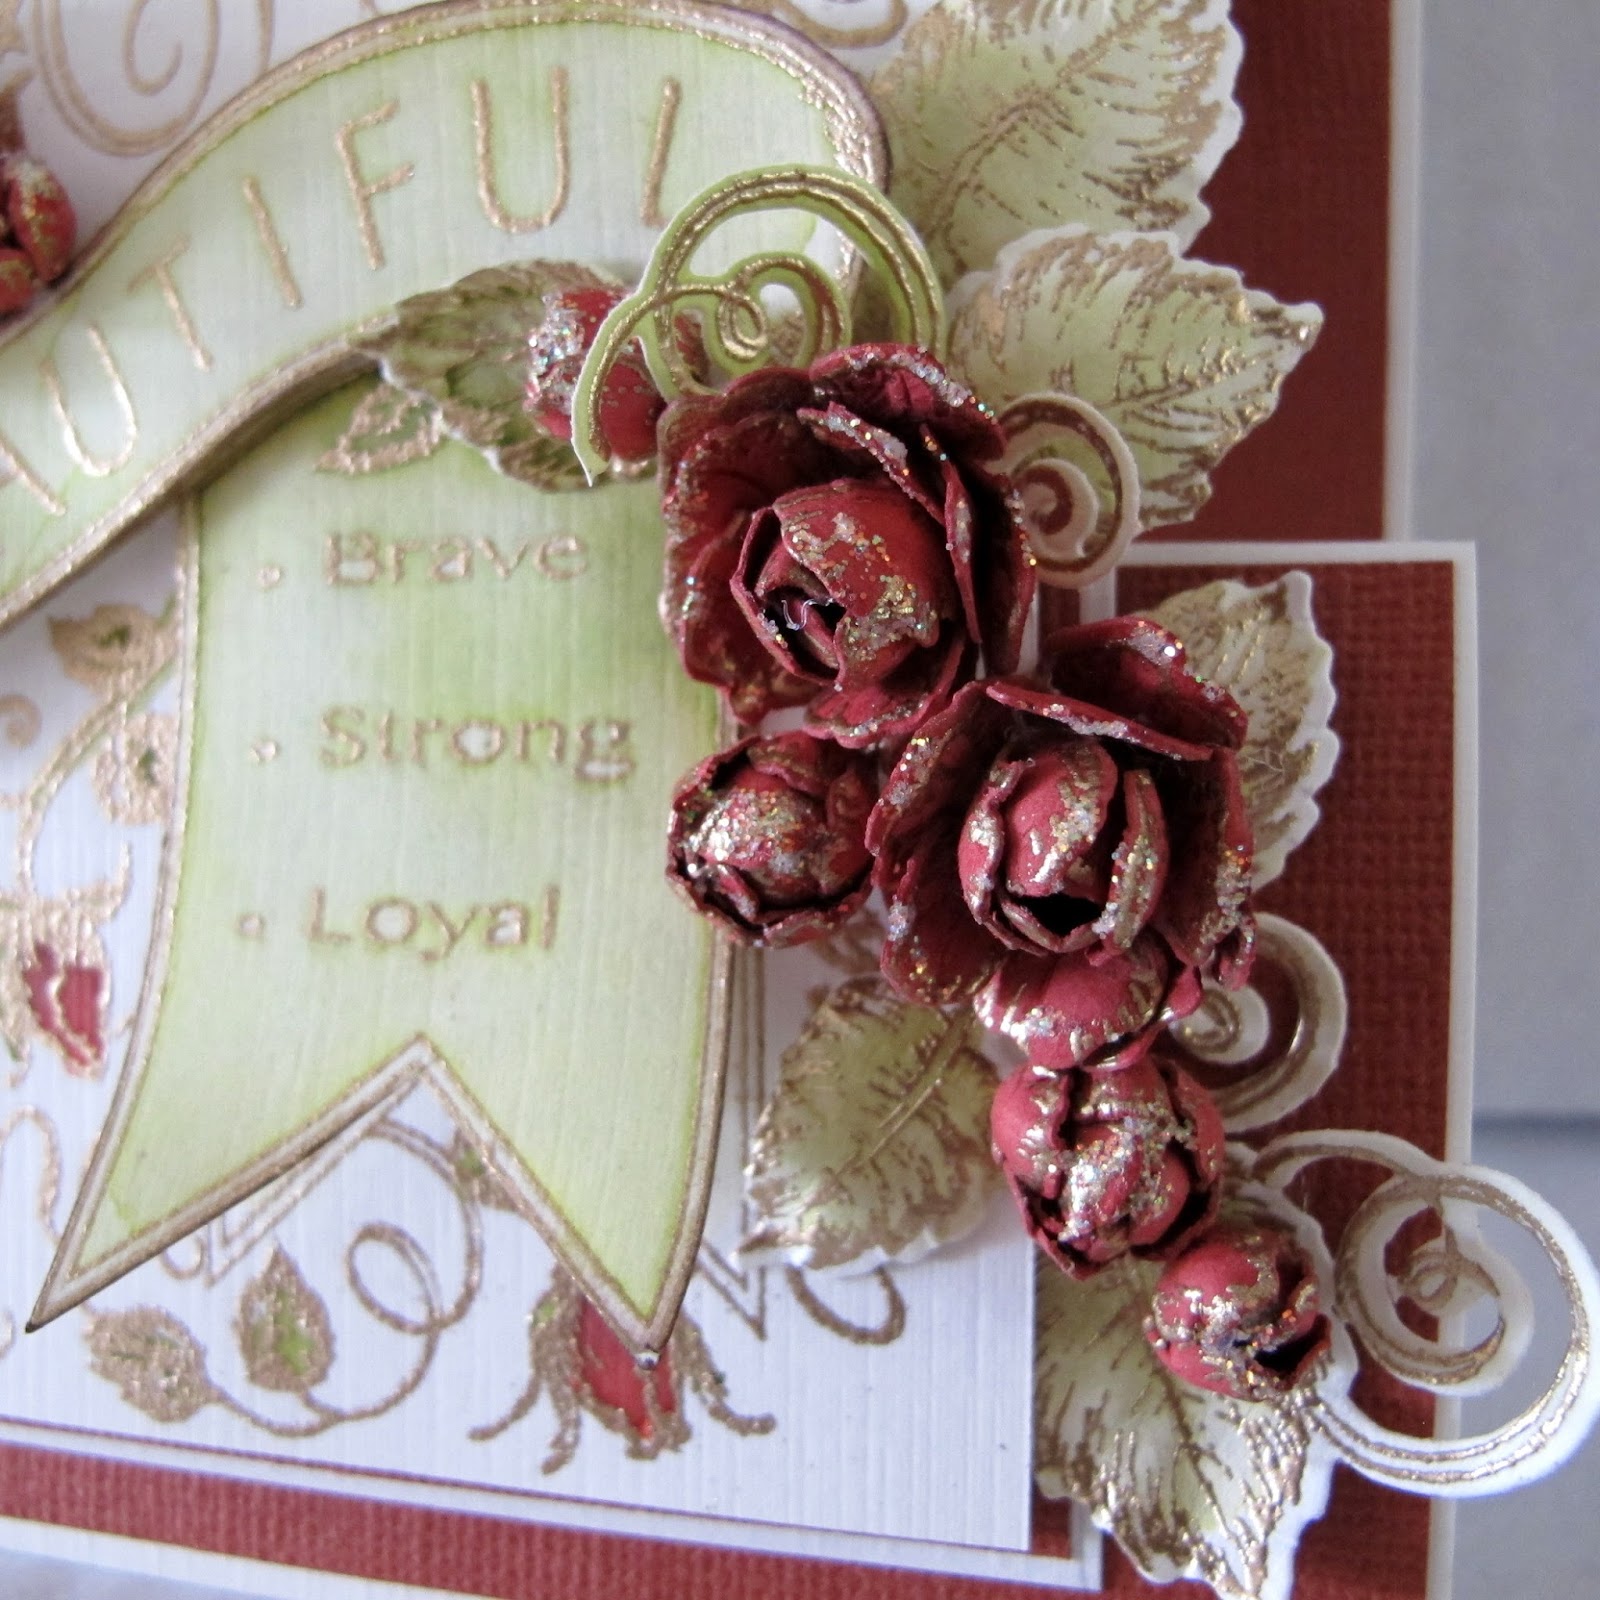
A close up of these fantastic roses.

I love this banner...Heartfelt Creations have dies to match all the stamps....
this is a win win for the die hards

I hope you have had fun visiting today....see you next week. Don't forget to go on back to check out the other girls creations this week....they are all fantastic!
Inky scrappy sussipoppins hugs oxo
Absolutely Stunning!!
ReplyDeleteBeautiful as always xx
ReplyDeleteThis is just so beautiful. I love the design and your roses are beautiful!
ReplyDeletebeautiful card
ReplyDeletewow! Stunning! I think your roses are gorgeous! You knocked this one over the moon!
ReplyDeleteLove your photography too!
Hugs, Marie