Wednesday, May 31, 2017

Classic Patunia "Thank you" Card

Hi...it's a Heartfelt Creation Wednesday again...
bringing you more eye candy.
Today I have for you a gain a card, featuring the petunias stamped and die cut in valium paper.They are so fun to make and are so sweet embossed in white embossing powder.
Have fun and enjoy your visit today at my place.


PRODUCT LIST:
Heartfelt Creations Products And Products Carried On Their Website:
Momento Inks: 

Other Products Used: 
Ranger: Heat Gun, Bone folder, Paper distressing tool, Hole pricking tool, Scissors, Ruler, Round inking tool. Distress Ink: Dusty Concord. Other: Spellbinder dies: S4-5364 Phrase set 2 ‘Thank You’. Hot glue gun, Versa-mark, Fussy Cutting Scissors, Double sided Tape, Double Sided Foam Tape, Purple organza Ribbon. Misti. Purple card stock, Purple embroidery thread and needle, Bow maker.


Love these sweet flowers done with the valium and embossing powder.
Using the valium paper gives a total new slant on any flower.


The crystal lacquer really pops the sentiment.


 Below you see the flowers cover the slide. Love these pills for the flower centres...like how they are different sizes. Point of interest, the pills are also a natural product.


The hand stitching does take a bit of time but sure gives a card that personal touch....made by hand with a lot of love....to treasure.


Those petunias again...placed around the bow...so pretty.


INSTRUCTIONS:  
This slider card when completed measures 7"x 8.1/2" (17.8 cm x 21.5 cm )

The card base cutting list 
# Taking the white card stock cut to 11"x8.1/2" ( 27.9 cm x 21.5 cm ). 
Along the 11" (27.9 cm ) length make 2 x  folds  at 2" (5.1 cm ). Make these into hill and valley folds. 
This will make a background of 7" (17.7 cm ) and the card foot to  2" (5.1 cm )  
# Taking the white card stock, cut a slider 3.1/2" 3.1/2"(8.9 cm x 8.9 cm ) 
# The card front 7" (17.7 cm ) long  x5.1/2"(14 cm ) high.

The matting for the card
Taking the purple card stock cut a matting layer for all a little smaller. 
Find the design paper in the paper collection and cut to size once a gain a little smaller than the purple card stock.
  NOTE: There will be a photo tutorial next time I post with this slider base card. For those that are having problems putting it together will have a much easier life after the post....sorry I can't do it sooner. I did it with the next Heartfelt Creations release and can't post till next month and that will have to be a three week wait for the post.

The decoration of the card. 
Click HERE to see the video on this collection and how to make the flowers.
Ink the edges with the Dusty concord distress ink and inking tool.  Prick holes along the edge of the card front design paper then embroider with thread using backstitch. Distress this edge with the paper distressing tool. Adhere this paper to the card by using the double side foam tape, the rest of the papers with clear drying glue or double sided tape. Once the card has been made, make all the flowers and the leaves using the vellum paper and the white embossing powder.  Shape carefully as not to crack the embossing powder. Make a double triple bow from the organza ribbon. Taking the purple card stock die cut the sentiment five times then adhere the layers together. Adhere all the embellishments in their place. Apply the prills to the flower centres using the clear drying glue or the crystal lacquer.  Apply the  crystal lacquer to the sentiment. 


Scrappy inky hugs, till next week with more eye candy,
sussipoppins
oxo

Wednesday, May 24, 2017

"Aloha"... Heartfelt Creations Wednesday with a card...

Hi, today I have for you a card. 
"Aloha"
 A different way of using the basket stamp and die in this collection...'Classic Petunia'...
Ballons or lamps....read on...


PRODUCT LIST:
Heartfelt Creations Products And Products Carried On Their Website:
OTHER PRODUCTS USED:
Yellow, Green cardstock, 170gm,  Aquarelle paper, Memento Inks: Elderberry, Thyme, Rhubarb Stalk, Dandelion, Cantaloupe, and Cottage Ivy. Ranger: Heat Gun, Water Mister, Inking foam tool.  Bone folder, Water coloring brush, Scissors, Ruler. Mustard Seed distress ink. Lindy’s Stamp Gang sprays Golden Sleigh Bells. Black Archival Ink, Hot glue gun, Versa-mark, Fussy Cutting Scissors, Double sided Tape, Double Sided Foam Tape, Fancy string, Misti, Hot glue gun. Dutch Doo-Ba-Doo modeling paste, Crafters Workshop Script mask

#Click HERE to see the video on making these flowers

Lots of close ups and instructions...enjoy.


INSTRUCTIONS: 
This tent fold card measures 6.1/2"x  6.1/2"(16.5 cm x 16.5cm ) when completed. Taking the white cardstock make the tent fold card base. Using the yellow cardstock cut a little smaller for the matting. Taking the green cardstock, cut this to 6 " x 6 ".  Find the pink background design paper in the paper collection, cut this a little smaller than the green cardstock. Taking the mask and the modeling paste, apply to the design paper. When the paste is dry ink the edges with the Mustard seed distress ink. Add a touch of green on the letters with the Thyme ink (green).  Adhere all the layers to the card base with glue or tape, except the top layer. This is done with double dots or foam double-sided tape to give height. To make the three lanterns, use the white card stock and stamp with the gold embossing powder, make six. You will find the petunia basket stamp and die in the Classic Petunia Bouquet sets. When die cutting the image, cut a few extra for each basket so the lantern will become a chipboard when all the layers are adhered together. Adhere the fancy string to the back of the card front and to the placement of the top of the lantern.  Adhere the lanterns in place with double dots and glue. Make the flowers and leaves by stamping with the black archival ink, die cutting then shaping.  Apply the Lettuce Entertain You prills to the flower centers. When dry adhere in place to the lanterns with the hot glue gun or the clear drying glue. The leaves are snipped so they become separate leaves then they are tucked in under the flowers and adhered in place with the hot glue gun or the clear drying glue. Taking the bling border trim so it can be laid across the join in the lantern.  Taking once again the yellow and green cardstock die cut the Aloha so this forms also a chipboard tittle. Adhere all the layers together then  to the card front. Apply the crystal lacquer to the top layer to finish the card. Put aside to dry.

I hope you enjoyed seeing a little mixed media  on this card. Quite simple but fun. Of course you can adapt and go crazy...what ever takes your fancy...lol
Have a scrappy inky fingers day....till next week.
Inky hugs from sussipoppins
OXO


Wednesday, May 17, 2017

Another Heartfelt Creations Wednesday with a classic "Thank You" card..

 ...using the Classic Petunia collection.
Hi, enjoy your visit.


PRODUCT LIST:
Heartfelt Creations Products And Products Carried On Their Website:

OTHER PRODUCTS USED:
Papers used: Card Stock: Purple Bazzel, Crafters Companion Centra Pearl White-hint of gold 300gm, Aquarelle paper 170 gm. Ranger: Bone folder, Paper distressing tool, Scissors, Ruler. Other: Zig clean color real brush ink Pens:080 and 043, Black Archival Ink, Hot glue gun, Fussy Cutting Scissors, Double sided Tape, Double Sided Foam Tape, Purple organza ribbon, Lilac lace trim, Misti, Zutter bow maker 


Love that "Zutter Bow Maker"


You can see the shadowing of the design paper and card stock in the lettering...well worth the effort.The boarders are wonderful! Love them!


you get to have a close up look see on the stamens that have been dipped in glitter


INSTRUCTIONS:
This tent fold card when finished measures 8.1/4" x 5.3/4" ( 21 cm x 14.5 cm )

# Click HERE to see the video on this collection

Make the tent fold card base to measure  8.1/4"x 5.3/4"( 21 cm x 14.5 cm ) from the 300gm card stock. Cut the purple card stock card to fit the base front. Cut the chosen design paper from the paper collection a little smaller. Distress the edge of the design paper with the distressing tool and adhere to the purple card stock with the double sided foam tape or double dots. ( all the design paper layers are done this way ) Taking the purple card stock again cut 7.3/4"x 5.1/4"(19.5 cm x  13.5 cm ) Find the contrasting design paper for the front, cut this a little smaller then adhere all to the card base. Adhere the lace and ribbon across the card front. Prepare the embellishments by stamping, die cutting and coloring.  ( Three flower sets, three leaf sets, four corners and one boarder ). Apply the glitter to the flower stamens, when dry adhere to the flower centers. Make the double triple bow from the ribbon.  Taking the purple card stock and the ….die set cut the words thank you four times and from the design paper once. Trim and adhere together adding the design paper as the top layer. Using the HCD2-751 die set, cut four leaves from the purple card stock. Taking the design paper stamp the sentiment 'Lets celebrate' and cut to a banner. Adhere to all to the card front. I used the hot glue gun as it sets faster. Taking the die set HCD1-7121 cut the letters to form thank you at least 4 times. Trim so the letters become single letters. Adhere the first layer to the card front then add the rest of the layers. This is so the letters are easier to layer and adhere. Once all is secure and dry apply the crystal lacquer to the words.

That was something different as far as my usual cards...lol. 
Have a scrappy inky day,
till next time.
Inky hugs


8.

Wednesday, May 10, 2017

#1 It's a Heartfelt Creation 2nd Wednesday of the month, so a new collection release!

"Classic Patunia"

Move on over spring, and let summer begin…the new Classic Petunia Collection by Heartfelt Creations has arrived!  No flower signifies summer more than the large trumpet shaped blossom of the gentle petunia!  Surround yourself with memories of wandering through greenhouses filled to the brim with a multitude of varieties in every colour, from solids to variegated, compact to blanketing and of course those showy hanging baskets and container gardens spilling over with these heat loving flowers! The becomingly illustrated cling stamp sets found within this collection will have you planning your very own garden themed paper crafts filled with trailing petunias, bountiful bouquets and lavish petunia filled hanging baskets.  Three sizes of coordinating stamp and petal die cuts will allow you to recreate the ever popular petunia, making it easy to cut and shape the perfect blossom in the ideal size and colour necessary for any project from handmade cards, scrapbook layouts and even altered art pieces.   A beautiful selection of premade card panels and scrapbook pages filled with illustrations of graceful petunias in hanging baskets, classic terra cotta pots and pretty garden scenes showcasing elegant petunia draped wishing wells and white washed garden benches allow for ease in creating any garden variety creations.  Filled with classic petunia pinks and deep purples along with pretty leaf like greens, the delicately patterned papers in this charming paper collection will transport you to your favourite garden plot!  So join with us as we usher in the summer season with the tender flowers of the new Classic Petunia Collection….no fertilizing, deadheading or watering required!  We promise!
I start this collection with a canvas, any photo could be used on this one as the title is so versatile.
Enjoy your stroll at my place today.
"It's a wonderful day canvas"


PRODUCT LIST:
Heartfelt Creations Products And Products Carried On Their Website:
Memento Inks:
OTHER PRODUCTS USED:
Ranger: Stardust stickles, Water Mister, Inking foam tool.  Bone folder, Water coloring brush, Paper-distressing tool, Hole pricking tool, Scissors, Ruler, Water brush. Color: Distress Inks: Festive Berries, Peeled Paint, Seedless Preserves, Picked raspberry. Lindy’s stamp gang sprays:  Ponderosa pines olive, Plumeria pink, Blazing sun, Frosty forest green, Cactus gold, Golden sleigh bells. Lindy’s Stamp Gang: Golden Sleigh Bells, Ponderosa Pines Olive, Plumeria Pink, Blazing Sun, Frosty Forest Green, Cactus Gold,
Memento inks: Thyme, Dandelion. Dutch Doo-Ba-Doo: Modeling paste, numbers mask. Other : seven and three quarters “ x seven and three quarters “- ( 20 cm x 20 cm )n canvas, Gesso, Spatula, Doo-Ba-Doo modeling paste, Black Archival Ink, Hot glue gun, Fussy Cutting Scissors, Double sided Tape, Double Sided Foam Tape, Cardboard, Misti, Dark Pink yardstick.

Scroll down and you will see lots of close up's of the embellishment placements.


I love these pills, if you don't have any...they are a must have. I love that they are different sizes....so yum!


Above you get to see the layering close up.


In the main photo you don't get to see very well the glitter and glossy clear crystal...but here you do.


Now a bids eye view for the right side of the canvas.


Look at all that glitter and sheen.


INSTRUCTIONS:
This canvas project when completed measures 7. 3/4" x 7. 3/4" – ( 20 cm x 20 cm. ) The photo used is cut to 1.1/2" x 2" – ( 3.5 cm x 5 cm. ) Start this project by sealing the canvas by applying gesso to the canvas front and sides. When the gesso is dry, place the mask over the canvas and apply a thick layer of modeling paste. Remove the mask then put the canvas aside to dry and clean the mask and spatula. When dry, spray the canvas with the Lindy’s stamp gang sprays randomly. Taking into account only the sides will show later. Taking the pink cardstock cut this to 6.1/2" x 6.1/2" – ( 16 cm x 16 cm ) Then find 2 of the design paper squares used in the project. Fussy cut the sentiment and surrounding flowers of one of the squares. Distress the edges then adhere both the squares together with the double dots or foam tape to give height and to form one paper. Fussy cut the butterflies, shape the wings then adhere in place. From the remaining off cuts of the design paper and pink cardstock cut rectangles for the frame of the photo. Distress the design papers then adhere the design papers to the cardstock papers to form the frame. Using the cardboard cut it smaller than the papers as to be able to raise the papers from the canvas when adhered in place. Put a layer of cardboard between the cardstock and design paper to give depth and shadows where wanted. This will also allow you to tuck the embellishments between the layers. Adhere all together with the aid of the hot glue gun, double sided tape and wet glue. While putting this aside to dry, make the flowers, leaves, flower baskets and flower bouquets. Make the flowers in different sizes using both the Classic Petunia stamp and die sets. Color and shape the flowers and leaves. Adhere all the embellishments in place in and around the layers and photo. When all is dry and secure apply the crystal lacquer and stickles. When this is dry apply clear drying glue to the flower centers and where you will want the prills on the canvas. Place the canvas in the funnel tray then spoon the prills in place. Once dry tap the excess prills back into the funnel tray then the extra prills into it’s container.  Touch up the edges of the papers and flowers with the Lindy’s stamp gang sprays with a water brush to finish the project.

# Click HERE to see the video on how to make this petunia flower

Now that is a cute flower to add to the collection. Next week I shall have more eye candy.
Till then inky scrappy hugs from ,
Sussipoppins...bye


Thursday, May 4, 2017

...Whats on my desk? ...Monkeying around with a Pillow Box...


Whats really on my desk today?


After months of dust and renovations I am starting to see some results...lol
Not yet finished but I can work and get some eye candy done...


You can see I need to get some time to get the filing done...till then long live the post-it-notes...yip having those so called, senior moments trying to find things.


Not having any trouble finding these! This is my addiction. I keep the collection stamps and dies in these folders. I just need that extra time to get the names all nice neat and pretty. I will have to make the time! Got to find that round to it all over again.
....and now....for the good stuff....what was I working on that you spied on my desk?
"
A Pillow Box"

PRODUCT LIST:
Heartfelt Creations Products And Products Carried On Their Website:
HCDP1-276 Monkeying Around paper collection
HCPC-3777 Palm Tree and Monkeys cling stamp
HCD1- 7132 Palm Tree and Monkeys die set
HCPC-3778 Monkeying Around cling stamp set
HCD1-7133 Monkeying Around cling die set
HCPC-3780 Relaxin Monkeys
HCD1-776 Eyelet Oval die set
HCD1-7100 Botanic Window die set
DDOTS- Double sided foam dots
159723- Designer Dries Clear Adhesive
173842- Scor-Pal

Other Products Used:
Paper: aquarelle paper 170gm, Green cardstock,
Spectrum Noir Blending pencils: Fern Leaf, Sage, Jade, Mauve, Blackberry,  Driftwood, Pebble, Peach, Winsor &Newton Oil Color solvent, Blending stumps.
Peeled paint distress ink. Double-sided foam tape, Double sided tape, Memento Rich Cocoa, Diamond stickles, Paper distressing tool, Fussy cutting scissors, 
Doo-Ba-Doo box art Pillow box 470.713.006

Instructions:
This pillow box when completed measures 10 and a half inch x  5 and a half inch ( 27 cm x 13.5 cm ) 


Taking the green cardstock and pillow box stencil make the pattern for the box. 


Extending the length so the box will become 10 and a half inch long ( 27 cm x 13.5 cm ). 


Use paper clips to hold the fold in place till the clear drying glue is dry


Find the leaf-patterned paper and make matting for the box front about a quarter inch smaller. 
(1.5 cm ) 


Ink the edge with the peeled paint ink then distress the matting paper edges.
Adhere the paper to the box front with the 3d foam tape or double dots.


Taking the green card stock cut six times the arched frames using the outer die. 


 Trim so frames can be made to size as seen below. Apply ink to the frame edges.


Stack and adhere with foam tape or double dots to the matting layer. If you scroll down 7 photos you will see this completed.

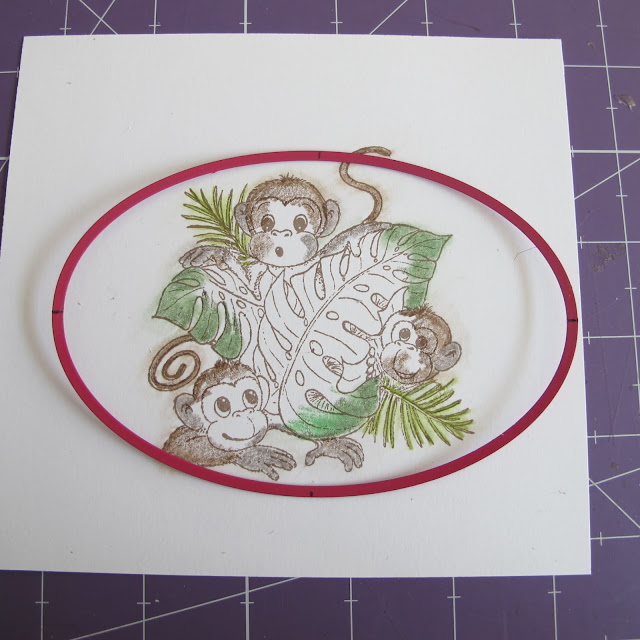
Taking the aquarelle paper, stamp the monkey image three times.
Cut one into an oval using the single oval part of the die from the Eyelet Oval die set. 


Tape the die down so it will not move while in the machine


Run it through the machine


Bring color to all three stamped images with the pencils. Fussy cut the monkeys and leaves from one stamped image, then only the leaves from the other. You can see here the first layer which is cut into the oval and the third layer. The second layer has only the leaves in it. You will see this if you scroll down 4 photos.


Bring shape to the images by using the deluxe flower shaping tools.  


Stamp, color and die cut four small sized palm leaves. You will also need four flower borders. Bring shape to the images using the deluxe flower shaping kit.


Below you see close ups of how the images are placed


Above the palm leaves are placed then the extra layers of the fussy cut image. This is the first and second layers.


You see the last layer placed.


Able you get to see close up the placement for the flowers under the oval frame.


The stickles are added once all is adhered and dry.The reason why I do this is so the image will stay in it's place as I am working on it, it will also not be dropped by mistake. 


Below you see the flowers, trim to fit and adhere in layers.


If you want to apply the stickles first, you need to allow time for it to dry before adhering them to their place.


add 3d foam or double dots to give dimension to the images.


You can see the stickles following the leaf veins and high lighting the flower centres with the golden rod stickles.
Once all is dry all that is left is to fold the ends into the box....and you are ready to go.


Now you know whats been on my desk....Scrappy love to you all inky fingers
OXO