Whats really on my desk today?
After months of dust and renovations I am starting to see some results...lol
Not yet finished but I can work and get some eye candy done...
You can see I need to get some time to get the filing done...till then long live the post-it-notes...yip having those so called, senior moments trying to find things.
Not having any trouble finding these! This is my addiction. I keep the collection stamps and dies in these folders. I just need that extra time to get the names all nice neat and pretty. I will have to make the time! Got to find that round to it all over again.
....and now....for the good stuff....what was I working on that you spied on my desk?
"
A Pillow Box"
A Pillow Box"
PRODUCT LIST:
Heartfelt Creations Products And Products Carried On Their Website:
HCDP1-276 Monkeying Around paper collection
HCPC-3777 Palm Tree and Monkeys cling stamp
HCD1- 7132 Palm Tree and Monkeys die set
HCPC-3778 Monkeying Around cling stamp set
HCD1-7133 Monkeying Around cling die set
HCPC-3780 Relaxin Monkeys
HCD1-776 Eyelet Oval die set
HCD1-7100 Botanic Window die set
DDOTS- Double sided foam dots
159723- Designer Dries Clear Adhesive
173842- Scor-Pal
Other Products Used:
Paper: aquarelle paper 170gm, Green cardstock,
Spectrum Noir Blending pencils: Fern Leaf, Sage, Jade, Mauve, Blackberry, Driftwood, Pebble, Peach, Winsor &Newton Oil Color solvent, Blending stumps.
Peeled paint distress ink. Double-sided foam tape, Double sided tape, Memento Rich Cocoa, Diamond stickles, Paper distressing tool, Fussy cutting scissors,
Doo-Ba-Doo box art Pillow box 470.713.006
Instructions:
This pillow box when completed measures 10 and a half inch x 5 and a half inch ( 27 cm x 13.5 cm )
Taking the green cardstock and pillow box stencil make the pattern for the box.
Extending the length so the box will become 10 and a half inch long ( 27 cm x 13.5 cm ).
Use paper clips to hold the fold in place till the clear drying glue is dry
Find the leaf-patterned paper and make matting for the box front about a quarter inch smaller.
(1.5 cm )
Ink the edge with the peeled paint ink then distress the matting paper edges.
Adhere the paper to the box front with the 3d foam tape or double dots.
Taking the green card stock cut six times the arched frames using the outer die.
Stack and adhere with foam tape or double dots to the matting layer. If you scroll down 7 photos you will see this completed.
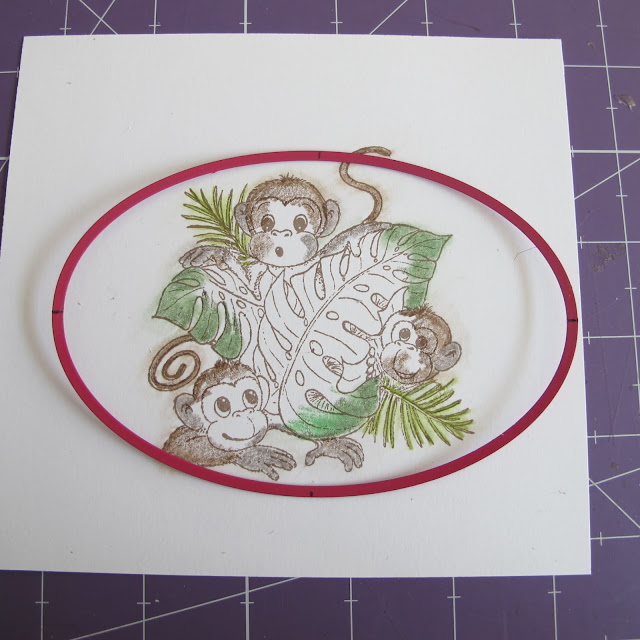
Taking the aquarelle paper, stamp the monkey image three times.
Cut one into an oval using the single oval part of the die from the Eyelet Oval die set.
Tape the die down so it will not move while in the machine
Run it through the machine
Bring color to all three stamped images with the pencils. Fussy cut the monkeys and leaves from one stamped image, then only the leaves from the other. You can see here the first layer which is cut into the oval and the third layer. The second layer has only the leaves in it. You will see this if you scroll down 4 photos.
Bring shape to the images by using the deluxe flower shaping tools.
Stamp, color and die cut four small sized palm leaves. You will also need four flower borders. Bring shape to the images using the deluxe flower shaping kit.
Below you see close ups of how the images are placed
Above the palm leaves are placed then the extra layers of the fussy cut image. This is the first and second layers.
You see the last layer placed.
Able you get to see close up the placement for the flowers under the oval frame.
The stickles are added once all is adhered and dry.The reason why I do this is so the image will stay in it's place as I am working on it, it will also not be dropped by mistake.
If you want to apply the stickles first, you need to allow time for it to dry before adhering them to their place.
add 3d foam or double dots to give dimension to the images.
You can see the stickles following the leaf veins and high lighting the flower centres with the golden rod stickles.
Once all is dry all that is left is to fold the ends into the box....and you are ready to go.
Now you know whats been on my desk....Scrappy love to you all inky fingers
OXO


ReplyDeleteevery thing looks great!!!