Hi, here's the show and tell...
This card is such fun to make...all the hard work is taken out of the equation. Just follow the instructions in the booklet that comes with the die...once you have the basic card measurements cut...easy as a breeze on a hot summers night.
The product list at the end of the post.
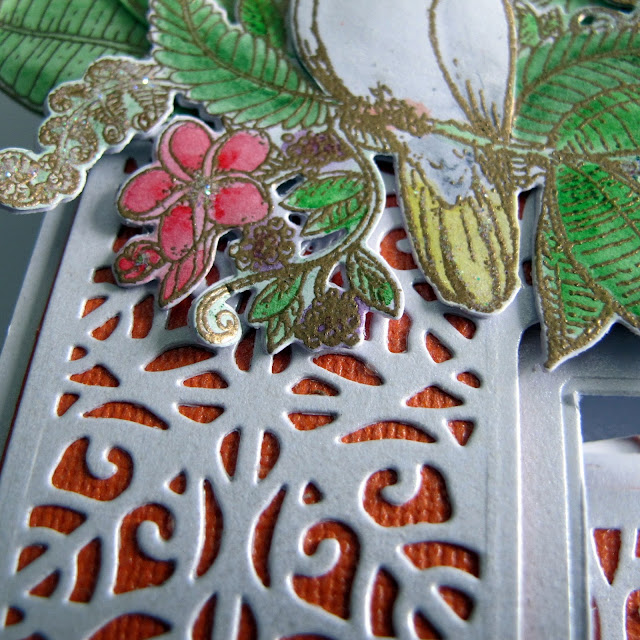
I have used Heartfelt Creations Tropical Paradise stamp and die collection to embellish this card.
I love how I could utilise the card shape to add all the layers. Therefore being able to use all the foliage in the collection. Stamping with gold embossing powder and using the Derwent water color pencils to complete the tropical paradise theme.
Orange is not my most fav colour but here it was a popper. Perfect for the embellishments.
Also it enhances the beautiful lace work...can't let that go astray....lol...it's all part of the die.
There more dies to complement this basic die set....adding to the collection.
Of course using the word dies, I was able to add layer on layer without having the card over done.
I inside peek...of cause one could always leave the inside left blank for personal written words. I like to write the personal note on the back of the card. Because it is layers and rather hard to write nicely on a uneven surface.....write something on a white paper then adhere it to the back.
Gemini die cutting machine
S-GLAM-MD-FAB Fabulous
S-GLAM-MD-HAP Happy Birthday (happy day)
CREATE-A-CARD Shutter card and Lace
HCPC-3782 Tropical Cockatoo stamp set
HCD1-7136 Tropical Cockatoo die set
Orange card-stock, Crafters Companion Pearla-white hint of gold 300gm card-stock
Gold embossing powder
Versa-mark
Heat tool
INK-Tense Derwent Water Colouring pencils 72 set.
Ranger Stardust stickels
Wet glue
Hot glue gun
INSTRUCTIONS:
Cut the card base using the 300gm yardstick, the CREATE-A-CARD die set. Cut the background from the orange card-stock. Cut the lace from the 300gm card-stock Use the instruction book on how to make the card in the set. Adhere all in place using a wet glue so you can slide the yardstick pieces into place. While drying make the embellishments for the decoration of the card. First gold emboss stamp the images then add colour using the Ink-Tense Derwent pencils your choice. Die cut the images a few times extra, adhere together to form a chippy. Arrange the images then adhere in place with the hot glue gun. Make the word sentiments by die cutting 4 layers, adhere the layers together to form a chippy. Adhere tot he top of the shutter card. When all is secure and dry, add the stickles to the letters and where you want to high light.
Thats it...so easy.
A few tips:*Prepare and cut a few extra card bases so you have them all ready to go when you want or need them.
*I love the 300gm card stock as it is strong enough to hold all the embellishments I like to add to my cards.
*If you use a lighter card-stock, if it is matted a few times it will become sturdier.


Gorgeous!!
ReplyDeleteWow love those die cut layers and dimension! Your bird and leaves are beautiful too!! Gorgeous card!
ReplyDeleteGorgeous card!!! Love it!
ReplyDelete