Wednesday, February 28, 2018

A Lush Lilac Heartfelt Creations Wednesday with....

'Have A Sweet Day'


Heartfelt Creations Products And Products Carried On Their Website:

Other Products Used:
Card Stock: Bazzill- Rose Beige and Mauve. Crafters Companion A4 White-hint of gold 300gm. Spectrum Noir Colour blend pencils: Pink Blush, Mauve, and Sage. Blending solution and blending stumps. Other: Stickles, Wow Sparkling Snow embossing powder, Heat Gun, Water Mister, Scissors, Ruler, Coffee Archival Ink, Hot glue gun, Versa-mark, Double sided Tape, Double sided 3d foam tape, Blue organza Ribbon, Cardboard, Misti stamping tool.


Instructions:
Go HERE to find the posting with a card that shows how to put the card base together.
The finished size of this slider card is 8.22in x 8.62in (20.9cm x 21.9cm) Taking the A4 card-stock, make hill and valley folds at 2in and at 4in (6cm and 12cm) Along the length. Taking the mauve card-stock cut the card foot and card background matting at 8.03in x 6.73in (20.4cm x 17.1cm). Taking the paper collection, find the paper print with the house on it. Cut the card front paper using the house as the feature, 8.89in length x 5.51in width (17.5cm x 14cm) Use the off cut design paper to cover the card foot and card back. Cutting a little smaller than the cardstock. Adhere in place. For the card front: taking a A4 cardstock, cut the card front base to measure 7.75in x 6.49in (19.7cm x 16.5cm) Taking the mauve card-stock cut the 1srt matting to measure 7.55in x 6.22 (19.2cm x 15.8cm) Taking the rose beige card-stock cut the 2nd matting to measure 7.16in x 5.82 (18.2cm x 14.8cm) Adhere the card front base, card-stock matting and the design paper front together using the 3d double-sided tape.  To make the slider, take a piece of A4 card-stock and cut to measure 2.75in x 4.33in (7cm x 11cm) and 4.13in x 1.77in (10.5cm x 4.5cm) Adhere the 2.75in (7cm) edge to the top center of the card background. Place double sided tape and wet glue to the 1.77in (4.5cm) edges. Place and adhere this at the center, 2.75in (7.5cm) down from the top edge of the back of the card front base. Once the glue has dried and secure, slide the slider into the holder on the card front base.


 Make the note scroll by stamping with the coffee ink onto the design paper. Die cut this with the matching die. Cut also 2 extra die cuts from the cardboard and adhere together to form a chippie. Add color to the flowers and leaves using the blender pencils and blending solution. Adhere to the left of the card front with the 3d foam dots. Make a double triple bow from the organza ribbon. Wrap a length of ribbon around the card front and adhere the bow to the right of the note scroll using the hot glue gun. 


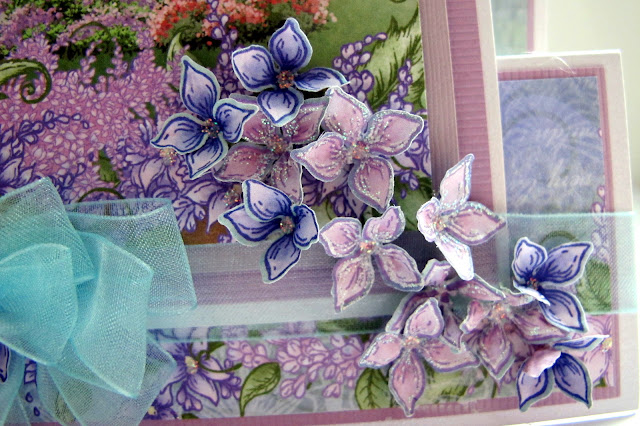
Make the flowers buy finding the flower prints in the paper collection. Using the misti stamping tool to stamp the printed flowers with the flower stamp and wow embossing powder. Die cut with the matching die. 27 flowers are used for this card. Some of the flowers are not stamped with the embossing powder to give contrast. Bring shape to the flowers using the Lush Lilac flower mold. Use a small-balled tool from the flower shaping tool kit to press the center of the flowers to give height to the lilac petals. Adhere in place as seen in the card photo.


 Thanks for dropping by today. This collection is so sweet and timeless. The little Lilac flowers are so wonderful as fillers. I know if you invest in them and the matching flower shaping mold, you will not be sorry.
Have a happy scrappy day, till next week,
Inky hugs

Monday, February 26, 2018

Crafters Companion love this week is all about 'Friendship' 'Vriendschap'


Hi welcome to my place today. 
This time I am featuring the  elegant and timeless gold gilding wax on 3D embossing, stamping with gold embossing powder and off course the delightful matching stamps on heat resistant acetate.
Enjoy.


CRAFTERS COMPAINION PRODUCT LIST:
Beautiful Bouquet CC-ST-BBOU stamp.
‘Special  Friend’ DS-C-FRIEND, ‘Vriendschap’ DS-E-W-41-NL Desire dies.
Centura Pearl-snow white hint of gold A4 300gm, Fluttery Collection- 
Luxury matt mirror card S-F-MIRRORM, Fancy design,  card-stock. 
  Rose Bouquet EF5-3D-ROSE embossing folder.
Heat resistant acetate A4.
King Gold Gilding Wax.
Gemini.
Scoreboard.
 OTHER PRODUCTS USED:
Versa-Mark, Heat gun, Clear drying glue, Double sided tape, Crafting foam A4, Misti stamping tool
Sequins, Gold embossing powder, Fussy cutting scissors, Ruler


MEASUREMENTS and INSTRUCTIONS FOR THIS CARD:
#1  14.6cm x 19.2cm hint of gold cardstock
#2  14.1cm x 18.7cm – mirror card stock
#3  13.5cm x18.1cm – design cardstock
#4  12.3cm x16.9cm – mirror cardstock
#5   11.7cm x 16.3cm – embossed design card-stock

 Prepare the card tent fold base using measurements for #1. Cut x2, make a 1.5 cm fold on one piece. Apply double sided tape and glue to the fold. Adhere both cardstock together.
Taking the design card-stock cut both sizes #5 and #3. Taking #5 emboss this with the embossing folder. Apply the gilding wax to the edges and out towards the card-stock centre to highlight the embossing. Apply a little at a time, adding more if wanted.
Taking the mirror card-stock cut the matting for #2 and #4. Adhere all the matting layers to the card base using the double-sided 3D tape or the crafting foam to give dimension and shadows in the matting layers.
Taking the acetate, gold emboss stamp x2 jars and x3 the rose with the stem. Fussy cut the images. Adhere one of the jars to the embossed card front with a cut to size clear glue dot. Adhere a few sequins then adhere the 2nd jar the same way. Add a few sequins to this jar and a few scattered under the jar as seen in the photo.
Taking the mirror card-stock cut the sentiments. Adhere to the top left and the right of the foot of the card.

 I hope you enjoyed the visit, have a happy scrappy crafting day....Inky hugs


Wednesday, February 21, 2018

Its Heartfelt Creations Wednesday with the Lush Lilac collection again.

Hi, today I have another wonderful card featuring gorgeous Lush Lilac collection...


Heartfelt Creations Products And Products Carried On Their Website: 
HCDP1- 287 Lush Lilac paper pad collection
HCPC-3816 Lush Lilac cling stamp set
HCD1-7171 Lush Lilac die set
HCD1-7118 Delicate Border dies
HCD1-7119 Classic Border Basics dies
HCD1-745 Luggage and Tags dies
HCST1-401 Deluxe Flower Shaping Kit
HCDA1-449 Stack and Store Daubers pack of 6
HCFB1-466 3D Lush Lilac Shaping Mold
RAHT Heat It Tool
532423-Kit Sizzix Vagabond 2
DDOTS Double Dots/3d foam squares
159723 Designer Clear Drying Glue
173842 Score-Pal
359848 Spellbinders Tool N’ one

Other Products Used:
Card-stock: Kraft card-stock, Rose Beige Bazzill card-stock.  Inks: Coffee Archival Ink, Milled Lavender, Walnut Stain distress inks. Other: Versa-mark, Wow Sparkling snow embossing powder, Diamond Stickles, Hot Glue Gun, Water Mister, Fussy Cutting Scissors, Double sided Tape, Mauve Organza Ribbon, Misti Stamping Tool, Pencil. Wasi Tape.


Instructions:
The finished size of this tent fold card is 6in x 6in (15cm x 15cm) Taking the Kraft card-stock and cutting it to measure 6in x 12in (15cm x 30cm)  Use the score-pal to make the fold  for the tent fold card. Taking the paper collection, find the design paper with the birds in it and the paper with the 3 tags. For the tags: Die cut the tags using the Luggage and Tags die set. Ink the edges of the tags with the walnut stain ink and daubers. For the card front: Taking the design paper, cut this to 3.94in x 4.92in (10cm x12.5cm) Take the Classic Border Basics die set and use the plain border die to cut the design paper in half from corner to corner. Ink all the edges of the cut design paper by using a dauber and the inks, milled lavender and walnut stain. Taking the rose beige card-stock cut 6in x 6in (15cm x 15cm) Place the cut design papers onto the cut card-stock a little from the straight edge then taking the pencil; draw the placement line for the lace border. Take the design paper away and die cut the boarders using the placement lines. You will now have two card-stock fronts with a border. Ink both the lace border edges using the walnut stain distress ink and daubers. Adhere the card front layers together then adhere to the card front base, using the 3d foam dots, as seen in the card photo. Adhere the tags in place. Taking the paper collection, find the paper with the lilac flower print. Using the versa-mark, embossing powder, stamp and the Misti stamping tool, stamp the flowers and buds. Taking the matching die set, die cut 23 flowers and 2 lilac bud images. Run the flowers through the vagabond machine using the Lush Lilac shaping mold to give shape to the lilacs and the buds also use the flower shaping tool kit. Taking the organza ribbon, make a double triple bow. Adhere the bow to the card front under the tags. Adhere the flower buds and flowers to the ribbon knot with the hot glue gun. Arrange and adhere with the hot glue gun the rest of the lilac flowers to the tags, border and under the bird on the card front. To finish the card, add the diamond stickles to each of the lilac flower centers in the paper print. Add also to the lilac flowers if wanting more bling.


I love decorating the bow knots with the lilacs.
This week all soft colors....lol.
I loved to share with you today. Don't forget to return to the Heartfelt Creations blog and store site,
There is so much more eye candy.
Inky hugs....till next week.
OXO


Wednesday, February 14, 2018

2nd Wednesday of the month is here again....that means a Heartfelt Creations new release!


The elegant, and well known lilac blossom takes center stage early in the spring season and is one of the first flowers to usher in the season of new beginnings! Enchanting clusters of tiny blossoms come together to create quaint floral displays with amazing color and a sweet-smelling fragrance that brings with it a feeling of gentility and old world charm! Join us in celebrating a perennial favorite…Introducing the Lush Lilac Collection by Heartfelt Creations! Venture out for a springtime stroll through a dreamy, garden themed paper collection filled with soft hues of luscious lavenders, deep purples, sky blues and pastel pinks accented with dreamy and romantic illustrations of cozy cottages, lilac filled parasols and lovely lilac filled garden settings! Softly scrolling swirls, vintage script and lace like details bring an old fashioned charm to this soft and innocent assembling of decorative papers, while three graceful cling stamp sets along with coordinating dies boast lush lilac sprays, a fetching lilac laden scroll, several endearing sentiments, as well as a winsome lilac filled parasol perfect for paper craft creations celebrating a multitude of occasions! A wonderful mix of lilac buds and blossom petal illustrations lend themselves beautifully to creating realistic and dimensional lilac blossoms when paired with the coordinating die and will bring a gentle touch of spring to all of your garden creations! So come along with us as we celebrate new beginnings and springtime beauty with the new Lush Lilac Collection 


 Something very different for me. The photo does not do this justice. The black and gold contrast is so elegant. Such an beautiful collection....yes Heartfelt Creations have done it again!


Heartfelt Creations Products And Products Carried On Their Website:


Other Products Used:
A4 Gold Foiled card-stock, Yellow stickles, Bone folder, Scissors, Ruler, Hot glue gun, Versa-mark, Fussy Cutting Scissors, Gold Organza Ribbon, Misti stamping tool, Spectrum Noir Metallic Pencils: blue, Pink, Green, Rose Gold, Violet, Purple, Gold.  Foam 3d squares or dots, Water mister,

  
Instructions:
The finished size of this card is 5.90in x 5.90in (15cm x 15cm)
Taking the black card-stock cut to 12in x 5.90in (30cm x 15cm) Fold in half using the score-pal to form the tent fold card base. Taking the gold foiled card stock cut the first matting to 5.70in x 5.70in (14.5cm x 14.5cm) Taking again the black card-stock cut the second matting to 5.51in x 5.51in (14cm x 14cm). Taking the Misti stamping tool, second matting card-stock and the versa-mark, stamp the Umbrella image in the left corner. Emboss with the gold embossing powder. Taking another sheet of black card-stock stamp again the umbrella image also the sentiment and the 14 flowers. Die cut the sentiment with the smallest eyelet heart die and a plain lager heart shape.  Die cut the Umbrella and flowers. 

Taking a scrap piece of gold foiled card-stock and cut an eyelet heart a little larger than the plain heart. Adhere the heart layers together in a stack with the 3d foam dots.
Taking the metallic pencils, color the flowers and the die cut umbrella. Adhere the umbrella with the 3d foam dots to the stamped image on the card front matting. Taking the Lush Lilac Flower Shaping Mold, place the die cut flowers in the mold. Mist the flowers, place the mold top on then run it through the machine twice. Adhere to the flower arrangement on the card front matting with the hot glue gun or the clear drying glue. Adhere the card front matting to the gold-foiled matting with the 3d foam dots. Wrap the ribbon around these two fronts and adhere with the hot glue gun. Make a triple bow, and then adhere this also with the hot glue gun to the right of the card. Adhere the heart under this bow, hiding the butterfly. Adhere the die cut butterfly above the bow with a 3d foam dot. Adhere the remaining 4 flowers to the right side of the heart stack. Adhere the matted card front to the card front base with the 3d foam dots. To finish the card, apply the yellow stickles to the flower centres.


This is the new fLush Lilac Shaping Mold released to go with this collection.
Don't we just love Heartfelt Creations for making our life so much easier...and fun.
Now you can make thousands of these cute little gems. They are always handy to have as fillers for all your crafting flower clusters.
****
Have a happy scrappy week, till next Wednesday.
Inky hugs, Sussipoppins 


Monday, February 12, 2018

Crafters Companion love today...

...is a card..
'Have a Great Day!...with love'


Crafters Companion Product List:
Embossing Folder-Country Cottage EFS-3D-CCOT
Fancy Design Card-stock A4
Classic Silky card-stock A4
Gilding wax Renaissance Gold and Silver
Gemini
 Sentiments:Stamp - 'Have A Great Day' CC-ST-SIWW
Die - Scattered Butterflies-CI17-CC-DIE
Dies: Rose Vine-DS-C-RVINE
Parisian Mirror-DS-C-PMIRR
Lace Bloom-DS-C-LB3DF
Score Board

Other Products used:
Paper distressed, Paper knife, Double sided tape, 3D double sided foam tape/squares/rounds, 
Self adhesive 1/2 Crystals, Hot glue gun, Clear drying glue, Archival sepia ink. 
Flower shaping tools and mat.


 Here the card front is open.


Close up of the Lace Blooms stated with the die then the gilding wax in both colours applied. Shaped then the crystal adhered to the flower centre. The flowers are adhere with the aid of the hot glue gun..


Here you see the stamped sentiment framed. The die used for this is the Parisian Mirror die set. The two smallest dies. The larger, the gold gilding wax was used to change the colour.


The die cut sentiment was made by taking the word die from the Scattered Butterflies die set. This was die cut five times then the silver gilding wax applied for the colour.


A view of the flowers placed at the top of the fussy cut open window. The gilding wax, both colours have been applied to pop the embossing.
*****
INSTRUCTIONS:
The card Base:The card base measures 18.4 cm x 13.6 cm. Cut x2 Make a 1.5 cm fold on the top of one of the cards. Make the fold.  Apply double sided tape or glue to this then adhere both card pieces together. This will form a tent fold card base. 

Cut from the fancy design paper 17.6 cm x 12.8 cm. Use the paper distressed to ravel the paper edges.
Use 3d foam tape/squares/rounds to adhere this matting to the card front.

Emboss the window design using the card stock, the same as the car base. Fussy cut the window so it will open. Apply the gilding wax to the front and the back of the open window. Adhere in place using the 3d foam tape/squares/rounds.

Die cut the sentiment frames. Apply the gilding wax on the larger and stamp the sentiment on the smaller frame. Adhere in place using again the 3d foam tape/ squares/rounds.

Die cut the flowers x 6. Bring both colours of the gilding wax on to the flowers for depth of colour. then using the flower shaping tools bring shape to the flowers. To apply the 1/2 crystals to the flower centres and to adhere the flowers in place on the card, use the hot glue gun.

Die cut the rose swirls and adhere to the card front with the hot glue gun and the 3d foam tape/squares/rounds. 

Die cut the "With Love" words 5x. Stack and adhere together using clear drying glue. Apply the gilding wax for colour. Adhere to the card using the hot glue gun or clear drying glue.
*****
Thats my Crafters Companion love for today...I hope you be a copy cat and give it a go.
Inky hugs
OXO