'Have A Sweet Day'
Heartfelt Creations Products And Products Carried On Their Website:
Other Products Used:
Card Stock: Bazzill- Rose Beige and Mauve. Crafters
Companion A4 White-hint of gold 300gm. Spectrum Noir Colour blend pencils: Pink
Blush, Mauve, and Sage. Blending solution and blending stumps. Other: Stickles,
Wow Sparkling Snow embossing powder, Heat Gun, Water Mister, Scissors, Ruler,
Coffee Archival Ink, Hot glue gun, Versa-mark, Double sided Tape, Double sided
3d foam tape, Blue organza Ribbon, Cardboard, Misti stamping tool.
Instructions:
Go HERE to find the posting with a card that shows how to put the card base together.
The finished size of this slider card is 8.22in x 8.62in
(20.9cm x 21.9cm) Taking the A4 card-stock, make hill and valley folds at 2in
and at 4in (6cm and 12cm) Along the length. Taking the mauve card-stock cut the
card foot and card background matting at 8.03in x 6.73in (20.4cm x 17.1cm).
Taking the paper collection, find the paper print with the house on it. Cut the
card front paper using the house as the feature, 8.89in length x 5.51in width
(17.5cm x 14cm) Use the off cut design paper to cover the card foot and card
back. Cutting a little smaller than the cardstock. Adhere in place. For the
card front: taking a A4 cardstock, cut the card front base to measure 7.75in x
6.49in (19.7cm x 16.5cm) Taking the mauve card-stock cut the 1srt matting to
measure 7.55in x 6.22 (19.2cm x 15.8cm) Taking the rose beige card-stock cut
the 2nd matting to measure 7.16in x 5.82 (18.2cm x 14.8cm) Adhere
the card front base, card-stock matting and the design paper front together
using the 3d double-sided tape. To make
the slider, take a piece of A4 card-stock and cut to measure 2.75in x 4.33in
(7cm x 11cm) and 4.13in x 1.77in (10.5cm x 4.5cm) Adhere the 2.75in (7cm) edge
to the top center of the card background. Place double sided tape and wet glue
to the 1.77in (4.5cm) edges. Place and adhere this at the center, 2.75in
(7.5cm) down from the top edge of the back of the card front base. Once the
glue has dried and secure, slide the slider into the holder on the card front
base.
Make the note scroll by stamping with the coffee ink onto the design
paper. Die cut this with the matching die. Cut also 2 extra die cuts from the
cardboard and adhere together to form a chippie. Add color to the flowers and
leaves using the blender pencils and blending solution. Adhere to the left of
the card front with the 3d foam dots. Make a double triple bow from the organza
ribbon. Wrap a length of ribbon around the card front and adhere the bow to the
right of the note scroll using the hot glue gun.
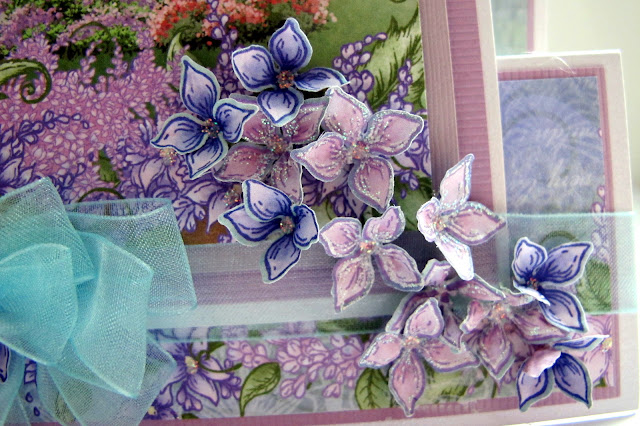
Make the flowers buy finding
the flower prints in the paper collection. Using the misti stamping tool to
stamp the printed flowers with the flower stamp and wow embossing powder. Die
cut with the matching die. 27 flowers are used for this card. Some of the
flowers are not stamped with the embossing powder to give contrast. Bring shape
to the flowers using the Lush Lilac flower mold. Use a small-balled tool from
the flower shaping tool kit to press the center of the flowers to give height
to the lilac petals. Adhere in place as seen in the card photo.


Stunning beautiful definitely a wow card xx
ReplyDeleteLovely!
ReplyDeleteWow Wow Wow so beautiful...xx
ReplyDeleteGorgeous!
ReplyDeleteJust beautiful - that house is just gorgeous and you have done it justice. Hugs xxx
ReplyDeleteGorgeous Susan!! I love center step cards and this one is a beauty!!!
ReplyDeleteJust love this Susan! I must try making a slider card!
ReplyDelete