Friday, March 29, 2019

Here is my take for the March Alumni hop...


A randomly chosen comment from a mystery blog will receive a $25 gift certificate to shop at Heartfelt Creations. To claim your prize please email Heartfelt Creations at socialmedia@heartfeltcreations.us with "Winner of the December Alumni Hop" in the subject line.  
The hop starts at 8AM EST on Friday, March 29th, 2019 EST and closes Monday, April 1st at 11:55PM EST . Winner will be announced on the HC Facebook page on Wednesday April 3rd, 2019.


Heartfelt Creations Products And Products
Carried On Our Website

HCFB1-473 3D Pansy Shaping Mold
HCPC-3831 Sweet as Honey cling Stamp set
HCD1-7185 Sweet as Honey die set
HCPC-3865 Petite Pansy Frame cling stamp set
HCD1- 7225 Petite Pansy Frame die set
HCPC-3864 Delicate Pansy Spray cling stamp set
HCD1-7224 Delicate Pansy Spray die set
HCPC-3862 Cherry Pansy cling stamp set
HCD1-7222 Cherry Pansy die set
HCD1-7179    Butterfly Kisses die set
HCST1-401 Deluxe Flower Shaping Kit
DDOTS  Double Dots/3d foam squares
159723 Designer Clear Drying Glue
173842 Score-Pal
359848 Spellbinders Tool N’ one
HCPP2-451 White cardstock14.5 oz.
Heat gun
Gold Embossing Powder
Zigg Clean Color Real Brush pens: Yellow 050, Grey 090, Haze Blue 302, Light Brown 061, Geranium Red 029, Violet 080, Brick Beige 075, Mid Grey 096

Other Products Used:
Spectrum Noir Harmony Inks: Orange, Crushed Velet. Other: Foam inking tool, Hot glue Gun, Water Mister, Scissors, Ruler, Double sided Tape, Double Sided Foam Tape, Misti, Gold Rod and Diamond Stickles, Lilac organza ribbon, Netting gold edged lace.

Instructions:
The finished size of this tent fold card is 18.2 cm x 22.4 cm
Begin by cutting the card base to the finished measurements.  Taking the white card, cut this a little smaller and colour with the foam inking tool and the orange Harmony ink, using a little of the Velvet colour as seen in the photo. For the Crushed Velvet card layer, cut this to 15 cm x 17.8 cm and bring the colour on to this the same way. Adhere the netting lace and ribbon across the card; adhere to the card base using the DDots double-sided 3D foam tape. Stamp the bee’s, flowers (x14), leaves (x 6), pansy sprays (x4) and the pansy frame (x1) Use the pansy shaping mold and the shaping tools to give shape to the flower petals and the leaves. Colour the leaves with the zig pens, mid green and the Geranium red, light brown and the violet for the pansy’s. The diamond is coloured with brick beige and the mid grey pens. The bee’s are coloured using the yellow, grey and haze blue for the wings. When all the elements are completed, arrange and adhere to the card front. Adhering two pansy sprays to the top and bottom of the diamond as seen in the photo. The diamond element is adhered using the hot glue gun to the flowers and placed on top. This will give the floating effect. Add the bow to the side at the diamond point then add the bees. Make the sentiment and adhere to the card. To finish the card, apply the stickles to the bees wings, the swirls and the sentiment.
Below...a few close ups 


Here is the blog hop list
Kathy Clement- https://wp.me/p34lmI-4yx
YOU ARE HERE: http://sussipoppins.blogspot.com/2019/03/here-is-my-take-for-march-alumni-hop.html#comment-form
Candy Slabaugh - https://candyscreationsblog.blogspot.com/2019/03/heartfelt-creations-march-alumni-design.html

Thats it for this post...I hope you enjoy the hop and see you next time. Till then happy scrappy days and Sussipoppins inky hugs.
OXO

Wednesday, March 27, 2019

"A Gift For You"


As promised here is one of the cards I submitted to Heartfelt Creations to get into the semi finals.
If you haven't already, please visit HERE and put a tick next to my name so I can be part of that wonderful dream team.
Heartfelt Creations Products And ProductsCarried On Their Website:
Bright pearl yellow stamens, - HCS1-458-1
Deluxe Flower Shaping Kit, - HCST1-401
Double Dots/3d foam squares, - DDOTS
Designer Dries Clear Adhesive, - 159723
Score-Pal, - 173842
Spellbinders Tool N’ one, - 359848
White cardstock14.5 oz, - HCPP2-451
Stack and Store Daubers pack of 6, - HCDA1-449
Gold Embossing Powder, - 359760
Zig Clean Color Real Brush Marker: Olive green, Wine red, Mustard, Warm grey, Mustard, - 478455
Other Products Used:Red card stock, Water Brush, Hot glue gun, Scissors, Ruler, Double sided tape, Double sided foam tape, Misti, Foam inking tool, Diamond stickles, White craft foam. Hot glue gun.

Instructions:
The finished size of this tent fold card is 16cm x 16cm / 6 ¼ “ x 6 ¼”
 Make a tent fold card base with the white card stock to the measurements above. Taking the red card stock cut the card front .4mm / 1/8th “ than the card base, adhere to the card base with 3D foam dots. Taking the ‘Elegant Pocket Accents’ die set, the craft foam and the red card stock. Die cut the fancy corners four times from the card stock and craft foam, adhere the foam to the card stock then adhere to the corners of the card front. Take the larger fancy die and cut twice in the red card stock only and adhere in the center of the card front. Take the smaller lace die and cut twice from the craft foam and the card stock. Adhere together then adhere to the center of the card front.
Taking the ‘Floral Corset’, ‘Floral Fashionista’ stamps and die sets, gold emboss then die cut the elements. Color the corset by using the Wine Red. Do the same with the flowers, using the Olive green for the leaves. Apply the mustard to the corset frame top and the stand. Apply the Warm Grey for the body of the corset.
Adhere all the corset pieces together then adhere to the center of the card front. Trim the corset stand away then arrange the flowers in clusters at the neckline, hemline of the corset and the corners of the card. Adhere the corset stand under the hemline flower clusters. Taking the sentiment from the ‘Elegant Pocket Accents die set, both the red and white card stock. Die cut two red and one white. Gold emboss one of the red sentiment pieces and trim away the words from the frame. Adhere all the sentiment layers together, 1st the white, 2nd the red and 3rd the gold. Adhere the sentiment in place with the hot glue gun then adhere a few flowers and leaves at the ends. To finish the card apply stickles to the corset lacing.


Thank you for visiting and don't forget to visit the two other posts.
Have a happy scrappy day,
Sussipoppins inky hugs and love


"Love You Forever"

As promised here is the detailed post of this card I submitted to Heartfelt Creations to get into the semi finals.

If you haven't already, please visit HERE and put a tick next to my name so I can be part of that wonderful dream team.


Bright pearl yellow stamens. HCS1-458-1
Deluxe Flower Shaping Kit. HCST1-401
Double Dots/3d foam squares. DDOTS
Designer Dries Clear Adhesive. 159723
Score-Pal. 173842
Spellbinders Tool N’ one. 359848
White cardstock14.5 oz. HCPP2-451
Stack and Store Daubers pack of 6. HCDA1-449
Ranger Archival ink Black. RACP468
Zig Clean Color Real Brush Marker: Olive green, Wine red, Mustard, Warm grey. 478455
Glitter. 85glitter
Med Yellow Bright Pearl Stamens. HCS1-458-2
Other Products Used: Water Brush, Hot glue gun, Scissors, Ruler, Double sided tape, Double sided foam tape, Misti, Foam inking tool, Harmony inks by Spectrum Noir: Pine tree, Chinese red, Lagoon.
Diamond stickles, Black fine nib Permanent marker pen. Matching Fancy netting.

Instructions:
The finished size of this card is 10 cm X 16.2 cm or 3.9"  x 6.6 "
 Make the easel card by taking the large dies and the white card stock, cut three large tags and two small tags. Make a hinge by cutting the width of the large tag x 3 cm or 1". Fold this in half across the width. Adhere the tag ends to the hinge. Make a fold across the width of one of these tags at 7 cm or 2 ¾" fold this into the other tag as this will be the easel fold. Adhere the remaining tag to the folded tag so the rounded part of the tag will show under the straight edge.
Taking the lagoon ink and ink foam tool, lightly ink the edges of the tags.
To make the matting, take the smaller tag die, white card stock, archival black ink and the Forever Love background stamp, stamp both the small tags then bring the Lagoon color on heavily at the edges to lighter in the center. Adhere the prepared matting tags to the card front tag and the inside card tag. Make the oval frames, inking the fancy edged oval with the Chinese Red then add the glitter to the edge. Adhere to the center of the tag front. Taking the white card stock, stamps and dies make the Floral Corset, flowers and the letters for the sentiment ‘Love’.  Adhere the flowers in place above and below the oval. Adhere a flower cluster as a stop where shown in the photo. Take a permanent marker and trace over ‘you forever’.  Adhere the netting to the back of the corset. Dabb the hem with clear drying glue then dipp into the glitter. When dry adhere the corset to the tag front oval. Apply stickles to the word ‘Love’, the flower centers and the flowers in the corset.


This is the closed card.

Thank you for visiting and don't forget to visit the two other posts.
Have a happy scrappy day,
Sussipoppins inky hugs and love


"Bonjour"

Hi, today I am show casing a simple but elegant card using the Parisian and the Peony collection brought out by Crafters Companion.
CRAFTERS COMPAINION PRODUCT LIST:
Gemini
Scoreboard
Stamp rockers
Water Brush Pens CC-WTBRSH-M3PC
Peony collection: Flowering Vines NG-PEO-MD-FVINE
Sheena Douglas white stamping card
Parisian collection: 3D Embossing folder-“Bonjour Paris” S-PAR-EFS-3D-BOPA,
Parisian collection: cardstock packet.
Spectrum Noir Harmony Ink pads: Green Topaz, Grasshopper, and Frozen Lake.
3D foam tape
Double sided tape
Rock-A-Blocks

OTHER PRODUCTS USED:
Hot glue gun, Clear drying glue, Ruler, Wired organza ribbon.
MEASUREMENTS FOR THIS CARD: 18.8 cm x 13.5 cm
Instructions: Make the tent fold card to the above measurements. Make the matting, using the green cardstock from the Parisian collection, a little smaller than the card front. Adhere using the double-sided tape or wet glue. Taking the white stamping card and the embossing folder, make the embossing layer. Using the inks and foam inking tool bring color to the embossing layer. Taking the ribbon make a bow. Adhere with a tie to the right of the embossing card. Die cut the swirls x3 and add color to them using the darkest ink.. Adhere the swirls under the ribbon bow using the hot glue gun. Adhere this to the card front with 3D tape.
***

A nice quick card for someone dear to the heart,
till next time, have a scrappy happy time,
inky hugs and sussipoppins love
OXO


Saturday, March 23, 2019

"Just For You."

Hi fellow scrappies,
as promised here is one of the cards I submitted to Heartfelt Creations to get into the semi finals.
If you haven't already, please visit HERE and put a tick next to my name so I can be part of that wonderful dream team.


Bright pearl yellow stamens, HCS1-458-1
Deluxe Flower Shaping Kit, HCST1-401
Double Dots/3d foam squares, DDOTS
Designer Dries Clear Adhesive, 159723
Score-Pal, 173842
Spellbinders Tool N’ one, 359848
White cardstock14.5 oz.   HCPP2-451
Zig Clean Color Real Brush Markers: Olive green, Light Violet, and Mustard.   478455
Rangers Gold Embossing Powder, 359760
Heat It Craft Tool   RAHT
Med Yellow Pastel Pearl Stamens, HCS1-457-2
 Other Products Used:Lilac card stock, Hot glue gun, Scissors, Ruler, Double sided tape, Double sided foam tape, White craft foam, Misti, Versa-mark,

Instructions:
The finished size of this card is 16 cm x 21 cm / 6 ¼ “ x 8 ¼ “
Taking the white card stock make a tent fold card to the measurements above. Make the Lilac card stock and make a card front 4mm / 1/8th smaller than the card base. Taking the white card stock and the ornate pocket accents die set and make the lace background. Do the same with the petite pocket accents die set. Die cut all the elements twice. Taking the tag dies from the album tags and accents die set, cut once the smaller tag then tape the two dies together to make a frame, cut one from the craft foam and another from the white card stock. Taking the large tag, this will be stamped with gold embossing powder using the hand stitched background stamp. Taking the tag frame emboss this also with gold embossing powder. Adhere the finished frame to the craft foam frame. Taking the harmony inks and inking foam tool, bring color to the lace elements. Layer upon layer to get the shading needed. Adhere all in place on the card front. 1st the lace background, 2nd the stamped tag, 3rd the four petite accent pieces then adhere the embossed frame to the tag out line. Taking the white card stock, Gold embossing powder, the misti, the zig pens and the Floral Fashionista, Banners Of Love stamp and die sets, stamp and die cut the elements. Prepare the elements for the card. Make 30 flowers, 1 banner, 1 mannequin, 1 sentiment banner, 3 flower clusters. Cut an extra mannequin and a backing for the year calendar from the white craft foam. Adhere the elements to the card front. 1st trim the stand from the mannequin then adhere the body to the left of the frame. Ink the edges of the year calendar and adhere in place then the trimmed mannequin stand under it. Adhere the sentiment with 3D foam dots or tape in place. Adhere the flowers where shown in the card photo. Trim the flower clusters as needed and adhere where needed under the flower clusters.

Thank you for visiting and don't forget to visit the two other posts.
Have a happy scrappy day,
Sussipoppins inky hugs and love


Friday, March 22, 2019

The Heartfelt Creations DT 2019 semi finalist have been chosen.....

I am one of them.....YAY.....every year Heartfelt Creations add a few new design team members to their dream team. I have got through to the semi finals....YAY....I will ask you if you would be so kind as to put a tick next to my name. If you have never visited me before, below is what I submitted to Heartfelt Creations so you can get an idea of my style of creating with their product. Under each photo you will find the link to visit and vote. You only need to visit the link one time and vote...but you can tell all your crafty friends. Thank you. 
I am in the running for this years team, so I would dearly appreciate it if you were to put a tick next to my name.
You can find the semifinalists list HERE at the Heartfelt Creations site. Such talent!
HERE is the voting link. NOTE: If you have already voted, you don't need to and can't vote again.
This card will be posted again so you can see all the details on the how too and products used.
So keep posted
I am in the running for this years team, so I would dearly appreciate it if you were to put a tick next to my name.
You can find the semifinalists list HERE at the Heartfelt Creations site. Such talent!
HERE is the voting link. NOTE: If you have already voted, you don't need to and can't vote again.This card will be posted again so you can see all the details on the how too and products used.
So keep posted


I hope you enjoyed your visit. I will be doing another post for each card giving details on the how to and close ups to help inspire you.
So keep posted.
Thanks for visiting and I hope you will take the time to vote for me.
Thank you and inky hugs

Tuesday, March 19, 2019

For faraway family on their " SPECIAL DAY"

Hi, today a card made from my Crafters Companion stash.....featuring of course the 
'PEONY' collection


Most products listed above can be found here at https://www.hobbidee-breda.nl 

CRAFTERS COMPAINION PRODUCT LIST:
Gemini
Stamp rockers
Water Brush Pens CC-WTBRSH-M3PC
STAMPS AND DIES-
               :“CRISALIS CLASSICS” by Christine Haworth CRIS-WED
               :Peony Collection “LAYERD PEONY” NG-PEO-STD-LAYP
                                                   “FLURISHING VINES” NG-PEO-MD-FVINE
Gemini Elements: “STITCH EDGE CIRCLE” GEM-MD-ELE-STCI
Desire: Classiques- Only Words “SPECAIL DAY” DS-C-SPDAY
             : Edge’ables “DELICATE TRELLIS” DS-EDG-DTREL
             :Create-a-Card “FLUTTERBY” DS-CAD-FLU
PAPER: Sheena Douglas White Stamping Card SD-STCARD
              :Centura Pearl-snow white hint of silver A4 300gm
EMBOSSING FOLDERS: 3D “BUTTERFLY TRELLIS” EFS-3D-BTREL
INKS: Spectrum Noir Harmony Inks: Straw Bale, Frosty Jade, Green Topaz, Pink Tulip.
 OTHER PRODUCTS USED: White organza ribbon, Versa-Mark, Gold embossing powder, Heat gun, Hot glue gun, Clear drying glue, 3D foam tape, Double sided tape, Mist stamping tool, Fussy cutting scissors, Ruler, Flower shaping tools and mat, Diamond stickles, Gold stamens

TITLE:“SPECAIL DAY”
 MEASUREMENTS FOR THIS CARD:
#1 17.5cm x 24.5 cm
#2 Embossed matting 16.8cm x 23.8cm
INSTRUCTIONS FOR THIS CARD:
#1 Emboss the hint of silver card twice using the Buuterfly Trellis 3D embossing folder. Trim to fit the matting measurement.
#2 Cut four times the Delicate Trellis edge’able die
#3 Make the flowers, Using three layers make three large and four small flowers.
#4 Make enough leaves and swirls as fillers for the clusters.
 #5 Stamp and color the bride image, die cut using the stitched circle.
#6 Cut the sentiment a few times so it will stand out. Cut the butterflies.
#7 Arrange and adhere to the card front.
#8 When all is secured with glue apply the diamond stickles to the sentiment, butterflies and swirls


I hope this post inspires you to give it a go with making these glorious peony flowers.
Till next time, Sussipoppins love and inky hugs
OXO

Friday, March 8, 2019

A Crafters Companion "HELLO"

Today I have for you a card I made using the Nature's Garden "Peony" collection
PRODUCT LIST:  ‘HELLO’
STAMP & DIES
Floral Spray- stamp & die. NG-PEO-STD-FLOS.
Layered Peony- stamp & die NG-PEO-STD-LAYP.
Trellis Frame-  die NG-PEO-MD-TREL.
Flourishing Vines- die NG-PEO-MD-FVINE.
Hello- die NG-PEO-MD-HEI.
PAPER:
Sheena Douglas white stamping card.
Green card stock.
INKS:
Spectrum Noir Harmony- Grasshopper, Honey pot, Pine Tree, Plum Jam.
Black archival ink.
OTHER: 
Hot glue gun, Clear drying glue, 3D foam tape, Double sided tape, Crafting foam A4, Fussy cutting scissors, Ruler, Flower shaping tools and mat, Gemini, Scoreboard, Rock-a-block’s, Glitter, White organza ribbon, Water coloring pen.

MEASUREMENTS FOR THIS CARD:
#1 Card tent fold base and the green cardstock layer is 6” x 6” / 16cm x 16cm.
#2 The design paper layer, cut 15.3cm x 15.3cm.
#3 The green card stock layer, cut 12cm x 12cm.  
#4 The card front layer, cut from the design paper 11.5cm x 11.5cm.

INSTRUCTIONS:
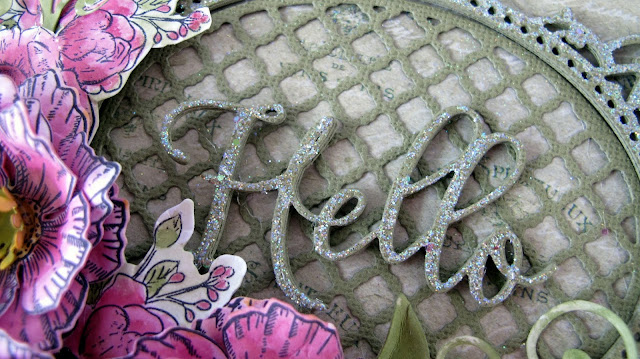
Taking the green card stock, die cut the frame out x 4, the trellis oval x 1, Hello x 6. For the frame and the sentiment stack and adhere together. Apply clear drying glue to the sentiment and frame top then dip into the glitter. Put aside to dry. From the stamping card stamp, the leaves x2, Small peon x9. Swirls with leaves x3,  the peony cluster x3 and 3 of the flower centers. Taking the matching dies, die cut then bring the colour to the elements. Using the shaping tools bring shape to the flowers, leaves and the swirls. Make the bow. Arrange all the elements in a cluster at the left foot of the card front. Adhere all in place with 3D double sided tape, clear drying glue and the hot glue gun.
Although the peony flowers are a bit large, they are a dream to work with and as you can see they work well to make a pleasing card. Remember I used the smallest size peonies for this card. I shall make something with the two larger peony size's and see how that goes...but that...is for another day.

Wishing you a happy scrappy day,
Sussipoppins inky hugs.
OXO