
"Cascading Petals"

“For my friend”
Heartfelt
Creations products and products carried by Heartfelt Creations used in this
project:
HCDP1-2115
Cascading Petals Paper Collection
HCPC-3912 Cascading Wisteria cling stamp set
HCD1-7296 Cascading Wisteria die set
HCPC-3913 Floral Song cling stamp set
HCD1-7297 Floral Song die set
HCD1-7298 Decorative Cage die set
HCPC-3845 Just For You Sentiments cling stamp set (Hey it’s
your …& For my friend)
85-glitter Crystal Ultrafine Transparent Glitter ½ oz.
409311 Color In Watercolor Brush-Fine
159723 Designer Dries Clear Adhesive
352854 Metal Tip for Adhesive Bottles.
3D184 Crystal Lacquer 4 oz4 3-D
HCDA2-450 Stack and Store Daubers-Pack of 30
RCHS100 Hydra sponges
Flower Shaping Tool Kit
DDOTS Double Dots 100pc.-3D foam circles
RACP505 Ranger
Archival Ink Pad -Sepia
RACP475 Ranger
Archival Ink Pad- Library Green
359848 Spellbinders Tool N’ One
368771 Score-Tool
DMCT4185 Groove Golf Tool Set
173842 Score-Pal Measuring & Scoring Board
OTHER
PRODUCTS USED:
Fussy
cutting scissors, Hot glue gun, Inks: Spectrum Noir- Pale fig, Pine tree,
Spring meadow. Creative Artist water colour box (a local brand of water colour
blocks). Double sided 3D foam tape, double sided tape. Diamond stickles, Inking
tools White card stock,
INSTRUCTIONS:
Taking the white card stock make a tent fold
card by cutting 2 of the above measurements. Scoring from the top the width of
one of the cards, this will be the back
part of the card base. Adhere the double side tape to this area. When the card
is completed remove the protection tape and adhere both card pieces together.
You can make a larger card this way without wasting a lot of card stock.
Find the sheet number 3A in the paper
collection and cut this a little smaller than the card front. Taking the
Grasshopper ink and inking tool, ink all the edges of the card front and card
base. Taking the sepia ink and the sentiment stamps used for this card, stamp
to the left of the card front. Adhere the card front to the card base using 3D
foam tape.
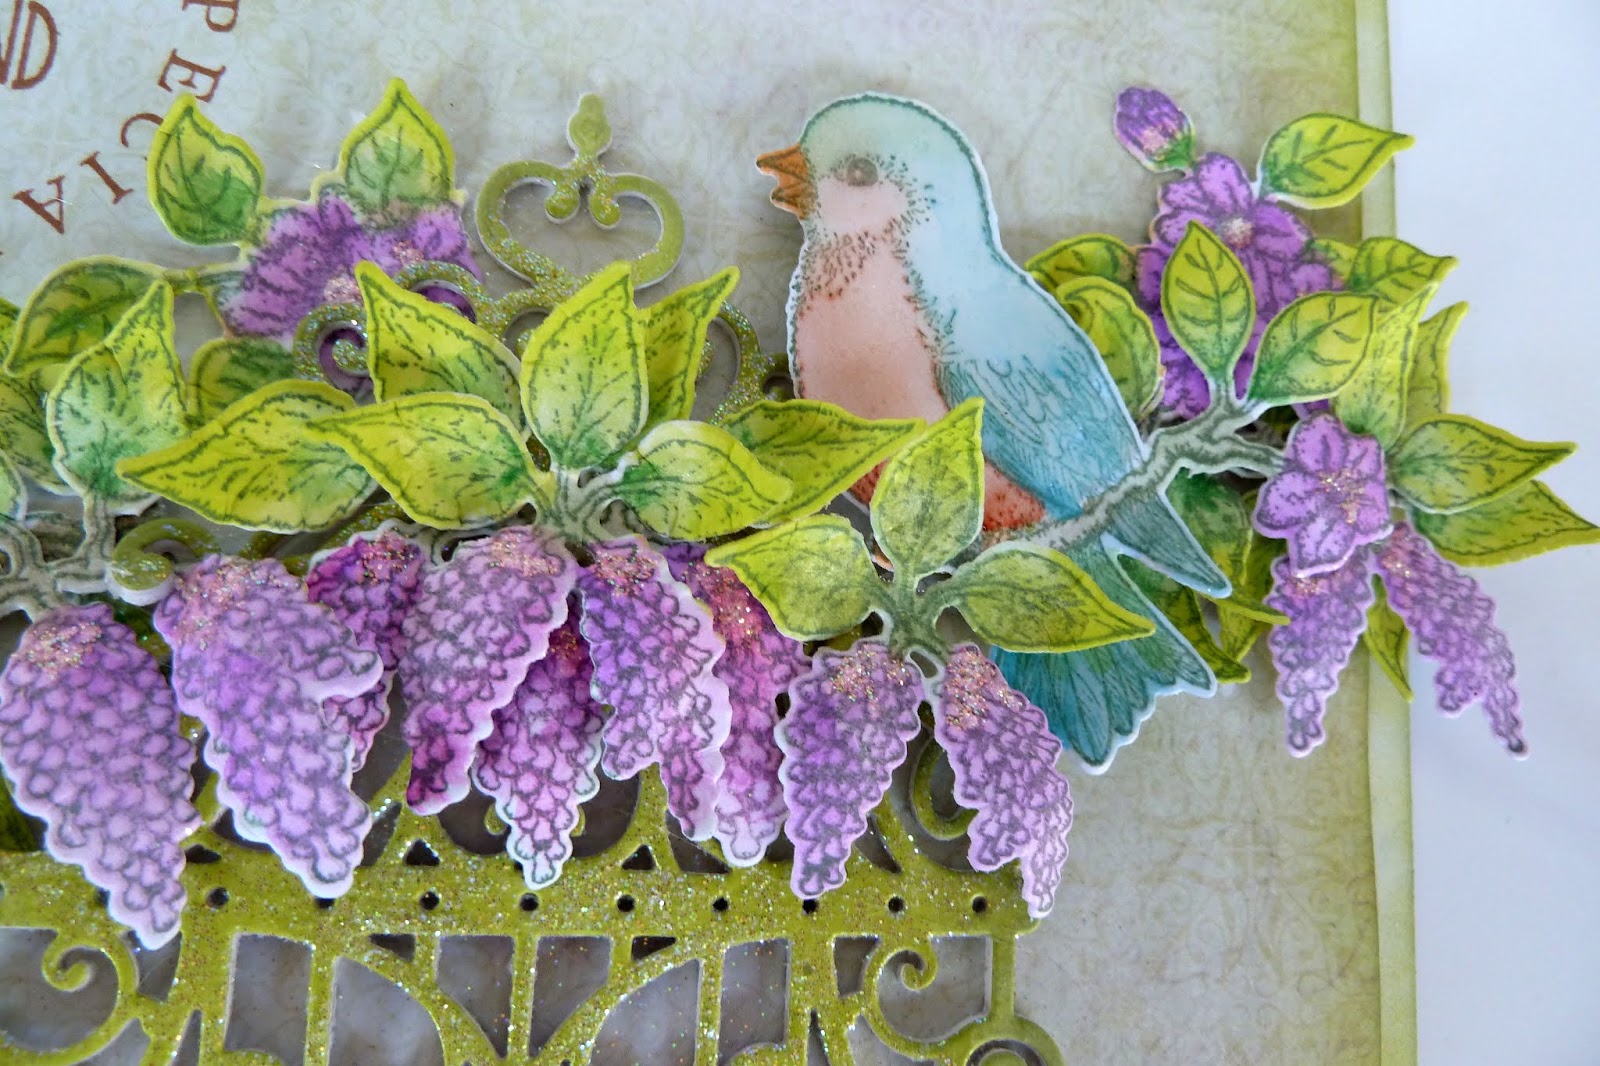
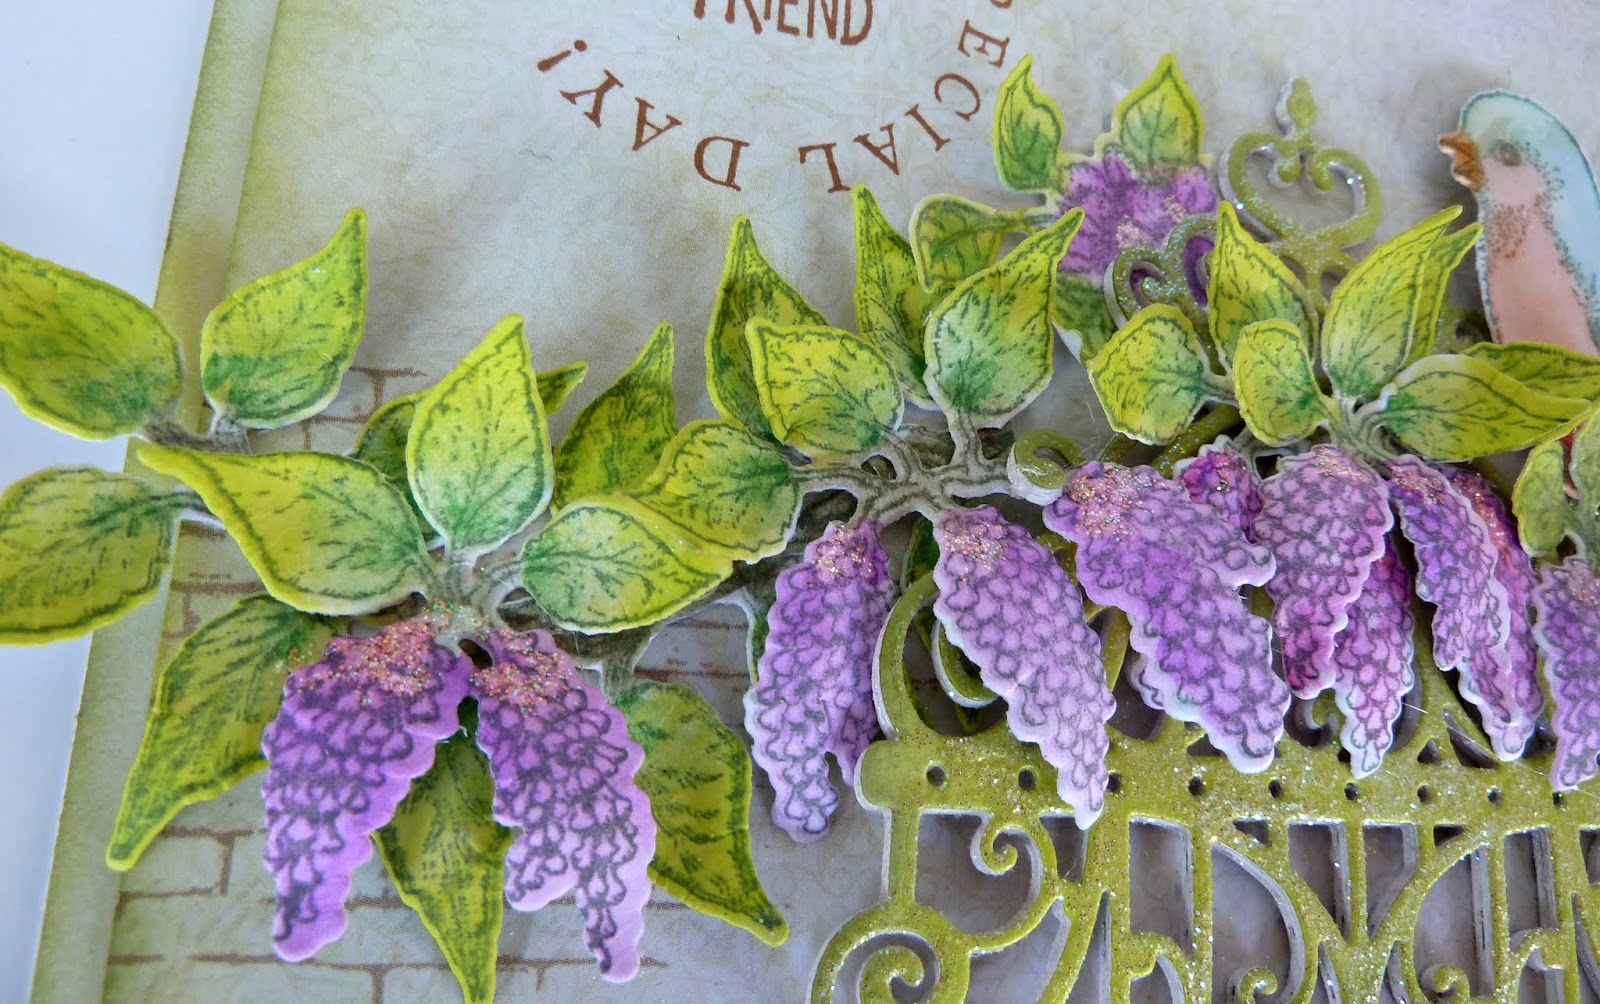
Taking the white card stock , Library green
ink, the stamp and dies needed to make
all the elements for this card, proceed by making 4x the branch with 2
wisteria’s hanging, 2x the branch with 3 wisteria’s hanging, 1x the larger
wisteria branch and 1x the branch without wisteria’s. 1x the bird facing to the
left and die cut 5x the cage.
Bring colour to the elements and shaping the
leaves and wisteria’s by using the flower shaping tools.Taking the grasshopper
ink and inking tool, bring the colour to one of the cages. Adhere all the cages
together. Using the hydra sponge apply clear drying glue to the cage then
sprinkle glitter over it. When dry adhere to the card front.
Arrange the flowers and leaves along the top of
the cage, trimming the flower from the bird away and using it to the left of
the cage. Adhere the bird in the leaves to the right of the arrangement. When
all is secured apply the clear crystal to the bird and the diamond stickles to
the flower tops.
An adorable collection. I love the new birds, larger than the ones we all ready have....and what do you think about the wisteria?...wonderful!
Enjoy.

So Pretty Susan!
ReplyDelete