
Today I have for you a pocket card ...
"MENU".
A sure worth while investment of spending a few 1/2 hours viewing the close ups and instructions...so pour yourself a coffee, tea or a dreamy whipped chocolate milk...what ever takes your fancy and indulge yourself.
Product List
Heartfelt Creations Products And Products Sold On The Website:
Other Products Used:
Card Stock: Kraft dark and Kraft light,
Ranger: Stickles, Heat Gun, Water Coloring Brush, Water Mister, Ink Foam Tool. Gold embossing powder, Bone folder. Distress Inks; Walnut Stain, Spun sugar, Tumbled Glass, Dusty Concord, Peeled Paint, Forest Moss, Bundled Sage.
Other: Versa-mark, Fussy Cutting Scissors, Double sided Tape, Diamond stickles, Corner punch.
Instructions on how to make this card:
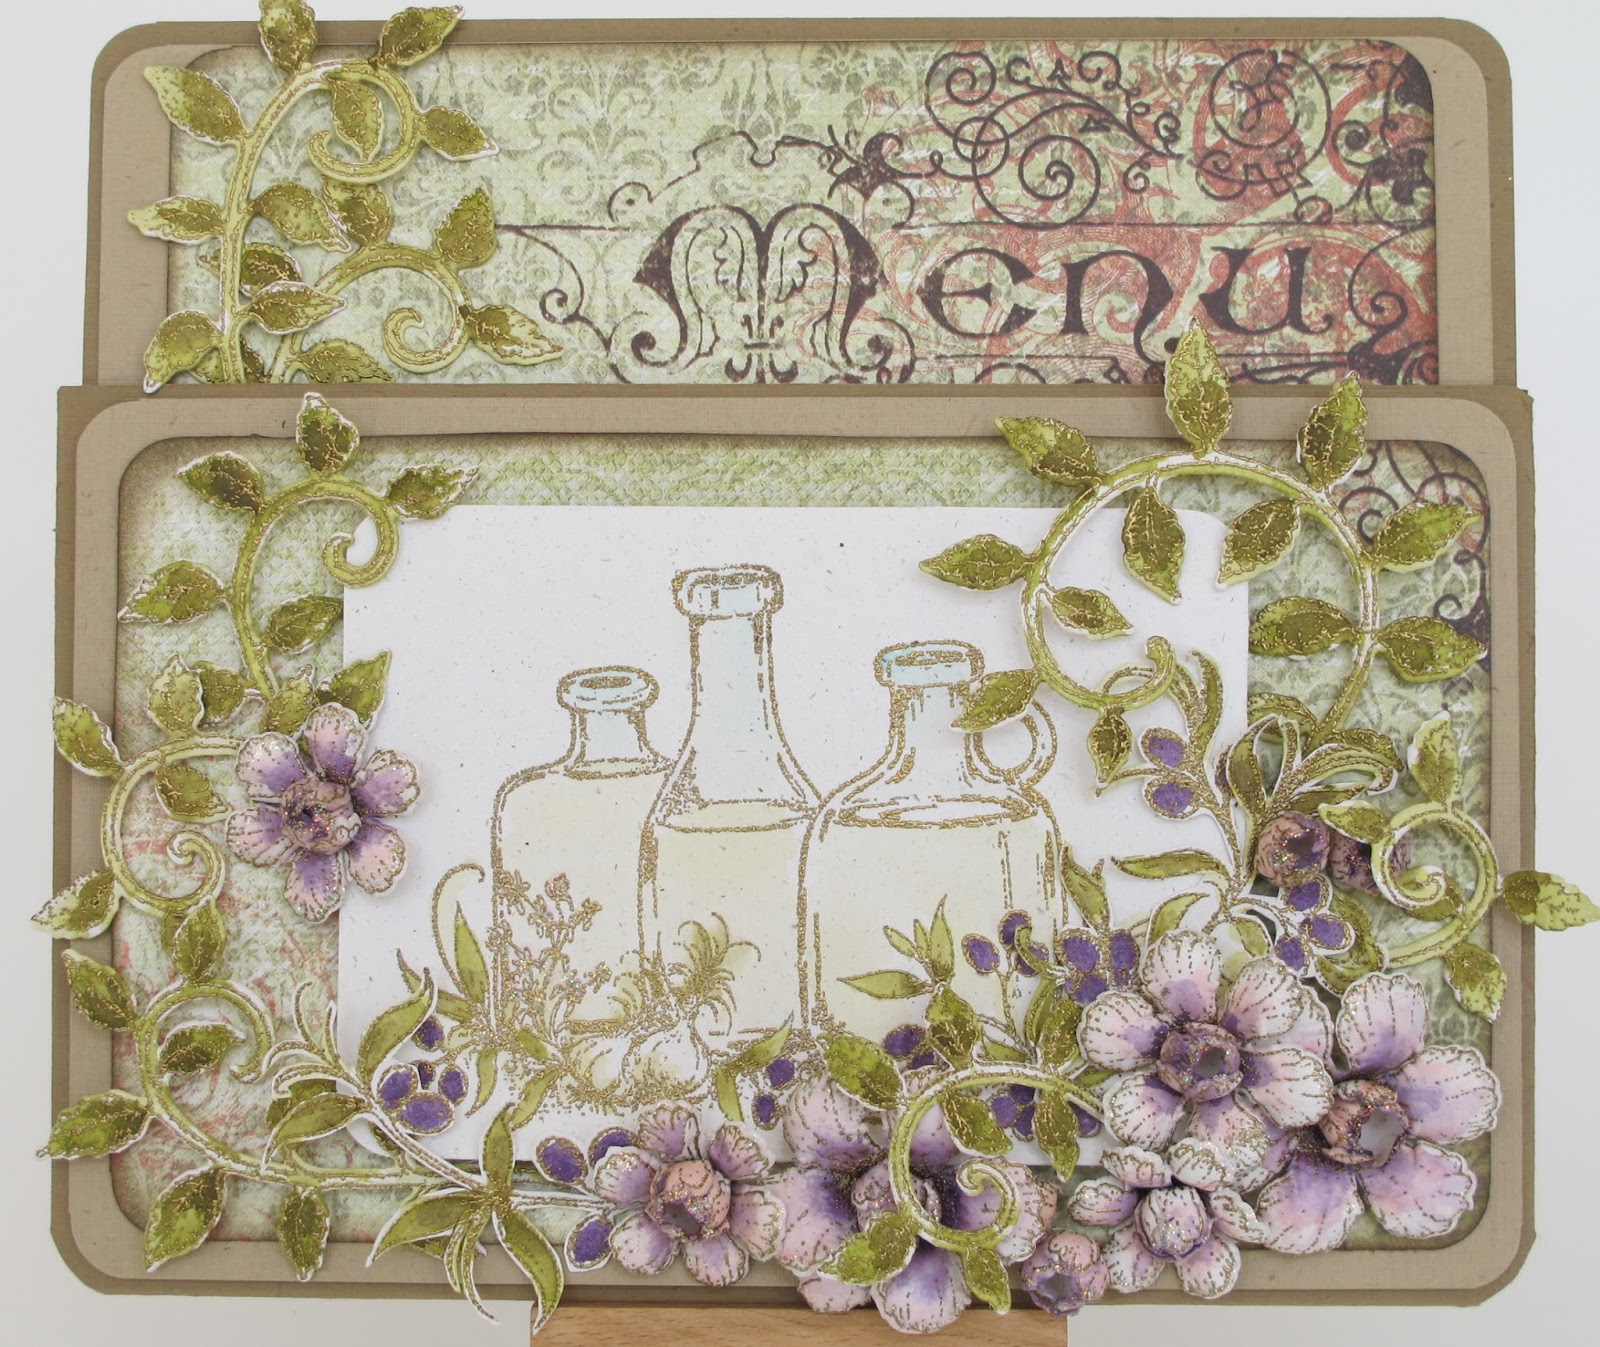
The finished size of this card is 17.5 cm x 19.5 cm

For the card, taking the dark Kraft card stock cut for the card base 18.0 cm x 16.0 cm.
For the matting with the light Kraft card stock, cut at 17.5 cm x 15.5 cm. Use the corner punch to round all corners. Find the green paper with MENU printed on it and cut to size, 17.0 cm x 15. 0 cm. Using the corner punch, round the corners. Ink the edges with the Walnut Stain ink.
The pocket:

Cut, 18.4 cm plus 1.5 cm each side for flaps. x 11.4 cm in the dark Kraft card stock. Fold in half. Cut away the 1.5 cm to the fold. Using the corner punch round the bottom folded edge corners. Adhere together to form the pocket. Make a matting layer for the pocket with the light Kraft card stock, 19.9 cm x 10.9 cm. rounding the corners with the corner punch. Using the same green design paper as the card cut a matting 17 cm x 9. 9 cm. Round the corners and ink with the Walnut Stain distress ink.


Stamp and cut, the flowers and vines with matching stamp and die sets, stamping with gold embossing powder. Color the flowers and vines with the distress inks.

Bring shape to the flowers and vines using the Deluxe Flower Shaping kit.

Adhere all the flowers and vines to the card front in their place. Also adding two of the vines to the left side of the card.

To finish your project add stickles to the flower petals and buds.

We have all heard it before....the photo does not look as good as the real thing...well it is true!
A shame my photo taking is wanting. The up side is...wait for it...that is the big reason why I started scraping. To make a bad photo look great!....you know the ones you took and don't have the negative or the children are all grown up...and that used coffee cup is in the picture....and, who is that person that keeps on getting in the way just when I took the shot. We could all go and do the moment again...but now the kids are a bit taller and grandpapa is a bit more grumpy....so we won't....Well. that is life...there is also photo shop.....but.... I think of all the hours it will take me to learn it....I'd rather make a few extra flowers to cover the nasties.
The solution for you, is to make the card yourself...then you too can see how really great it is...LOL
....and...if you do...you too can have inky fingers.
I shall leave you with that scrappy thought and inky hugs for this week.
sussipoppins
Hi, Sussi! If you drive through the mountains in Western North Carolina, you'll find dozens of rustic little roadside stands groaning beneath the weight of jars of jams, honey, fresh berries, fruit and veg. This card captures that rustic roadside stand feel perfectly! I love the climbing vines and beautiful flowers! And the embossing and coloring are magnificent! Nicely done!
ReplyDeleteloving that gold embossing on this card, your flowers are gorgeous.
ReplyDeleteWOW... love the magic you create with the gold embossing :)
ReplyDeleteBeautiful!! Love it!! hugsxx
ReplyDelete