
Yes you got it right...another double posting...letting you down softly from last week. Hope you had fun on the hop. Thanks for all the love left behind last week. I tried to get back to you all, but ran out of time. So and big hug to all that left some love behind in the comments. There was so many that popped in on me...but what does one expect ? with that dream of a prize...
*************
'DRUM ROLL'
The winner of the to die for prize is from Angelica's blog and is 'Diana Joy.' This will be be announced and posted on FB and the Heartfelt Creations blog. Diana, you will need to email info@heartfeltcreations.us with her details. Cindy is expecting her email!
Congratulations Diana xox
**********************
Don't forget to scroll right through as there is another post below this one....lol
#1
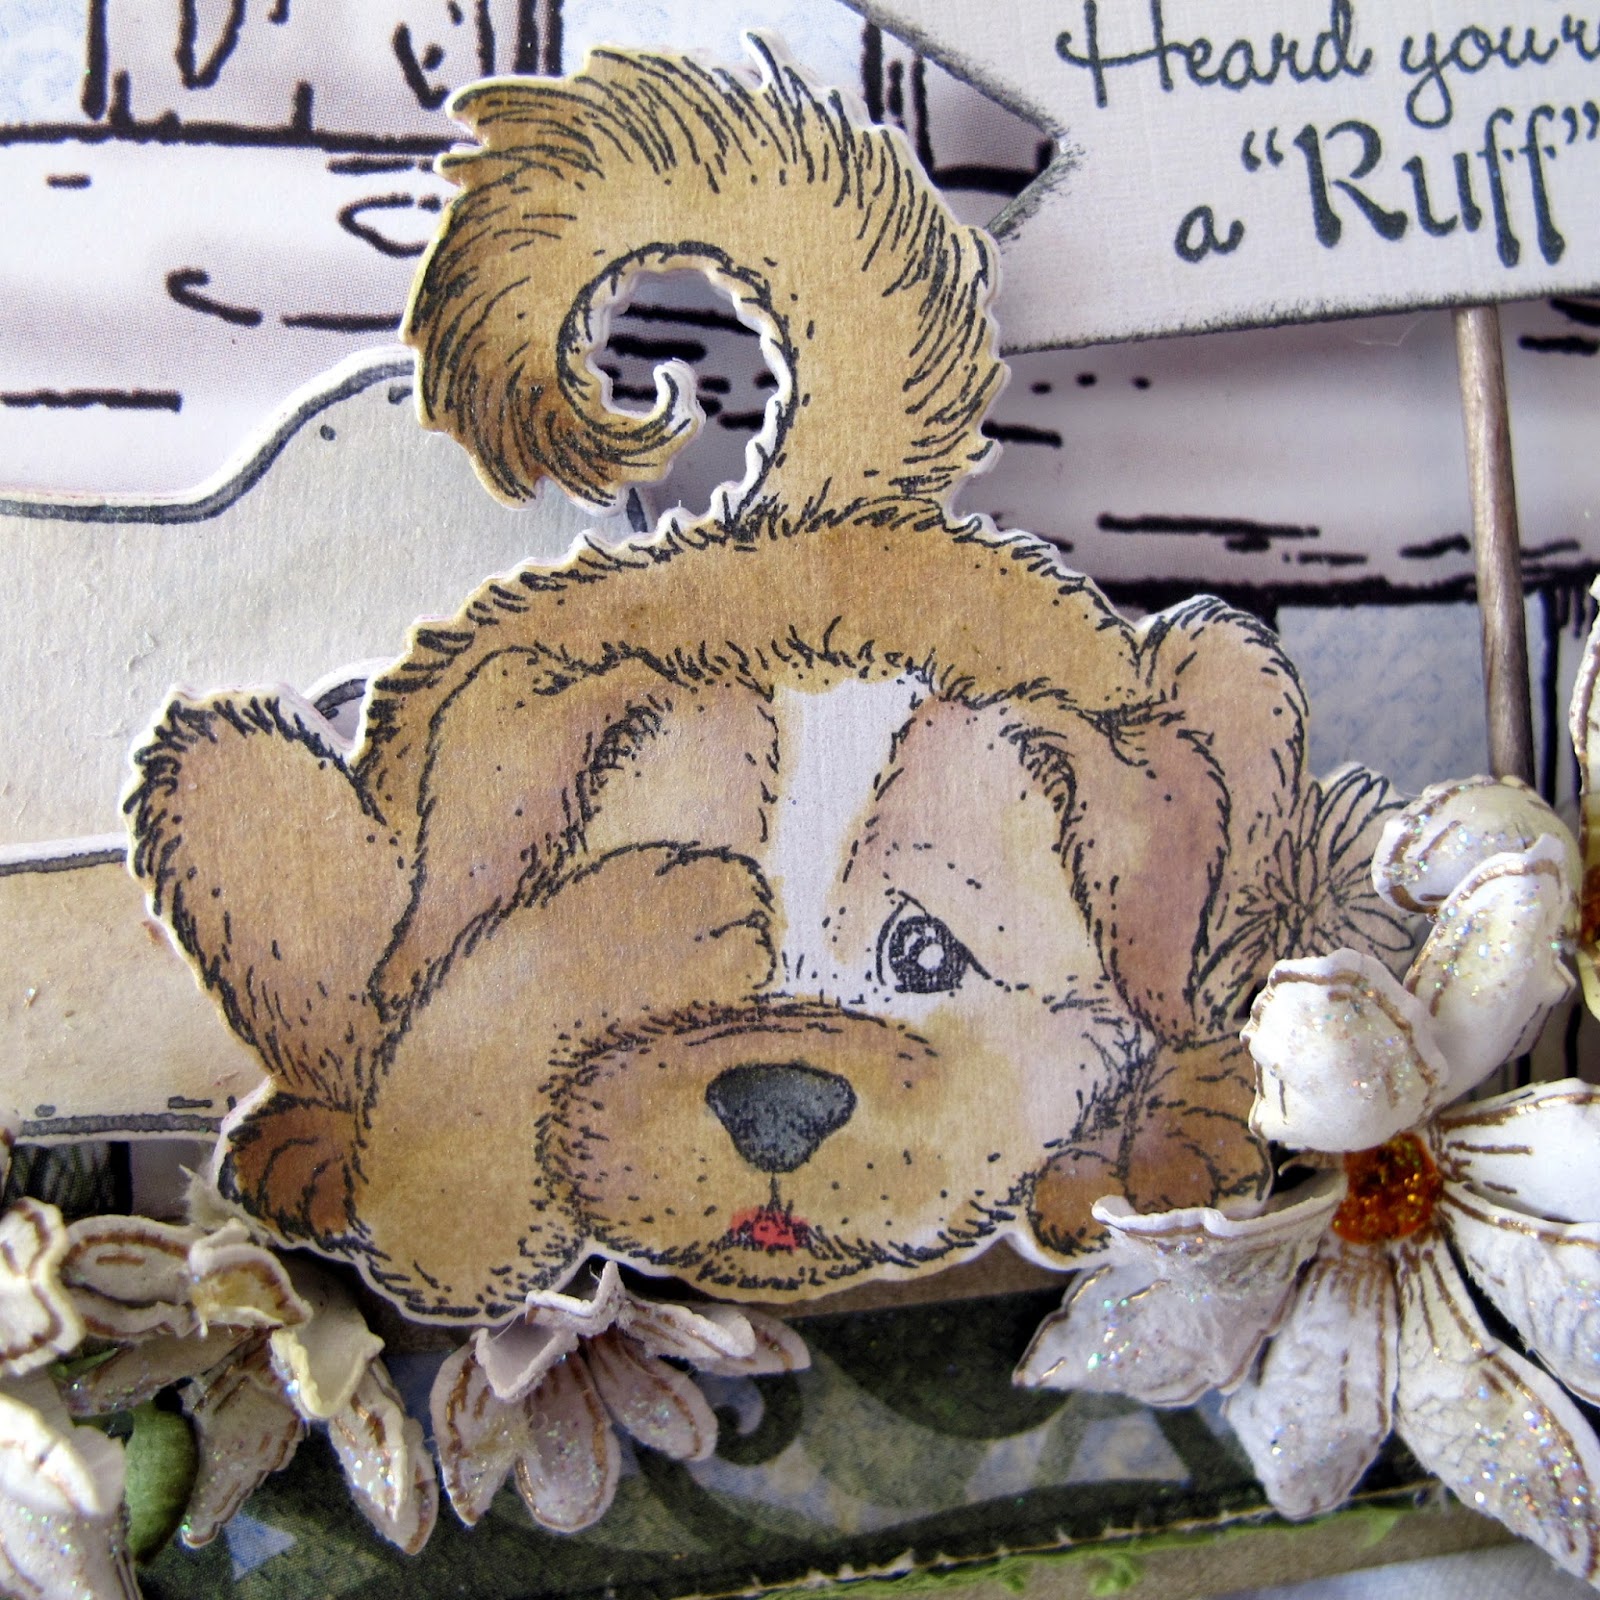
“Heard You’re Having A Ruff Time”
“Heard You’re Having A Ruff Time”

Heartfelt Creations Products And Products Carried On Our Website:
Other Products Used:
Card Stock: Green (Parakeet), Crafters Companion A4 Whit-hint of gold 300gm. Ranger: Orange peel Stickles, Heat Gun, Water Mister, Inking foam tool. Bone folder, Water coloring brush, Paper-distressing tool, Scissors, Distress Inks: Forest moss, Mustard Seed, Black Soot, Honey yellow, Old paper, Antique linen, Mowed lawn. Other: Black archival ink, Versa-mark, Double sided Tape, Double Sided Foam Tape, Scoreboard,
Misti, Hot glue gun, Cocktail stick, Creative Embellishments-“Hope”

Instructions:
This Z slider card fits into an envelope that measures 22 cm x 21 cm when completed. A4 cardstock is used to make the 17.5 cm x 21 cm ‘Z’ slider card
To make the card base: Taking the A4 cardstock and score at 6 cm and at 12 cm along the long edge. Fold into valley and hill folds. This will form the card front foot (6 cm x 20.8 cm) and card front background (17.7 cm x 20.8 cm). For the slider, cut 11.5 cm x 7 cm. For the card front cut 14 cm x 17 cm. For this card, the white base is inked with forest moss distress ink. This ink lets the pearl base show through. All the matting layers will be cut at 2 mm smaller each side. Cut one matting layer in each of the green card stock and the design paper found in the paper pad to fit all the card base elements. Ink the edges of the design paper with forest moss ink. Adhere all the matting layers together, except the top edge of the card front and the first matting layer. This is so you can slide the slider between the card stock layers. If you forget to do this, don't panic. Then you make a band measuring16.5 cm x 2 cm and adhere to the top back side of the card front. Use this for the slider guide; adhere to the back of the card front. Fixed. Adhere the slider to the top center of the card background front. (Make sure you do not place the glue and double-sided tape too low. If you do this, the card front will not sit flat when closed. If this happens, make a slider guide for the back and place it lower in the back. ) Adhere the card front to the center of the card foot. Slide the slider in to place.
Make and adhere all the embellishments to the card front. First stamp and make the flowers. The stamping for the flowers is done with the gold embossing powder. When shaped with the flower shaping kit, add the clear drying glue to the tips of the daisies, then dip into the glitter. Put aside to dry. When dry tap off the extra glitter.

Cut the leaves and sentiment banner using the Cut-Mat-Create die set. Ink the edges of all of the elements. Stamp the sentiment. Color the cocktail stick and adhere to the back of the sentiment to look like a post.

Stamp the Pooch and his bones. Die cut the images and extra 4-6 times extra to make chipboards from the images. Adhere all together.
Taking the Creative Embellishment “Hope” word, apply the clear drying glue to the front of the word then dip it into the glitter. Add a second layer if needed.

Put aside to dry. Once all the layers for the card base has been put together and the “Hope” is dry, you can now adhere all the embellishments for the card. First adhere the bones to the lower card front, then the Pooch to the center using the aid of foam 3d dots to keep the height even.

Adhere the daisies and leaves then the sentiments.

Note: When adding the slider decoration, make sure the slider still slides before securing with glue.
**************
#2
"The Lord is your Joy"

Below zooming in on those roses.These are made with the larger sized petals. 4 layers.

Above - the card front first fold-out layer.

Above - second fold-out layer

Above and below - the third fold-out layer.

below- the card base layer

Below- just to enjoy the beautiful roses and die borders.


Heartfelt Creations Products And Products Carried On Our Website:
Other Products Used:
Card Stock: White pearl finished card stock (brand unknown)
Ranger: Platinum Stickles, Water Mister, Inking foam tool. Bone folder, Water coloring brush, Paper distressing tool, Scissors, Distress Inks: Walnut stain, Forest moss, Tattered rose, Aged mahogany. Other: Versa-mark, Black archival ink, Double sided Tape, Double Sided Foam Tape, Misti, Spellbinders Classic oval S4-112, Pearl beads (flower centers), Hot glue gun, Creative expressions embossing folder Quilted flower EF-017, A4 die cutting machine. Masking/wasi tape

Instructions:
The finished size of this card is 19.5 cm x 16.5cm.
Find the fold out card from the card set that fits the dies on the product list. Taking the card stock cut strips to measure 17.8 cm wide. For each card fold front cut two fancy boarders and one plain. Using the card shape to guide where to place the boarders on the card stock. Tape them down so they won’t move as you put them through the die cutting machine. Trim to the length as needed. The lace boarders I cut shorter than the card as it would be too heavy and bulky if I did not. Run the plain card fronts through the machine with the embossing folder. Ink this with the tattered rose ink to make the embossing pop. Distress the top edge of the embossed layer, finish the layer edge with a touch of Aged mahogany ink. Apply enough ink to the lace boarders so they will be totally colored green or pink. The pearl effect will show through the ink. Adhere all the layers in their place. Stamp all the sentiments, roses and leaves with the black ink. Color, die cut, and shape the leaves and flowers. Use the pearls for the center of the roses as you are making them. Add with the inking foam tool a little aged mahogany ink to the top of the rose buds and roses to add more interest. Cut the sentiments so they will fit in the card sections. Bring the Forest moss in on to the sentiment shapes with the foam-inking tool adding walnut stain ink to the edges to give more depth. Adhere the sentiments in place with the 3d foam tape. Not to make it too thick or the card will not close. Arrange and adhere the leaves and roses around the sentiments. Trimming the swirls and leaves as you go. Tip: I found the hot glue gun good to adhere the roses and leaves as they stayed in place and did not have to hold them in place till the glue dried. The down side is you have to be fast and placement has to be correct first time. Wet glue is more forgiving and you can change the position if you got it wrong. When all glue is dry and embellishments are secure. Apply stickles to the swirls to finish the card.
Well thats it for this week.
Scrappy inky hugs to you all and have fun playing.
sussipoppins.
Keeping you up to date: The building here is starting to come together, The stairs, windows and electric in in. Holding my breath as electric sockets and lighting is a big issue in a craft room! Hoping I did well but I am sure I will be missing something when all is done....The laundry will be closed and ribbed by the end of the week, so I can do a load of washing that has been piling up for the last few weeks. Yes still living out of a suit case and camping in the lounge down stairs. Yip living in there worlds at the moment. Mine, the real world and the building white dust and rubble world....lol.
One thing I do know, once all is done I will be living in a dream world....can't wait. Hoping to put the floor down in end Dec-Jan. So when all is in it's place...round march I think...all going well.
Then the fun really starts....can't wait!
Hugs
This is absolutely gorgeous!!
ReplyDeleteWow...two gorgeous cards!!!
ReplyDeleteAbsolutely gorgeous!
ReplyDeleteOne word...Stunning!
ReplyDelete