Wednesday, December 29, 2021

Inspiration Wednesday brings you

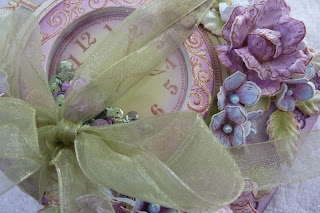
 a classic clock card...read further on how to make this.

To get a print out of this go to: https://www.heartfeltcreations.us/gallery/what-time-is-it

INSTRUCTIONS: This tent fold shaker card measures 6 “ x 7 “ when completed.

Using the Simply Classic Oval Frame die set, taking the outer die and the white card stock die cut two shapes. Taking the scor-pal, make a 3 / 4 “ fold across the top of one of the shapes. Apply double side tape and adhesive to this then adhere the two shapes together to form a tent fold card base. Using the thistle ink and a dauber, ink the outside of the card front.

Using the second die in from the same die set to make a card front using the collection paper pad sheet 1 B. Using the Sapp Green ink and a dauber, ink the outside of this shape. Adhere to the card front by using the clear drying adhesive.

To make all the embellishments for this card:

Using the sepia ink and the white card stock stamp and die cut with the matching die set- The Hydrangea petals, you will need 16 of the smaller size. -The roses, you will need 9 rose petal layers of the medium size ( each rose is made with 3 petal layers ) -The leafy accents, you will need 4 of these

Bring color to the images by using a dauber and the inks, Magenta Hue and French Ultramarine for the Hydrangea petals, Thistle ink for the roses and sap green for the leaves and the leafy accents color with the sap green and the leaf green inks. Once the elements are colored, use the matching 3D shaping molds to bring shape to them. Also use the flower shaping tool kit to do extra shaping when needed. Add the blue stamens to the hydrangea petals and make the roses ready for use.

For the sentiments use the sepia ink to stamp on the white card stock and the Timepiece Sentiments set. Using the circle die that is found in the Elegant Moments Timepiece die set that fits the clock face, use also the circle die found in the Small Circle & Basics die set 3 rd out from the centre of the set. Place this so you will get the outer sentiment in a ring. When you have done this, bring color to the sentiments by using the daubers and the sap green, the thistle inks.

To make the clock:  

You will first need to use the Elegant Moments Timepiece cling and die sets, with the sepia ink and white card stock, taking  the clock stamp and stamp one image. Die cut this, this will be your clock base. Color this with the thistle ink using the dauber.

Using the same sets but this time using the versa-mark and the gold embossing powder onto the white card stock. Stamp the image twice. ( The second image, only the clock face is needed. ) Die cut the clock image, then die cut the next part of the clock with the matching die. ( this will become the clock front ) Using now the second clock, die cut the clock face by using the smaller circle die. Now align the die to the clock hands then die cut.

Bring color to the clock pieces by using a dauber with the sap green and the thistle inks as seen in the project photo.

Adhere with the clear drying adhesive the die cut clock bases together first the sepia stamped clock then the gold stamped clock.

Adhere the clock cut out front from the gold embossed clock back in place using the 3D foam dots or 3D foam tape.

To make the clock face shaker part: Using the die cut clock face

Using the same die circle used for the clock face and the circle die from the Small Circle & Basics die set ( the die 3 rd out from the centre of the die set ) Align these together with tape then die cut three rings from the 3 D foam card stock.  Taking the clear card stock make a circle using the circle die used for the clock face. Adhere all the foam card stock layers together then the clear card stock layer and last the gold embossed clock face. Place a few sequins on the main clock face so they fall into the foam circles, adhere the foam circle clock face to the main clock base. Adhere a green sequin to the clock hand join as seen in the project photo.

Putting the card together: Arrange the leaves on the card front, placing the clock to check the leaves are placed correctly, then adhere the leaves in place. Adhere the sentiments in place also placing the clock to see the placement is correct. Now you can adhere the clock in its place by using the 3d dots or 3d foam tape. This should be 1 / 4 “ high.

Place the roses and hydrangea petals on the card as seen in the project photo. Add a few sequins and apply the diamond stickles as seen in the project photo.


https://www.youtube.com/watch?v=faBoB2s49RI 

Hydrangea petals

https://www.youtube.com/watch?v=FSdPL7nXvQE

Classic rose

https://www.youtube.com/watch?v=YaDMrVikE44

Leafy accents


HEARTFELT PRODUCTS AND PRODUCTS SOLD ON THEIR WEBSITE THAT ARE USED:

HCFB1-462 3D Rose Shaping Mold, HCFB1-467 Leafy Accents Shaping Mold, HCFB1-489 Hydrangea 3D Shaping Mold, HCDP1-2134 Moments In Time paper pad collection, HCPC-3971 Elegant Moments Timepiece cling, HCD1-7379 Elegant Moments Timepiece die, HCPC-3973 Timepiece Sentiments cling, HCPC-3835 Leafy Accents cling, HCD1- 7193 Leafy Accents cling, HCPC 3752 Classic Rose cling, HCD1-7110 Classic Rose die, HCPC-3900 Cottage Garden Hydrangea cling, HCD1-7278 Cottage Garden Hydrangea die, HCS1457-2 Pastel Pearl Stamens -medium, HCD2-7382 Simply Classic Oval Frame die, HCD1- 7154 Small Circle & Basics die, HCST1-401 Deluxe Flower Shaping Kit, HCPP1-475 Deluxe Flower Shaping paper pad-pack of 50, HCDA1-449 Stack and Store Daubers-pack of 6, GBCC1212 Clear Cardstock 12x12, 359760 Gold embossing powder, RAHT Heat It Tool, 352854 Metal Tip For Adhesive Bottles, 159723 Designer Dries Clear Adhesive, RACP500 Ranger Archival ink Sepia,, RACP614 Ranger Archival ink Magenta Hue, RACP436 Ranger Archival ink Leaf Green,, RACP607 Ranger Archival ink French Ultramarine, 173842 -Scor-pal Measuring & Scoring Board, 359848 Spellbinders Tool N’ One

OTHER PRODUCTS USED: Inks used: Ranger Archival ink Sap Green and Thistle. Other: Double sided tape, Thistle and Green Sequins, Versa-Mark, Diamond Stickles, Fussy cutting scissors, Misti, 3D foam card stock, Hot Glue Gun, 3D double sided foam tape

Adorable collection.
See you next time.
OXO


Tuesday, December 28, 2021

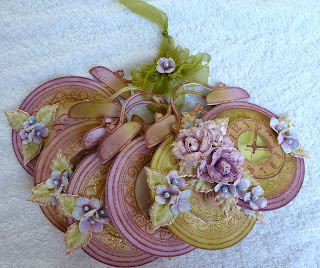
Another exciting inspiration post using the HEARTFELT CREATIONS collection....


......Moments In Time collection....


HEARTFELT CREATIONS  product and product carried on their web site: 

HCFB1-462 3D Rose Shaping Mold, HCFB1-489 Hydrangea 3D Shaping Mold, HCFB1-467 Leafy Accents Shaping Mold, HCDP1-2134 Moments In Time paper pad collection, HCPC-3972 Simple Moments Timepiece  cling, HCD1-7380 Simple Moments Timepiece  die, HCPC-3973 Timepiece Sentiments cling, HCPC-3835 Leafy Accents cling, HCD1- 7193 Leafy Accents cling, HCPC 3752 Classic Rose cling, HCD1-7110 Classic Rose die, HCPC-3900 Cottage Garden Hydrangea cling, HCD1-7278 Cottage Garden Hydrangea die, HC Stamens Pearl medium, HCST1-401 Deluxe Flower Shaping Kit, HCPP1-475 Deluxe Flower Shaping paper pad-pack of 50, HCDA1-449 Dauber, 352854 Metal Tip For Adhesive Bottles, 159723 Designer Dries Clear Adhesive, RACP500  Ranger Archival ink Sepia,, RACP614 Ranger Archival ink Magenta Hue, RACP436 Ranger Archival ink Leaf Green, RACP607 Ranger Archival ink French Ultramarine, 359848 Spellbinders Tool

 OTHER PRODUCTS USED: Inks: Ranger Archival Thistle, Sap Green. Other: Double sided tape, Diamond Stickles, Fussy cutting scissors, Misti, 3D foam card stock, Hot Glue Gun, 3D double sided foam tape, Washi tape, Green organza ribbon, 2 photos.


INSTRUCTIONS:

This sentiment book measures 5 “ X 5  1 / 2 “ plus the ribbon hanger when completed. This book has 5 pages and a cover.

Prepare all the elements used in this project by using the white card stock and the Sepia ink. First prepare the clock page bases by stamping and using the matching die from the Simple Moments Timepiece sets. Do this seven times, plus cut four extra die cuts. You will also need six die cuts from the design paper found in the paper pad for this collection, this will be the backing for each of the pages. From the Timepiece Sentiments set, chose three sentiment circles then stamp and die cut with the matching die found in the Simple Moments Timepiece die set. Find the circle die that fits the outside of the fancy swirl circle part of the clock and use this to die cut the photo to go onto the clock face. Taking into account when die cutting the photo, this circle will be larger than what will be seen when finished. What you will see when all is put together will be the same size as the clock face circle. Using the same circle die used to cut the photo die cut from the white card stock five circles, these will be used for hand written journaling.  When adding colour to the clock elements, the inks used will be Thistle and Leaf green unless stated.

Use the Classic Rose sets to make three roses, each rose has 3-4 petal layers. The ink colour used is Thistle. Watch the film to see how they are made. For the hydrangea petal flowers, use the Cottage Garden Hydrangea sets, one petal plus a blue coloured stamen cut in 1 / 2 for each flower. The colours used are Magenta Hue and French Ultramarine. The leaves, use the plain leaf vine with 10 leaves on it from the Leafy Accents sets. Some of the leaves will be trimmed away from the vine to be used in the flower clusters. In total there will be 26 leaves used in this project so make at least 3-4 leaf vines. The colours used for this is Leaf Green and Sap Green.

To make the two clock pages with the photo: for this book:- Using a stamped clock and the die that matches the clock face, die cut out the clock face for each page. Colour the clocks with the inks and the aid of the daubers. Apply clear drying adhesive to the back side of the edge of the circle holes. (not stamped side) Place the pre-cut photos to close the hole in the clocks. Taking the pre-cut design paper clock backings and adhere these to the back of each clock. Taking the journaling circle, ink the edges then adhere this also to the back of the clock page. Trim away the clocks feet and the bell hammer. Apply the diamond stickles to the swirls and put aside to dry.  When dry, using a hot glue gun to adhere in a cluster, the hydrangea petal flowers and leaves on each page as seen in the project photo.

To make the three sentiment pages for this book:- Taking a pre-stamped and cut clock  and one of the sentiments, colour with the inks. One of these pages will be the book back page therefore adhere two of the extra card stock die cuts to the back of this page. This page does not have a journaling circle, the other two do. Adhere to the back of each page a collection design paper die cut. Taking the remaining two journaling circles and ink the edges then adhere these to the back of the clock pages. Adhere to each page a circle sentiment to cover the clock face. Trim away the clocks feet and the bell hammer. Apply the stickles to the fancy swirls and the edge of the sentiment circle, when this is dry, arrange and adhere the flowers and leaves in clusters as seen in the project photo.

To make the front page:- Taking one of the remaining clocks and the circle die that fits the fancy swirl frame in the stamped image, die cut this out. The rest of this clock image will not be used. With the last remaining clock page,  die cut the clock face with the matching die, use also at the same time the die that cuts the circle with the clock handles. Secure the dies with the washi tape so the dies will not move as you are cutting. Add colour with the inks to all the die cut elements.

Adhere the fancy swirl frame to the clock front using the 3D double sided foam tape. Adhere the two extra card stock and design paper die cuts of the clock to the back of the clock, adhere also the journaling circle  in place. Flip the page over and with the 3D foam dots or the 3D double sided foam tape adhere the die cut clock face in place over the stamped clock face. Apply the stickles to the clock face circle edges. Arrange and adhere with the hot glue gun the roses, leaves and the hydrangea petal flowers in clusters as seen in the project photo. Trim away the clock feet, leave the bell hammer alone on this book cover.

To hold the book together, use the organza ribbon. Using a 14 “ length of ribbon, thread this through all the clock handles then fold in half and tie a knot about 1  1 / 2 “ – 2 “ from the fold. From another piece of ribbon make a triple bow. Using the hot glue gun, adhere the bow to the knot in the ribbon then adhere to the bows knot two hydrangea petal flowers. Now make another knot in the ribbon 1 - 2 “ above the bow. This last knot makes a loop so you can not only lay it on a table but you can hung it on a door, cabinet or draw handle.

 For instructions on how to make the flowers, visit the links below.

https://www.youtube.com/watch?v=faBoB2s49RI 

Hydrangea petals

https://www.youtube.com/watch?v=FSdPL7nXvQE

Classic rose


Till next time....inky hugs

Wednesday, December 15, 2021

It's inspiration Wednesday again over at Heartfelt Creations...

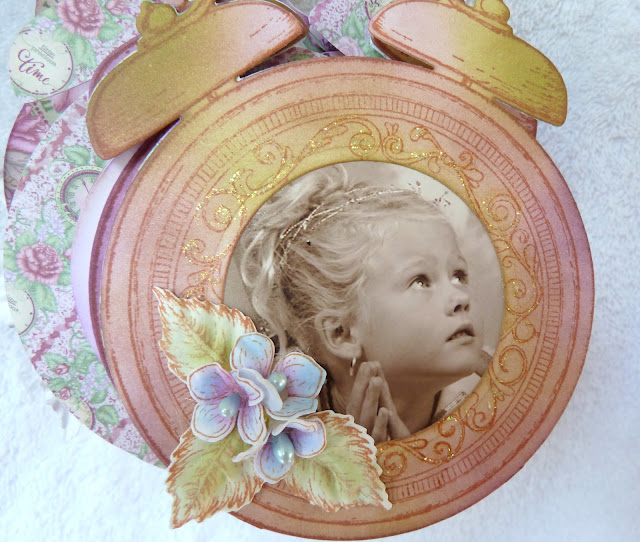
today I have a mini folder for you so fun with clocks... 

When the bow opens...this is what you see.

Instructions:

This card is made from the ready made 5“ x 7“ Gateway fold cards.

Taking a ready made gateway card base, trim off one of the panels and put this aside for another project. Ink the edges of all the panels except the panel that will be back of the card with the thistle color.

Chose a design paper from the collection paper pad, sheet 6A. Using the largest frame die from the Eyelet Frame Gateway set, die cut three frames. Ink the edges of these frames also with the thistle ink. Adhere these to the card front and insides of the card. The card base is now ready for decorating.

Taking the white card stock, sepia ink, and the Simple Moments Timepiece sets, stamp and die cut three times plus an extra die cut. All the matching circle dies are found in the Simple Moments Timepiece die set. The colors used for the clock will be a combination of thistle and leaf green inks.

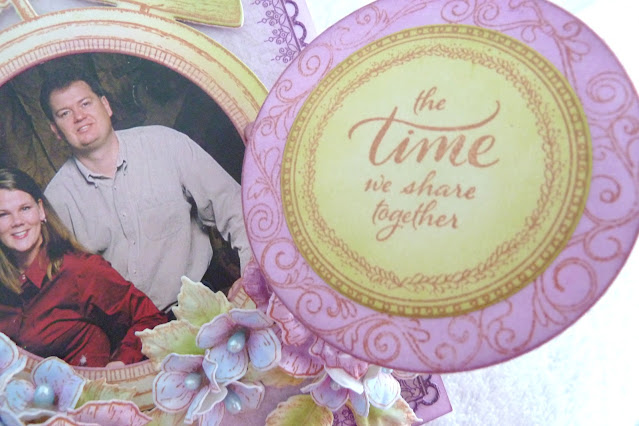
To make the card inside clock, bring color to one of the clocks by using the daubers and inks. Taking the card stock, sepia ink and the sentiment stamp, stamp the sentiment then die cut with the matching circle die. Bring color to this with the leaf green ink. Apply diamond stickles to the sentiment details and when dry adhere the sentiment onto the clock face and adhere the clock in place on the card inside using the 3D double sided foam tape.

To make the card front clock, die cut both the swirly frame circles from both the remaining clocks. Put these aside for later. Use this same die size to cut the photo to size. Apply the inks to color the stamped clock base. Adhere this to the extra die clock base then adhere the photo in its place.

To make the clock face door, stamp and die cut a sentiment using the sepia ink and the white card stock, Ink this with the leaf green ink. Adhere this to one of the fancy swirls circles, covering the clock face.

To make the shaker clock door part, make two 3D foam rings by using the 3D foam card stock and  die cutting with the circle dies that fit the fancy swirls frame and the clock face. Taping together with the washi tape so they don’t move when die cutting. Adhere both foam rings to the back of the fancy swirly frame, color the sides with the thistle ink. Die cut and color the clock face from the remaining fancy swirly circle. Adhere this to the circle base in the foam rings. Place the sequins onto the clock face. Die cut a circle from the clear card stock using the matching sized circle die. Adhere this to the foam ringed circle then adhere the fancy swirl die cut frame to close the shaker.

To attach the clock door to the clock, using the white card stock and the small hinge die from the Window Hinges die set, die cut four times this hinge. Adhere two together and cut away the rectangle piece in the middle. Adhere the pieces to the clock base and the clock door as seen in the project photo. The remaining two hinges, adhere together and use both the inks to color it. Adhere on top of the already adhered hinge.

Adhere the now made clock to the card front by using the 3D foam tape or the 3D foam dots. Apply a little diamond stickles to the swirls on the clock door also to the clock handles. Cut the ribbon length in half so you have a double ribbon. Adhere the ribbon to the back of the card with the double sided tape, taking into account that your bow will be to the left side of the clock, so the right side length of the ribbon will be longer than the left. This ribbon also holds the clock door closed.

Arrange the leaves, roses and hydrangea petals, trimming the leaves away from the vine as needed as seen in the project photo. Then adhere in place using the hot glue gun.

To make the flowers and leaves, using the sepia ink and the white card stock stamp and die cut with the matching die sets: The  Classic Rose set, the Cottage Garden Hydrangea set and the leafy accents set.

The Hydrangea petals, you will need 22 of mixed sizes. Magenta Hue and French Ultramarine for the Hydrangea petals. Once shaped with the 3D shaping mold, use the flower shaping tools to poke a hole in the center and thread a half stamen through this. Secure with the hot glue gun. Trim the excess stem away when the glue has cooled.

The 3 roses, you will need 3 rose petal layers of the medium size for each rose. These roses are colored with the thistle ink then shaped using the matching 3D shaping mold. Use the flower shaping tool kit to do extra shaping when needed. See the film on how to make the roses.

The leafy plain vine, you will need 4-5  of these. Color with the sap green and the leaf green inks. Using the matching 3D shaping mold to bring shape to the leaves.

For a printout and all the products used for this card visit HERE


Lots of close ups to get a birds eye view. 


See you next time for more inky fun.
Till then have a happy scrappy day and keep on keeping safe.
Inky hugs, Susan


Wednesday, December 8, 2021

Inspiration Wednesday, brings you a exciting new collection release!

MOMENTS IN TIME.
Gives you all that is yum with keeping time the Heartfelt Creations way.

Visit here for a printout of this project and all the Heartfelt Creation products used to make this.


INSTRUCTIONS:

This large easel card  measures  6 3/4“ x 8 1/2"  when completed. To make the easel card base: Start by taking the white card stock and cut three times 6 3/4“ x 8 1/2“  for the card base. Cut also a strip of 1“ x 6 3/4“ for the card hinge. Using the scor-pal, fold in half one of  the card bases along the  8 1/2“  edge.

Score and fold also the hinge strip to 1/2“ x 6 3/4“.  Adhere this hinge to the folded card stock and one of the 6 3/ 4“ x 8 1/2“ card stock at the 6 3/4“ edge to make the easel card folded base. Adhere the remaining card stock piece to the folded card, from the 6 3/4“ edge to the fold to be the card front base.

Taking the sheet 6B from the collection paper pad and cut two at 6 3/4“ x 8 1/2“  for the new card front and card base. Bring the Thistle colored ink onto the paper edges with the aid of a dauber. Adhere in place with the double sided tape or clear drying adhesive. This is your prepared card base.

From the same paper pad design sheet, cut a piece 5 3/4“ x 6 3/4“, ink the edges with the Thistle ink, this will be the matting to go on top of the lace frame later.

Taking the white card stock, prepare the back ground and the Intricate Swirl Frames die to make the lace frame back ground for the card.  Die cut the frame twice. Trim away one of the longer edges of the frame about 3/4“ on both frames. Add color to all the frame pieces using the Thistle ink. Adhere the frames to the card front by using the double sided 3D foam tape. You will have a gap in between the pieces at the middle of the card, adhere 3D foam tape to this gap then adhere the cut away pieces to the card to cover the gap, place these so they extend a little over the edges. Adhere now the matting layer already prepared, this will cover the remaining exposed gap.

Prepare the pocket needed for the card: Taking the white card stock and the pocket die from the Fancy-fold Pocket & Accents die set then die cut two pockets. Taking one of the pocket die cuts, trim away the side fold lines, the underneath fold lines, leaving alone the line just under the pocket, this will extend the depth of the pocket, cut the rest away. Using clear drying adhesive, adhere the two pockets together to reinforce the pocket front. Taking the Thistle ink to color the pocket, coloring  also the inside of the side folds so you will not see the white when adhered in place. Make the folds in the pocket (the first fold on the underneath of the pocket will not be used as this enables the pocket to be lengthened.) Apply double sided tape to the folded flaps ready to adhere to the card front. When adhering, apply also clear drying adhesive to strengthen, this is also so you can slide in place.

To make the lacy corners: Using the white card stock and the corners From the Swirly Boarder Accents die set, die cut a pair of corner bases and two pairs of the inner lacy corners X 3 ( 3 layers for each corner) Color the corner base and two pairs of lacy corners with the Thistle ink and a dauber. Adhere the lacy corners layers together, three each corner, thus four corners. Adhere two of these corners to the pair of corner bases. Adhere these two corners to the pocket corners. The remaining corner pair, adhere to the card front as shown.

To make the clock tags: Taking the white card stock, sepia ink, the Elegant Moments Timepiece sets, the Simple Moments Timepiece sets, stamp and die cut both the clocks twice.

The Elegant Moments Timepiece: Taking one each of the Elegant and Simple Moments Timepiece clocks and the matching die to fit the clock face of the Simple Moments Timepiece clock, also the die with the circle and the clock face handles in it. Using these dies, die cut all. Using the matching die to cut the fancy frame around the clock face of the Simple Moments Timepiece clock. Bring color to the pieces: the clock base Leaf Green and Thistle ink with the aid of a dauber, the fancy frame with the Thistle ink and the clock face with the Leaf Green ink. Adhere together as shown using the double sided 3D foam tape or the 3D foam dots. Apply a little diamond stickles to enhance the elements in the clock. Die cut the clock base shape in a matching design paper from the paper pad and adhere this to the back of the clock. (as an alternative, you could always use the white card stock for this so you could use this to write a message or add a photo.) Make a triple bow from the ribbon and adhere in place. Adhere a flower to the knot of the bow, do this with the hot glue gun.

The Simple Moments Timepiece:- Taking the remaining Elegant and Simple Moments Timepiece clocks and the matching die to fit the clock face of the Elegant Moments Timepiece clocks, Die cut the circle. Die cut the clock handles from the circle with the matching die also die cut three extra from the white card stock, adhere all the layers together. Add color to all the clock pieces. Adhere the clock face in position on the clock base then the clock handles. Apply now the diamond stickles to highlight the elements in the clock. Adhere two leaves and three flowers to the right side of the clock bell. Taking the white card stock and the die that fits the swirly frame in the clock and die cut two circles. Ink the edges of these circles with the Leaf Green ink. Adhere to the back of both clocks, this is for the hand written message.

To make the leaves and flowers for this card: Using the sepia ink and the white card stock stamp and die cut with the matching die sets listed:  the Classic Rose, the Cottage Garden Hydrangea and the Leafy Accents. From the hydrangea petals, you will need 37 of mixed sizes, the roses you will need enough for 6 of the medium sized rose (each rose is made with 3 petal layers). The leafy accents, you will need five or six of the plain leafed vine and one of the leaf vines with the swirls in it.

Bring color to the images by using a dauber and the inks, Magenta Hue and French Ultramarine for the hydrangea petals, thistle ink for the roses and for the leaves, color with the sap green and the leaf green inks. Once the elements are colored, bring shape to the elements by using the matching 3D molds also using the flower shaping tool kit to do any extra shaping when needed. Add the blue stamens to the hydrangea petals and make the roses ready for use. You can watch the film for details on how to put these together.

For the sentiment, use the sepia ink to stamp on the white card stock and the Timepiece Sentiments set. Find the circle die that fits the sentiment from the Simple Moments Timepiece die set. From the same sets, stamp and die cut also the clock handles. The clock handles are adhered to the sentiment circle to the right of the sentiment.

First arrange then adhere with the hot glue gun the sentiment, the flowers and leaves to the card front and card base as shown. Making sure you have a card stop by using the flowers across the card base. Make a triple ribbon bow and adhere to the right side of the card base.

To finish the card off, apply a little stickles to the elements (this can be done as you go when making the card but then you need to put it aside to dry before going any further with the project which would make it longer to finish).


Other Products: Inks: Archival ink Sap Green, Thistle. Other: Double sided tape, 3D double sided foam tape , Diamond Stickles, Fussy cutting scissors, Misti stamping tool, Hot glue gun, Green organza ribbon.

Friday, November 26, 2021

It's BLACK FRIDAY!


Over at Heartfelt Creations, they have all the goodies and eye candy.
Today they have a Black Friday discount you can't miss...so be sure to check it out

Here is my card made with the must have new release dies.


INSTRUCTIONS

This tent fold card measures 8 1/4“ x 5 3/4“ when completed.

Taking the white card stock to make the card base to the above measurements. Using the Vibrant Fuchsia  ink and a dauber, ink the edges of the card front base. Taking a piece of white card stock cut a matting a little smaller than the card base.  Adhere this to the card front with 3D foam tape or foam dots.

Find the design paper used for this card in the paper pad collection. Sheet 12B. Cut this also a little smaller than the new card front. Using the gold card stock and the corners found in the Simply Classic Oval Frame die set and die cut the four corners. Adhere these to the corners of the design paper then adhere this to the card front.

Using again the Simply Classic Oval Frame die set, the oval die, the design paper and the white card stock, die cut an oval shape from each then adhere them together. Now die cut the rest of the gold card stock elements used from this die set, the fancy oval and five leaf shapes. Also die cut from the gold card stock the Letters & Numbers die set, the words Thank You once each in the larger letter font. Die cut four layers for each letter in the white card stock. Adhere all together using the quick stick and the clear drying adhesive. Adhere the gold fancy oval frame to the design paper oval. Adhere this to the card front with 3D foam dots.

Using the white card stock, the sepia ink and the Vining Clematis Banner stamp and matching die, to make the banner. Use the water color brush, the Elderberry, Parakeet, Banan, and Pesto Green aqua pencils to color the banner. Using the deluxe shaping tools, bring shape to the vines and flowers. Make a curl in the banner by rolling this across your fingers, adhere the banner in place by using the foam dots in the banner centre and securing it at the ends to the oval with clear drying adhesive. Hold in place until the adhesive is dry.

Make the Clematis flowers by: Stamping, coloring and die cutting: three large petals and two smaller petals. Bring shape to the petals by using the collection 3D shaping mold. Use the pricking tool from the flower shaping set and make a hole in the petal centre, big enough to be able to get three folded stamens through it. Adhere in place by using the hot glue gun. When the hot glue is dry, trim off the excess stamen stems ready to use.

Adhere the clematises in place at each end of the banner. Cut in half the gold leaf shapes and adhere behind the flowers in pairs. Adhere with the hot glue gun. Adhere the sentiment to the banner by using the clear drying adhesive and the quick stick too


Heartfelt Creations Products and Product Sold On Their Web Site: HERE

HCDP1-2133  Floral Banner Paper Pad collection, 

HCPC-3970  Peony and Sunflower Banner cling, 

HCD1-7378  Peony and Sunflower Banner die

HCFB1-5009 3D Rustic Sunflower Shaping Mold

HCD1-7228 Lacy Diamond Frame die

HCD2-7371 Letters and Numbers die

HCST1-401 Deluxe Flower Shaping Kit

HCPP1-475 Deluxe Flower Shaping Card Stock Paper Pad- White- 50

HCGP1-488 Deluxe Gold  Card Stock

HCDA1-449 Stack and Store Daubers- Packet of 6

Designer Dries Clear Adhesive, Metal tip for Adhesive Bottles, Hydra Sponges, Score-pal Measuring and scoring Board, Quick stick Tool, Glitter-Ultra Fine, Color In Water color brush-fine, Double sided 3D Foam Dots , Spellbinders Tool ‘N One, Ranger Archival Inks: Sepia, Library Green, Sunflower, Leaf Green, Red Geranium

OTHER PRODUCTS USED:

Cream Organza Ribbon, Fussy cutting Scissors, Ruler, Black Sand, Pattern Making Tracing Tool, Foam Mat, Misti Stamping Tool, Double Sided 3D Foam Tape, Double Sided Tape, Hot Glue Gun, Ranger Archival Venation Orange ink.  

                     , 


If you have visited the Heartfelt Creations shop and blog you would have seen all the goodies and inspiration there....need I say more?

Till next time....have a safe happy scrappy day

Inky hugs Sus


Wednesday, November 17, 2021

Inspiration Wednesday with Heartfelt Creations

Today the inspiration comes from the Floral Banner collection.
This will be a collection I sure will be going to often. So adorable!!!!!!
Visit their online store to find all the products used for these card 


This slimline tent fold card measures 4“ x 8 1/4“ when completed. Use the white card stock to make the card base to the above measurements. First by cutting 8“ x 8 1/4 “ , make a fold at the 8“ edge so you get the tent fold.

Using the white card stock make a matting by cutting it a little smaller than the card base front, adhere this in place using the 3D foam tape or dots. Taking the sheet 12B from the collection paper pad, cut this a little smaller than the card front. Using the pattern making tracing tool, a ruler and a foam pad make holes along all the edges of the paper. Adhere this to the card front using 3D foam tape or double dots.

Taking both stamps from the Elegant Rose Banner set, the white card stock, sepia ink stamp twice the straight banner and the heart banner. Use the matching dies to die cut all images. Bring color to the images using the tea rose for the roses and Leaf Green for the leaves. Red Geranium for the heart shape.

Cut the heart shape in half in the length, this will be adhered to behind the straight banner with 3D dots or foam tape. Adhere this to the card front using the 3D foam dots or 3D foam tape. The remaining banners will be used later.

Taking the green organza ribbon, wrap this around the card front and across banner, adhere in place. Make a separate triple bow from the ribbon and adhere this to the right side of the banner by using the hot glue gun.

To make the OXO sentiment, die cut four layers for each letter from the white card stock using the larger size font from the Letters & Numbers die set. For the top layer of the OXO, use the gold deluxe card stock and the die cut once for each letter, adhere all together to form the sentiment. Adhere this to the banner on top of the ribbon with the clear drying adhesive.

Fussy cut the remaining stamped banner roses and leaves and adhere In place as fillers behind the heart. As seen in the project photo. Now adhere the roses and buds in place using the hot glue gun.

To make the roses: Stamp with sepia ink onto the white card stock-each medium sized rose has four petal layers. Nine roses and two buds in total. Bring color to the stamped images using a dauber and the tea rose ink. Shape using the matching mold and the deluxe flower shaping tools. Adhere together using the clear drying adhesive or the hot glue gun.

Once the roses are formed, apply a little adhesive to the roses and buds by using the hydra sponge, then sprinkle the glitter onto the roses and leave to dry. Tap away any excess glitter so they are ready to use.


For a printout of this project visit HERE
My next project today is this card...the floral frames are framed with the gold....just love it!

This tent fold card measures 6“ x 6“ when completed. Using the white card stock to make a card base to the above measurements. Taking the sheet 2B from the collection paper pad, cut this a little smaller than the card front. Using the pattern making tracing tool, a ruler and a foam pad make holes along all the edges of the paper. Adhere this to the card front using 3D foam tape or double dots.

Taking the gold card stock and the Eyelet Royal die cut two of the lace frames. Adhere this to the centre of the card front using the clear drying adhesive. There will be a gape, between the two frames, the banner will cover this.

To prepare the front banner, taking the straight rose banner, stamp this with the sepia ink on  white card stock that is 6“ in length as you will extend the banner when die cutting. Using the matching banner die, die cut the banner as so, place the stamped image on the sandwich plate making sure the end of the part you want extended will not be on the plate, so just before the end part of the die will not be in the sandwich. Tape to secure in place. Place the die now on the stamped image. Place the top plate edge to the end of the banner die, just to before the end of the stamped image so it will not cut the end part of the die. Thus you will be cutting only the sides of the banner and not the ends, so you get an extended banner.

Stamp and die cut one extra banner but do not extend this as it will be fussy cut and adhered to the extended banner.

Stamp the sentiment from the sentiment stamp set, the first sentiment with sepia ink and the second with the versa-mark and gold embossing powder. Add a little e gold embossing powder to the ends of the banner as well. Do this to the extended banner only.

Color the rose and leaf  images with the elderberry and Pesto Green, Bottle Green aqua pencils. Use the water brush to spread the colors. Fussy cut the smaller banner as so, the larger rose with two buds stay intact, the two roses are cut apart and used for under the sentiment banner as shown. Before adhering in place, bring shape to the flowers by using the deluxe shaping tools.

Adhere the banner and roses in place using the 3D foam tape or double dots. Adhere the fussy cut roses and leave in place by using the clear drying adhesive. To finish draw a line around the banner with the elderberry pencil then apply water to soften the line.


To find all the product used and a printout of this project, you can visit HERE


For so much more inspiration, you need to visit HERE...there is also print outs you can get of all the postings....have fun.

My next post will be featuring that special craft day of the year,,,yes 

BLACK FRIDAY! 

They do have a special BLACK FRIDAY for you.

Inky hugs and keep safe.


Wednesday, November 10, 2021

A new collection over at HEARTFELT CREATIONS

The new FLORAL BANNERS collection!!!!!
This is my 2nd most fav collection this year! Flowers always gets the first prize from me....lol.


For all the details and a print out of products and instructions visit:-https://www.heartfeltcreations.us/gallery/thank-you-sunflower-banner

******************
The second card I made for this weeks posting....
For the print out etc....visit:-https://www.heartfeltcreations.us/gallery/thank-you-so-much-banner


For more eye candy and inspiration on this wonderful collection, visit:-https://www.heartfeltcreations.us/blog/debuting-the-floral-banners-collection

All the HEARTFELT CREATIONS products and the products carried by HEARTFELT CREATIONS used for these cards are listed in the instructions and you can find them on their website HERE

I am hoping you are all well and safe. Have a happy scrappy week crafting and getting inky fingers.

Inky hugs and love, Susan
 

Wednesday, November 3, 2021

Hi, today featuring the 'Heart Throb' and the 'Seasonal Wreath' collection from Heartfelt CReations

Products used from the Heartfelt Creations collections and products sold on theirwebsite

HCDP1-2132 Seasonal Wreath Paper Collection 

HCD1-7375 Seasonal Wreath die set

HCPC-3967  Winter Seasonal Wreath Accents cling stamp set

HCD1-7374 Winter Seasonal Wreath Accents die set

HCPC-3966  Autumn Seasonal Wreath Accents cling stamp set

HCD1-7573 Autumn Seasonal Wreath Accents die set

HCPC-3965 Summer Wreath Accents cling stamp set

HCD1-7372 Summer Wreath Accents die set

HCD2-7371 Letters and Numbers die set

HCD2- 7327 Elegant Swirl Gateway die set

HCPP1-475  -Deluxe Flower Shaping Paper Pads pack of 50-white              

HCST1-401- Deluxe Flower Shaping kit

HCDA1-449- Stack and Store Daubers pack of 6

 OTHER:-

409311 Color in Water color Brush fine

RACP475 Ranger Archival Library Green ink

RACP482 Ranger Archival Olive ink

RACP669 Ranger Archival Viridian ink

RACP436 Ranger Archival Ink Leaf Green ink

RACP993 Ranger Archival Red Geranium ink

RACP005 Ranger Archival Sunflower ink

159723 Designer Dries Clear Adhesive

352954 Metal For Adhesive Bottles

173842 Scor-pal Measuring and Scoring Board

DDOTS- 3D Double Sided Foam Dots

3D1844 3D Crystal Lacquer 4 oz

 Other Products used:- Inks used: spectrum Noir aqua pencils: :- bison, persimmon, sunflower, cherry, mango, pesto green and cherry. Other: Paper trimmer, Hot glue gun, Double sided tape, Double sided 3D foam tape, Black sand, 12 “ x 12 “grey board, Sand paper.

INSTRUCTIONS: This Lay Out measures 12 “ x 12 “

Using the design paper sheet 9B in the collection paper pad and adhere this to the 12 “ X 12 “ grey board for the  lay out base. Find the design paper sheet 2B and trim this to 6 “ x 7 “ . Ink the edges with the Viridian ink then adhere this to the lay out base as seen in the project photo, a little to the lower right using the double sided foam tape
Die cut the torn lace frames by using the large lace frame from the Elegant Swirl Gateway die set and the paper sheet 2B, die cut two. Using  the lower part of the frame by tearing it to size then inking with the Viridian ink and layering so it will frame the two photo corner edges.. The photo size used for the lay out is, 2  3 / 4 “  x 3  3 / 4 “. The photo is backed with grey board and the edges are sanded with the sand paper.

Using the white card stock and the Library Green ink, stamp all needed embellishments for this project. Using the archival inks and the aqua pencils to color the stamped images. Archival inks used:- Bow: Viridian and Olive. Wheat: Sunflower. Granite Apples: Red Geranium and Leaf Green. Aqua pencils used:- Owls: Bison, Persimmon pencils. The flowers:  Sunflower, Cherry, Mango pencils.  Leaves: Pesto green and Cherry pencils. The hearts: Cherry pencil.

When all is done die cut the images using the matching die sets. Bring a little shaping to the elements by using the flower shaping tool kit. Adhere the elements to the lay out, clustering in the corner s as seen in the project photo. Use the hot glue gun and the clear drying adhesive to do this.

Make the sentiment by using the larger sized letters from the Letters and Numbers die set. Die cut four layers each letter from the white card stock and one layer each from  the 2B paper sheet. Adhere all the layers together before adhering to the lay out. Add the sand to the flower centres by applying the clear drying adhesive then sprinkling sand on the flowers. Add the leaves, flowers and the hearts to the photo sides as seen in the project photo. To finish the project add the crystal lacquer to the letters. 

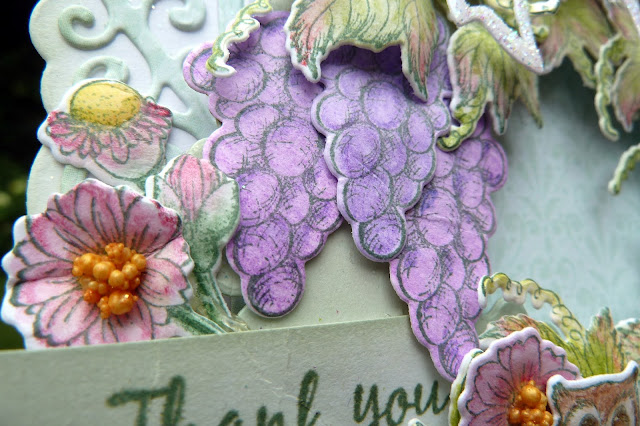
Below are a few of my favorite close ups of this LO. These owls are sooooo cute!


 Now that he has grown to a ripe old age of over 18....he is still a heart throb....lol
Have a happy scrappy day.
Inky hugs.

Wednesday, October 27, 2021

Today's inspiration is thanking you so much

Featuring the 'Seasonal Wreath' collections from Heartfelt Creations.
Lots and lots of details in in this collection.

 Aren't these cute little owls adorable. Great to finish off any card or craft project.


I love this bow! I chose to use it this way so you can see through it. The bow has a background die with it. It looks fantastic with a gold backing.

FOR A PRINTOUT ON THIS CARD GO HERE

Heartfelt Creations products and products sold on their website: HERE

HCDP1-2132 Seasonal Wreath Paper Collection 

HCD1-7375 Seasonal Wreath die set

HCPC-3966  Autumn Seasonal Wreath Accents cling stamp set

HCD1-7573 Autumn Seasonal Wreath Accents die set

HCPC 3965 Summer Wreath Accents cling set

HCD1- 7372 Summer Wreath Accents die set

HCPC- 3846 Thank You Sentiments cling set

HCD2-7327 Elegant Swirl Gateway die

HCPP1-475  Deluxe Flower Shaping Paper Pads pack of 50-white

HCST1-401- Deluxe Flower Shaping kit

HCDA1-449- Stack and Store Daubers pack of 6

409311 Color in Watercolor Brush fine

RACP475 Ranger Archival Library Green ink

RACP436 Ranger Archival Viridian ink

159723 Designer Dries Clear Adhesive

352954 Metal For Adhesive Bottles

DDOTS- 3D Double Sided Foam Dots

85-Glitter Crystal Ultrafine Transparent Glitter 1/2oz

3D1844 3D  Crystal Lacquer 4oz

ANC818 Go-Man-Go Prills

 Other Products used:- Inks used: spectrum Noir aqua pencils: Bison, Straw, Persimmon, Cherry, Mango, Pesto Green, Iris. Other: Paper trimmer, Hot glue gun, Double sided tape, Double sided 3D foam tape.

INSTRUCTIONS:

Make the card base by using the outer die from the Elegant Swirl Gateway die set and the white card stock. Die cut twice then with the  score-pal, make a 1 / 2 “ score line across the top of one of the card bases. Apply double sided tape to above the fold then adhere both card bases together. Using the Viridian ink and a dauber ink the edges of the card front. Taking a green based design paper from the paper collection and the large lace die frame from the Elegant Swirl Gateway set, die cut the lace frame. Adhere this to the card base. With the next frame in from the die set and the white card stock, cut four of these frames. Adhere them together then apply clear drying adhesive using a hydra sponge to the top layer, sprinkle glitter over the adhesive. When dry tap away the excess glitter then adhere to the card front. Die cut from the white card stock the background wreath, ink this with the Viridian ink with the aid of a dauber. Adhere this to the card base with 3D foam dots. This will be the base for all the elements.To make all the elements for this card use the library green ink for the stamping onto the white card stock. Colors used for the stamped elements are: The set of owls, bison, straw and persimmon pencils. The flowers, sunflower, cherry and mango pencils. The grapes and leaves, iris, pesto green and cherry pencils. Die cut the stamped images with the matching die sets then bring shape to them by using the flower shaping tools. Die cut the bow and apply clear drying adhesive to it with the aid of a hydra sponge then sprinkle glitter onto it. Make a sentiment banner by stamping the sentiment with library green ink onto white card stock then cut the ends as seen in the photo. Ink the edges with the Viridian ink.Adhere all the elements to the wreath base, clustering as seen in the photo using the hot glue gun and the clear drying adhesive. Cut the sentiment banner in half and adhere one half on each side of the wreath. Apply the crystal lacquer to the owls eyes and the flowers. Sprinkle the prills onto the flower centres.

Have a great day and week with inky fun,

 hugs Susan