
today I have a mini folder for you so fun with clocks...


Instructions:
This card is made from the ready made 5“ x 7“ Gateway fold cards.
Taking a ready made gateway card base, trim off one of the panels and put this aside for another project. Ink the edges of all the panels except the panel that will be back of the card with the thistle color.
Chose a design paper from the collection paper pad, sheet 6A. Using the largest frame die from the Eyelet Frame Gateway set, die cut three frames. Ink the edges of these frames also with the thistle ink. Adhere these to the card front and insides of the card. The card base is now ready for decorating.
Taking the white card stock, sepia ink, and the Simple Moments Timepiece sets, stamp and die cut three times plus an extra die cut. All the matching circle dies are found in the Simple Moments Timepiece die set. The colors used for the clock will be a combination of thistle and leaf green inks.
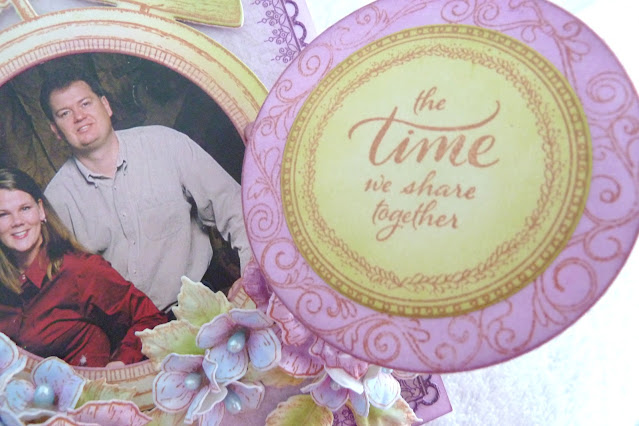
To make the card inside clock, bring color to one of the clocks by using the daubers and inks. Taking the card stock, sepia ink and the sentiment stamp, stamp the sentiment then die cut with the matching circle die. Bring color to this with the leaf green ink. Apply diamond stickles to the sentiment details and when dry adhere the sentiment onto the clock face and adhere the clock in place on the card inside using the 3D double sided foam tape.
To make the card front clock, die cut both the swirly frame circles from both the remaining clocks. Put these aside for later. Use this same die size to cut the photo to size. Apply the inks to color the stamped clock base. Adhere this to the extra die clock base then adhere the photo in its place.
To make the clock face door, stamp and die cut a sentiment using the sepia ink and the white card stock, Ink this with the leaf green ink. Adhere this to one of the fancy swirls circles, covering the clock face.
To make the shaker clock door part, make two 3D foam rings by using the 3D foam card stock and die cutting with the circle dies that fit the fancy swirls frame and the clock face. Taping together with the washi tape so they don’t move when die cutting. Adhere both foam rings to the back of the fancy swirly frame, color the sides with the thistle ink. Die cut and color the clock face from the remaining fancy swirly circle. Adhere this to the circle base in the foam rings. Place the sequins onto the clock face. Die cut a circle from the clear card stock using the matching sized circle die. Adhere this to the foam ringed circle then adhere the fancy swirl die cut frame to close the shaker.
To attach the clock door to the clock, using the white card stock and the small hinge die from the Window Hinges die set, die cut four times this hinge. Adhere two together and cut away the rectangle piece in the middle. Adhere the pieces to the clock base and the clock door as seen in the project photo. The remaining two hinges, adhere together and use both the inks to color it. Adhere on top of the already adhered hinge.
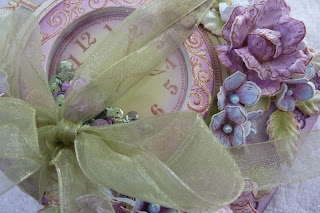
Adhere the now made clock to the card front by using the 3D foam tape or the 3D foam dots. Apply a little diamond stickles to the swirls on the clock door also to the clock handles. Cut the ribbon length in half so you have a double ribbon. Adhere the ribbon to the back of the card with the double sided tape, taking into account that your bow will be to the left side of the clock, so the right side length of the ribbon will be longer than the left. This ribbon also holds the clock door closed.
Arrange the leaves, roses and hydrangea petals, trimming the leaves away from the vine as needed as seen in the project photo. Then adhere in place using the hot glue gun.
To make the flowers and leaves, using the sepia ink and the white card stock stamp and die cut with the matching die sets: The Classic Rose set, the Cottage Garden Hydrangea set and the leafy accents set.
The Hydrangea petals, you will need 22 of mixed sizes. Magenta Hue and French Ultramarine for the Hydrangea petals. Once shaped with the 3D shaping mold, use the flower shaping tools to poke a hole in the center and thread a half stamen through this. Secure with the hot glue gun. Trim the excess stem away when the glue has cooled.
The 3 roses, you will need 3 rose petal layers of the medium size for each rose. These roses are colored with the thistle ink then shaped using the matching 3D shaping mold. Use the flower shaping tool kit to do extra shaping when needed. See the film on how to make the roses.
The leafy plain vine, you will need 4-5 of these. Color with the sap green and the leaf green inks. Using the matching 3D shaping mold to bring shape to the leaves.
For a printout and all the products used for this card visit HERE


No comments:
Post a Comment