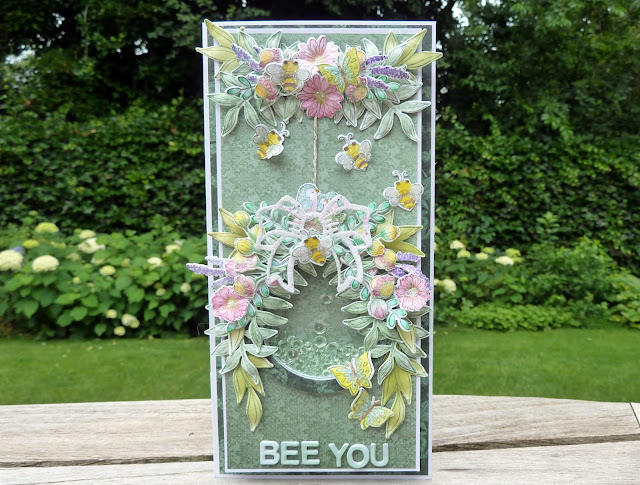
with a slimline shaker card,' Bee You'
INSTRUCTIONS:
This
slimline shaker card measures 4 “ x 8 1
/ 4 “ when completed.
Taking the white card stock cut to 8 “ X 8 1 / 4 “ and fold to 4 “ x 8 1 / 4 “ to make the card base. Cutting also a card front, measuring 3 1 / 2 “ X 7 3 / 4 “ .
Taking the design paper sheet 6 B, cut this to measure a little smaller than the card base, adhere in place. Do the same but using the sheet 12 B for the card front matting. Adhere this to the card front.
Taking the
circle die from Large circle die set and die cut a circle into the card front
about 1 1 / 4 “ from the foot of the front. Taking the clear
card stock and cut so the hole will be covered plus extra. Adhere this to the
back of the card front white card stock. Taking the two circle dies to make a layered
ring. Make 5 layers and adhere all together. Make also a layer from the design
paper sheet 6 B, adhere this also in place. Adhere this ring to the card front.
Using 3D foam tape or the 3D Double sided foam dots, apply these to the back of
the card front and around the circle opening. Making sure there is enough hight
for the shaker elements. Place the shaker elements so they are in the circle
when adhered. Adhere the card front to the card base.
To make all
the elements for the decorating of the card:- Using the white card stock and
the library green ink, stamp, color and die cut with the matching dies from the
Summer Wreath Accents set. The bow is
from the Seasonal Wreath die set. Bring shape to the elements by using the
flower shaping tool kit. Apply the clear drying adhesive with a small piece of
hydra sponge then sprinkle glitter to the bow, the flower centres, the bee’s
and butterfly’s wings. Taking the Letters and Numbers die set, and the white
card stock, cut each letter for the sentiment BEE YOU four times and once each
letter from the design paper. Adhere the layers together. Apply the crystal
lacquer to each letter once they are adhered in place on the card front.
The color
pencils used are:- The bee; Mango, Bison. The leaves: Pesto green, Cypress,
Parakeet, Spinach. The flowers: Mango, Cheery, Parakeet. The lilacs: Iris. The butterfly’s:
Mango, Aqua. The birds: Soft Red, Sky Blue, Mango, Persimmon.
To put it all together start with adhering the twine from the cluster placement at the top of the card to the top of the circle. Arrange the elements in a cluster where the twine begins as seen in the photo, adhering with the clear drying adhesive and the hot glue gun. Do the same for above the circle letting the elements fall to both sides of the circle.
HCDP1-2132 Seasonal Wreath Paper Collection , HCD1-7375 Seasonal Wreath die set, HCPC-2132 Seasonal Wreath Accents cling, HCD1-7372 Seasonal Wreath Accents die, HCD2-7371 Letters and Numbers die set, Deluxe Flower Shaping Paper Pads pack of 50-white, Deluxe Flower Shaping kit, Clear Card Stock 8.5 x 11, Color in Watercolor Brush fine, Archival Ink Library Green, Designer Dries Clear Adhesive, Metal For Adhesive Bottles, Scor-pal Measuring and Scoring Board, 3D Double Sided Foam Dots, Hydra sponges, Crystal Ultrafine Transparent Glitter ½ oz Glitter, 3-D Crystal lacquer 4oz, Quickstik Tool
OTHER PRODUCTS USED: Inks used: spectrum Noir aqua pencils: Mango, Bison. Pesto green, Cypress, Parakeet, Spinach, Cheery, Iris, Aqua, Soft Red, Sky Blue, Persimmon. Other: Paper trimmer, Hot glue gun, Double sided tape, Double sided 3D foam tape, Bling stones or sequins (for the shaker elements) White and silver bakers twine, Glitter.


No comments:
Post a Comment