Showing posts with label Prima Marketing. Show all posts

Thursday, May 7, 2015

"Once Upon a Time"

Hello to you,
I thought, a white lacy background for this card was needed to show off the lovely Broken hearts and Humming bird. Both a treasure for any well loved "Once upon a time" garden.


Heartfelt Creations Products And Products Sold On Our Website:
HCPP1 Romantique Garden Paper Collection
HCD 744 Arianna Lace Die
HCD 729 Decorative Blossom Corner Die
HCD 744 Once Upon a Time Die
HCPC 3642 Romantique Wings Cling Stamp Set
HCPC 3594 Time Sentiments Cling Stamp Set
3-D Crystal Lacquer
Double Dots 100pc
Stamp Positioner Kit
Deluxe Flower Shaping Kit
Spellbinders Tool N' One

Other products used: Ink: Prima Marketing tan, Archival Jet Black, Paper: SUP A4 neutrals white x2, A4 very vanilla x1, Derwent ink-tense pencils, water coloring paintbrush, Spellbinders Majestic Elements S5-161, White seam-binding ribbon, Distress tool, Diamond stickles, Fussy cut scissors, Bone folder


The size of this card is 14 cm x 21 cm: Taking the A4 neutral cards, fold one in half, this is the base card. With the second card cut 18.7 cm x 13.4 cm., this is the card front. From the paper pad, find the paper with green background and white bleeding hearts. Cut to 14.2 cm x 20.6 cm., this is the matting; distress the edges of the paper. Adhere both matting paper and neutral card to the base card with double dots.


Cut from the very vanilla card; the frame and oval from s5-161, lace points from HCD 744, large lace corner from HCD 729, Stamp and cut the sentiment from HCPC 3594 and HCD 744. Using the stamp positioner stamp the image from HCPC 3642 on to the oval shaped card. Extra stamping for the 3d work; stamp both the image of the bleeding hearts and bird, and the stork of bleeding hearts from the same stamp set. Color all images, then fussy cut for the 3d.


Using the blossom tool and molding kit, bring shape to the bird and bleeding hearts. Adhere these to your work with the double dots. With the tan ink, ink the edges of the oval, lace frame and lace triangle. Apply; stickles to the Arianna lace points and crystal lacquer to the sentiment. To attach the triangle lace, use a thin strip of double-sided tape, this will be placed just under the frame and ribbon.


 Adhere the frame with double dots. Cut and adhere a length of ribbon on the right of the card. Make a double triple bow from the ribbon then adhere to the corner of the lace triangle. The placement for the sentiment is on top of the ribbon knot.


Tuck and adhere the lace points behind the bow. Apply the crystal lacquer to the humming bird to finish.
************

Thank you for taking a few moments to visit today, there is so much eye candy at the Heartfelt blog this week! When is there not? I hope you can take the time to look at each of the posts over there. Just you wait till the new releases comes out the following week....it will blow you away....
Till then have a scrappy day, inky hugs,  sussipoppins xox
********
I just want to make aquick Post Note: 
For those that live in Holland....you can order the Heartfelt products from Cindy and Ewerin at Scrapbookdepot. If they don't have what you want in stock...you know it...they will oder it in for you. This is great, as you can also get the ones that got away...back order. Also, the ones you are yet to catch....pre-order. Have fun choosing which to get this time round....sorry for the headache....LOL


Wednesday, February 4, 2015

Beautiful Moments With You layout

Hi! 

It is my favorite day of the week again - Wednesday posting at Heartfelt Creations!

And here is my creation this week:


Heartfelt Creations Products and Products sold on our Website: 

 Other Products Used: The Crafter's Workshop Masks: TCW 437, TCW 457; Derwent Intense water color pencils: (leaves) Leaf green 1600, (twigs) Willow 1900, Bark 2000, (flowers) Fuchsia 0700, Chilli Red 0500, Sun Yellow 0200, (bird and water) Iris Blue 0900, (bird house) Baked Earth 1800. Ink: Archival Black, Versa fine crimson red, Versa fine vintage sepia. Glimmer Mist: Olive Vine, Burnt Red, Pink Bubblegum. Other: Gesso, Sponge, Chipboard, Distress tool, Prima Marketing E. Line stones x 2, fussy cut scissors, Galeria Iridescent medium, spatula, heat gun 

This layout is not easy for a beginner so please, refer to the photo often for guidance, as to where and how placement of the embellishments should be. The layout is a standard size of 30 cm x 30 cm. The photo size is 9.1 cm x 15 cm. Find the pink design paper from the Birds and Blooms Paper Collection. With Archive black ink, the stamp Birds and Blooms Collage Set, stamp the background. Stamp the image a few times so the stamping will show from under the layering later. 


Using the gesso and sponge apply the gesso, spreading from out the center to the sides. This gives a darker to light effect. When dry, bring on the texture with the masks, iridescent medium and a spatula. When using masks and mediums, be careful not to smudge between extending a pattern and layering on your work. It takes time and patience but it is better in the long run, to let it dry between the layers. I always like to air dry rather than heat dry mediums. When the medium is totally dry, spray liberally glimmer mist to the right and left center of the page, forming puddles. Tilt the page so the mist puddles will form running drip lines, let them run to the bottom of the page. Repeat again, but tilting the page so the drip runs in the opposite direction. If needed, with your lips, blow to direct and help the movement of the flow. 


To speed up the drying process you can use the heat gun. Don't panic, the mediums and heat will curl and wrinkle the paper. To correct this and to enable the paper to support the weight of the goodies that will later be added, cut 30 cm x 30 cm from the chipboard. Glue the paper to the chipboard. Wet glue will allow a small time frame to enable you to move and straighten the paper to fit the chipboard. Place the paper towel over the board, with the Brayer firmly roll over the board to flatten away all wrinkles and bumps not wanted. 

In the Paper Pad you will find the card frames with lightly printed out line images for coloring in. Select two of these frames. To stamp the images onto the frames use the Versa Fine Crimson ink and the following stamps: HCPC 3648 Home Sweet Home, the image of the bird and birdhouse, HCPC 3647 Hydrangea Bird Bath, the image of the birds on the birdbath. Color the stamped images in with the watercolor pencils and brush. Attach the frames to the layout with Double Dots


Prepare the photo by backing it with chipboard. Attach this also to the layoutt with Double Dots. Look to the photo for an idea of where to position the frames and photo. 

To make the blooms and embellishments for this layout, start by using the HCPC 3644 Birds and Blooms, the blooms on a branch and 6 single blooms stamp. Stamp the images onto watercolor paper 3 times each, color in with the Derwent watercolor pencils and water brush. Then die cut them with the matching die. Ball and shape with the Paper Blossoms Tool Kit and  Paper Blossom Molding Mat


For the larger blooms, use the HCPC 3608 Arianna Blooms Set and HCD 748 Arianna Blooms die and die cut enough for 3 large, 3 small blooms plus 1 bud. Spray the stamped die cuts with the burnt red and pink bubblegum glimmer mist. Shape and ball the blooms using the Paper Blossoms Tool Kit and  Mat


For the twigs use HCPC 3645 Leafy Branch Set and HCD1 757 Leafy Branch die . Cut 2 long twigs and 1 short twig. As above stamp, die cut, color and ball the images. The 2 butterflies are taken from the HCPC 3649 Birds and Blooms Collage Set. Ink up only the butterfly image of the stamp with vintage sepia ink. Stamp twice to make two butterflies. Color in the image with watercolor pencils then fussy cut. 


Now for the real fun part, that is, putting it all together! Start first with the large Arianna Blooms, using Double Dots and wet glue, attach the 3 large blooms in their place. From now on, only wet glue will be used to attach all embellishments. Placement of the twigs: cut the short twig in two, place and glue down under and to the right side of the frame, on the right side of the layout. Place one of the small Arianna blooms under this frame and next to the photo. 


For the 2 long twigs, one is placed above the frame on the left of the layout, the remaining twig, place on the right of the same frame, under the photo. Place one of the small Arianna blooms and the bud on top of the twig and next to the large bloom. Place and attach the branch and bloom die cuts. Use two cuts for the top left corner, one tuck under the bloom on the right and the other lay on top of the left corner of the photo, draping over the bloom and down on to the frame. Place the remaining Arianna bloom in the center point of the branch. 

For the lower left side cluster, place the branch on the frame draping one of the branches up onto the photo. Now glue all the small single blooms onto the bloom image on the branches. Put a spot of glue here and there on the back of the leaves to attach. But do not do this too much, or you will lose the 3-D effect. Place the two butterflies to the lower right of the Lay Out. Take the E. designer stones from the packet and cut to look like leaves. Take off the plastic backing and put in place as shown in the photo. Add 3-D Crystal Lacquer  to the bird on the birdhouse and to the single flower centers. To finish add Stickles to the butterflies.

I hope I've inspired you to try this! 
Any questions, please leave a comment and I'll get back to you as soon as I can. 

scrappy inky hugs, 
sussipoppins

Wednesday, January 28, 2015

Jolie with Heartfelt Creations

Heartfelt Creations' Wednesday! 

Hi, it's that time of week again... and I've prepared a brand new project for you with Heartfelt Creations' newest release "Birds and Blooms"


Heartfelt Creations Products and Products Sold on our Website:
HCDP1 250 Birds and Blooms Collection Paper Pad
HCD 713 Decorative Lace Border die
Paper Blossoms Tool Kit
Paper Blossoms Molding Mat
Art Institute Glue
Speedball Brayer 4"

 Other Products Used: Green cardstock x 2; Green lace; Prima Marketing Old Road ink; ruler; pencil; scissors; cardboard (3 mm); water mister; Tim Holtz scissors; 1 meter of pale green lace 2.5 cm wide; 23 cm of green ribbon 7 mm wide; Prima Marketing E. Pearls and crystals x 2 pkt; double sided tape 

The Layout size is 30.4cm x 30.4cm. The photo size is 9.1cm x 14.7cm. From the Paper Pad you will need two of the large leaf boarder papers, one of the soft turquoise paper and one printed layout paper. Wet glue the soft turquoise design paper to a 30.4cm x 30.4cm cardboard. Take the leaf boarder papers and fussy cut the borders, ink the edges of the leaves with the Old Road ink. Using the Paper Blossoms Tool Kit and Paper Blossoms Molding Mat  shape and curl up the leaves. Fussy cut the bloom clusters from the layout design paper, also ink the edges and shape them with the balling Paper Blossoms Tool Kit and Paper Blossoms Molding Mat .
 

Cut a 9cm strip from the green cardstock. Place and glue it in the center of your background. Adhere the fussy cut leaf boarders on either side of the green cardstock. Ink all around the edges of the layout background with Old Road.

To make the paper lace: Using the cut offs from the leaf boarder papers and HCD Decorative Lace Border die, die cut four borders and from the green cardstock die cut 8. Cut away the excess lace pattern in the lengths of all the 12 die cuts, so you will have at least a 5cm wide lace remaining. Keep the cut offs for another project. Wet glue the green lace die cuts together, matching and trimming so you don't see the joins. With the water mister, lightly mist the green paper lace to soften the structure. Mist again if needed. When pliable, pleat and scrunch to get it to look like gathered lace. Put aside to air dry. When air-dried this will be hard and will keep its shape.


Adhere double sided tape to both sides of the "straighter" edge of the lace. Place the ruler on the taped edge, leaving the frilled part free, roll along the top of the ruler with the Speedball Brayer to really flatten and make sure the tape is truly glued in to all the creases. You can roll with out the ruler, but be careful you don't slip and flatten the frill. If so, you get to start all over again. Trim away any excess paper and get it as straight as you can using Tim's scissors to do this, they are strong enough to cope with the thickness of the layers. Put the lace a side to prepare the photo.


You get to do a bit of puzzle work now. Cut cardboard 8.5cm x 14.3 (x1), 6cm x 12cm (x1), 5cm x 12cm (x2) Wet glue these cardboards to the back of the photo. Centering the boards as you go along. With the pencil and ruler, rule a line in the length, 2 cm from the edge. This will be your guideline for placement of glue and paper lace.

Apply wet glue to the leaf side of the pencil lines. Place the design paper lace die cuts on top of the glue, sliding the lace so it is aligned and straight to the pencil line. Halve the green paper lace, making sure you have enough on all ends to fold under to neaten. Remove from one side the protective layer of the double sided tape on the lace and place it on top of the already adhered lace layer. Remove the remaining protection layer for the tape. Cut 33 cm of pale green lace for both sides of the sides of the boarder place the lace on top of the green paper lace covering any nasties.


Adhere a 9cm length of pale green lace to the top right and lower left of the already attached lace. Adhere the green ribbon to the lace to cover the join.


Place and adhere the photo in the center of the boarder. Arrange and cut the fussy cut bloom clusters so when placed and adhered they will fall in the length. The lower right cluster has two layers. Adhere the pearls in a row on the ribbon and in the center of the flowers.

Till next time! Have a scrappy week!
inky hugs, sussypoppins

Wednesday, December 3, 2014

Romantique Garden Mixed Media Canvas


Hey Hey...have you ever had a day when every thing goes...not the way you planed?...
For me this was one of them...started with the dish washer leaking as I was running out the door. Need I say more.....The up side!
 We have Heartfelt creations and thats sure worth waking up to on a Wednesday morning.
Take a wonder down the garden below, and enjoy the moment.
They say a picture says a thousand words....this is one of them...

Products Used: 

Other Products: Spellbinders: Grand Nestabilities LF-190; Paper: Water color paper, masking paper; Ink: Archival black Color Box black; Other: Ink markers SUP, Glimmer Mist olive vine key lime electric blue, White acrylic paint, Gesso, Studio multi-medium matte, Viva Kristall-gel medium, Ranger crackle paint Milled lavender Old paper, Water color brush, Paint brush, Versa mark, Gold embossing powder, Sequins matching paper for flowers, Glass beads of various colors and size, Stickles Star-dust Gold, Textured cotton braid, Canvas size 29.7cm x 39.8cm, Water brush, Spatula, Tweezers, Stencils: Prima Marketing #575927 Tim Holtz latticework. 

Instructions: Allow drying time for this canvas. Needs time to between layering of mediums. The centre section of the canvas is 23.5cm x 17cm. Cut 23.5cm x 17cm from the design paper Romantique Garden paper pad, water color paper and card board. Stamp the image from Romantique Garden stamp on the water color and masking paper. Mask the image, then stamp to fill the back ground using stamps from Scenery Builders set. Color image, when dry add Star-dust Stickles to the flowers. The frame: center the 4th die of the Grand Nestabilities on the design paper, cut. Do the same for the card board. Glue both die cuts together. Apply Double Dots to back of frame. Put aside.


 Prepare canvas by applying a coat of gesso, when dry, a coat of white paint. Leaving the brush strokes to be seen, this gives texture. Stamp a background with the Elegant Word Background stamp using Archival ink. Place the frame in the center of canvas and draw gently around it with a pencil, to mark future placement. Put aside the center frame. Using the Latticework stencil and spatula, apply the crackle paint randomly sometimes blending the two colors together. 


In places, flatten the pattern with the spatula. Do not put any texture in the area inside the pencilled frame area, leaving this area flat. Using the Prima Marketing stencil, at the right and left side of the pencilled frame area, apply a thick layer of Kristall-gel medium. Apply also a little of the mediums to the design paper frame. 


When all is dry, ink the inside of the frame edge. Attach the stamped picture and frame in the marked area. Spray the cotton braid with green Glimmer mists. When dry, starting where the flowers will be placed, glue to the edges of the frame, so the join will later be covered. Tear strips from a design paper from the paper pad. Using All Seasons Gazebo stamp and Gold emboss the strips of paper. Inking all the edges of the teared paper and curling the edges where needed. Tucking under the cotton braid, glue the teared paper down along some of the frame edge. Mix the glass beads with Studio gel medium. Using the spatula apply the mixture to areas on the canvas, taking into account the flower placement. See photo. 


 To make each flower cut x1 vellum, 1x design paper using the HPD 746 flower die. Ball the cut flower petals, glue and stack. Place a matching sequin in the center. Asters are cut and stamped x3 for each flower. Ball and stack. The centers are finished with Gold Stickles. 


Stamp and die cut the leaves. Paint by hand using both shades of green Glimmer mists and water paint brush. Stamp the bicycle on water color paper then color. Apply Stickles to the flowers in the bikes basket. Cut this shape out. Double Dot the back ready to glue down. Do the same with the birds. 


The placement of the flowers: Place the leaves then the flowers. When happy with the arrangement, apply glue. Punch circles using 3/4" punch. Cut a swirl shape into the circle. With tweezers curl this into a rose bud shape. Glue these rose buds down randomly to fill the arrangement. Glue a few sequins in the same manner. With Gold Stickles add a few triple dots here and there. 


When all is dry and in place, make a mix of water and blue glimmer mist on a dish. Apply the mix to areas with the crackle paint, this will highlight the cracks. Do the same with the green mist.
Hope you had fun with the eye candy...
My scrappy day can only get better, so I'm wishing you all a fantastic, scrappy, inky fun day/night.
sussipoppins Hugs

Monday, September 29, 2014

Be my PRINCE every day!


This is a card you want to give to someone special.....male special....
The paper used on this card....wait for it!....
I found this in France...a Prima Marketing paper block. After finding 2 stores while on vacation in France this year...thinking to my self, how very clever, with my find....my Frans said to me 
"I shall stay in the car with the dogs, but don't take all day!" Ha! I spent a little over 1/2 hour, do you believe it! I now realize how spoiled I am! Here in the Netherlands, we have a good selection to chose from. Not so many stores as a few years ago, but there are a lot of webstores. I am sure there are a lot of hidden treasure stores in France. I have yet to find them! 
I will say though, I find  the French way of scrapping very refreshing. making something fantastic from simplicity. 
We all can learn something from those enavated creative arty divas. We can always learn from each other, that's what makes it such fun.


Love this frog stamp from MAGNOLIA. I had the paper stamped for a while, sitting in a container, waiting to be finished and used. I took a lot of my old stash with me on vacation to use up. It was fun discovering what I had in my treasure box. The coloring of the images on this card was done with the retired STAMPIN' UP crayons. I don't know why they did that! A shame it is retired, as it is a great product. Still that's life....I am just very happy I have them still.


The die cuts are all from MAGNOLIA. The dies are called DOOHICKEYS. The dies cut very well and fine. I have never had a problem with them. The die swirls give fine cuts, so they always look great springing out from behind a flower or leaf.
Embossing folders I took with me came in handy....got to use at least once very thing you take with you on vacation. The suit case was too heavy not to use everything. If you don't. How are you going to talk your way out of that one?


A bit of inking, distressing and layering always a must for me.
All tied up with brown string. (found that in France!)
One thing I did not take with me, that was bling! I was not happy about that one! Or brads. (What is worse, I did not come across it while shopping) So I used stickles in place of.....it's called.......making do with what you got!
I used a sketch for the first time while making this card. 
MOJO MONDAY.
I personally, found it harder to work with than LO sketches...but that is because there is not enough space to do all I want to do....so I have to keep saying to my self..."I shall do it on the next card"!
I think this is more of a LO persons problem. We are used to a lot more space to play around in.
But...Hey...I am happy I could play with my wonder toys while away...and it made a complete vacation. Win Win. Me happy, my Frans happy.

Till the next post....keeping my fingers and toes crossed. 
The dead line date is here for HEARTFELT CREATIONS semi finals.
I managed to get mine in last week...the waiting is killing us. A whole month to wait.....

Well its time again to sign off.
Wishing you all a happy, inky, scrappy day.
Sussipoppins 

Monday, September 8, 2014

The Trees


Yip.....posting again....I am even supprising my self!

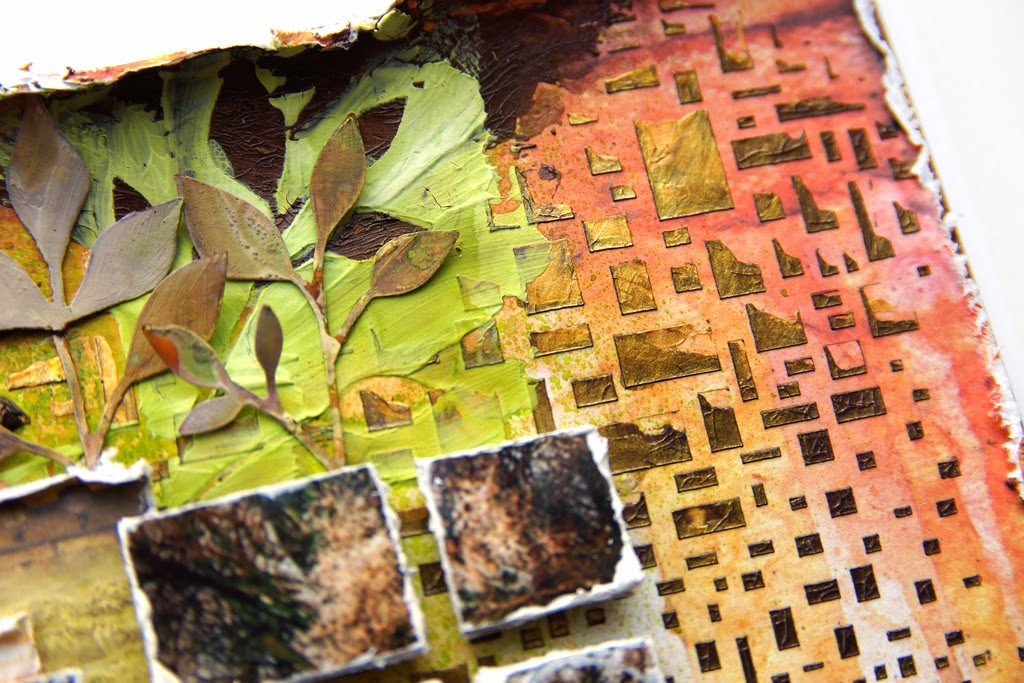
This LO is a fav of mine. I had been given these photo's from a friend of mine as sometimes, it is not always wise to use too many personal photo's. After juggling and cutting away unwanted bits of scenery, and a whole days worth of fun...this is the out come.


I even used some of that bright, hit you in the face green. Mixed with a few dabs of gesso, you know, that white stuff, I can't live without, stuff that I am so addicted to...I thought, it turned out rather well.


The leaves and branches are made using a die from MEMORY BOX. I made my own masks and stencils, to use in the back ground. The same die was used for this. 
I think this gives the back ground more depth and interest. Of course the crackle paint does help.


The ready made mask used to bring on the squares, is from CRAFTERS WORKSHOP.
The masking crackle paste is from VIVA.


With these photo's of trees, the branches draping into the water.The light layer of snow and the hint of   the sun through the leaves...this makes me want to take a cup of coffee, sit and think of a few memories gone by. 


Yes it was a lot of concentrating and puzzling to get the squares in the right place after distressing and gesso being added to the photo edges, yes to all. I think the end results made it well worth it.


I used one of the Prima alpha stamps for "THE" part of the title. Chipboards covered with design paper for the "TREES" part of the title. Before gluing down, finish with inking the edges.
Layering the letters gives a bit of fun to the title.

Till next time, try to have a happy scrappy day, 
Inky hugs,Sussipoppins


Monday, September 1, 2014

LIFE TIME

Hi,

To make up to all those with a lot of faithfulness that have been waiting for something interesting to be posted by sussipoppins....which, I might add, have been waiting a fair long time...but we won't go down that street today. We take the right turn instead, down the Tutorial Lane.... 

............."THE HOW TO TUTORIAL LANE"........

Today, I have decided to add a how to to the post. Detailed instructions, instead of a brief what I did.
The supply list and Instructions,you will find at the end of the post. 

Don't forget to have fun and get those hands and fingers grubby.....Any questions etc. Just leave a comment and I shall get back to you as soon as possible.


We all know how much I love to make my own flowers, but clustering, is always a win, win in a L.O.


The butterflies are finished with a iridescent medium.


More clustering and pearl pen dots.


Close up of the swirl roses.
The stickles are added when they are glued down and dried.
Reason being....so they can't move and you can what ever them with out the risk of dropping them. It's like having an extra pair of hands.


The title is from a Prima Marketing packaging. "Waste not want not"


Love those metal clips. Some times it is just what a LO needs.


Getting a close look at the masking and boarder die cuts.


See how the rhinestones lengthen the trail of the flower arrangement.
The pearl pen dots extend the line and bring it all together.


Hope you enjoyed the photo show, now for the supplies and instructions. 
Have fun.
SUPPLY LIST:
PRIMA MARKETING -Donna Downing foam stamp, Heart. -Art journal pad 12"x12"(Jodie Lee #950682) -Paper pad A4 (Finnabar. Sunrise Sunset #960094) -E designer rhinestones #300081
MARTHA STEWART  -L Butterfly punch
STAMPIN UP   -1/2" circle punch
THe CRAFTER'S WORKSHOP -Chicken wire mask
VIVA -Pearl pen. Gold -Kristall gel medium.
RANGER -Dobber paint, Red Gold, Silver. -Stickles, Platinum
SIZZIX -Movers and Shapers, Leaves, -Picture Wheel #658558 -Tattered Florals #656640
-Decorative Boarders and Hearts #658946
THIS & THAT -Iridescent medium(Goleria) -Ink, for distressing- Red, Brown, green.-Distressing tool. (for the out side edges of the LO) -Double sided foam tape. -Flower stamens. -Alleen's Tacky glue -Swirly leaf mask. -Cardboard box or chip board. (I used cardboard box) -Crop-a-dile (for flowers or a prick tool, to make wholes for the stamens) -Balling tool and mat. (for the flowers)
-Tweezers -Card Stock. A contrast color.

INSTRUCTIONS:
#1 
Using the swirly leaf mask, bring on the design with the iridescent medium.The placement of this mask is so the points of the leaves are at the edge of the page. Both on the right as the left. I masked two times to get this effect, Later, this will give the look of peeping out from under the clustering. When dry, bring the second layer of masking with the chicken wire mask and kris tall gel. Leave to dry. Distress the edges of the design paper with the distressing tool. Then attach to the card stock, which gives you a base for your LO.
#2
Cut a heart shape from the cardboard box  carton, or if you prefer chip board.. Seal the board with gesso, this will also give the board a white wash look. Stamp with the Donna Downey heart stamp, using the ranger silver and gold paint as ink. ( wash the stamp after using the paint before it dries. If you don't , it will not come off later. ( bad for any stamp) Ink around the edges with red ink or paint.
#3
Attach the heart when dry with double sided foam tape. Place a little to one side, so it is off center.
#4
Using the picture wheel die cut x1 of each, design paper and cardboard box or chip board. Glue the two together. Ink around the edges. Attach this to the center of the heart using double sided foam tape.
#5
Cut x2 from design paper, using the decorative boarders and heart die. Cut one in half. Place one of the halves on each side of the circle frame you have attached in step 4. Place the 2nd paper frame you have just cut, on top. Forming a layered effect. (See 4th photo from bottom.)
#6
Cut a photo to fit the circle of the die cut from step 4.
#7
Make the flowers and leaves using the tattered flowers and mover and shapers leaves dies. The larges flower is made using x3 both small and medium sized flower shape. The rose buds are made with the small size flower shape. x3 for each bud. Ball the flowers with the balling tool.The centers are filled with x2 flower stamens. Fold the stamen stems in half. poke through a whole made with the crop-a-dile, then glue to hold.
#8
Ink flowers and leaves then arrange and glue them all down. Add iridescent medium and stickler. This added after they are glued down, because then they won't move or get dropped and spoil all your hard work.
#9
Attach butterflies at the body, curling the wings up. To give that in flight look.
#10
Add bling swirls and bling leaves.
#11
Using the pearl pen, stip. here and there to form swirls and dots to add to the flow of the flower clusters. Also making a trail, see photo's.
#12
I used a sentiment from the packaging for the title. Placeing a bling in  the center of the flower.
#13
Because the title had the word time in it, I added a metal clock clip.

Remember, if you have any questions leave a message and I shall get back to you. 

Have a fun scrappy day giving this LO a go,
Inky hugs, 
sussipoppins oxo