Showing posts with label Ranger. Show all posts

Wednesday, October 21, 2015

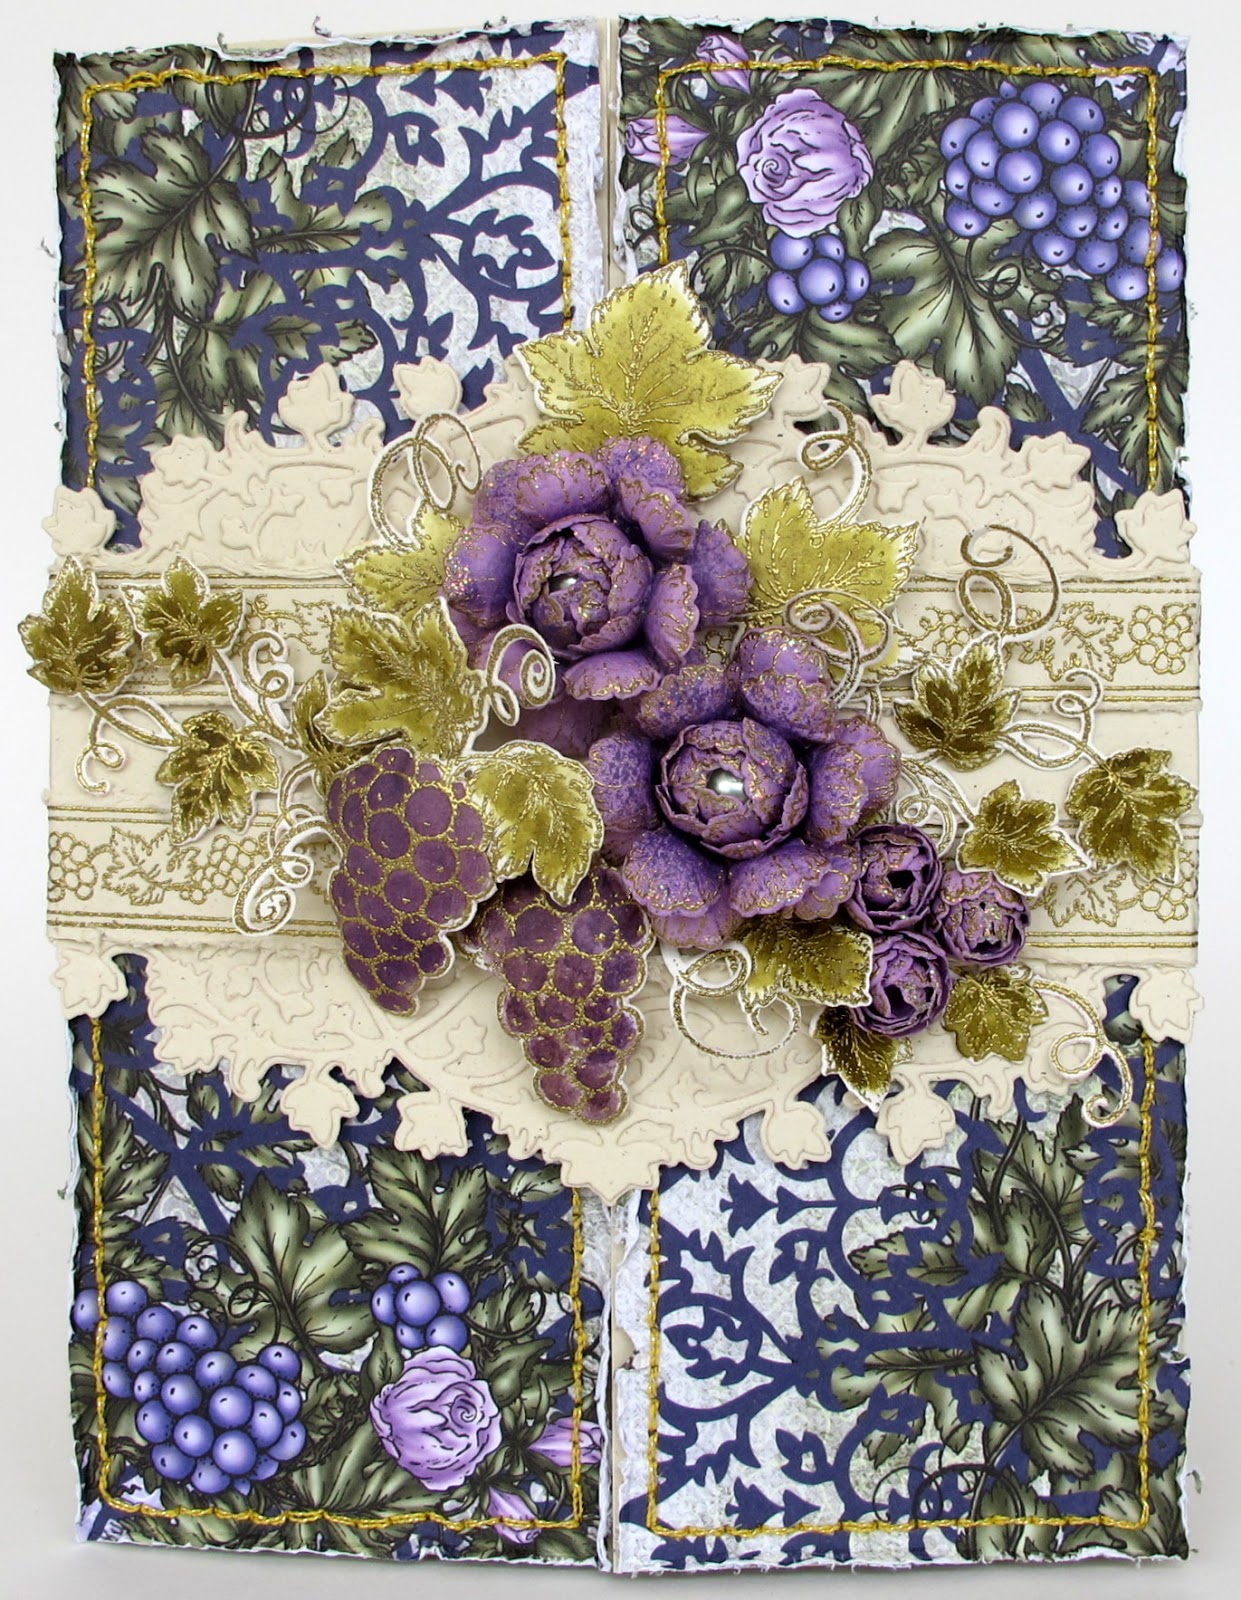
Riviera collection Belly Band Card

Hi, I shall welcome you to my place this week with the....
 a bellyband - gate fold card, using once again...the fantastic.... Italiana Riviera Collection. 
Introduced by Heartfelt Creations


Heartfelt Creations Products and Products carried by Heartfelt Creations:

Other Products used:
Ranger: Gold embossing powder, Heat gun, Diamond stickles, Hole piercer, Dusty Concord, Forest Moss distress inks, Water coloring brush, Prick pen, Paper-distressing tool. Cardstock: Ivory for the card base and belly band, white for embellishments and Lilac card for the flowers. Other: Versa-mark, Gold thread, Needle, Large Pearl bead x 2, Washi tape, Double sided tape, Pencil.


Directions: 
The finished gatefold and bellyband card measures, 14.8 cm x 20 cm
All the stamping is done with the gold embossing powder. For the card base cut from the card stock 20 cm x 29.6 cm, make this into a gatefold. Find the paper from the paper collection with the design shown on the card fronts. To get the same pattern used in the card fronts you will need both papers, cut and flip so you get the same pattern in the top right and left lower corners. 

The size for both these papers, 7.5 cm x 20 cm.  Using the prick pen to make the holes for the back stitching along the edges with the gold thread. Once the backstitching is done, distress the edges with the distressing tool. Adhere to the fronts with foam tape / double dots. 

To make the bellyband: 


Taking the cardstock, cut 12 cm x the length of the cardstock. Taking the pencil, mark the center of the longest edges. Place the point of the solid boarder die at the pencil mark. Use the washi tape to secure the die in place so it will not move while die cutting. Repeat on the opposite side. Taking another piece of cardstock cut x 2, 15 cm x 4.5 cm. Die cut these pieces with the fancy cut boarder die. Trim so they will fit to the die cut base boarder. Adhere to the boarder base with wet glue so you can slide them to fit. 


To hide all the raw untidy edges make a paper ribbon with the thin boarder image. Stamp this x 5, trim these so you have enough to paper distress the edges. Adhere the paper ribbon so the joins will not be seen when the roses and vine leaves will be placed. (see below photo) Score at the point where the die cuts end so the band will fold around the card. The bellyband will be too short to close, therefore, you will need to do some patchwork. 


Cut a piece of cardstock to fit and adhere the ends so the band can be closed. Using the remaining paper ribbon to tidy any unwanted nasty edges. (see above photo)


For the making and placement if the embellishments on the bellyband: Stamp and die cut enough for 2 x roses and 3 x rose buds, 2 x large grapes, 1 x large vine leaf clusters, 1 x vine leaf boarder. Color the die cuts with the distress inks and water color brush, then shape with the aid of the Flower Shaping Kit. 


(The pearl beads are used for the rose flower centres)
 For tips on making the roses, look to the product list for the video. Assemble and arrange before adhering the embellishments with foam tape and glue. 


 Once all is dry, add a little stickler to the roses and buds to finish the cluster.

This sure was a fun card to make. The only hard part was getting the band to fit the card. Once that is done...then it is pure fun making all the flowers and leaves...don't you love these leaves! 
Coloring is also great therapy...love getting my fingers all inked up this way..LOL

Have a scrappy inky day...till next week
Inky hugs, sussipoppins


Wednesday, September 23, 2015

Thinking of You Today

Hi, today a LO using the enchanted Mums collection from Heartfelt Creations.
Such a cutie of a photo, look at those eyes! She is turning out to be a true beauty.
To see a previous LO with this beauty click
I did not want to over do it...but the Mums are perfect for the job...of course in real life this is much more....


Love these dragonflies...all different sizes...always makes a delightful finish to a project!


The photo below shows my lack of resistance on adding those great Sparkling Poinsettias from a previous collection this year from Heartfelt Creations. They can make great fillers for any project.
Don't you love the leaves!....so yum!


See below, the gold emboss stamping peeks out from under the flower clusters. You get a birds eye view on how to place the banner.


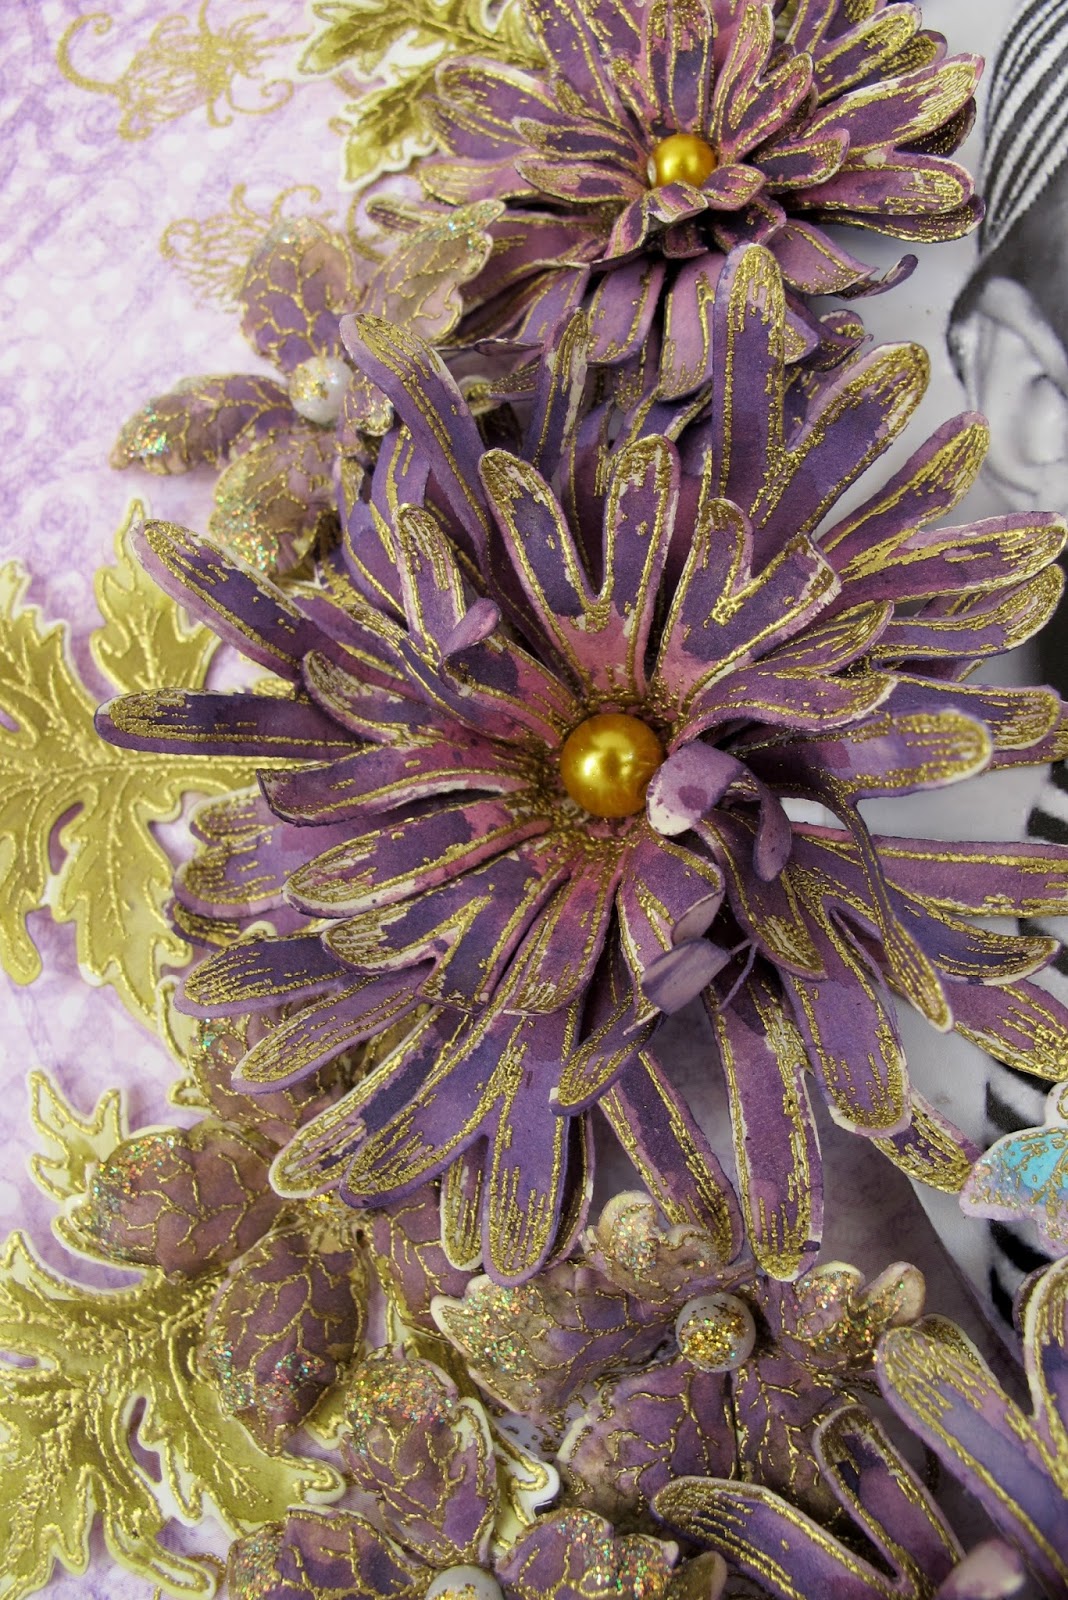
Another close up on the Mum finished with a gold pearl beed. Love how the distress inks blend...or don't. The close ups show how they work great together...love the richness. Don't forget, when the paper/card stock dries, it dries hard, so it keeps it's shape better.


See the close up below, showing the placement for the Mum flower buds. You can make them smaller or larger depending on the size stamp used, that is what is so great about the new Heartfelt Creations stamp sets, you get all the sizes in one go. The matching die, the same...and they match the stamp much better than they used to!
Heartfelt Creations have up graded their dies! They align true to the stamp, no edge to allow for.
Always the case, you get what you pay for! I think it is worth paying that little bit extra for all the bother taken out of die cutting....don't you?


"Thinking of You Today" Product list

Heartfelt Creations Products and Products carried by Heartfelt Creations:

Other Products used:
Ranger: Gold embossing powder, Heat gun, Water coloring brush, Inking tool, Diamond and Gold Rod stickles. Inks: Tim Holtz Distress Inks; Forest Moss, Dusty Concord, Peacock Feathers. Other: Pencil, Cardboard, White card stock, Gold Pearl beads x 3,
Pearl beeds x 5. Spellbinders Grand Oval LF-110

Directions: this Lay Out measures 30.5 cm x 30.5 cm. The photo size: 13 cm x 17.5 cm All the stamping is done with the gold embossing powder for this project.
Find the design paper in the collection. Adhere this to a cut to size cardboard. Ink the edges with the Dusty Concord ink. Take the grand oval die and cut the photo and x3 cardstock. Adhere together then ink the edges. Place this in the center of the page, draw around the oval with the pencil. Using the stamp poisitioner and stamp image from Single Enchanted Mum set. Gold emboss so the image will show under the flower placements. Stamp x2 above to the left of the oval and x3 under the oval. To raise the photo from the page, cut and adhere together, x 2 cardboard squares that will fit under the photo. Adhere this to the center of the oval then adhere the photo. Stamp and die cut the leaves and flowers. For tips on how to make these flowers click HERE. After coloring and shaping the flowers leaves and Dragonflies place and adhere along the left side of the oval. Adhere the Pearls to the flower centers. Stamp, die cut and color the sentiment banner. Shape the banner to a curve so it will fall from the photo to the paper in 3d. Adhere two Dragonflies to the right of the oval. When all is dry and to give the Lay Out the finishing touch, add Diamond stickles to the flowers and Dragonfly wings, the Gold stickles to the Pearl Pearls.

Have a scrappy happy inky week...till next time,
Inky hugs...sussipoppins

Wednesday, August 26, 2015

# Two of Three

BEST WISHES pocket card

Hi again, Second eye candy for you today......
This is a card, you will want to make more than one.......you will be wanting to keep one for the  trophy self.


This week, I tried a new card stock.....and am falling in love with it!. I got the tip from my fellow DT at Heartfelt Creations, Lizz...a real sweetheart...and does great crafting. You will be seeing a lot more of this pearl card stock with the Heartfelt Creations products on my postings. I think the two make a great marriage...what does not with the Heartfelt Creations product ?

Heartfelt Creations Products And Products Sold On Our Website:

Other Products Used: Card Stock: Crafters Companion Cuntura Pearl snow white- hint of gold A4. Ranger: Stickles, Heat Gun, Water Coloring Brush, Water Mister, Ink foam tool. Gold embossing powder, Bone folder. Glimmer Mist: Olive Vine, Flower Power, Coral Reef, Caramel Apple, Patina. Spellbinder dies: S2-082 Sentiments one, S5-201 Curved Boarders Two. Other: Double sided tape, Seam binding ribbon, 3 Pearl beads, Versa-mark, Fussy Cutting Scissors, Double sided Tape

Instructions: The finished size of this pocket card is 11.9 cm x 20.5 cm
To make the Pocket: Taking the card stock, cut the pocket back 13.5 cm x 16.5 cm. Make folds at 1.5 cm along the 16.5 cm edge and one on the 11.9 cm edge. This will be the gluing tabs. Cut into the ends to miter the corners. Sharpen these folds with the bone folder. Cut a card front. 11.5 cm x 15.5 cm and cut the center out leaving a 1.5 cm edge on three sides. Giving the card a U shape. Adhere this to the pocket tabs. This will cover the mitering in the corners. To make the frame, stamp the frame image with the gold embossing powder. Color with the glimmer mists, die cut the image using the matching die. 


Cut the clear card stock to fit and adhere at the outer part of the frame with double sided tape. ( You can see the clear card stock in this photo of the completed card.) This will stop the card catching on the leaves as it slides in and out. Alien and adhere to the front of the pocket.
Stamp twice the wood and butterfly image from the Berries and Peaches stamp set, using gold embossing powder. Fussy cut the image complete and the other fussy cut the peaches. Color with the glimmer mists. Shape and ball, using the Deluxe Flower Shaping kit. Color the seam binding ribbon with one of the matching glimmer mist colors. Make a triple bow. Cut a slot large enough for the ribbon on both sides of the peaches on the wood from the complete fussy cut image. Adhere the wood image to the front of the frame. This will cover the flowers in the frame. Adhere the ribbon across and around the pocket, placing the ends into the cut slots. Adhere the fussy cut peaches to the peach image. Adhere the triple bow to the side under the leaves. 


Stamp, die cut, color and shape the flowers and leaves. One flower for the pocket, two flowers for the card. Add a pearl to the center of the flowers. Adhere one of the flowers and leaves to the flower shape in the frame above the center circle. 


The placement of the flowers are to the left.


Stamp the banner image, masking the sentiment on the stamp. Fussy cut the image then color with the glimmer mists. Die cut and adhere the sentiment to the banner. Adhere the banner to the right. Adhere the flowers and leaves to the left. The placement will allow the card to slide in and out and the flowers will stop just above the pocket top. To finish add stickles to the pearls, sentiment and butterfly.


The insert card tab has been left plain. Although you could stamp further on it, it will show through the clear card stock. A suggestion is, you could write, stamp on the reverse side of the card tab 

This was a sure fun card to make...I loved working with this card stock. As you can see it colours fantasticly well with this sold faithful glimmer mists. Now if you all have used your stash up...but I don't believe it. I am sure everyone has a few colours in the bottom of the draws....who knows????
This week three cards posted. Yip....I got carried away this week. Had fun doing it too.
Inky hugs and scrappy thoughts.
sussipoppins

# Three of Three

You're Sweet...
A simple background brings out the elegance of this beautiful stamp and die set 


Heartfelt Creations Products and Products carried by Heartfelt Creations:
173842 Scor-pal

Other Products: Derwent Inktense water color pencils: Fuchsia 0700, Tangererine 0300, Leaf Green 1600, Sun Yellow 0200, Field Green 1500, Iris Blue 0900, Apple Green 1400, Chili Red 0500. Ranger: Gold embossing powder, Heat gun, Watercolor brush, Diamond stickles. Other: Viva Decor-Inka Gold 918, Versa-mark, off white card stock, Fussy cut scissors

Directions: This hinge card, when finished measures 18.3 cm x 13.4 cm.
Note: All the stamping is done with the gold embossing powder.
For the back and front of the card, cut x2 18.3 cm x 13.4 cm. For the hinge, cut 13.4 cm x 3 cm. Adhere together to form the card base. Cut the matting as follows, 17.3 cm x 12.3 cm, 16.7 cm x 11.7 cm, 16.1 cm x 11 cm. Place and adhere all layers to the card base. Taking the Decorative Oval die and card stock, die cut x5. Adhere one layer at a time so you can make certain all is aligned. This will form a chipboard. When all is dry apply the Inka Gold to the out side edges. Center and adhere the oval to the card base. 


Taking the stamp image used for this card from the Berries and Peaches stamp set and matching die. Stamp, color and die cut x 2. Cut away the peaches and leaves from one of the die cuts. 

See how the gold embossing makes the stamped image so royal.


The dies to match the peaches makes ones like so much easier! Love them!

Fussy cut the butterfly.  Shape all the cut images using the Deluxe Flower Shaping Kit. Stamp the sentiment x2. Cut away the word berry from the sentiment. Bring color to the edges with the Inka-Glod. Arrange and adhere all in place with the Double Dots cut to size and glue. To finish, add stickles to the butterfly wing.


See here the sentiment is stamped cut and edged with the Inka Gold. Tucked in and under, this does not take away from the rest of the embellishments.

Well...three posting for this week...triple the work but triple the fun...
I loved stamping and colouring with this stamp and die sets. I hope you give it a go or that I have inspired you to work out of the box....leaving you with that scrappy thought. 
Don't forget to go back to the Heartfelt Creations blog for the rest of the  eye candy that is there.....
Love Wednesdays!
Inky hugs 
sussipoppins


Friday, June 26, 2015

Blazing Poppy Bell Jar tutorial

Hello to you all on this Friday morning, it is my turn to show you step for step this week on how to make something with this so wonderful Poppy Collection. I had sooooooo many ideas on what to do, it was so hard to make a choice....so I decided to use the KISS solution....
"Keep It Simple Susan"
This is something you can make with most flowers...we like that...
I hope you will get all fired up...inspired....and a ready to go feeling after spending a little time at my place this Friday, have fun.....


Step 1: Stamp the poppies using the versa-mark and black embossing powder. Stamp enough to make 5 X large, 1 X medium, 12 X small flowers. Each flower has 2 petal layers.


Step 2: Die cut the flowers. Die cut the leaves. 42 leaves are used in this project. Coloring with glimmer mist, make sure the mixture in the bottle is mixed well, so the sediment in the bottom of the bottle is totally mixed in the fluid. Pour a little of the color into a watercolor palette or small plate ready to paint onto the flower petals. See TIP #1.


Step 3: Do the same for the leaves using the Olive Vine glimmer mist


Step 4: When, the glimmer mist is dry on the poppy petals, using the TIP#1 paint the Olive vine to the petal edges.

Step 5: Make a whole in the center of the flower with a prick pen BEFORE you start shaping the petals for the placement of the brad later.

Step 6: Use the Deluxe Flower Shaping kit to shape the poppy petals. First ball with the balling tool so the petals curled down then curled the ends up again. Play around and have fun with a few extra cut petals. Balling and shaping till you get what you feel happy with. (The balling, breaks the paper fibers down which enables the shaping to take place. When you use water spritzer, a mister or wet color, the petals or leaves will dry hard and keep their new shape. Remember if you wet them again, the paper shaping will flatten. The balling and shaping will soften and relax.)


Step 7: Secure the petal layers together by adding a brad to each poppy flower top.


Step 8: Add double-sided 3d foam dots, to the center back of the top poppy petal. Secure this with the glue gun, so it will stay permanently in place. Remember you have used glimmer mist so the surface will not be porous. Again with the glue gun, adhere the two layers of poppy petals together as shown.

Step 9: To make, what I call “spring screws” cut very thin strips of card stock as shown. No more than 2mm wide x the length of the card stock. Using the quelling tool from the Delux flower Shaping kit, wind the card stock strip around the end point till the paper strip is used. Carefully remove the wound paper, holding one of the ends. This will keep the curl in a screw form, looking a bit like party slingers.


Step 10: Cut the polystyrene ball in half with a serrated edged knife. I used a not so best, bread knife. Paint the half ball with green Acrylic paint. If you do not have the right color green, make a mix of a little black with a green to get it right.


Step 11: Place the glass vase upside-down. Thus the vase foot becomes the top. This will become the “Bell jar” Adhere the painted half ball when dry, to the Bell jar top.

Step 12: Adhere the 5 large Poppy flowers around the base of the half green ball. The medium sized Poppy on the top. Add the leaves as shown in the photo. Look to tip #3 as to how to add the spring screws. This completes the top of the Bell jar.


Step 13: For the Bell jar bottom, make the Poppy flowers the same as the top using the smallest size of the stamp and die set. Place them in a line around the bottom of the glass. Place the leaves behind, under and next to the flowers as fillers. Use the same method as Tip #4 where needed. Curl the leaves on the under side up so they lay flat on the table.


Step 14: To make the center card: Cut with the red card stock 9 cm x 30.5 cm. Fold in ½ to form a card base. Cut Matting using the same card stock, cut twice at 8 cm x 14 cm. Using Water color paper cut twice at 7 cm x 13 cm.


Step 15: Take the stamp for the image from the Poppy Stems and Poppy Fillers stamp sets. Stamp one each on the watercolor paper. Use the “Tip” #1 for the coloring of the stamped image.


Step 16: Distress the matting. Use double sided tape to adhere all the papers together. Adhere the papers to the card base, making the centerpiece card. Write a special message, place a photo on the inside of the card or leave it as is. Place in the Bell jar.

"TIP" #1 
*Pour the glimmer mist color on to a water palette, china plate. I have been known to use a plastic rubbish bag in my WS. What is good about this, you can roll it up when you are done and use it again the next time you need it. Using a water coloring brush add color to your project, the same way as you would water colors. Keeping track of your colors, when dry add water then you are ready to go again.

*If you leave for the glimmer mist that is poured on to a palette for a while, the moisture will evaporate, thus the color will become deeper also, more of the metallic showing in your work. For the Olive Vine, I some times leave it over night so it becomes dry and a very intense in color. Then you can really see the gold. You can pick up the color with only the water on the brush or you could add a spray of water with a spritzer to get it flowing. Add more water as needed, depending on how intense or thick you want or need the glimmer mist to be. There are so many products on the market now…. but, we all still have the old faithful glimmer mists in our cupboards that need using up. This same technique can be used for all sorts of painting and enhancement of your cards, scrap or mixed media creations. It also makes a change from using paints or watercolors. 

“TIP”#2 
All the gluing and adhering in this project will be done with the glue gun. This will be quick and secure as to staying in place. You just need to watch your fingers as far as the heat goes, we don’t want any unwanted burns.

“TIP” #3 
The reason why I make these to the length of the paper is so you can trim the spring screws to the length you want or needed for your project. Also because the screws are made with the card stock used in the project, there will be a lot going on but it will not fight with each other for attention. Thus not becoming too much or over done. I always place the glue on the largest end of the screw, then place between the flowers and leaves with the aid of tweezers. Thus using the screws as a filler.

“TIP” #4 
 Glue 2 leaves together at the side of the leaf, making sure one is a little higher than the other. This is so it looks natural and flatters the flowers more.

Products needed
Heartfelt Creations and Other Products sold on our Website: 

Other Products: Watercolor paper, Archival black ink, Acrylic stamp block, Paper distressing tool, Double-sided 3d foam tape, Acrylic paint, Black and Green Old china plate, (to mix the paint) Pigs hair paint brush, Glue Gun, Glass vase, Glimmer mist: Olive Vine, Red Velvet, brick, Watercolor palette, Watercolor brush Black brads, large and small, Brick red and green card stock, Polystyrene ball, Bread knife/serrated edged knife, SUP black embossing powder, Versa-mark, Heat gun, Tweezers.

The complete project with close ups:


.......... more close ups of the other side


*********


Lots of close ups...some times we can not get enough of them. I hope you have fun giving this a go.You have the whole weekend to get it done....LOL....have fun making all those Poppies. This will make a wonderful gift for some one dear to the heart...or to spoil ones self....just.... because we deserve it.
We are having great sunny weather over here in Holland....I thought our summer was over last week. We can get in some multitasking in this weekend, out side shaping Poppies with our Deluxe Flower Shaping kit... and... getting all that vitamin D in...now that sure is a feel good fun experience...if you are not having those rays of sunshine...and if you are having that cold, wet, windy weather, snuggle up with hot chocolate, cookies and making these Poppies...that can also be a feel good thing to do on a Friday/weekend. It is a win win. 
What ever your situation, have a scrappy inky time and remember, if you have any questions, leave a comment and I shall get back to you as soon as possible.
Till next Wednesday....inky hugs
Sussipoppins

Wednesday, June 24, 2015

You Inspire Me

Hi every one, I hope you had a scrappy week....I did...
Today a posting with the Blazing Poppy Collection and Art Anthology.


I am so pleased with this card. So I made lots of close ups.
I nearly did not send it in to head quarters..ha ha..I can always make another...but...when???
A great marriage between these two products....see what can be done with the Sorbet Dimensional Paint and those fantastic, must have Poppy stamps and dies.....

To make this step card you well need the following
Heartfelt Products and Products carried by Heartfelt Creations: 

 Other products used: ART ANTHOLOGY Sorbet Dimensional Paint- Vegas Gold, Chocolate. Ranger: Heat gun, gold embossing powder, Peeled Paint distress ink, Water paintbrush, spatula, water mister. Spellbinders: S5-216 Tranquil Moments. Other: SUP A4 natural white card stock, Fine paintbrush, Versa-mark, 25 cm Green lace ribbon, Gold pearl beads x 4. Plastic plate. Toothbrush. Fussy cut scissors 


Instructions: This step card, when complete measures 21 cm x 15.5 cm. To make the step card base, cut the SUP card stock 21 cm x 29.8 cm. Score a fold at 14.9 cm from the 29.8 cm length. For the step, on both sides, cut 4.8 cm from the edge to 4.8 on both ends. Which will give you 11 cm front. The valley fold is 2.5 cm. For the card front stamping, use the spatula to take a scoop of the Vegas Gold medium, spread a thin layer on the plastic plate. This is so when you apply the stamp to the medium, it will not clog up the stamp. Stamp the card front randomly with the image. Clean the stamp immediately with water and the toothbrush. NOTE! The medium dries fast! 


To make the Poppies, use the gold embossing powder to stamp the Poppy petals, 2 for each flower. Die cut these with the matching die set. Stamp also with the gold embossing powder, 2 times the Poppy corners, fussy cut these. Cut the corners in half at the large flower so you have 4 pieces. Cut away the large leaf at the top and put aside for later. Color with the Vegas Gold and the Chocolate Art Anthology paint, covering also the back of the petals. Once dry, spray with the water mister then ball and shape with the deluxe flower shaping kit. Adhere the gold pearl bead to the center of the poppies. 


The die cutting with the SUP card stock: Die cut the hearts x 3. Adhere the 3 solid hearts together. Put aside 2 of the heart frames for another project. Cut 2 of the dies shapes from the same set. From the Tranquil Moments set, cut the tab for the sentiment, 1 x the tag with the lace edges. Using the same die set and the green paper from the Blazing Poppy paper collection, cut 2 x the tag with the lace edges and the frame x1. 


Putting it all together: Apply the medium to the edges of the card front, the heart, the tag with lace edges and the frame. When dry adhere the frame to the card front. Cut all the tags with the lace edges in half. Adhere 2 halves to the side panels, stack the green and SUP card stock halves and adhere with 3d foam squares to the top and bottom of the frame. Apply the glitter to the outer heart and sentiment tag ends. Adhere the heart frame to the stack with glue. Adhere the solid heart with 3d foam to the stack. Arrange and adhere the Poppies, leaves and fussy cut Poppy corners to the solid heart. Stamp the sentiment "You Inspire Me" to the sentiment tag. Give the tag a curl so it will fall over the Poppies. Adhere the tag with glue across the Poppies. To finish adhere the remaining die cut to the sides.


*****

And here is my second card for this week
Something a little different for me! A bit brighter than my usual choice of colors...but still fun to make.


Heartfelt Creations Products And Products Sold On Our Website: 

Other Products Used: Card Stock: A4 SUP Natural White X 2. Ranger: Stickles, Heat Gun, Water Coloring Brush, Water Mister, Ink Foam Tool, Bone folder. Distress Inks: Walnut Stain, Barn Door, Mustard Seed, Pine Needles, Tumbled Glass, Peacock Feathers, Crushed Olive, Black Soot, Broken China, Other: Versa-mark. Other: SUP white Embossing Powder, Fussy Cutting Scissors, Double sided Tape, Double Sided Foam Tape

Instructions: The finished size of this card is 14.5 cm x 21.0 cm Taking one of the SUP card stock, fold this in half. This is your card base. Sharpen the crease with the bone folder. From the remaining SUP card stock cut 13.8 cm x 21.0 cm, this will be your card front. Both the borders on the sides of the card front are made by stamping with white embossing powder. Stamp enough times to fill the border to your liking. 


 Stamp the vase image with black ink on the card front. Stamp also this image for fussy cutting once colored with inks. Color this with the distress inks, Barn Door, Pine Needles and Mustard Seed. Black Soot and Pine Needles are used to color the poppy centers. Apply the same distress ink colors to the image to form a glow on the outside of the stamped image on the card front. 


Now apply inks to the borders. Apply the color to the card front in layers. Listed on order of use. Tumbled Glass, Broken China, Peacock Feathers, Walnut Stain. Look to the photo to see how the shading goes from dark to light. 

 Adhere the leaves to the image. Adhere the vase fussy cut image with Double Dots or 3d foam tape/squares. Using the same inks, stamp and fussy cut the flower cluster image from the Blazing Poppy fillers set. 


Find and cut to size the sentiments from the Blazing Poppy paper collection for June.. Adhere in place as seen in the photo. Adhere the flower cluster. To finish the poppies, add a little Star Dust stickles to the centers. Before adhering the card front to the card base, apply to the card base edges in the length Mustard Seed, enough to give a yellow boarder when the card front is glued. Adhere together with double sided tape or wet glue.


Well thats my dash for today....there is so much yummy going on over at the Heartfelt Creations blog lately....makes me feel like I have been slacking.....when I see what those ladies are making, it is always a OMG moment!
A little date to keep in the back burner....all going well Friday will be a posting of a tutorial I made with the Blazing Poppy Collection. Every one in the Heartfelt Creations team gets to do a tutorial during the year......this Friday's, I think, will be a great idea for a gift for someone dear to your heart or to spoil your own self...because you deserve it....so keep the date!
In the mean time have a scrappy day and a few inky hugs.
Sussipoppins oxoxxo