Showing posts with label Spellbinders.. Show all posts

Wednesday, September 16, 2015

2nd week, Heartfelt Creations Enchanted Mum "Thinking of you today"

Hi, Wonderful Wednesday Heartfelt Creations followers.
Today is full of promise, new and wonderful things yet to happen...another Enchanted Mum's Wenesday!
A tent fold card carrying a banner with a sentiment..suitable for any moment in life. 
'Thinking Of You Today'


PRODUCT LIST-
Heartfelt Creations Products and Products carried by Heartfelt Creations:
Other Products used: Ranger: Victorian Velvet, Aged Mahogany, Forest Moss distress inks, Gold embossing powder, Heat gun, Water coloring brush, Prick tool. Other: Double sided tape, Needle and gold thread, 2 Shades of pink ribbon 13 cm each, Off white card stock, 
Spellbinder Filigree Delight S5-177

Directions: The size of this hinge card is 16.2 cm x 13 cm.
Note, all the stamping is done with embossing powder. All will be stamped or cut using the card stock unless stated. To make the card base front and back, cut x2 16.2 cm x 13 cm. The card hinge, cut x1 13 cm x 3 cm. Adhere together with double sided tape and glue to strengthen the hinge. Cut x1, 13 cm x 16.2 cm for the base matting. Adhere to the card base. Find the pink design paper in the Enchanted Mums paper collection and cut x1, 14.9 cm x 11.7 cm matting. Prick wholes 5mm from the edges for the embroidery. Back stitch with the gold thread. Adhere to the card front. Taking the Filigree Delight die frame, cut x4. Adhere all layers together to make chipboard. Adhere the two shades of ribbon across the center of the frame. Stamp, color and die cut the flowers and banner from the Enchanted Mums stamp and die sets. Do the same for the leaves using the Delightful Daisies stamp and die sets.


Getting in close to these wonderful Mum's


Each flower will need: x2 medium sized flower petals. For the center buds, x2 small sized flower is used. Give the flowers and leaves shape using the tools in the Deluxe Flower Shaping kit. Tips on making these flowers click on the video and tips on the product list Adhere the flowers and leaves to the frame. 


After giving the banner a curve by curling it gently with your fingers, place it across the Mums. Adhere with spot of glue to the banner ends to the ribbon. Hold down the ends of the banner in it's place till the glue dries.
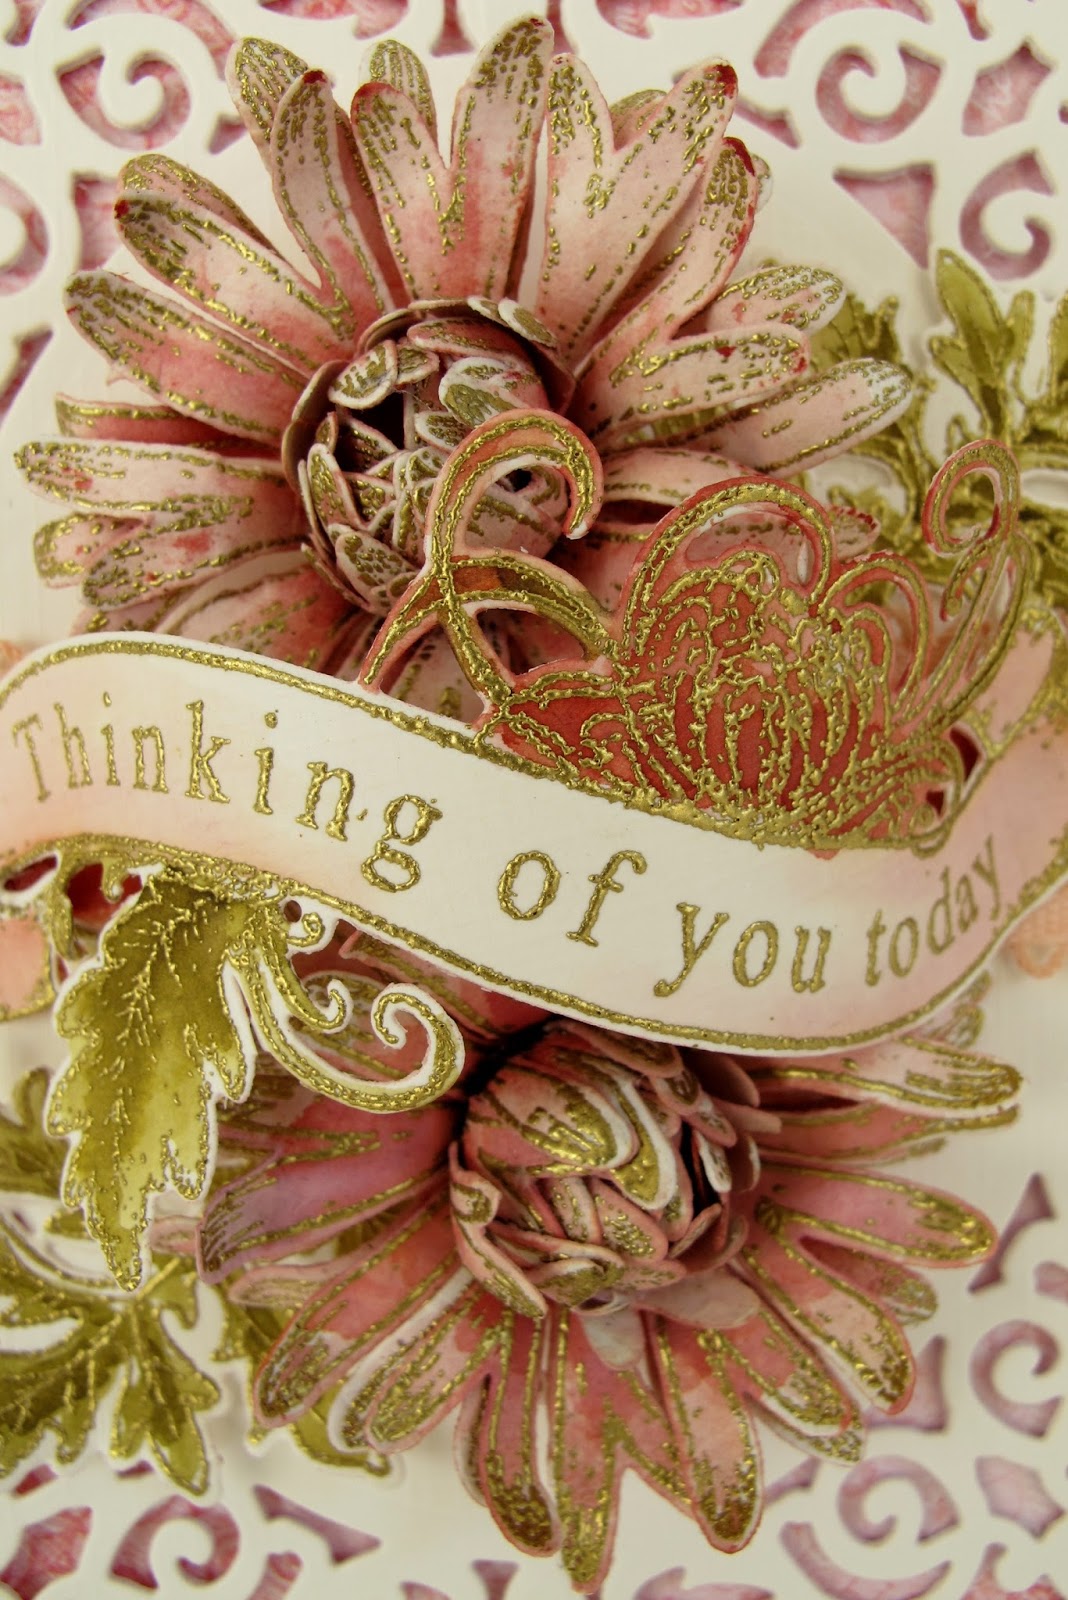

This card, .... so much a fav of mine, I had trouble sending this one in....just as well I can make some more...have to get onto doing that for all the special people in my life...This card would look great in any colour too.
Inky hugs to you all for this so, happy inky, scrappy, day,  week,
sussipoppins hugs, xox
Don't forget to get back to the Heartfelt Creations blog for all the eye candy there...
WARNING!...this will take the rest of your morning or day up. So make allowances for that...LOL

Wednesday, September 2, 2015

Discover Life....with the Farmers Market collection

Hi, something a little different,
a card with a bit of mixed media very appropriately titled....
"Discover Life"....


Below a product list- 
Heartfelt Creations Products and Products carried. By Heartfelt Creations:
Other Products used:
Ranger: Peeled Paint, Dusty Concord distress ink, Foam inking tool, Water color brush, Heat gun, Gold embossing powder, Paper distressing tool, THS043 Traveler stencil. Other: Speed ball brayer,Spellbinders S5-218 a2 Divine Eleoquince. Winsor and Newton Iridescent Medium, Medium knife, Olive silk seam binding ribbon. White card stock.


A few close ups, this one is the title done with the Iridescent medium and the traveler stencil from Tim Holtz. 


You can see in this close up how the edges have been inked with the Forest Moss distressing ink.


See how the white from the card stock die cuts show through...this high lights the 3d effect.


The bow to the left and the die cut stamped image is tucked a little under the bow.
Under is the full instructions on how to make this card. You can also find this on the Heartfelt Creations blog....with many other ideas from the rest of the Design Team as always...

Directions:
The finished card measures 14 cm x 17. 2 cm
Cut the card base as so, cut 14 cm x 17. 2 cm x2 and a hinge 14 cm x 3 cm. Make a fold at 1.5 cm in the length. Adhere to the card front and back with double sided tape and glue.
Take the design paper and cut to 13.4 cm x 16.7 cm. Ink the edges with the Forest Moss, then distress all sides with the paper distresser. To make the frame, die cut using the large frame from the Devine Eleoquence set. Cut x 1 from the design paper and x3 from the card stock. Adhere all layers together to make a chipboard frame. Ink the edges with the Forest Moss. For the front frame, using the small tag frame from the same set, cut x 4 from the card stock. Adhere all the layers together to form a chipboard. Ink this also with the Forest Moss. Taking the World map stamp and black ink, stamp the image on to the frame. Taking the stencil and medium, apply the medium to form the words. Put aside to dry.  Taking the ribbon, wrap this around the design paper, adhere the two frames to the card base. Make a triple bow from the same ribbon, adhere to the left side of the frame. Stamp, color and die cut  x 3, the olive image from the Jars and Accents stamp set. Adhere these as can be seen in the card photo.

I hope you had fun following this, any questions, feel free to leave a comment below.
Have a scrappy inky week, till next Wednesday.....
Inky hugs from sussipoppins

Wednesday, August 26, 2015

# Two of Three

BEST WISHES pocket card

Hi again, Second eye candy for you today......
This is a card, you will want to make more than one.......you will be wanting to keep one for the  trophy self.


This week, I tried a new card stock.....and am falling in love with it!. I got the tip from my fellow DT at Heartfelt Creations, Lizz...a real sweetheart...and does great crafting. You will be seeing a lot more of this pearl card stock with the Heartfelt Creations products on my postings. I think the two make a great marriage...what does not with the Heartfelt Creations product ?

Heartfelt Creations Products And Products Sold On Our Website:

Other Products Used: Card Stock: Crafters Companion Cuntura Pearl snow white- hint of gold A4. Ranger: Stickles, Heat Gun, Water Coloring Brush, Water Mister, Ink foam tool. Gold embossing powder, Bone folder. Glimmer Mist: Olive Vine, Flower Power, Coral Reef, Caramel Apple, Patina. Spellbinder dies: S2-082 Sentiments one, S5-201 Curved Boarders Two. Other: Double sided tape, Seam binding ribbon, 3 Pearl beads, Versa-mark, Fussy Cutting Scissors, Double sided Tape

Instructions: The finished size of this pocket card is 11.9 cm x 20.5 cm
To make the Pocket: Taking the card stock, cut the pocket back 13.5 cm x 16.5 cm. Make folds at 1.5 cm along the 16.5 cm edge and one on the 11.9 cm edge. This will be the gluing tabs. Cut into the ends to miter the corners. Sharpen these folds with the bone folder. Cut a card front. 11.5 cm x 15.5 cm and cut the center out leaving a 1.5 cm edge on three sides. Giving the card a U shape. Adhere this to the pocket tabs. This will cover the mitering in the corners. To make the frame, stamp the frame image with the gold embossing powder. Color with the glimmer mists, die cut the image using the matching die. 


Cut the clear card stock to fit and adhere at the outer part of the frame with double sided tape. ( You can see the clear card stock in this photo of the completed card.) This will stop the card catching on the leaves as it slides in and out. Alien and adhere to the front of the pocket.
Stamp twice the wood and butterfly image from the Berries and Peaches stamp set, using gold embossing powder. Fussy cut the image complete and the other fussy cut the peaches. Color with the glimmer mists. Shape and ball, using the Deluxe Flower Shaping kit. Color the seam binding ribbon with one of the matching glimmer mist colors. Make a triple bow. Cut a slot large enough for the ribbon on both sides of the peaches on the wood from the complete fussy cut image. Adhere the wood image to the front of the frame. This will cover the flowers in the frame. Adhere the ribbon across and around the pocket, placing the ends into the cut slots. Adhere the fussy cut peaches to the peach image. Adhere the triple bow to the side under the leaves. 


Stamp, die cut, color and shape the flowers and leaves. One flower for the pocket, two flowers for the card. Add a pearl to the center of the flowers. Adhere one of the flowers and leaves to the flower shape in the frame above the center circle. 


The placement of the flowers are to the left.


Stamp the banner image, masking the sentiment on the stamp. Fussy cut the image then color with the glimmer mists. Die cut and adhere the sentiment to the banner. Adhere the banner to the right. Adhere the flowers and leaves to the left. The placement will allow the card to slide in and out and the flowers will stop just above the pocket top. To finish add stickles to the pearls, sentiment and butterfly.


The insert card tab has been left plain. Although you could stamp further on it, it will show through the clear card stock. A suggestion is, you could write, stamp on the reverse side of the card tab 

This was a sure fun card to make...I loved working with this card stock. As you can see it colours fantasticly well with this sold faithful glimmer mists. Now if you all have used your stash up...but I don't believe it. I am sure everyone has a few colours in the bottom of the draws....who knows????
This week three cards posted. Yip....I got carried away this week. Had fun doing it too.
Inky hugs and scrappy thoughts.
sussipoppins