Wednesday, March 17, 2021

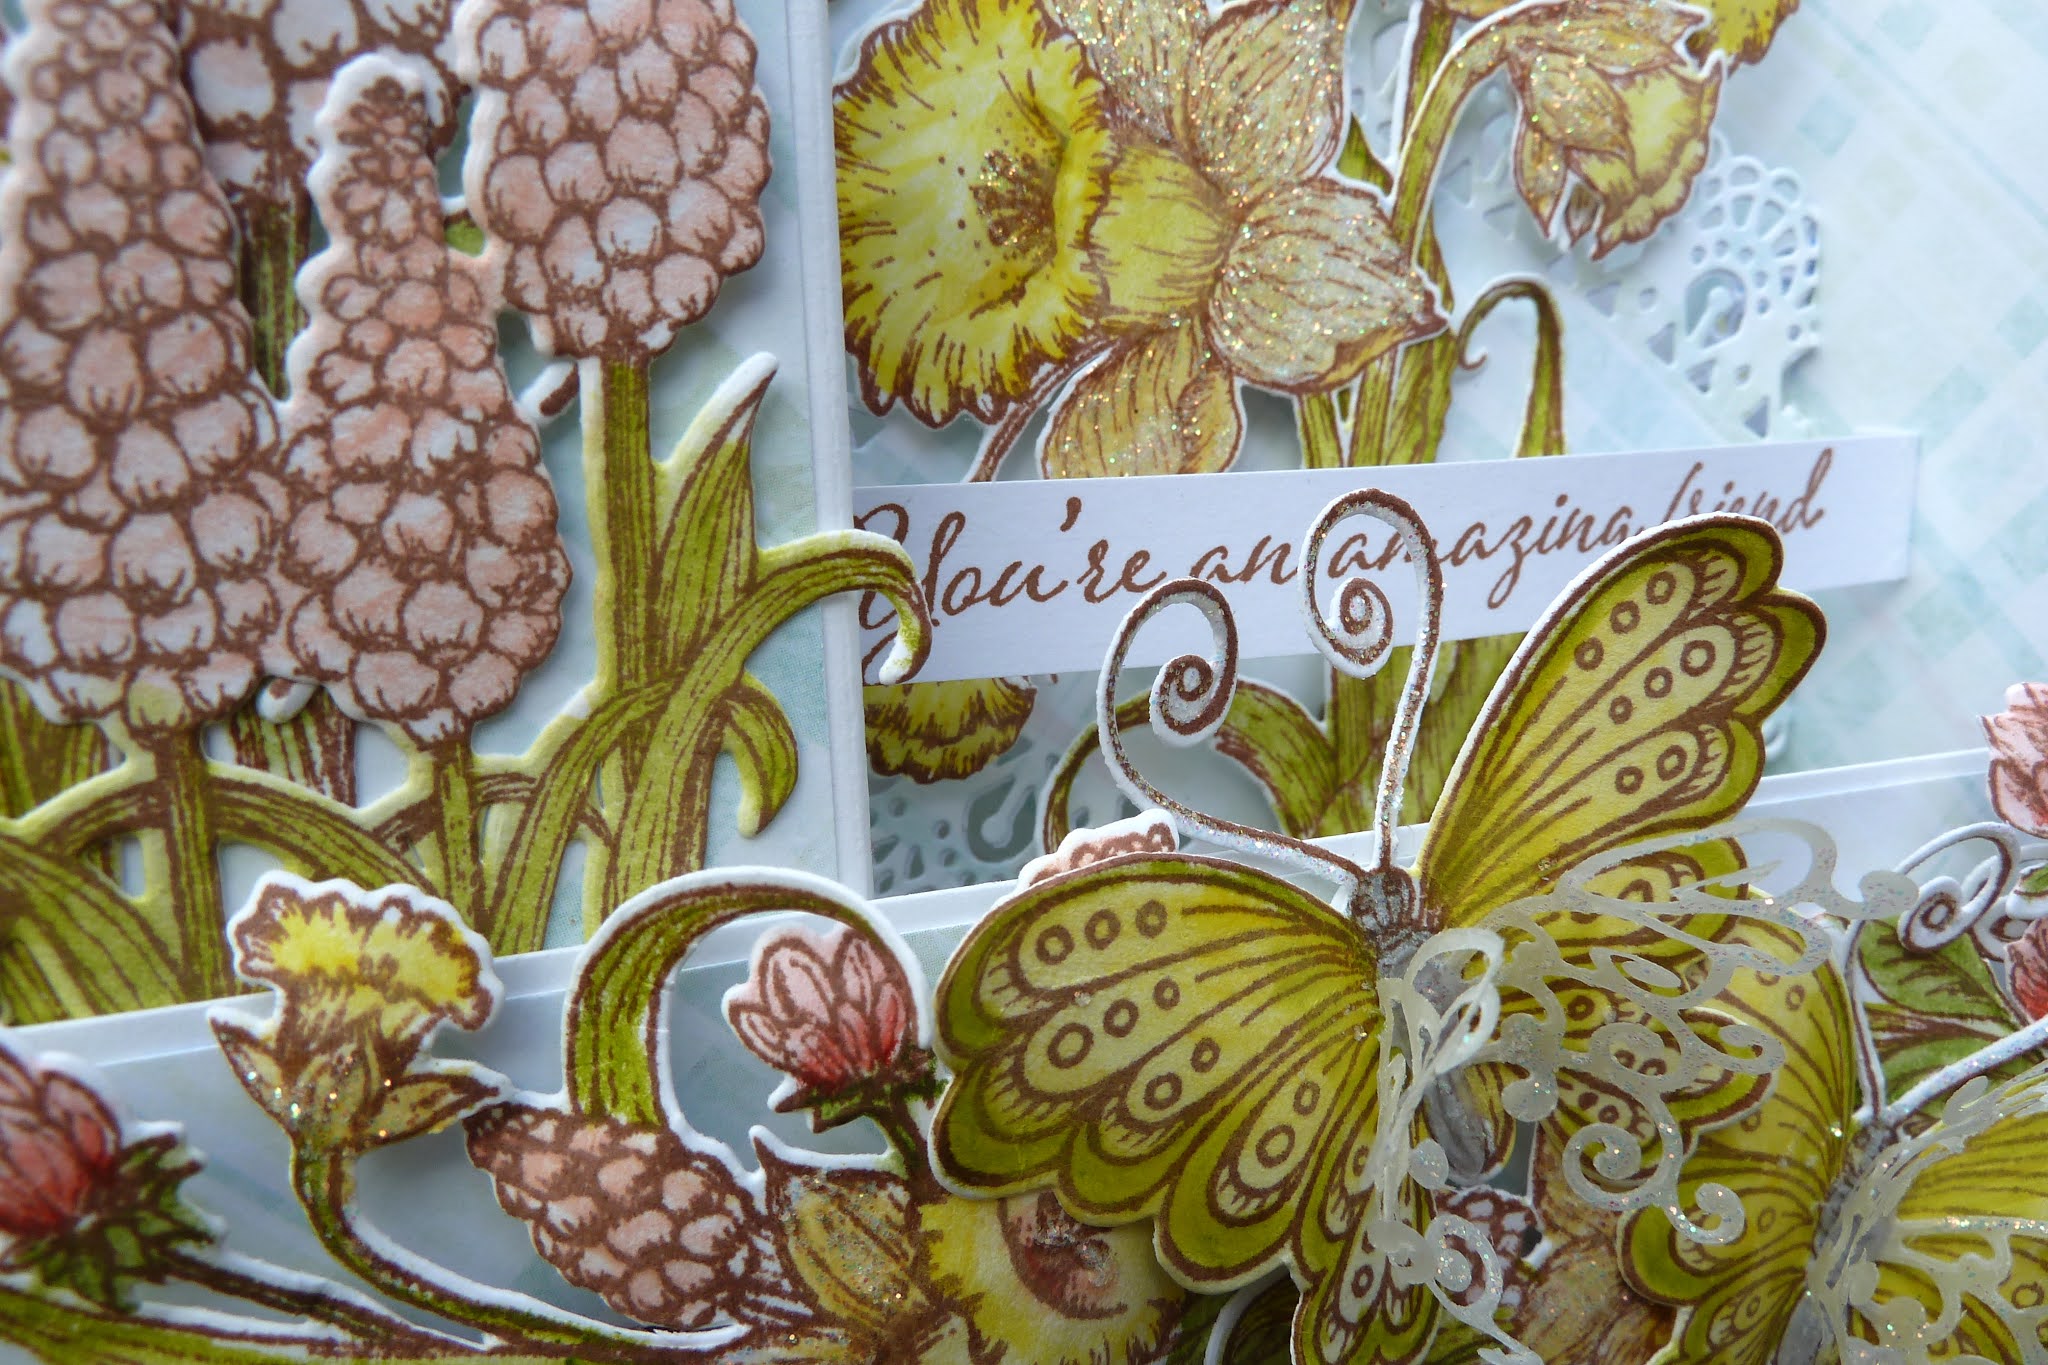
Inspiration Wednesday is running circles around the coming spring...

 daffodils in spring always makes an amazing day.

For all the info on how to make this card, visit Heartfelt Creations
There you will find all the details and measurements etc.
To purchase product used for this card visit:  https://www.heartfeltcreations.us/shopGlad you visited my place...till next time happy inky scrapping, 
inky hugs


PREVIEW FOR NEXT WEEK


Wednesday, March 10, 2021

Wednesdays inspiration with the charm of gold embossing powder...

 ...it enhances the adorable daffodil in it's simple beauty.

This release brings you an extension of last months Dazzling Daffodil but on a higher level...

...yes in 3D...

HEARTFELT CREATIONS PRODUCTS AND PRODUCTS CARRIED IN THEIR WEB STORE:

HCDP1-2125 Spring Garden paper collection

HCFB1-496 Daffodil Shaping Mold

HCPC-3946 Spring Daffodil cling stamp set

HCD1-7344 Spring Daffodil die set

HCPC-3945 Fragrant Hyacinth cling stamp set

HCD1-7345 Fragrant Hyacinth die set

HCPC-3943 Delightful Daffodil and Butterfly cling set

HCD1-7341 Delightful Daffodil and Butterfly die set

HCPC-3944 Delightful Daffodil and Hyacinth cling

HCD1-7342 Delightful Daffodil and Hyacinth die set

HCPC-3945 Delightful Daffodil Spray cling set

HCD1-7346  Delightful Daffodil Spray die set

HCD2-7339 Regal Lattice Gateway die set die set

HCPC-3930 Elegant Gateway Sentiments cling set

HCD1-7201 Ticket and Tags die set

HCD1-7298- Decorative Cage die set

HCS1-4572- Stamens Pastel Pearl-medium

HCGP1-488 Luxe Gold Paper

HCPP1-475 Deluxe Flower Shaping paper pack of 50

HCST1-401  Deluxe Flower Shaping Kit

RACP451-Ranger Archival Ink- Coffee

173842 Scor-pal measuring and scoring board

18002 Rajni Chawla’s Vellum -10 sheets

159723 Designer Dries Clear Adhesive

409311 Color In Water Brush-fine

DMCT4185 Grove Golf Tool set

OTHER PRODUCTS USED: Spectrum Aqua blend pencils: Daffodil: Wheat, Sunshine, Strawberry, Coral. Leaves: Pesto Green, Oregano. Hyacinths:  Hyacinth, Pesto Green. Other: Diamond stickles, Double sided tape, Double sided 3D foam tape, Inking Tool, Hot glue gun, Dutch Doobadoo or other crafting paste, paste spatula, Tim Holtz mask-Latticework THS019, Glimmer mist-Haunted Shadow 61180, Water spritzer, Hot Glue Gun.

INSTRUCTIONS:

This card when finished, measures   6  1 / 2 “ X 8  1 / 4 “  Taking the white card stock make a hinged tent fold card base to the above measurements.

Find a sheet for the matting of the card front in the paper collection.  Trim this a little smaller than the card base measurement. Using the mask, latticework, crafting paste and a spatula to give texture to the matting. Once this is dry spray with the glimmer mist and spritz with water to get the color wanted. When this is dry adhere to the card front with the 3d foam tape or adhesive.

Taking the gold paper, the  Decorative Cage die and the Regal Lattice Gateway die then die cut the background frames for the card front. Cut the cage back ground from the vellum. Adhere the layers to the card front.

Stamp, color, die cut and shape the daffodils, Hyacinth’s and boarders used for this card. 1 X straight boarder, 1 X each daffodil size 2 X the smaller Hyacinth and 1 X each size of the 3d Daffodils. These Daffodils are clipped in at the flower edge so they curl over easier. See the color list for colors used. Use the Daffodil shaping mold and the gulf tools to bring shape to the 3d daffodils Adhere to the card front.

To make the sentiment, use the white card stock, the sentiment from the Elegant Gateway Sentiments stamp set and the banner die from the Ticket and Tags die set. Stamp the sentiment then die cut the shape. Taking the gold paper, cut this to fit across the card so it is a matting for the sentiment. Spray the white card stock sentiment piece with the glimmer mist. When dry adhere this to the gold paper layer then to the card front. Adhere a Hyacinth to the right side of the sentiment.

To finish the card apply the diamond stickles to the Daffodil supporting petals.

I loved making this card as it has a bit of mixed media to it.....and love the gold embossing.
Till next week...you know it, inky hugs from me to you.
Here is some extra yum that is coming your way next week.


Friday, March 5, 2021

It's all about the boy and the girl today


 ...and of course the daffodil...

Today I am sharing with you a LO made using the adorable Dazzling Daffodil collection. Enjoy the journey.


HEARTFELT CREATIONS PRODUCTS AND PRODUCTS CARRIED IN THEIR WEB STORE:

 HCDP1-2124 Delightful Daffodil and Butterfly paper collection

HCPC-3943 Delightful Daffodil and Butterfly cling

HCD1-7341 Delightful Daffodil and Butterfly cling

HCPC-3944 Delightful Daffodil and Hyacinth cling

HCD1-7342 Delightful Daffodil and Hyacinth cling

HCPC-3915 Welcome Baby cling

HCD1-7300 Welcome Baby die

HCD1-7202 Album Tags and Accents die

HCD1-7201 Ticket and Tags die

HCD2-7189 Eyelet Rectangle and Basics die

HCPP1-475 Deluxe Flower Shaping paper pack of 50

HCST1-401  Deluxe Flower Shaping Kit.

DDOTS-Double sided 3D  foam dots

RACP451-Ranger Archival Ink- Coffee

RACP505 -Ranger Archival Ink- Sepia

159723 Designer Dries Clear Adhesive

409311 Colo In Water Brush-fine


OTHER PRODUCTS USED:

Inks: Spectrum Noir: Harmony Ink Grasshopper Spectrum Aqua blend pencils: Daffodil: Primrose, Wheat, Sunshine, Strawberry. Leaves: Pesto Green, Oregano. Butterfly: Asphalt, Sunshine, Bison, Umber. OTHER: Card board box (corrugated), Diamond stickles, Double sided tape, Double sided 3D foam tape, Green card stock, Ribbon, Fussy cutting scissors.

INSTRUCTIONS:

This is a lay out of 12 “ X 12 “. The checked printed design found in the paper collection for the Delightful Daffodils used for the base of this lay out. Taking the green matching card stock cut the bases for the tags used. Die cut also the tag hole enhancers and tabs ( cut 4 for each tab and hole enhancer, adhere together in layers before adhering them to the lay out where needed) Using a matching design paper from the collection to die cut the matting for the tags. For the smaller tags/tabs, you will need to fussy cut these at the indent made by the die. When you die cut them, you will see the indents. Make also the boy and girl using the Welcome Baby stamp and die set. Die cut also 4 extra for each word. Adhere all together then use the ribbons to join the tags together. When this is done you can now adhere all the elements to the lay out. The placement for the top large tag is 4  1 / 2 across at the flat edge and 3  1 / 4 down from the top of the lay out edge. The lower large tag is placed 2  1 / 4 from the foot of the lay out. The Daffodils are placed under and over the small tags as seen in the photo. Adhere the butterflies in place and add the diamond stickles to the Daffodil centers.

A birds eye view of the joining of the tabs.

 One word for this collection...'Adorable'
It is giving me the feeling of , spring is around the corner. Enjoy the moment.
Next week we have more yum for you...take a look at this.

Inky hugs from me to you.

Thursday, February 25, 2021

Hi, sharing with you a fun card...

 ...Daffodils and Hyacinths.


HCDP1-2124 Delightful Daffodil and Butterfly paper collection

HCPC-3943 Delightful Daffodil and Butterfly cling

HCD1-7341 Delightful Daffodil and Butterfly cling

HCPC-3944 Delightful Daffodil and Hyacinth cling

HCD1-7342 Delightful Daffodil and Hyacinth cling

HCPC-3945 Delightful Daffodil Spray cling

HCD1-7346  Delightful Daffodil Spray die

HCD1-7228 Lacy Diamond die set

HCPC-3930 Elegant Gateway Sentiments cling

HCPP1-468 Deluxe Flower Shaping paper pack of 50

HCST1-401  Deluxe Flower Shaping Kit.

RAHT Heat It Craft Tool

DDOTS-Double sided 3D  foam dots

RACP451-Ranger Archival Ink- Coffee

RACP505 -Ranger Archival Ink- Sepia

173842 Scor-pal measuring and scoring board

18002 Rajni Chawla’s Vellum -10 sheets

159723 Designer Dries Clear Adhesive

409311 Color In Watercolor Brush-fine

 OTHER PRODUCTS USED: Inks: Spectrum Noir: Harmony Ink Grasshopper. Spectrum Aqua blend pencils: Daffodil: Primrose, Wheat, Sunshine, Strawberry. Leaves: Pesto Green, Oregano. Hyacinths: Pesto Green, Coral. Flowers: Strawberry. Butterfly: Asphalt, Sunshine, Bison, Umber. OTHER: Diamond stickles, Double sided tape, Double sided 3D foam tape, Inking Tool.

INSTRUCTIONS: This card when finished and folded flat measures 8“ x 6. 1/8“

Using a sheet of white card stock cut to 12“ x 6. 1 /8“. At one end make folds at  2“ and 4“ flip to the other end and do the same. Fold the fold lines to a hill and valley folds. Taking the sheet found in the paper collection with the checks printed and cut matting for each panel. Cutting these just a little smaller than the card base. Adhere to the card base. Taking the white card stock make a bridge for the card front, cut this to 2“x 8“ mat this also the same as the card front. Adhere across the card front at both the 2“ panels so when folded to one side it will sit flat. Taking the same paper design, cut the diamond frame using the die in the Lacy Diamond frame set. Make folds each end of this diamond frame, you will need 4 “ for the card bridge and the rest for the folds. Adhere the folds to the sides of the card to form a bridge.

Make the embellishments by stamping, die cutting and coloring the following: 2x Hyacinth clusters, 3x large single Hyacinths, 2x Butterflies and butterfly extra wings from vellum, 2x Daffodil with buds, 1x single Daffodil, 3x Flower clusters.

Color the elements by using the water color pencils listed in the product list and trim as needed when adhering to the card front as seen in the photo. Flower clusters across the card bridge and two butterflies. Daffodils adhered to the diamond frame, the Hyacinths adhered above the bridge on the panels each side of the card front.

The sentiment is stamped on a strip of card stock trimmed to at least 5“ . You will need 4“ for the width of the card front, the rest is folded at each end and then adhered to the sides the same as the diamond frame.

To finish the card, apply the diamond stickles to the Daffodils and butterflies.


This was a fun card to make so I hope you will give it a try.
I am so happy to share this with you, have a happy scrappy week, 
till then inky hugs
oxo

Thursday, February 18, 2021

Wednesday inspiration at Heartfelt Creations with, Daffodils and Hyacinths...

......a wonderful combination to opening doors.


HEARTFELT CREATIONS PRODUCTS AND PRODUCTS CARRIED IN THEIR WEB STORE: 

HCDP1-2124 Delightful Daffodil and Butterfly paper collection

HCPC-3943 Delightful Daffodil and Butterfly cling stamp set
HCD1-7341 Delightful Daffodil and Butterfly die set

HCPC-3944 Delightful Daffodil and Hyacinth cling stamp set

HCD1-7342 Delightful Daffodil and Hyacinth die set

HCPC-3945 Delightful Daffodil Spray cling stamp set

HCD1-7343 Delightful Daffodil Spray die set

HCPC-3908 French Doorway cling stamp set

HCD1-7292  French Doorway die set

HCD1-7272 Rounded Sunlight Window die set

 HCD1- 7319 Elegant Especially For You die set

HCDC-3934 Elegant Especially For You cling stamp set

HCCB1-482 6” x 6”  Swing Card-white

HCPP1-468 Deluxe Flower Shaping paper pack of 50

HCST1-401  Deluxe Flower Shaping Kit.

RAHT Heat It Craft Tool

DDOTS-Double sided 3D  foam dots

RACP451-Ranger Archival Ink- Coffee

173842 Scor-pal measuring and scoring board

18002 Rajni Chawla’s Vellum -10 sheets

159723 Designer Dries Clear Adhesive

409311 Color Water Brush-fine 

OTHER PRODUCTS USED:

Inks: Spectrum Noir: Harmony Ink Grasshopper. Spectrum Aqua blend pencils: Daffodil: Primrose, Wheat, Sunshine, Strawberry. Leaves: Pesto Green, Oregano. Hyacinths: Blue Marine, Pesto Green. Butterfly: Asphalt, Blue Marine, Sunshine, Bison, Umber. Door: Brass Persimmon, Pineapple, Sepia. OTHER: Diamond stickles, Double sided tape, Double sided 3D foam tape, Clear embossing powder, Versa-mark, Inking Tool, Card board corrugated box (to use as 3D tape)

INSTRUCTIONS: This easel card measures 6 inches x 6 inches.

Taking the pre-made swing card base, fold the square in half next to the circle for the stand. Using the sheet 5a, for the matting of the card base. Matt all the card base that will be seen when the card is standing. The matting is cut a little smaller than the card base. Adhere in place. Use the circle die from the rounded sunlight window die set for the matting for the card front circle. Ink the edges with the Lemon tonic ink then adhere in place. Adhere half of the folded card to the circle so it can stand and make the easel card.

Taking the white card stock, stamp and matching die from the French doorway set also the versa-mark, clear embossing powder and the heat tool. Make the doorway. Use the pencils to bring color to the doorway. Adhere to the circle on the card front and trim away any excess from the bricks. Use the card board or 3D foam dots to raise the door and door frame.

Using the white card stock, stamp and die sets to make the Daffodil boarders, hyacinths and butterflies. Make the sentiment by doing the same but cutting extra layers to give the sentiment height and for the sentiment back ground. The sentiment has also been finished with the clear embossing powder. The sentiment is used as the easel card stop. Adhere all to the card front decorating as seen in the photo. Apply the diamond stickles to the Daffodils, apply also to the butterflies. Make and adhere the butterfly vellum wings to the butterfly bodies. Adhere also in place


 Adorable collection! Have fun playing with it if you invest in it.

Scrappy inky hugs,

Sussi P

Wednesday, February 10, 2021

Inspiration Wednesday with a new collection!


A adorable new collection called, 'Delightful Daffodil and Butterfly' Fantastic for the coming spring.

Enjoy the journey


HEARTFELTCREATIONS PRODUCTS AND PRODUCTS CARRIED IN THEIR WEB STORE:

 HCDP1-2124 Delightful Daffodil and Butterfly paper collection

HCPC-3943 Delightful Daffodil and Butterfly cling
HCD1-7341 Delightful Daffodil and Butterfly cling

HCPC-3945 Delightful Daffodil Spray cling

HCD1-7346  Delightful Daffodil Spray die

HCD2-7340 Eyelet Frame Gateway die

HCD2-7337 Teardrop Lattice Gateway die

HCPC-3930 Elegant Gateway Sentiments cling

HCCB1-495 5” x 7” Gateway Fold Card-White

HCPP1-468 Deluxe Flower Shaping paper pack of 50

HCST1-401  Deluxe Flower Shaping Kit.

DDOTS-Double sided 3D  foam dots

RACP451-Ranger Archival Ink- Coffee

RACP505 -Ranger Archival Ink- Sepia

18002 Rajni Chawla’s Vellum -10 sheets

159723 Designer Dries Clear Adhesive

409311 Color In Watercolor Brush-fine

 OTHER PRODUCTS USED: Inks: Spectrum Noir: Harmony Ink Grasshopper. Spectrum Aqua blend pencils: Daffodil: Primrose, Wheat, Sunshine, Strawberry. Leaves: Pesto Green, Oregano. Flowers: Strawberry. Butterfly: Asphalt, Coral. Other: Diamond stickles, Double sided tape, Double sided 3D foam tape, Inking Tool.

 INSTRUCTIONS: Taking the Gateway ready made card base and cut one of the panels away. Keep this for another project. For this card the sheet 4a was chosen as the back ground matting. Using the outer die from the Eyelet frame gateway die set, cut a matting for the card front. Adhere this to the card front. Using the white card stock and the Teardrop lattice gateway die to cut the frame for the card front. Apply the green to the lattice frame using the grasshopper ink and inking tool. Adhere to the card front. Using the die that matches the cut out archway in the lattice frame, die cut the archway. Stamp, colour and die cut the Daffodil boarders and butterfly’s needed for this card. Use the special inner butterfly die to cut from the vellum to adhere in the butterfly later, one for each butterfly. Decorate the front of the card as seen in the photo. Using the flower shaping tools to give shape to the images. For the card inside: using the white card stock, sepia ink, the sentiment stamp and the pencils, prepare the sentiment. Use the die from the Eyelet frame set that matches the size of the card front arch. Die cut this. Using the same die set, die cut another larger arch for the background using the paper from the sheet 4a. Ink the edges of both layers of paper with the grasshopper ink. Adhere the sentiment arch to the matting with a 3D double sided foam tape or dots. Adhere to the inside of the card aligning all with the arch opening in the card front. Adhere a butterfly to the sentiment as shown in the photo. Apply the diamond stickles to the daffodil centers and the dots on the butterflies. Last adhere the inner butterfly from vellum to the butterfly body.


Have a happy scrappy week and fun crafting.
Keep on keeping safe.
Inky hugs.


Thursday, February 4, 2021

To my sweet friend

 Using the gateway card bases and the Countryside Cottage collection, this fun card was made...

Enjoy


For the product list and all instructions on how to make this, visit: https://www.heartfeltcreations.us/gallery/autumn-leaves
And don't forget to visit the blog for more eye candy.
https://www.heartfeltcreations.us/blog/elegant-inspiration-and-a-delightful-daffodil-sneak-peek


For some fun...whats coming, visit: https://www.heartfeltcreations.us/collections/

Here you get to see the new collection from Heartfelt Creations. Yes releasing next week!


Have a happy scrappy inking fun week

till then inky hugs