Wednesday, April 29, 2020

This inspiration Wednesday has lots of sparkle with it....have fun.

  Hi, this Wednesday is all wrapped up with flowers and glitter..."Lets celebrate you"


                        HEARTFELT CREATIONS PRODUCTS USED FOR THIS PROJECT:


OTHER PRODUCTS USED:
White stamping card stock, Spectrum Noir Harmony ink- Olive, Pine Tree, Green  Topaz and yellow, Misti stamping tool, Foam inking tool, 3D double sided tape, 3D foam double sided tape. Hot Glue gun, Yellow card stock, Cream organza ribbon.


This box when made measures: 1” deep x 5 ½” hight x 7 ½ “ width
To make the box base: Taking the yellow card stock and cut the base to 9 ½” x 7 ½”. On the 7 ½” side make a fold at 1” and a fold at 6  ½”. At the 9 ½” side make a fold at 1” and a fold line at 8 ½”.Taking the yellow cardstock and cut the lid to 9 ¾” x 7 ¾”. On the 7 ¾” side make a fold at 1” and a fold at 6 ¾”. At the 9 ¾” side make a fold at 1” and a fold at 8 ¾”.On the longer sides of the lid and bottom box cut into the corners, fold all fold lines and adhere to form a box and lid.
To decorate the box top: Taking sheet 2B from the paper collection and cut this a little smaller than the box lid. Ink the edges with the Green Topaz ink and the inking tool. Adhere this to the box lid.
Taking the gold cardstock and the white stamping cardstock, cut the lace frames using the Elaborate Oval  frames die set. Cutting the frame background first out of the gold cardstock then alternating with the white stamping card, cut the layers out. Ink the white card stock frame edges with the green topaz ink. Taking the sepia archival ink, stamp the sentiment to the last lace frame.  Apply to the white card stock frame edges clear drying glue with the aid of the hydra sponge. Dip the edges with glue on it in the glitter. Set aside to dry. When dry tap any lose glitter away then adhere all the layers to the box lid using 3D foam tape and clear drying glue.
Make the flowers and leaves by using both the large and small stamp and die sets. Use the library green ink for the stamping. The flowers are coloured with the yellow ink and the leaves with the green inks.  In total there are 13 leaves, 2 large flowers, 4 med sized flowers and 3 small sized flowers. Bring shape to the leaves and flowers by using the matching molds and the deluxe flower shaping kit. The flowers have two layers. The flower centres are made by pricking a hole in the centres by using the sharp end of the golf tools. Cut the stamens in half and thread through the hole then secure the stamen ends using the hot glue gun. Apply clear drying glue to the leaf ends and the flower petals then dip then into the glitter. Put aside to dry. When dry tap away any lose excess glitter. Trim away the stamen tails behind the flower ready to glue down to the box front. Arrange the cluster of flowers and leaves, adhere in place with the hot glue gun or clear drying glue. To finish the project, make a triple bow from the organza ribbon and adhere to the left side of the box using the hot glue gun.


If you love glitter and all that goes with it....this one is for you.
The new release dies are perfect for decorating your card backgrounds or crafting projects.
Till next week....have scrappy fun.
Glittery, sparkly inky hugs....Susan

Wednesday, April 22, 2020

This inspiration Wednesday is about making a box.....

....to stash away your treasures or to give a treasured gift.
These wonderful new background dies a perfect for this....thank you Heartfelt creations for making available these adorable lace backgrounds...


HEARTFELT CREATIONS PRODUCTS USED FOR THIS PROJECT:

HCDP1-2114 French Cottage paper collection
HCGP1-488 Luxe Gold card stock
HCFB1-487 Wild Rose Shaping Mold Large
HCFB1-486 Wild Rose Shaping Mold Small
HCPC-3907 Large Wild Rose cling stamp set
HCD1-7290 Large Wild Rose die set
HCPC-3906 Small Wild Rose cling stamp set
HCD1-7289 Small Wild Rose die set
HCPC-3910 Lifestyle cling stamp set
HCPC-3845 JUST For You Sentiments cling stamp set
RACP505 Ranger Archival ink Sepia
RACP475 Ranger Archival ink Library Green,
Deluxe Flower Shaping Kit
RAHT Heat It Craft Tool
DDC08 Designer Dries Clear Adhesive refill
ANC818-Go Man Go Prills

OTHER PRODUCTS USED:
White stamping card stock, Spectrum Noir Harmony ink- Honey Pot, Misti stamping tool, Foam inking tool, 3D double sided tape, 3D foam double sided tape. Hot Glue gun, Yellow card stock, Diamond stickles


INSTRUCTIONS:
This box when made measures: 1” deep x 5 ½” hight x 7 ½ “ width
To make the box base: Taking the yellow card stock and cut the base to 9 ½” x 7 ½”. On the 7 ½” side make a fold at 1” and a fold at 6  ½”. At the 9 ½” side make a fold at 1” and a fold line at 8 ½”.Taking the yellow cardstock and cut the lid to 9 ¾” x 7 ¾”. On the 7 ¾” side make a fold at 1” and a fold at 6 ¾”. At the 9 ¾” side make a fold at 1” and a fold at 8 ¾”.On the longer sides of the lid and bottom box cut into the corners, fold all fold lines and adhere to form a box and lid.
To decorate the box top: Taking sheet 12B from the paper collection cut this a little smaller than the box lid. Ink the edges with the Honey Pot ink and the inking tool. Adhere to the box lid.
Taking the gold cardstock and the white stamping card cut the lace frames using the Royal Elegance Frames die set. Cutting the frame background first out of the gold cardstock then alternating with the white stamping card, cut the layers out. Ink the white card stock frames with the honey pot ink and stamp with the same ink the edges using the flower cluster stamp from the Lifestyle cling stamp set. Taking the sepia archival ink, stamp the sentiment to the last oval frame. Adhere all the layers to the box lid using 3D foam tape and clear drying glue.

Make the flowers and leaves by using both the large and small stamp and die sets. Use the library green ink for the stamping. The flowers have two layers. Both flowers are stamped using the largest flower of the stamp sets. The centres are filled with the prills or you can use small beads. Apply a thick layer of clear drying glue to the centres  then sprinkle the beads or prills, set aside to dry then tap away any lose beads or prills. Six leaves are used for this arrangement. Arrange and cluster the flowers and leaves, adhere in place with the hot glue gun or clear drying glue. To finish your project apply the diamond stickles to the leaf and flower petals.


Was this not fun.... or was this fun! 
I am planning more of this to come. Matching cards and boxes...Oh what fun.

A little tittle tat note: I have not been so active of late, the reason being....I am moving. Yes I am moving house. I will be moveing May 8th...well actually I will be moving twice...yes you got it right. Twice. 1st to Beekbergen, our hoiladay home.  This move will be for 4 weeks then moving again to a permanent location in Ugchelen. Now where on earth is this place.  I now live in Heemstede, which is about 30 min from Amsterdam and are moveing to the middle of Holland to the provincie of Apledoorn. Which is about 1 1/2 hours drive from Heemstede. Ugchelen is about 19-20 min to Apeldoorn city center...very exciting. The house we have bought is almost in the bush....well you feel like it is when you are in the back yard. So we will be woken up each morning by the robbins and all that goes with the bush. I think I will become an out doors kinda gal....lol.
Boy am I glad the packing is almost done! I think 2 truck loads plus trailers....thats alot of craft product in those boxes...lol. ( you pack up all your craft stuff and see how much you have...and it's all needed!) Because of the packing I have not had time to get cabin fever due to the stay at home rule here..... the carona virus. Pretty scarry as my Frans is a high risk person and me?...I'm always high risk...lol. My heart goes out to all those that have lost someone dear and to those in the care secture. I will say I am glad we dont have a complete lock down though as if it was, we would not have been able to seel the house and be moving. We are being very carefull and taking all into account what is needed to be  done to keep safe.
I will keep you updated on the journey and try to get some photos up for you.

Have a scrappy one and inky hugs.
Susan

Wednesday, April 8, 2020

April 8th is the date for a new collection release from Heartfelt Creations!

...and it is a wowzer!
It's called the 'French Cottage Collection'
...all that is good and yummy.


 “Im Thinking Of You” 

HEARTFELT CREATIONS PRODUCTS USED FOR THIS PROJECT:
HCDP1-2114 French Cottage paper collection
HCFB1-487 Wild Rose Shaping Mold Small
HCFB1-647 Cherry Blossom 3D flower shaping mold
HCPC-3908 French Doorway cling stamp set
HCD1-7292 French doorway die set
HCPC-3909 French Cottage ‘Scape cling stamp set
HCD1-7293 French Cottage ‘Scape cling die set
HCPC-3910 Cottage Lifestyle cling stamp set
HCD1-7293 Cottage Lifestyle die set
HCPC-3844 FOR My Friend Sentiment cling stamp set
HCS1-458-2 Bright Pearl-med (blue)
RACP505 Ranger Archival ink Sepia
Deluxe Flower Shaping Kit
RAHT Heat It Craft Tool
359760 Gold Embossing Powder
DMCT4185 Groove Golf Tool set
DDC08 Designer Dries Clear Adhesive refill
478455 Zig Clean Color Real Brush Markers

OTHER PRODUCTS USED:
White stamping card, White card stock. Spectrum Nior Harmony ink- Silent Night,  Misti stamping tool, Foam inking tool, 3D double sided tape, 3D foam double sided tape. Hot Glue gun, Versa-mark. Fussy cutting scissors, sharp cutting blade knife, Diamond stickles..


INSTRUCTIONS:
This card measures 8 ½’ x 6 ½” (22.7cm x16.5cm)
Make a tent fold card to the above measurements. Find the design paper sheet 4B, cut this a little smaller than the card base. Ink the edges of the card base and the design paper with the  Silent Night ink. Adhere the design paper to the card front. Taking the white stamping card cut  5 ¾” x  5 ½” for the door front.
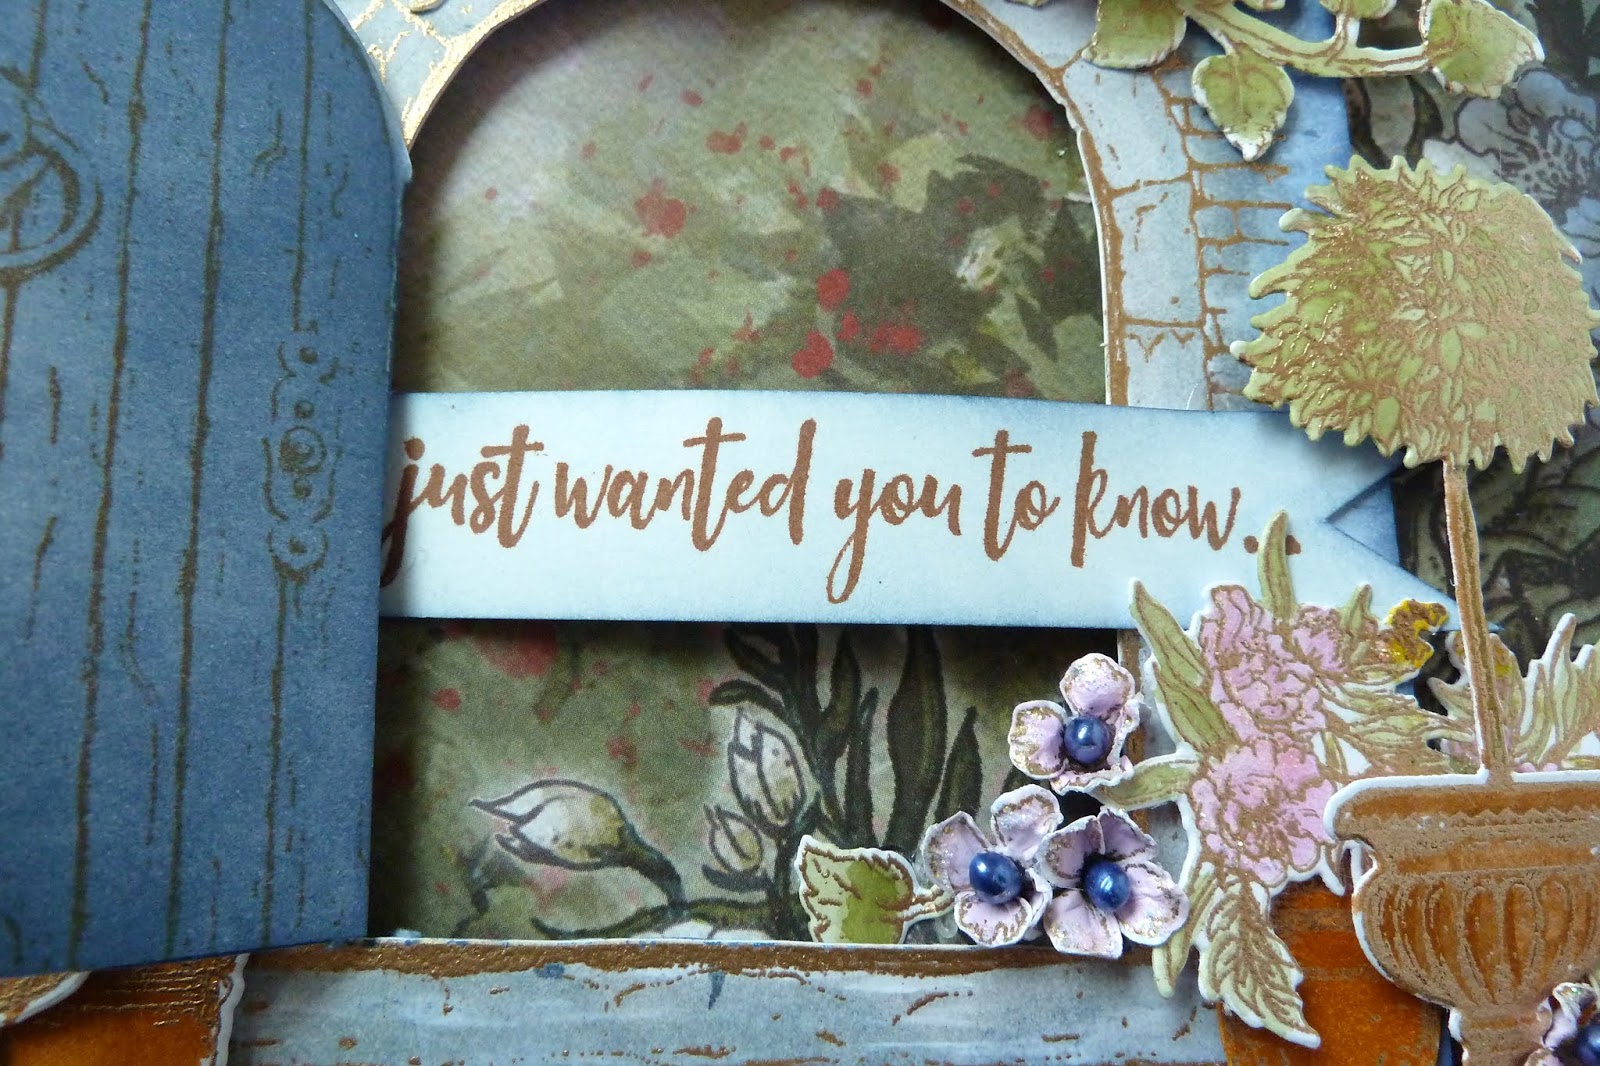
Taking the white stamping cardstock, the versa-mark the gold embossing powder and the French Cottage collection of stamps and dies then stamp and emboss the  following. The French door x2 (1 on the pre-cut stamping card and 1 for only the door) the tree in the pot x2, the  flower cluster x4, the terracotta flower pots x 3, the leaf vine x 2, the small flowers x 11(single layer), the larger flower x 12 (double layer)
Using the Zig markers apply the blue color to the 2 doors. Apply the grey to the bricks, brown and green to the flower pots. Pink and green to the flower clusters The same green to the leaf vines. Apply the pink color to all the flowers. Use the flower molds to bring shape to the flowers.
To make the flower centers:Taking the stemens, cut these in ½. The small flower has 1 To make the flowers, first taking the finest golf tool and prik a hole in the centre of all the flowers. One  stemen for each flower and the larger flower has 3 stemens. Secure the stemens with the hot glue gun shaping the flower as the glue cools.
Taking the fussy cutting scissors or a sharp cutting blade knife, cut from the door hinge to under the door at the left side of the stamped image. For the remaining door use the die to cut this out. Adhere the doors together so when the door is opened you will not see any white card stock.
Adhere the stamped door piece to the card front using double sided 3D foam tape. Make a banner with the “just wanted you to know” sentiment, ink the edges with the silent night ink. Do the same for the I’m thinking of you” sentiment. Adhere the sentiment to the paper under the door hinge and to the bricks so the door will not close. Arrange and adhere all the embellishments to the card front. Make a curl in the sentiment banner then adhere to the foot of the card front. To finish the card, apply the stickles to the flowers.


...and this is only the start...this collection has so much to offer.
You just wait and see. Till then have lots and lots of scrappy days, inky hugs.
OXO


Wednesday, April 1, 2020

It's Heartfelt Creations inspiration Wednesday again...

this week , I've got it all wrapped up...and no wrapping paper this time...lol


Heartfelt Creations product and other product carried bt Heartfelt Creations on their website:

HCDP1-2113 Wild Rose paper collection
HCFB1-487 Wild Rose 3D Shaping Mold-large
HCPC-3907 Large Wild Rose cling stamp set
HCD1-7290 Large Wild Rose die set
DMCT4185 Grove Golf Tool Set
HCFB1-464 3D Floral Basics Shaping Tool Kit
RACP475 Ranger Archival ink-Library Green
RACP499 Ranger Archival ink-Plum
RACP436 Ranger Archival Ink-Leaf Green
RACP649 Ranger Archival Ink-Pink Peony
RACP005 Ranger Archival Ink-Sunflower
85-Glitter Crystal Ultrafine Transparent Glitter
159723 Designer Dries Clear Adhesive 
HCDA1-449 Stack and Store Daubers pack of 6
HCST1-401 Deluxe Flower Shaping Kit


OTHER PRODUCTS USED:
Inks: Ranger Archival ink-Venetian Orange, White card stock, Scissors, Green organza ribbon, Hot glue gun, Double sided tape, Empty perfume box or such like, Diamond dust.


INSTRUCTIONS:
This project measures the size of the gift in a box you have. This project is wrapping a gift with out the wrapping, you are decorating the box of the gift. This box is a empty perfume box I had but you can use what ever you have or want to give.
To make the flowers and leaves: Taking the white card stock and the library green ink, stamp the leaves and two of each of the two wild rose from the large Wild Rose set, color these with the Pink Peony and the centers with the Venetian Orange. The out side is highlighted with concentrated Plum. Two layers of two sizes are used to make the flowers. The centers are filled with clear drying glue then diamond dust is sprinkled over the glue. The yellow from the inked centers will show through once the glue has dried. Set aside to dry. The leaves are colored using the Leaf green and Library green inks. The large flower shaping mold is used to bring shape to the leaves and flower petals.
To decorate the box: Taking the box, measure the box on all sides. The lid and base, the sides and front and back. Write the measurements down then make them all a little smaller so you have the box showing on the sides of the design paper. For this box I chose the design paper with a flower boarder from the Wild Rose paper collection. Cut the paper to the measurements so the boarder shall be at the foot of the box. The edges are inked  with the archival ink, plum. Adhere the paper pieces to the box using double sided tape. Taking the green organza ribbon, wrap around the box and adhere with the hot glue gun. Make a organza ribbon ½ bow by folding the ribbon three times, each fold a little shorter than each other. Adhere with a dot of hot glue. Make two ribbon ½ bows. Make the flowers and leaves. Arrange on the ribbon  line around the box the flowers and leaves, adhere this with the hot glue gun. To finish the project adhere the ½ bows each side of the arrangement.


Enjoy some details of the wildroses.


 Till next week....inky hugs...and have a scrappy week.
OXO


Wednesday, March 25, 2020

Inspiration Wednesday with the wildrose collection from Heartfelt CReations...

Hi, today I am bringing you another card, enjoy.
 ‘YOU ARE…SO MUCH MORE...’ 


Heartfelt Creations Product and other Products carried on their website:

HCDP1-2113 Wild Rose paper collection
HCFB1-486 Wild Rose 3D Shaping Mold-small
HCFB1-487 Wild Rose 3D Shaping Mold-large
HCPC-3906 Small Wild Rose cling stamp set
HCD1-7289 Small Wild Rose die set
HCPC-3907 Large Wild Rose cling stamp set
HCD1-7290 Large Wild Rose die set
HCD1-7291 Treasured Heart Gift Box die set
HCS1-490 Assorted Rose Hip Stamens-large
HCD1-7271 Round Window Frame die set
HCPC-3844 For My Friend Sentiments cling stamp set
DMCT4185 Grove Golf Tool Set
HCFB1-464 3D Floral Basics Shaping Tool Kit
RACP475 Ranger Archival ink-Library Green
RACP984 Ranger Archival Ink-Cactus Flower
RACP436 Ranger Archival Ink-Leaf Green
RACP500 Ranger Archival ink-Sepia
85-Glitter Crystal Ultrafine Transparent Glitter
159723 Designer Dries Clear Adhesive 
HCDA1-449 Stack and Store Daubers pack of 6
HCST1-401 Deluxe Flower Shaping Kit
RLHS100 Hydra Sponges

OTHER PRODUCTS USED:
Inks: Ranger Archival ink-Venetian Orange, White card stock, Scissors, White organza ribbon, Hot glue gun, Double sided tape, 3D double sided foam tape, Score-pal

INSTRUCTIONS:
This card measures 6 ¼” x 6 ¼” (16cm x 16cm) when competed. Taking the white card stock make a tent fold card base to the above measurements. Find the pink check print and the pink and green print design paper in the Wild Rose paper collection. Trim the pink checked paper a little smaller than the card base. Trim the pink and green paper about 1” smaller than the card base.. Before  Adhering  both papers to the card base using the 3D double sided foam tape, taking the Round window frame die and die cut the frame from the checkered paper center. Ink both papers and the frame edges with the Cactus Flower ink. Apply clear drying glue with the aid of a hydra sponge to the lace part of the frame. Sprinkle glitter to this and set aside, when dry adhere to the card front.
Taking the sentiment and stamp this with  the sepia ink. Trim the banner to the size of the sentiment. Cut the right end of the sentiment to a ribbon end. Ink the edges with the Cactus Flower ink.
Taking the white card stock and the heart dies from the Treasured Heart Gift Box set. Cut the hearts twice and the heart outside twice.  Bring the Cactus Flower ink to both the heart outsides then adhere together using the clear drying glue. Cut also twice the double hearts, these are inked with the leaf green ink. Trimmed at the center ready for adhering in place later.
To make the flowers: Taking the white card stock, Library green ink, the stamps for the leaves and the med sized flowers. Stamp 5 leaves, 4 flowers. Color the leaves with the leaf green ink, use the Cactus Flower and Venetian Orange for the flowers. Taking the matching dies die cut all. Use the 3D shaping molds to bring shape to the leaves and flowers. Adhere the flowers together and make a whole in the flower center for the large stamen. Secure the stamen by using the hot glue gun. Apply clear drying glue to the petal edges with the aid of a hydra sponge then sprinkle glitter over the glue. Set aside to dry. When dry, When the glue is cold, trim the stamen stem away ready for adhering to the card front.
Make a triple bow from the organza ribbon, arrange and adhere  the flowers and leaves to the lower left of the Round Window frame. Adhere the bow, the green hearts and  both the pink hearts in place. Last adhere the sentiment banner across the front of the card.


  Don't you just love these large stemens!


       This collection makes card making a breeze. 
More eyecandy next week, till then have a scrappy day and inky hugs.
OXO

Wednesday, March 11, 2020

March 11th..Heartfelt Creations inspiration Wednesdaday with a new collection!...

...Wild Rose Collection...this is an adorable collection with a gift box and the timeless wildrose flower with a leaf. There is also a flower shaping mold to go with it...Heartfelt cReations sure know how to make our life Oh so sweet.

I am showing off today with a gift box, made with the adorable box die that comes with the collection.
                                                                'Treasured Gift Box'


Heartfelt Creations Products and Product carried By Heartfelt Creations On Their Website:

HCDP1-2113 Wild Rose paper collection
HCFB1-486 Wild Rose 3D Shaping Mold-small
HCFB1-487 Wild Rose 3D Shaping Mold-large
HCPC-3906 Small Wild Rose cling stamp set
HCD1-7289 Small Wild Rose die set
HCPC-3907 Large Wild Rose cling stamp set
HCD1-7290 Large Wild Rose die set
HCD1-7291 Treasured Heart Gift Box die set
HCS1-458-2 Stamens Bright Pearl-Med (red)
DMCT4185 Grove Golf Tool Set
HCFB1-464 3D Floral Basics Shaping Tool Kit
RACP475 Ranger Archival ink-Library Green
RACP436 Ranger Archival Ink-Leaf Green
RACP005 Ranger Archival Ink-Sunflower
85-Glitter Crystal Ultrafine Transparent Glitter
159723 Designer Dries Clear Adhesive 
HCDA1-449 Stack and Store Daubers pack of 6
RLHS100 Hydra Sponges

OTHER PRODUCTS USED:
 White card stock, Scissors, White organza ribbon, Hot glue gun, Double sided tape, Diamond dust.


INSTRUCTIONS:
To make the Wild Roses and leaves: Taking white stamping card stock, library green archival ink stamp the leaves and flowers. 3x leaves, 18x small flowers, 1x med flower. Chose the color for the flowers, here is the Sunflower used. For the stamen centers, use the red stamens, clear drying glue and diamond dust or glitter. Apply glue to the stamen heads then dip into the diamond dust or glitter set aside to dry. Make one for each flower center, when dry make a whole in the flower center so the stamen can be threaded through. Secure the stamen to the flower using the hot glue gun. When the hot glue has cooled trim away the stamen threads ready to use on your project. The leaves are colored with the Leaf green ink. The flowers and leaves are shaped using the 3D shaping molds. Use the shaping tools to ball the flower centers so the petals stand higher.
Find the green printed paper from the wild rose paper collection. Taking the dies for the basic gift box, place the dies for the gift box so you will get 6 sides from the paper and 1 under piece. Taking the square cut out die and the white card stock, cut also 6 squares. Adhere double sided tape to the join flaps on each side.
Taking the die cut squares, using the leaf green archival ink and daubers, bring ink onto the squares. Apply clear drying glue to the square using the aid of a hydra foam sponge. Dip this into the glitter and put aside to dry. When dry adhere one to each of the sides of the gift box. Taking the premade wild flowers, adhere with the hot glue gun 3 wild roses to the center of the squares. Adhere each gift box sides together leaving one side still open. Adhere the gift sides to the base then closing the last box side. Using double sided tape and clear drying glue to do this.
Taking the green printed strip from the paper pad, you will be using both paper strips. Divide both the strips into 4. Trim the edges into a point so you can adhere together with out it being too thick. Adhere  both ends together with the glue gun or clear drying glue without making a fold in the paper-so it forms a bow. Arrange each piece so you have a four sided bow then make another to so you can adhere on top of this which makes a layered bow. Adhere the leaves and wild rose to the center of this bow.  Fold the gift box top so it forms a closing lid. To the last folded top piece adhere the bow to this so it will still open.

 Showing you a few detail shots of this box, enjoy.


You can see how the box opens.


This box can be used for any occation....just change the colors and add more flowers...thats an answer to any problem...just add more flowers...LOL

Till next week...inky hugs and have a scrappy day.
OXO

Wednesday, March 4, 2020

MARCH 4th is inspriation Wednesday with Heartfelt Creations using the TEA TIME COLLECTION

Hi, today I have a out of the box card for me but still adorable....let me know what you think.


HEARTFELT CREATIONS PRODUCT AND PRODUCT SOLD ON THEIR WEBSITE:
HCDP1-2112 Tea Time Paper Collection
HCPC-3892 A Day At The Sea cling stamp
HCD1-7266 A Day At The Sea die set
HCPC-3965 Elegant Tea Pot cling stamp
HCD1-7288 Elegant Tea Pot die set
HCPC-3804 My Cup Of Tea cling stamp
HCD1-7287 My Cup Of Tea die set
HCPC-3903 Special Tea Pot cling stamp
HCDA1-1449 Stack and Store Daubers pack of 6
RACP5005 SEPIA Ranger Archival Ink
478455 Zig Clean Color Real Brush Marker 36 pack

OTHER PRODUCTS USED:
Diamond stickles, Tea die distress ink, foam inking tool. Fussy cutting scissors

  
INTRUCTIONS:

This tent fold card measures 6 ¼”x 6 ¼” / 16cm x 16cm.
Make the card base to the above measurements with the white card stock. Find the printed paper with the lace in the print, cut this a little smaller than the card front. Ink both card front and paper edges with the Victorian Velvet, the Tea die ink using the inking foam tool or daubers.  Taking the sentiment and sepia ink, stamp the sentiment to the printed paper to the right, below the center. Adhere both paper and card front together using the 3D foam dots or tape.
Using the white card stock and sepia ink, stamp the elements: 3x tea bags, 1x the tea cup boarder, 2x the flower boarder, 2x the rope frame from the, A day at the sea set.
To make the rope frame, trim the frame and adhere together to form a longer rope frame. Color with the Beige zig marker. Cut the 3d foam tape or dots to fit the rope frame and adhere to the card front once the placement is found using the flower boarders. Color the flower boarders using the  Peach pink, pale rose, mid green, olive green zig markers. Trim To make the rope frame, trim and adhere together with the clear drying adhesive, color this with the the flower boarders  as seen in the photo so they will fit at the rope frame sides. Adhere using 3D foam tape and clear drying adhesive. For the tea bags: Die cut extra tea bags from the white card stock, 4x for two bags and 6x for the center bag. Adhere the layers together. Color the tea bags by using the tea die ink. The tea bag ties are colored with the pale rose and the mid green zig markers. Adhere in place.  Prepare the tea cups and place them above the stamped teacup in the tea bag. Fussy cut the remaining flower boarder off cuts and adhere these to the foot of the card and a few flowers and leaves to the center tea bag so the peck out behind the tea bag. To finish the card apply the diamond stickles to the rope frame, the tea cups, the flowers and the tea bag ties.


I love the tea cups on the tea bag with the flowers peaking from behind.
Next week we have a new release...can't wait.
Till then inky hugs,
Sussi