Showing posts with label Ranger Distress Inks. Show all posts

Wednesday, September 16, 2015

2nd week, Heartfelt Creations Enchanted Mum "Thinking of you today"

Hi, Wonderful Wednesday Heartfelt Creations followers.
Today is full of promise, new and wonderful things yet to happen...another Enchanted Mum's Wenesday!
A tent fold card carrying a banner with a sentiment..suitable for any moment in life. 
'Thinking Of You Today'


PRODUCT LIST-
Heartfelt Creations Products and Products carried by Heartfelt Creations:
Other Products used: Ranger: Victorian Velvet, Aged Mahogany, Forest Moss distress inks, Gold embossing powder, Heat gun, Water coloring brush, Prick tool. Other: Double sided tape, Needle and gold thread, 2 Shades of pink ribbon 13 cm each, Off white card stock, 
Spellbinder Filigree Delight S5-177

Directions: The size of this hinge card is 16.2 cm x 13 cm.
Note, all the stamping is done with embossing powder. All will be stamped or cut using the card stock unless stated. To make the card base front and back, cut x2 16.2 cm x 13 cm. The card hinge, cut x1 13 cm x 3 cm. Adhere together with double sided tape and glue to strengthen the hinge. Cut x1, 13 cm x 16.2 cm for the base matting. Adhere to the card base. Find the pink design paper in the Enchanted Mums paper collection and cut x1, 14.9 cm x 11.7 cm matting. Prick wholes 5mm from the edges for the embroidery. Back stitch with the gold thread. Adhere to the card front. Taking the Filigree Delight die frame, cut x4. Adhere all layers together to make chipboard. Adhere the two shades of ribbon across the center of the frame. Stamp, color and die cut the flowers and banner from the Enchanted Mums stamp and die sets. Do the same for the leaves using the Delightful Daisies stamp and die sets.


Getting in close to these wonderful Mum's


Each flower will need: x2 medium sized flower petals. For the center buds, x2 small sized flower is used. Give the flowers and leaves shape using the tools in the Deluxe Flower Shaping kit. Tips on making these flowers click on the video and tips on the product list Adhere the flowers and leaves to the frame. 


After giving the banner a curve by curling it gently with your fingers, place it across the Mums. Adhere with spot of glue to the banner ends to the ribbon. Hold down the ends of the banner in it's place till the glue dries.
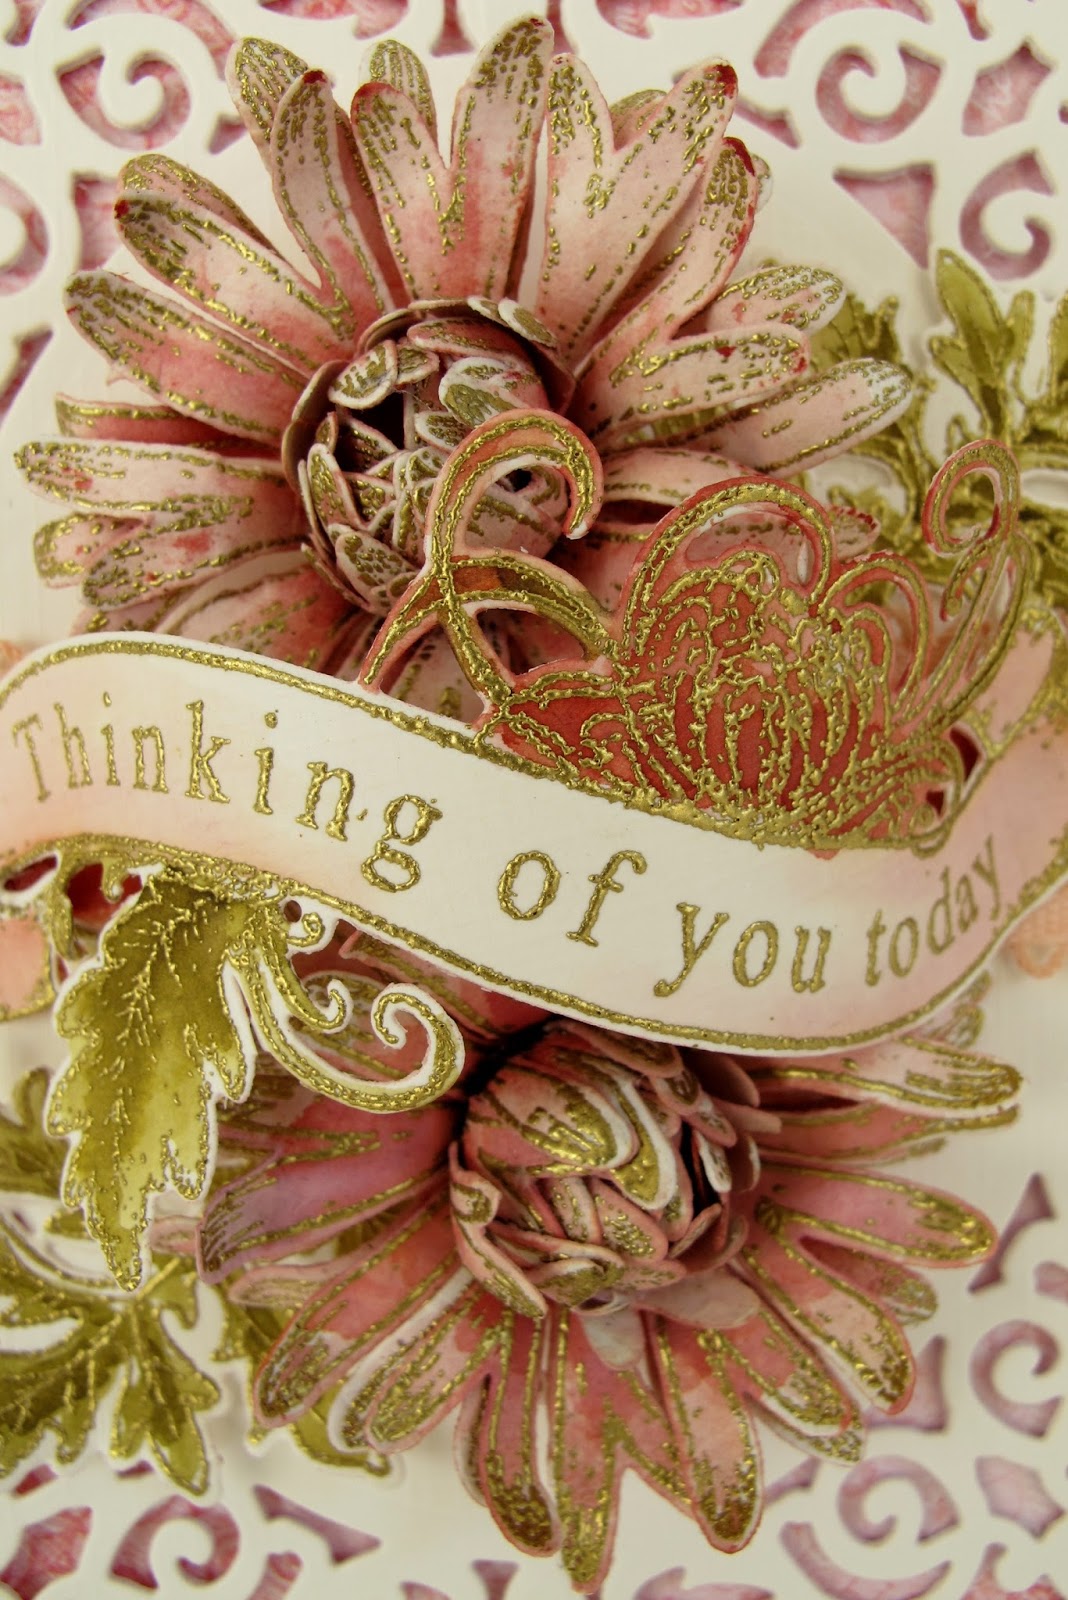

This card, .... so much a fav of mine, I had trouble sending this one in....just as well I can make some more...have to get onto doing that for all the special people in my life...This card would look great in any colour too.
Inky hugs to you all for this so, happy inky, scrappy, day,  week,
sussipoppins hugs, xox
Don't forget to get back to the Heartfelt Creations blog for all the eye candy there...
WARNING!...this will take the rest of your morning or day up. So make allowances for that...LOL

Wednesday, September 9, 2015

New Release! "Enchanted Mums Collection"

A very good morning to you all...a wonderful exciting Wednesday for all......
after a few days of rain...it now feels the Autumn season is just around the corner...so I am very pleased with this new release as it is a hold fast of the Summer that is leaving us here in Holland....a hold onto the moment, treasures....that will get us through the cooler days to come, when you see the collection...you will understand...LOL...a few words of enticement to enhance the appetite for good things to come.....


This collection will let you escape to serene and alluring garden surroundings, in a beauty of shimmering dragonflies. They glide through warm and gentle summer breezes, landing to perch on beautiful bouquets of chrysanthemums dancing in the sunlight.  Graceful flowing floral images and exquisite die cuts along with soft hues of pinks, purples, greens and yellows are sure to bring about a sense of peace and calm to your soul.  Create your very own impeccable garden themed designs with the assortment of light and airy mums taking centre stage in five gloriously illustrated stamp sets along with swirling vines and beautifully detailed dragonflies, all of which mirror the stunning images found within this enchanting paper collection.  Create authentic, true to life blossoms and embellishments with three coordinating dies, perfect to grace your scrapbook layouts and original card creations.  Whether you are celebrating special occasions or  preserving precious family memories, an enchanting time of creativity awaits you with the Enchanting Mum Collection.


Above,  close up of the Mum's beaded centre.


Are these Dragonflies adorable!...or are they adorable!


Another close up of the clustered frame. I got quite excited about the laying of the vine across the Mum. To make our toy collection complete....Heartfelt Creations has a die for this too....so we do not have to fussy cut!....they are think out of the box!....so glad we are on the same page...LOL...got to keep laughing, it keeps me young! Making up for all those sleepless nights scrapping....you too?
Back on track... The dragonfly placements brings this to almost, perfection!
This card has no sentiment, you could always add one, but I thought....yes that was painful...LOL...to put a sentiment on the front, took away from the elegance of the card....but that is a question of taste....it's your party and you can do what you want too....LOL...remember that song?


Product list:
Heartfelt Creations Products and Products carried by Heartfelt Creations:
Other Products used: Ranger Gold embossing powder, Heat gun, Diamond stickles, Whole piercer, Evergreen Bough, Dusty Concord, Forest Moss, Victorian Velvet, Aged Mahogany distress ink. Spellbinders S6-002 and S6-001 matting basics, Versa-mark, Gold thread and needle. Off white card stock. A Pearl bead. Double sided tape.

Directions: The finished hinge card measures, 14.08 cm x 20 cm.
All the stamping is done with the gold embossing powder unless stated other wise. For the card base,  cut from the card stock, 14.8 cm x 20 cm twice. For the hinge, cut a strip 20 cm x 3 cm. Apply double sided tape to this, then make a fold at 1.5 cm. Adhere together. Cut the card matting as follows: From card stock cut 19.3 cm x 14.9 cm, 16.7 cm x 11.7 cm. Taking the design paper, cut 18. 7 cm x 13.8 cm. Prick wholes along the edges of this paper and embroider with the gold thread. Adhere all the layers together with the double sided tape or glue. For the oval frame, take the decorative oval die and cut 4-5 cuts. Cut away the inside lace so you have only the out side frame. Glue the layers together so you have a chipboard frame. Using he versa- mark, apply this to the top so it does not cover the frame completely. Apply the embossing powder. Do this a few times so you get the coverage you want. Stamp and die cut the Mum flower so you have 4 of the largest flower shape. Color with the inks then shape the flower using the flower shaping tools. Add a large pearl bead. You can find tips on the flower making by clicking onto the video and tips in the product list. Stamp and die cut the vine front banner. Color this with the inks. Making the 4 dragonflies from the flower stamp and die cutting, color and shape these.
Adhere the oval frame, the made Mum flower. Adhere the vine banner edges to the frame, draping over the flower. Shape the banner before adhering a little with your fingers so it will be rounded. Spot glue to hold it's place. Add the dragonflies. To finish add stickles to the wing tips.

 You see what I mean now....if you go back to the Heartfelt Creations blog or site you will see sooooo much more eye candy....the design team are so great there. A lot of fun to be had for all. Have a scrappy day, 
Inky hugs from me to you.
sussipoppins


Wednesday, September 2, 2015

May Your Blessings Be Many...and troubles be few....


We can sure do with a bit of that....lol
Sure is a blessing....all this abundance of veg and sunshine sunflowers stamps and dies from Heartfelt Creations this month....
Another week of yum Farmers Market cards etc over at Heartfelt Creations.
Here is one of my postings for the week...again all richly gold embossed...
what a feast for the eyes....hope you agree


Heartfelt Creations Products And Products Sold On Our Website:

Other Products Used:
Ranger: Diamond Stickles, Heat Gun, Water Coloring Brush, Water Mister, Ink Foam Tool. Gold embossing powder, Bone folder, water mister, Water coloring brush, Heat-gun. Distress ink: Bundled Sage, Peeled Paint, Rusty Hinge, Forest Moss, Mustard Seed, Spiced Marmalade, Wild Honey, Ripe Permmon. Peacock Feathers, Barn Door, Fired Brick. Other: Spellbinder S4-472 Labels 42 Decorative Accents, SUP A4 natural white card stock, Versa-mark, Fussy Cutting Scissors, Double sided Tape, Back Sand (flower centers)

Instructions: The finished size of this step card is 21 cm  x  14.8 cm. Make the  side step card from the A4 card stock. The side step is 5 cm and to the left side of the card.
Distress the edges of the card with the Walnut Stain distress ink. Taking the swirled stamp image from the Sunflower Bouquet set, mask and gold emboss on the card front.  Stamp so the swirls from the Sunflower Bouquet image will peak out from under the frames. 


(see how the swirls peace out from under the frame and flowers)

Do the same to the side step and one of the small frames. Gold emboss stamping the Sunflowers and die cut with matching die. Gold emboss the Veggie Collage, the banner image (masking the sentiment), garlic bulb from the Jug of Herbs and the butterfly from the Berries and Peaches set. Fussy cut and color all the stamped images with the distress inks. Make up the flowers using the Deluxe Flower Shaping Kit. Mask the Veggie Collage stamp so you can use the MAY YOUR BLESSINGS on the banner and the BE MANY AND YOUR TROUBLES FEW on the right hand bottom side of the card front in black ink. Adhere the frames to the card front. 


(see how all the layers are placed...have fun with this one)
I sure did!

Adhere the Veggie Collage to the frame. Adhere the garlic, butterfly and the banner. Add the Sunflowers and vines. To finish the card add stickles to the butterfly wings and the vines.

I love the gold embossing...I find it makes all the stamping and die cutting richer...thus your art work even better than you think!
Food for thought.....
Scrappy inky hugs again to you all,
Sussipoppins

Discover Life....with the Farmers Market collection

Hi, something a little different,
a card with a bit of mixed media very appropriately titled....
"Discover Life"....


Below a product list- 
Heartfelt Creations Products and Products carried. By Heartfelt Creations:
Other Products used:
Ranger: Peeled Paint, Dusty Concord distress ink, Foam inking tool, Water color brush, Heat gun, Gold embossing powder, Paper distressing tool, THS043 Traveler stencil. Other: Speed ball brayer,Spellbinders S5-218 a2 Divine Eleoquince. Winsor and Newton Iridescent Medium, Medium knife, Olive silk seam binding ribbon. White card stock.


A few close ups, this one is the title done with the Iridescent medium and the traveler stencil from Tim Holtz. 


You can see in this close up how the edges have been inked with the Forest Moss distressing ink.


See how the white from the card stock die cuts show through...this high lights the 3d effect.


The bow to the left and the die cut stamped image is tucked a little under the bow.
Under is the full instructions on how to make this card. You can also find this on the Heartfelt Creations blog....with many other ideas from the rest of the Design Team as always...

Directions:
The finished card measures 14 cm x 17. 2 cm
Cut the card base as so, cut 14 cm x 17. 2 cm x2 and a hinge 14 cm x 3 cm. Make a fold at 1.5 cm in the length. Adhere to the card front and back with double sided tape and glue.
Take the design paper and cut to 13.4 cm x 16.7 cm. Ink the edges with the Forest Moss, then distress all sides with the paper distresser. To make the frame, die cut using the large frame from the Devine Eleoquence set. Cut x 1 from the design paper and x3 from the card stock. Adhere all layers together to make a chipboard frame. Ink the edges with the Forest Moss. For the front frame, using the small tag frame from the same set, cut x 4 from the card stock. Adhere all the layers together to form a chipboard. Ink this also with the Forest Moss. Taking the World map stamp and black ink, stamp the image on to the frame. Taking the stencil and medium, apply the medium to form the words. Put aside to dry.  Taking the ribbon, wrap this around the design paper, adhere the two frames to the card base. Make a triple bow from the same ribbon, adhere to the left side of the frame. Stamp, color and die cut  x 3, the olive image from the Jars and Accents stamp set. Adhere these as can be seen in the card photo.

I hope you had fun following this, any questions, feel free to leave a comment below.
Have a scrappy inky week, till next Wednesday.....
Inky hugs from sussipoppins