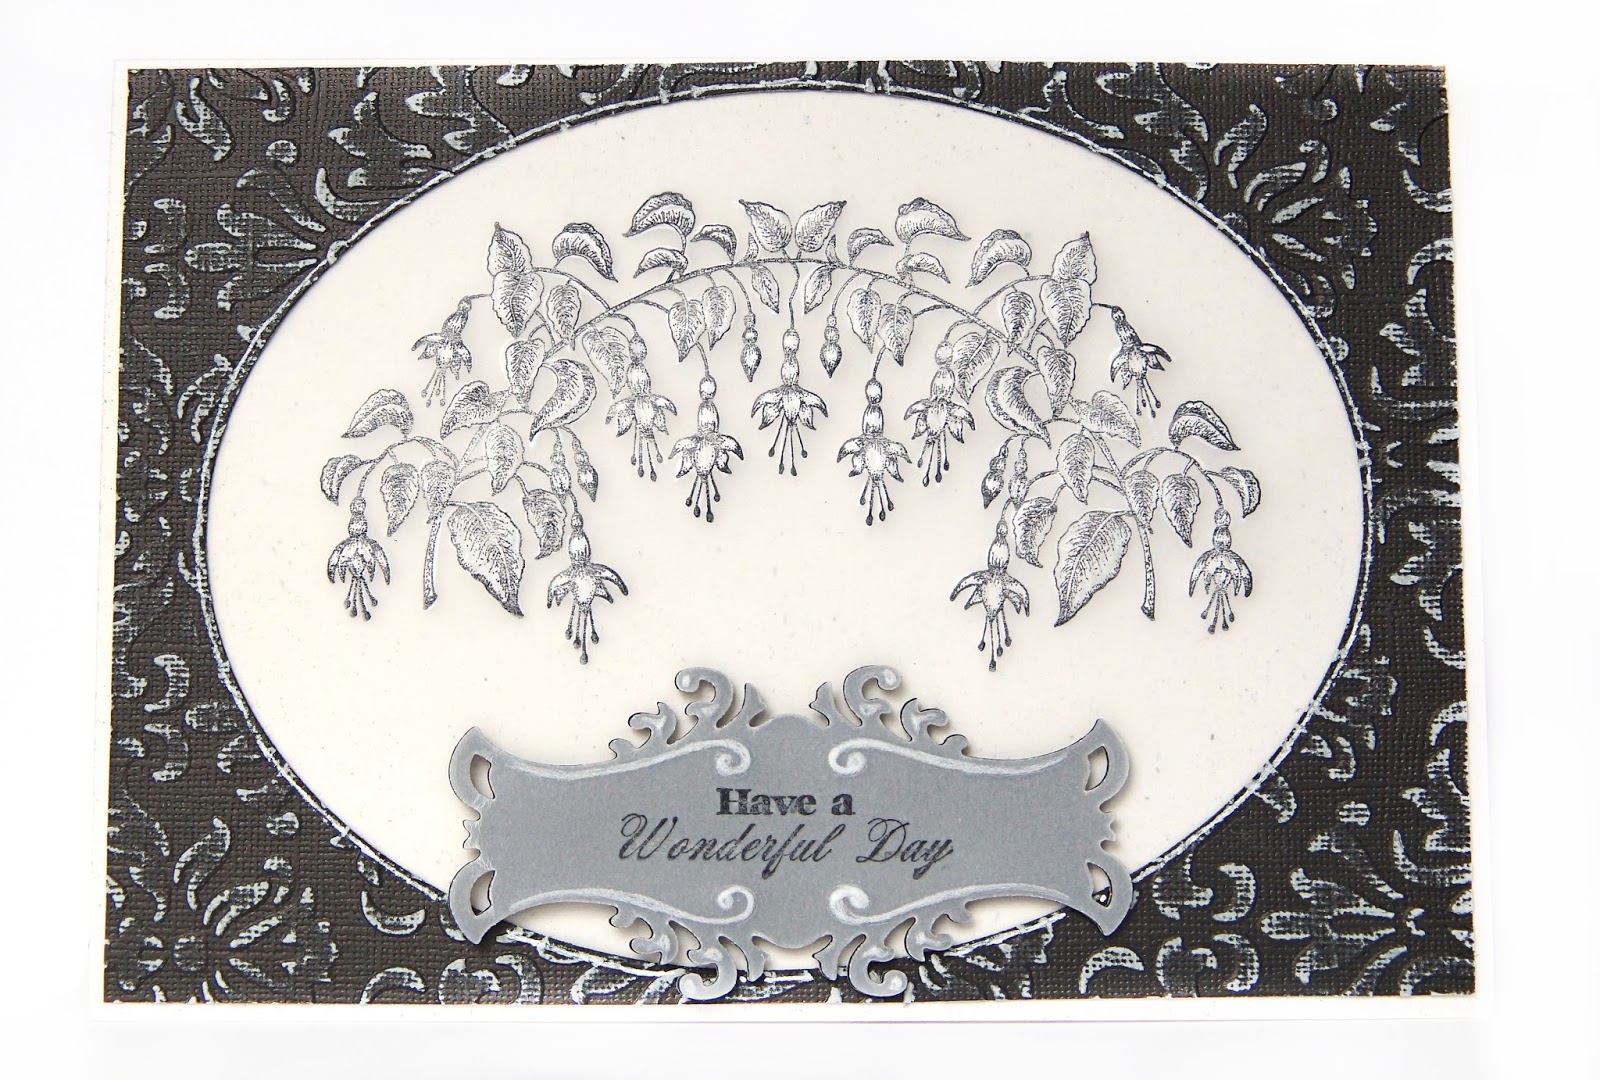
Wednesday, June 17, 2015

BEAUTIFUL THINGS card HEARTFELT WEDNESDAY

Hi, another Poppy Wednesday!
These Poppies are such fun, take a look and see.

Heartfelt Creations Products and Products Sold on our Website: 


Other Products Used: Card stock: SUP A4 Natural Ivory, Bazzill Light green, Darker green and Brick red. Glimmer mist: Olive Vine and Brick. Other: Gold embossing powder, Heat gun, Versa-mark, 45cm Green ribbon, Distressing tool, , Water color brush, 2 x gold brads, Permanent black marker pen, Black Soot distress ink, Double sided tape, Prick pen tool, Bone folder.

Instructions: Finished card size, 21 cm x 10 cm. Taking the Ivory card stock, cut 21 cm x 20 cm. This will be your card base. Fold the 20 cm length in half. Using the bone folder sharpen the fold. Taking the light green card stock, cut 20.8 cm x 9.8 cm. Distress the edges. Adhere to the card base. Taking the Ivory card stock, cut 20 cm x 8 cm. This is your stamping paper. Stamp the image from the Blazing Poppy fillers set, x 2 across the length of the paper with gold embossing powder. Color the stamped image with the glimmer mist colors using the watercolor brush, the same as you would with water coloring. Tear the top edge off, above and along the top of the stamping. See the photo. 


Cut strips of the same card stock and tear along the edges. Leaving enough room for the ribbon placement, adhere papers together to form the card front. Adhere the ribbon across the front of the card front. Make x 2 half, triple bows with ends, see photo. Using double sided tape and wet glue secure the half bows in place to the right side of the card., leaving enough space for the flower and leaves. 

Make the Poppies and a poppy bud, by taking the Ivory card stock, using the Blazing Poppy stamp and die sets, gold embossing powder, stamp and die cut. Color both sides of the flower petals with the Brick glimmer mist. Cut the leaves using the All Geared Up die and the dark green card stock. Color this with Olive Vine glimmer mist. Wrap a leaf point around the bud. Draw with the black marker, lines across the brads for the Poppy centers. Prick a whole through each flower center, secure together with a brad. 


To make the screw swirls. Cut strips of red brick card stock 2 mm. Take the quelling tool from the Delux Flower Shaping Kit and quell the paper strips. When done, slide off the tool and pull. You now have a Swirl/spring screw. 


Find the sentiment in the paper collection. Cut to size and ink the edges. Arrange and adhere the embellishments made, using wet glue so you can slide and move to their placement in the arrangement. Order of placement; swirl spring screws, leaves and large Poppy, leaf and small Poppy, Poppy bud.
*******
Beleive me....these Poppies can be adapted to make so many flowers...and they go with anything.
Have a scrappy inky day...
Hugs Sussipoppins


Wednesday, June 10, 2015

Make a Wish....Heartfelt Creations Wednesday!


Hi! I have done something quite exciting today!
Take a look at another way you can use these wonderful stamps and dies!


Heartfelt Creations Products and Products Sold on our Website: 
HCDP1-255 Blazing Poppy Paper Collection 
HCD1-764 Blazing Poppy Die set 
HCPC 3674 Blazing Poppy Cling Stamp Set 

Other Products Used: Versa-mark, Gold embossing powder, Heatgun, Gold thread and needle. SUP Cherry cobbler blendabilities/Red copic marker, Prick pen tool, Green staz-on ink, Walnut Stain distress ink, Gold color wire, Gold beads, Glue dots, 3d Foam tape, Paper distressing tool, Bone folder, A4 SUP Natural Ivory cardstock, x 2. Cardboard box, Crocodile tool (this is a tool to hold paper etc while using the heat gun so your fingers will not get burnt.) 

Instructions: The size of this card when finished, 21 cm x 14.7 cm. Taking the A4 cardstock, fold in half and trim if needed, so it will measure 21 cm x 14.7 cm. Sharpen the fold with the bone folder. This will be your card base. Take the red and black design paper from the Blazing Poppy paper collection. Cut the black paper to size, 20.9 cm x 14.6 cm. Distress the edges with the distressing tool. 


Take the same paper, flipping it to the red side. Cut this to size, 20.6 cm x 8.6 cm and 20.6 cm x 5.4 cm. This will be come your card fronts. Distress all the edges of these papers. Prick holes in the red paper as seen in the photo. Taking the gold thread and needle, backstitch this. Curl the edges up as seen in the photo. Adhere the black paper to the card base with the foam tape, do the same with the red paper. 


Die cut the photo with the 2.75 “ x 3.75 “ die from the Cut Mat Create 1a. Cut from the cardboard the same size for backing. Adhere together with wet glue. When dry, take the sanding tool and sand the edges of the photo so a little of the white shows from the photo paper. Use two strips of cardboard to give more height when gluing down to the card. Place and glue down in the center on the join line of the red paper. Adhere the photo to the cardboard strips with wet glue so you can slide it in place. 

To make the leaves: Taking the plastic cardstock, stamp both the large and small leaf images with the green staz-on ink. Die cut with the matching dies. Note, the die will not cut the through the plastic but it will give you a cutting guide-line. To shape the leaves: Once the leaves are cut out, use the Crocodile tool to hold the plastic while heating with the heat gun. When the plastic gets soft, stop with the heat, quickly mold the plastic before it cools. Apply the heat as needed. (This process needs a bit of practice and patience but well worth the effort) 


To make the flowers: Stamp the flower images with gold embossing powder. Color the flip side of the embossing with a Red copic marker or the Cherry Cobbler blendabilities marker. Apply the heat slowly so the plastic does not curl up too much with the heat. Try to keep it as flat as possible for the die cutting. A bit tricky, but the effect is so worth it. Die cut the flowers with the matching die set. (If the plastic curls too much and is not flat enough, you will have to miss the die cutting part out. 


Then, taking into account, you will not have a cutting line, so be careful not to cut too close to the edge of the flower petals) Prick a whole in the center of each flower. Note: be careful as the embossing powder can flake off. Do not panic if this happens in the center, the bead will cover this. The flaking can also give the flower a distressed effect. To form and shape the flower use the same method as for the leaves. Shaping petal for petal. Prick the wholes again, they may have closed a little with the heat. Taking the gold wire, thread the bead onto it, twist the wire to secure the bead in the center. Thread the wired bead through both flower centers. Secure with a ¼ of a glue dot, placed between both layers. 


Open the twisted wire and with the quelling tool; quell the ends to form a spring screw shape. Taking the gold wire again, make a few extra spring screws. Make 5 bead sprigs by threading a bead on the wire and twisting, the same as the method used for the flowers. Adhere the leaves, flowers, spring screws and bead sprigs with ¼ cut to size glue dots. From the paper collection find the sentiment “Make a wish”, die cut this with the matching die. 


Add the Walnut Stain ink to the edges of the die cut. Adhere the sentiment to the side left of the photo. Adhere a few beads under the sentiment, under the flowers bottom right and in the tear on the right side of the edge with wet glue so you can slide the beads into place.
*******
Hey Dottie, did you enjoy this.....yes you are the one that is behind the inspiration of this card. You all have a lot of fun making these plastic flowers....just don't get your fingers burnt! You need them to get inking inky for next time.....LOL
Don't forget to hop back to Heartfelt Creations blog to get more inspiring get up and go ideas.
Have a scrappy great day...
Inky hugs Sussi P
oxo

Wednesday, June 3, 2015

"Thinking of you"

Hello to you on this wonderful Wednesday...my fav day of the week!
Today, a card made from the Cascading Fuchsias Collection


Heartfelt Creations Products And Products Sold On Our Website: 
Embossing Enamel 

Other Products Used: Paper: Card Stock: SUP A4 Natural White, Peach Bazzill. Ranger: Prick Tool, Bone folder, Heat Gun, Ink Foam Tool. Ink: Black Stazon Distress Inks: Walnut Stain, Forest Moss, Alcohol ink: Wild Plum, Raisin, Cranberry, Bottle, Pesto. Blending solution. Spellbinder Dies: S5-218 Devine Eloquence. Other: Versa-mark, Fine paint brush. 


Instructions: The finished size of this card: !4.8 cm x 21 cm. For the card base, take the SUP A4 card stock and fold in half. Using the bone folder sharpen the fold. Taking the Cascading Fuchsia oval die cut x 2 from the SUP A4, die cut x 2 Peach card stock. Put 1 of the SUP oval frames aside. Cut away the center of the remaining 3 oval frames. Stack and glue these oval rings together, forming a chip board. 


Keeping and putting aside the SUP lattice off cut for later. To this chipboard frame apply the Forest Moss ink with the foam tool, adding a little Walnut Stain ink to the edges only. Apply Versamark to the frame, clear embossing powder then fix this with the heat gun. Repeat this if needed, so you have a glossy finish over the oval circle. Adhere the remaining SUP Lattice frame to the left side of the center. This will become your guide for he placement for the Fuchsia spray. 


Taking the clear card stock, cut this to fit the card base front. This will be your card front. Use the stamp positioner to align the stamp, for the Fuchsia spray. Remembering you will be stamping with stazon on the flip side of the clear card stock (This is because when you use alcohol ink, it will distort the stamped image. So you need to apply the color on the flip side of the stamping.) If you make a mistake, you can remove the ink and alcohol with the blending solution. (But make sure the surface it is dry and clean before continuing.) Color the image with the alcohol inks.


 Taking the remaining SUP lattice frame centers. Cut and glue to the card front base. Arranging as shown in the photo. Add a very light application of the Forest Moss ink with the foam ink tool. Apply the Walnut Stain to the edges of the base card front. Adhere the clear card stock card front to the base at the frame with the wet glue. When the glue is dry, do the same with the chipboard frame. Holding down so the frame will not slip out of alignment while drying. Taking the HCD-750 Cut Mat Create die set and the S5-218 die set. Find the small tag die and die cut using the SUP A$ card stock. Ink all edges with the distress inks. Stamp the sentiment on the top tag.


 Adhere the tags together with cut to size Double Dots. Adhere the tag to the lower right of the frame.
*********
So much fun can be had, coloring with all those bottles of alcohol ink that we have stashed in the back cupboard...LOL
Love that oval frame....you can do so much with it!
Till next week, have a scrappy day, inky hugs,
Sussipoppins xox

Wednesday, May 27, 2015

Heartfelt Creations Wednesday

Hello to all visiting my place today.
This Cascading Fuchsia Collection card looks simple, but it sure has a elegant charm!
It is such a shame the photo's don't do it justice.
Take the time to follow the text, then you will see. Have fun.


Heartfelt Creations Products And Products Sold On Our Website: 

Other Products Used: Papers: Perkament vellum. Card Stock: SUP Natural White, Core'dinations core color CS Nightfall FB040-12 Spellbinder Dies: LF-110 Grand Nestabilities Ovals 2nd largest size, S5-031 Fancy Tags Three. Other: Stazon black ink, Double sided Tape, Bone folder, E-boss A4 embossing folder Sanding paper, White gelly-roll 08 pen 


Instructions: The finished size of this card is, 14.8 cm x 21 cm. Taking the SUP A4 card stock, for the card base, fold in half. Use the bone folder to sharpen the fold. Cut the vellum and core'dinations card stock to, 14.8 cm x 20.4 cm. this is your card front. Using the Grand oval die cut an oval from the core'dinations card front. Emboss with the embossing folder, then sand the embossing to expose the white core. With the gelly-roll pen, draw and the edge of the oval. 


Taking the vellum, stamp the image from the Vining Fuchsia stamp with the Stazon. On the flip side of the stamping using the two finest nibs from the Deluxe Flower Shaping Kit, trace and fill in the image. Where you do this, it will become white and ball a little on the reverse side. 


Careful not to press too hard or you will make a whole in the paper. Taking a scrap of vellum, core'dinations and spellbinders tag die, die cut a tag from each. Once again using the same nibs from the Deluxe Flower Shaping Kit, trace on the vellum tag the embossing area of the die. (You will not be able to emboss the vellum in the normal way. The velum will crack and break) Stamp the sentiment on the tag using Heartfelt Sentiments Stamp Set. Adhere this to the core'dinations tag with finely cut strips of double sided tape behind the stamped words. 


To put all together: Adhere the core'dinations card front to the vellum with double sided tape, then to the card base. Adhere the tag with double dots to the card front center bottom.
*******
Now you need to get into your craft space and get started.
Don't forget over at scrapbookdepot, they have the goodies...at least you can order them there.....and when you are done here...get back over to Heartfelt Creations......because there is so much great stuff going on over there this week. Warning....you will spent most of the day there! So brace yourself!
You all have a wonderful scrappy day,
scrappy Inky hugs sussipoppins


Wednesday, May 20, 2015

"As You Recover"

Hi!
Funny...this is so apt for today......the net work was down...we have just got it back!
So I am recovering! LOL
That is a very good thing, but, it was a bit scary! It made me realize how much we have become dependent on the net! When you think about it..what would we do if we didn't have it any more.
I know!
......more time to craft!......

This card is one of two I made for this week. Basically the same but with a little difference.
I hope you get to try them both.

 HCPC-3671 Fuchsia Clusters Stamp Set 
 HCPC-3673 Heartfelt Sentiments stamp Set 
 HCPC-3658 Daisy Flourish Stamp Set 
 HCD1-761 Everyday Heroes Die Set 
 HCST1-401 Deluxe Flower Shaping Kit 
Double Dots 
Art Institute Glue 
Metal Glue Tip
Stamp Pad Mat 
Stamp Postioner Kit Other Products 

Used: Paper: Purple. Card Stock: SUP A4 Natural White x 2, Very Vanilla. Ranger: Stickles, Heat Gun, Water Coloring Brush, Water Mister, Ink Foam Tool. Inks: SUP: Rich Razzelberry, Blushing Bride, Perfect Plum, Old Olive, Mossy Meadow. Other: Versa-mark, Gold Embossing Powder, Fussy Cutting Scissors, Double sided Tape, Organza Ribbon, Gold thread and needle, Glue dot. 

Instructions: The finished size of this card 25 cm x 10.5 cm. Using the A4 SUP Natural White card stock cut to 25 cm x 21 cm, fold at 10.5 cm. This is your card base. Take the Purple paper, cut to 24.5 cm x 10 cm. This will be your card base matting #1. Taking the Daisy Flourish stamp set, gold emboss stamp the small image around the edge of the paper. 


To make the card front, use the SUP natural White, cut this to 23.5 cm x 9 cm. Using the FUCHSIA CLUSTERS stamp set, stamp positioner kit and Gold embossing powder, stamp the images on to the card front. Stamp the same images also onto the Very Vanilla cardstock, this is to be fussy cut after coloring. Color all stamped images with the SUP inks. Fussy cut the images from the Very Vanilla card stock. Apply, cut to size double dots to the back of the fussy cut pieces.


Gold emboss stamp and die cut the sentiment circle using the HCPC stamp and HCD die sets. Die cut 3 extra sentiment circles, glue these together to make a chip board, gluing the stamped circle to the top. Apply cut to size double dots to the back of this. Make a triple bow from the ribbon. 


Putting it all together: Adhere the first 2 layers of matting with double side tape to the card base. The card front, adhere with double dots. Place the fussy cut flower heads and leaves on top of the stamped image on the card front. Adhere the circle sentiment in the center of the card. Place a few leaves to the top and bottom of the sentiment. Adhere the bow to the sentiment with a glue dot. To finish apply stickles to the stamen ends and the points of the Fuchsia buds.


*****
Hope you had fun....now for the second twist on the same card.

Heartfelt Creations Products And Products Sold On Our Website:
HCDP1-254 Cascading Fuchsia Paper Collection
HCPC-3671 Fuchsia Clusters Stamp Set
HCPC-3673 Heartfelt Sentiments stamp Set
HCD1-761 Everyday Heroes Die Set
HCST1-401 Deluxe Flower Shaping Kit
DDOTS  Double Dots
159723 Art Institute Glue
352854 Metal Glue Tip
SMP001 stamp Pad Mat  
387623 Stamp Positioner Kit

Other Products Used:
Paper: Purple.  Card Stock: SUP A4 Natural White x 2, Very Vanilla. Ranger: Stickles, Heat Gun, Water Coloring Brush, Water Mister, Ink Foam Tool. Inks: SUP: Rich Razzleberry, Blushing Bride, Perfect Plum, Old Olive, Mossy Meadow. Other: Versa-mark, Gold Embossing Powder, Fussy Cutting Scissors, Double sided Tape, Organza Ribbon, Gold thread and needle, Glue dot.

Instructions:
The finished size of this card 25 cm x 10.5 cm. Using the A4 SUP Natural White card stock cut to 25 cm x  21 cm, fold at 10.5 cm. This is your card base. Take the Purple paper, cut to 24.5 cm x 10 cm. This will be your card base matting #1. From the paper collection, chose paper for the matting #2, cut this to 24 cm x 9.5 cm.


For the card front, use the SUP natural White, cut this to 23.5 cm x 9 cm. With the FUCHSIA CLUSTERS stamp set, the stamp positioner kit and Gold embossing powder, stamp the images on to the card front. Stamp the same images also onto the Very Vanilla card stock, this is to be fussy cut after coloring. Using the prick tool, prick the embroidery wholes .5 cm from the edges on the card front. Backstitching this with the gold thread. Ravel the edges of all the cut paper and card stock with the distressing tool. 


Color all stamped images with the SUP inks. Fussy cut the images from the Very Vanilla card stock. Apply, cut to size double dots to the back of the fussy cut pieces. 


Gold emboss stamp and die cut the sentiment circle using the HCPC stamp and HCD die sets. Die cut 3 extra sentiment circles, glue these together to make a chip board. Apply cut to size double dots to the back of this. Make a triple bow from the ribbon. 


Putting it all together:  Adhere the first 2 layers of matting with double side tape to the card base. The card front, adhere with double dots. Place the fussy cut flower heads and leaves on top of the stamped image on the card front. Adhere the circle sentiment in the center of the card. Place a few leaves to the top and bottom of the sentiment. Adhere the bow to the sentiment with a glue dot. To finish apply stickles to the stamen ends and the points of the Fuchsia buds.
*******

I hope you had fun...you can see I have become addicted to gold embossing!
I love it. I find, I get such a elegant rich effect with this....the only thing is....I have to sock up on more! I am running out!....
Secrets out...I had a shopping appointment today....and I am sure you understand, that will not be cancelled for any reason! LOL
A quick inky scrappy hug before running out the door.
XOX

Wednesday, May 13, 2015

'CELEBRATING YOU'

Hi!
I did a  "Mixed Media Tag" art work for the launch of the new collection.
'CASCADING FUCHSIA'
A tag is always fun, not too big but enough to make a statement.
These Fuchsias are fun to make and can be made in all colors to enhance any project....a must have on the shopping list!

There is also a new die that has come with this collection. Today I made a mask from it...read on and find out how to. Have fun!

Heartfelt Creations Products And Products Sold On Our Website:
 HCDP1-254 Cascading Fuchsia paper Collection
HCPC-3668 Cascading Fuchsia Stamp Set
HCPC-3672 Fuchsia Bouquet Stamp Set
HCPC-3547 Bold Leaf Cling Stamp Set
HCPC-3667 You Inspire Me Cling Stamp Set
HCPC-3650 Butterfly Medley Cling Stamp Set
 HCD1—761 Everyday Heroes Die
HCD1-761 Cascading Fuchsia Die Set
HCD1-736 Classic Leaf Die
HCD1-759 Butterfly Medley Die
 HCST1-401 Deluxe Flower Shaping Kit
Double Dots 100pc. -3D Foam Squares
Art Institute Glue - Dries Clear
Metal Glue Tip - Art Institute
 Clear Cardstock 12 x 12
Clear Cardstock 8.5 x 11
 Stamp Mat Pad
3-D Crystal Lacquer
Stamp Positioner Kit
Spellbinders Tool N' One

Other Products Used: Card Stock: SUP A4 Very Vanilla, Purple Bazzill , scrap card stock Ranger: Prick Tool, Stardust Stickles, Paper Distressing Tool, Heat Gun, Water Coloring Brush, Water Mister, Foam Ink Tool. Distress Inks: Crushed Olive, Black Soot, Seedless Preserves, Forest Moss, Warn Lipstick. Adirandack alcohol ink: Lettuce, Stream, Current, Terracotta. Other: Gesso, Viva modellier Crème 908, Spatula/old credit card, Versa-mark, Gold Embossing Powder, Beads, Double sided Tape, Double Sided Foam Tape, Karan Fosters Wax String, Spellbinders S4-116 Standard circles small, Glimmer mist Haunted Shadow 61180, Green Linen string, Cardboard box/chipboard. 


Instructions: The finished size of this Tag is 21.2 cm x 12.8 cm. The photo size,3 cm x 3.5 cm. Cut the tag shape out from the Purple card stock and the paper from the paper collection. Taking the “Cascading Fuchsia” stamp set and the matching die, stamp and die cut using the Very Vanilla card stock. Color the Fuchsias with the distress inks. Prick a whole in the center of the flowers. Ball and shape with the Deluxe Shaping Kit.


Using the waxed string, tie a knot tin one end then thread all the layers and a few beads. Apply glue between each layer to secure. Making 9 flowers and 1 flower bud.


Taking the “Bold Leaf “stamp set, use the Forest Moss ink to stamp. Die cut using the matching die set. To make the circle sentiment, use the “You Inspire Me” stamp set. Stamp with gold embossing powder then die cut using the circle dies from the Spellbinders S4-116. For the Celebrating You sentiment, use the “You Inspire Me” stamp set and the “Everyday Heroes” die set. Ink around the edges of both sentiments with Seedless Preserves.


Find the paper with the lace edges strip in the paper collection, cut out. Making a mask from the “Cascading Fuchsia” die, the oval lattice. Cut this x 3 from scrap card stock. Cut away the out side frame. Glue the lattice together to form the mask. Use the same die and Purple card stock to make a extra frame, add a little gesso to the frame then put aside. Taking the tag made from the paper collection, bring a layer of gesso to the tag. Using the mask, apply the gold medium. When dry, apply a thin layer of gesso so the gold is not too overpowering but you still see it. Using Glimmer mist, spray a little color, misting with water when needed. Let it run over the tag.


Taking the gold embossing powder and the “Fuchsia Bouquet stamp set, stamp on both right side corners. Ravel the edges of the tag with the distressing tool. Apply versamark to the edges here and there, gold embossing powder then fix with the heat tool. Adhere the two tags together with Double Dots. For the photo, cut a piece of cardboard from a box to fit. Adhere this together. Sand the edges of the photo to give a white distressed edge.


To put it all together: In the following order, adhere the paper lace strip, the purple frame to the left side of the tag, place and arrange the top cluster of Fuchsia flowers and leaves. Place the photo using Double Dots to give extra height. Arrange and adhere the sentiments to the right of the photo. Arrange and adhere the small cluster of leaves and Fuchsias to the lower left and under the photo. Take 3 lengths of green string to tie a bow at the top of the tag.


 To make the clear butterflies, take the clear card stock and stamp the butterflies with the Butterfly Medley” stamp, using Stazon ink. Die cut with the matching die. (Note: this will not cut through the clear card stock but it will give you a cutting line to go by.) Cut the images out then color with the alcohol inks. (Note: Add color from the flip side of the stamping or the alcohol will smudge your image.)

To finish, bend the wings up from the body and adhere to the tag with cut to size glue dots.

*********
I hope I have inspired you to come out of your box and try some of this icky inky fingers fun?
Don't you just love those clear butterflies? I have gotten addicted....all over again!
another one for the list!
Don't forget to get to the Heartfelt Creations blog for more eye candy....this week, is a total explosion of yummy over there! One after the other! So brace yourself!

TIP FOR THE DAY: "if you can't beat 'em join 'em"
Well, thats what I am going with today and I'm holding onto it.....LOL
You all have a happy scrappy day and inky love,
till next time, sussipoppins hugs

Thursday, May 7, 2015

"Once Upon a Time"

Hello to you,
I thought, a white lacy background for this card was needed to show off the lovely Broken hearts and Humming bird. Both a treasure for any well loved "Once upon a time" garden.


Heartfelt Creations Products And Products Sold On Our Website:
HCPP1 Romantique Garden Paper Collection
HCD 744 Arianna Lace Die
HCD 729 Decorative Blossom Corner Die
HCD 744 Once Upon a Time Die
HCPC 3642 Romantique Wings Cling Stamp Set
HCPC 3594 Time Sentiments Cling Stamp Set
3-D Crystal Lacquer
Double Dots 100pc
Stamp Positioner Kit
Deluxe Flower Shaping Kit
Spellbinders Tool N' One

Other products used: Ink: Prima Marketing tan, Archival Jet Black, Paper: SUP A4 neutrals white x2, A4 very vanilla x1, Derwent ink-tense pencils, water coloring paintbrush, Spellbinders Majestic Elements S5-161, White seam-binding ribbon, Distress tool, Diamond stickles, Fussy cut scissors, Bone folder


The size of this card is 14 cm x 21 cm: Taking the A4 neutral cards, fold one in half, this is the base card. With the second card cut 18.7 cm x 13.4 cm., this is the card front. From the paper pad, find the paper with green background and white bleeding hearts. Cut to 14.2 cm x 20.6 cm., this is the matting; distress the edges of the paper. Adhere both matting paper and neutral card to the base card with double dots.


Cut from the very vanilla card; the frame and oval from s5-161, lace points from HCD 744, large lace corner from HCD 729, Stamp and cut the sentiment from HCPC 3594 and HCD 744. Using the stamp positioner stamp the image from HCPC 3642 on to the oval shaped card. Extra stamping for the 3d work; stamp both the image of the bleeding hearts and bird, and the stork of bleeding hearts from the same stamp set. Color all images, then fussy cut for the 3d.


Using the blossom tool and molding kit, bring shape to the bird and bleeding hearts. Adhere these to your work with the double dots. With the tan ink, ink the edges of the oval, lace frame and lace triangle. Apply; stickles to the Arianna lace points and crystal lacquer to the sentiment. To attach the triangle lace, use a thin strip of double-sided tape, this will be placed just under the frame and ribbon.


 Adhere the frame with double dots. Cut and adhere a length of ribbon on the right of the card. Make a double triple bow from the ribbon then adhere to the corner of the lace triangle. The placement for the sentiment is on top of the ribbon knot.


Tuck and adhere the lace points behind the bow. Apply the crystal lacquer to the humming bird to finish.
************

Thank you for taking a few moments to visit today, there is so much eye candy at the Heartfelt blog this week! When is there not? I hope you can take the time to look at each of the posts over there. Just you wait till the new releases comes out the following week....it will blow you away....
Till then have a scrappy day, inky hugs,  sussipoppins xox
********
I just want to make aquick Post Note: 
For those that live in Holland....you can order the Heartfelt products from Cindy and Ewerin at Scrapbookdepot. If they don't have what you want in stock...you know it...they will oder it in for you. This is great, as you can also get the ones that got away...back order. Also, the ones you are yet to catch....pre-order. Have fun choosing which to get this time round....sorry for the headache....LOL