

HEARTFELT CREATIONS PRODUCTS AND PRODUCTS CARRIED IN THEIR WEBSTORE:
Products Used:
3D Clematis Shaping Mold, HCFB1-5006
Climbing Clematis Paper Collection, HCDP1-2128
Clematis Cling Stamp Set, HCPC-3954
Clematis Die, HCD1-7355
Clematis Birdhouse & Trellis Cling Stamp Set, HCPC-3956
Clematis Birdhouse & Trellis Die, HCD1-7357
Elegant Especially for You Cling Stamp Set, HCPC-3934
Elegant Especially for You Die, HCD1-7319
Eyelet Oval Die, HCD1-776
Deluxe Flower Shaping Kit, HCST1-401
Deluxe Flower Shaping Paper Pack of 50 - White, HCPP1-475
Designer Dries Clear Adhesive, 159723
Metal Tip for Adhesive Bottles, 352854
Groove Golf Tool Set, DMCT4185
Spellbinders Tool N' One, 359848
Ranger Archival Ink Pad - Sepia, RACP505
Ranger Archival Ink Pad - Library Green, RACP475
Heat It Craft Tool, RAHT
OTHER PRODUCTS USED:
Stamping Up water colour pencils:-Gorgeous Grape, Garden Green, Razzleberry, Early Espresso, Daffodil Delight, Old Olive. Other: Double sided tape, Double sided foam Tape, Hot glue Gun, Fussy cutting scissors, Glitter, Pattern making tracing tool, Ruler.
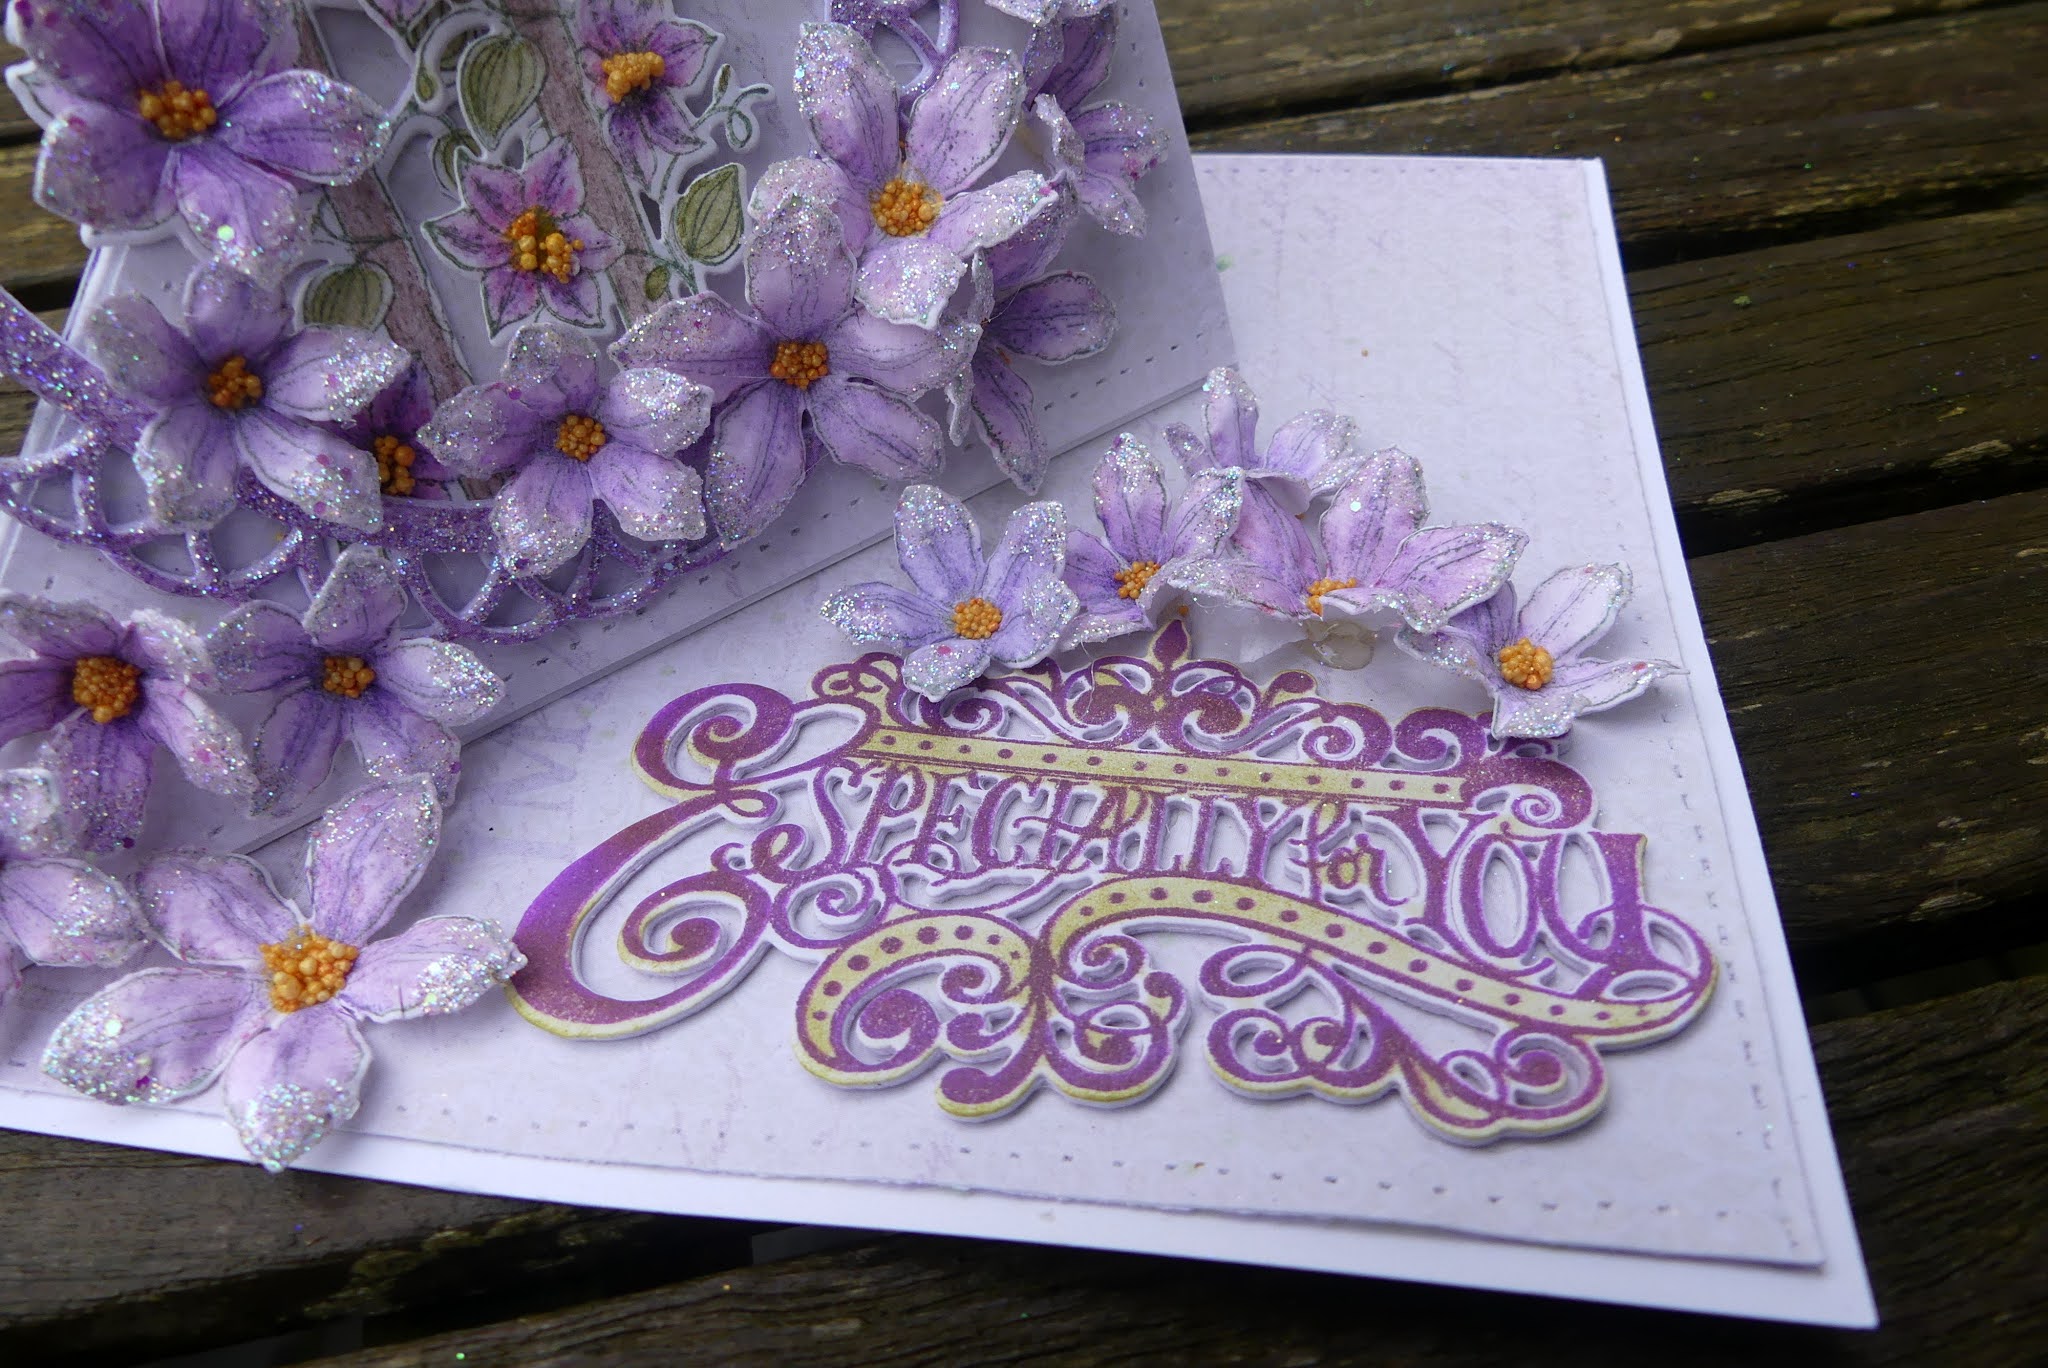
INSTRUCTIONS: this is a twisted triangle easel card, 6“x 6“
Using the white card stock to make the card base by cutting this to 12“x 6“, make the fold at 6 “. Make a diagonal fold from the card front from the left foot corner to the top right corner.
Find the design paper sheet 2 B in the collection paper pad. Use this to mat the card fronts. The only part that is not matted is the back of the card. Cut all the card matting a little smaller than the card base. Using the pattern making tool, the stamp mat pad and a ruler to make small holes along the matting edges. Adhere all the matting in place using the double sided tape
Make the sentiment by stamping with the sepia ink onto the white card stock, die cut this plus 3-4 extra die cuts. Adhere all together then adhere to the card inside at the foot, to the right.
Taking the eyelet oval die set and die cut using the outer part of the die. Do this twice from the design paper sheet 11 B and 3-4 times from the white card stock. Adhere all together, having the front and back of the frame showing the design paper. Apply glitter to the frame by applying the adhesive with the hydra sponge then sprinkling the glitter over this. When dry tap away the excess, using a tray to catch the glitter. Adhere this to the card front at the right side of the fold in the card front. (so the half of the frame is open when the card is open.
All the rest of the stamping is done with the library green ink. Make two birdhouses buy stamping and cut out using the matching die. Stamp and cut out the clematis flowers. Use the color list to color in the images. Bring shape to the flowers by using the collection mold, use the flower shaping tools in the flower centers to shape the flowers more. Apply adhesive to the flower petals the same as the eyelet frame. Apply a little clear drying adhesive to the flower centers and sprinkle the prill beads to the centers. When dry tap away any excess prills.
Adhere first the birdhouses to the card front, in the frame as seen in the photo of the card. Arrange the flowers around the birdhouse and frame then adhere with the hot glue gun. Do the same for the card stop, above and to the left under side of the sentiment.


Just Gorgeous and so cleverly made ! Love it !
ReplyDelete