Wednesday, October 27, 2021

Today's inspiration is thanking you so much

Featuring the 'Seasonal Wreath' collections from Heartfelt Creations.
Lots and lots of details in in this collection.

 Aren't these cute little owls adorable. Great to finish off any card or craft project.


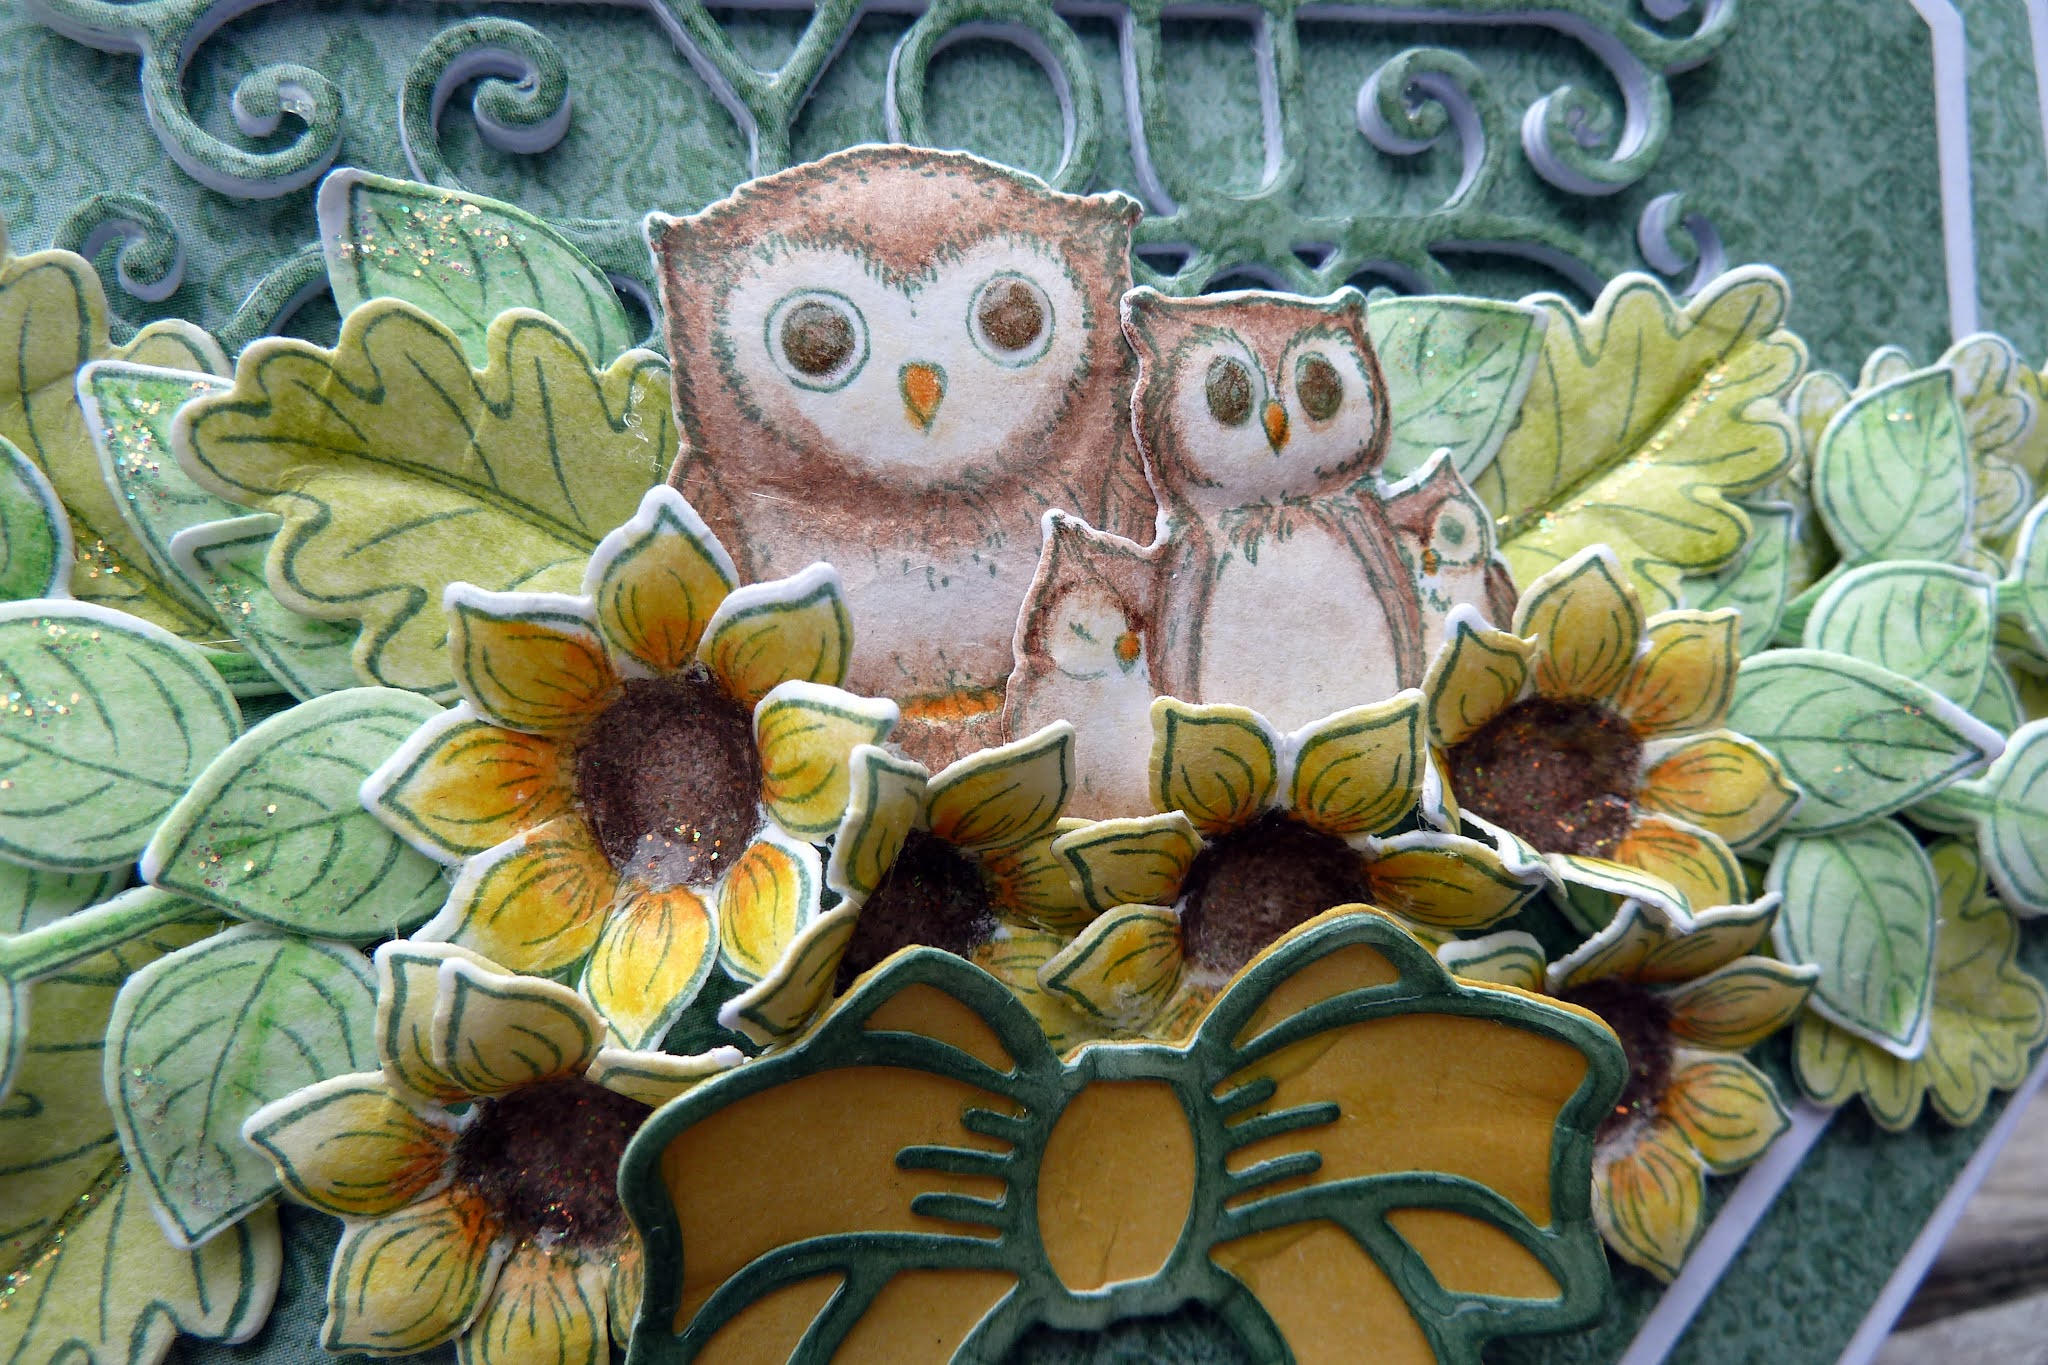
I love this bow! I chose to use it this way so you can see through it. The bow has a background die with it. It looks fantastic with a gold backing.

FOR A PRINTOUT ON THIS CARD GO HERE

Heartfelt Creations products and products sold on their website: HERE

HCDP1-2132 Seasonal Wreath Paper Collection 

HCD1-7375 Seasonal Wreath die set

HCPC-3966  Autumn Seasonal Wreath Accents cling stamp set

HCD1-7573 Autumn Seasonal Wreath Accents die set

HCPC 3965 Summer Wreath Accents cling set

HCD1- 7372 Summer Wreath Accents die set

HCPC- 3846 Thank You Sentiments cling set

HCD2-7327 Elegant Swirl Gateway die

HCPP1-475  Deluxe Flower Shaping Paper Pads pack of 50-white

HCST1-401- Deluxe Flower Shaping kit

HCDA1-449- Stack and Store Daubers pack of 6

409311 Color in Watercolor Brush fine

RACP475 Ranger Archival Library Green ink

RACP436 Ranger Archival Viridian ink

159723 Designer Dries Clear Adhesive

352954 Metal For Adhesive Bottles

DDOTS- 3D Double Sided Foam Dots

85-Glitter Crystal Ultrafine Transparent Glitter 1/2oz

3D1844 3D  Crystal Lacquer 4oz

ANC818 Go-Man-Go Prills

 Other Products used:- Inks used: spectrum Noir aqua pencils: Bison, Straw, Persimmon, Cherry, Mango, Pesto Green, Iris. Other: Paper trimmer, Hot glue gun, Double sided tape, Double sided 3D foam tape.

INSTRUCTIONS:

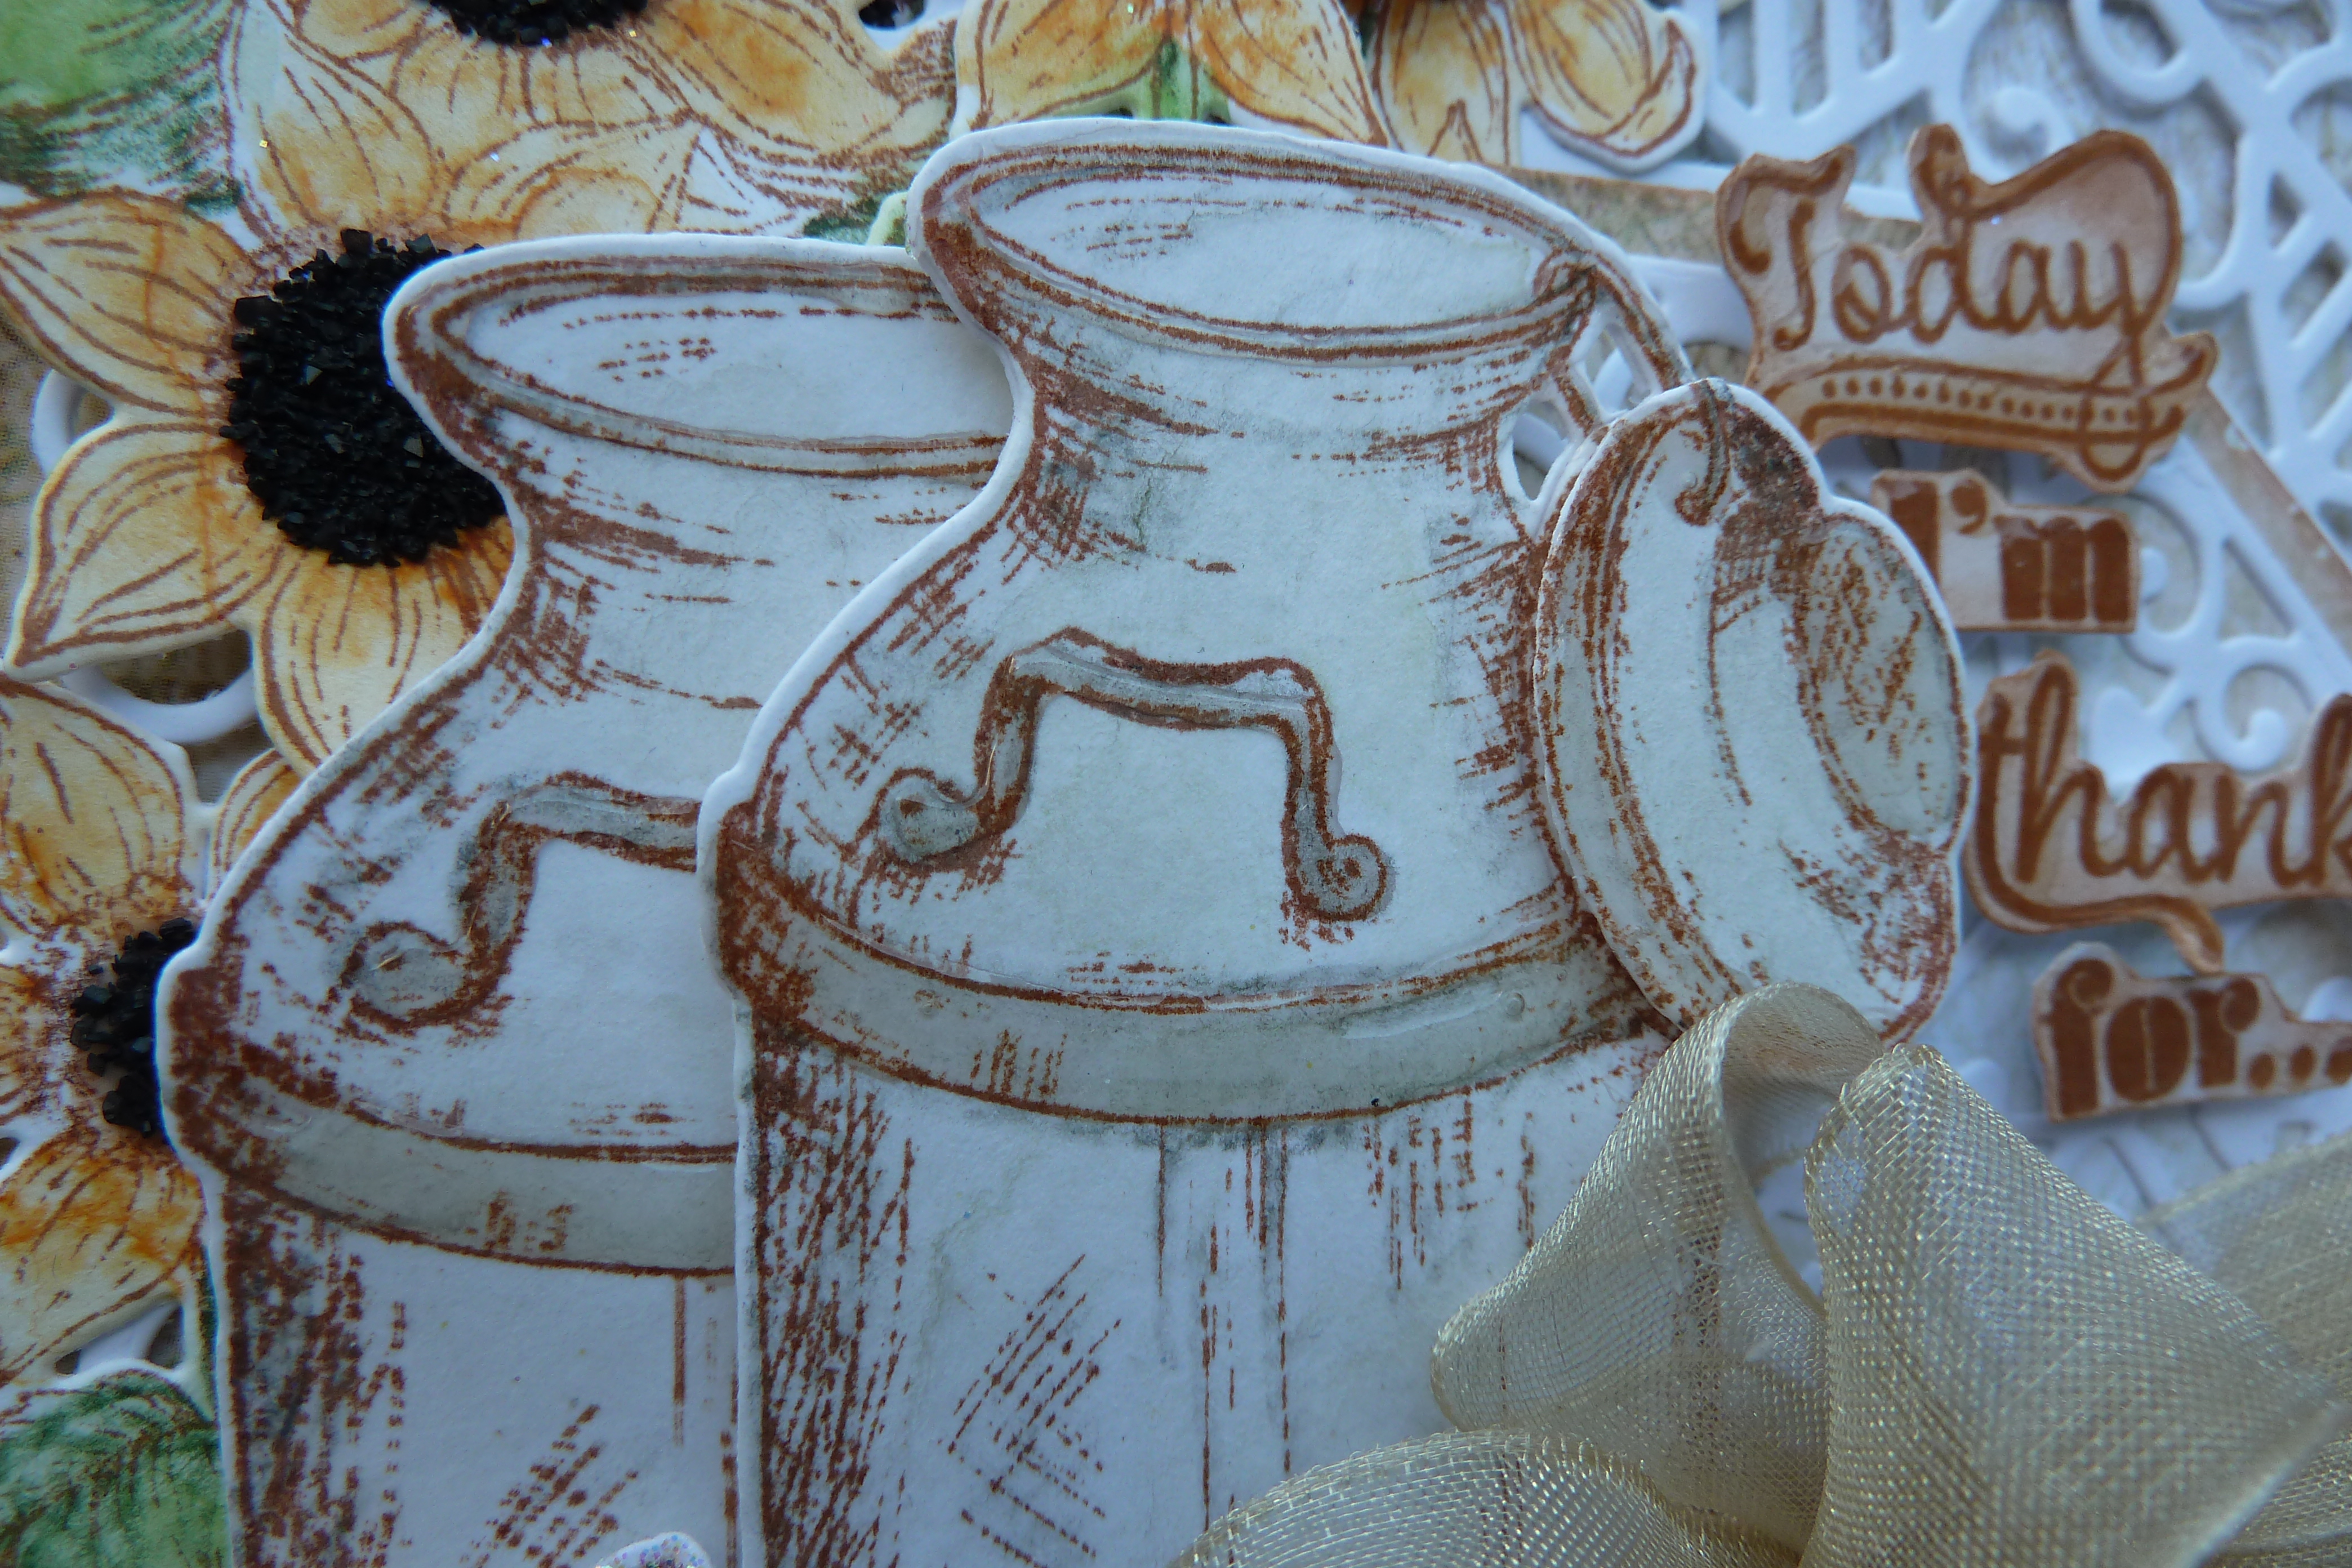
Make the card base by using the outer die from the Elegant Swirl Gateway die set and the white card stock. Die cut twice then with the  score-pal, make a 1 / 2 “ score line across the top of one of the card bases. Apply double sided tape to above the fold then adhere both card bases together. Using the Viridian ink and a dauber ink the edges of the card front. Taking a green based design paper from the paper collection and the large lace die frame from the Elegant Swirl Gateway set, die cut the lace frame. Adhere this to the card base. With the next frame in from the die set and the white card stock, cut four of these frames. Adhere them together then apply clear drying adhesive using a hydra sponge to the top layer, sprinkle glitter over the adhesive. When dry tap away the excess glitter then adhere to the card front. Die cut from the white card stock the background wreath, ink this with the Viridian ink with the aid of a dauber. Adhere this to the card base with 3D foam dots. This will be the base for all the elements.To make all the elements for this card use the library green ink for the stamping onto the white card stock. Colors used for the stamped elements are: The set of owls, bison, straw and persimmon pencils. The flowers, sunflower, cherry and mango pencils. The grapes and leaves, iris, pesto green and cherry pencils. Die cut the stamped images with the matching die sets then bring shape to them by using the flower shaping tools. Die cut the bow and apply clear drying adhesive to it with the aid of a hydra sponge then sprinkle glitter onto it. Make a sentiment banner by stamping the sentiment with library green ink onto white card stock then cut the ends as seen in the photo. Ink the edges with the Viridian ink.Adhere all the elements to the wreath base, clustering as seen in the photo using the hot glue gun and the clear drying adhesive. Cut the sentiment banner in half and adhere one half on each side of the wreath. Apply the crystal lacquer to the owls eyes and the flowers. Sprinkle the prills onto the flower centres.

Have a great day and week with inky fun,

 hugs Susan


Wednesday, October 20, 2021

Inspiration Wednesday at Heartfelt Creations

 with a slimline shaker card,' Bee You'


INSTRUCTIONS:

This slimline shaker card measures 4 “ x 8  1 / 4 “ when completed.

Taking the white card stock cut to 8 “ X 8  1 / 4 “ and fold to 4 “ x 8  1 / 4 “ to make the card base. Cutting also a card front, measuring 3  1 / 2 “ X 7  3 / 4 “ .

Taking the design paper sheet 6 B, cut this to measure a little smaller than the card base, adhere in place.  Do the same but using the sheet 12 B for the card front matting. Adhere this to the card front.

Taking the circle die from Large circle die set and die cut a circle into the card front about 1  1 / 4 “  from the foot of the front. Taking the clear card stock and cut so the hole will be covered plus extra. Adhere this to the back of the card front white card stock. Taking the two circle dies to make a layered ring. Make 5 layers and adhere all together. Make also a layer from the design paper sheet 6 B, adhere this also in place. Adhere this ring to the card front. Using 3D foam tape or the 3D Double sided foam dots, apply these to the back of the card front and around the circle opening. Making sure there is enough hight for the shaker elements. Place the shaker elements so they are in the circle when adhered. Adhere the card front to the card base.

To make all the elements for the decorating of the card:- Using the white card stock and the library green ink, stamp, color and die cut with the matching dies from the Summer Wreath Accents set. The  bow is from the Seasonal Wreath die set. Bring shape to the elements by using the flower shaping tool kit. Apply the clear drying adhesive with a small piece of hydra sponge then sprinkle glitter to the bow, the flower centres, the bee’s and butterfly’s wings. Taking the Letters and Numbers die set, and the white card stock, cut each letter for the sentiment BEE YOU four times and once each letter from the design paper. Adhere the layers together. Apply the crystal lacquer to each letter once they are adhered in place on the card front.

The color pencils used are:- The bee; Mango, Bison. The leaves: Pesto green, Cypress, Parakeet, Spinach. The flowers: Mango, Cheery, Parakeet. The lilacs: Iris. The butterfly’s: Mango, Aqua. The birds: Soft Red, Sky Blue, Mango, Persimmon.

To put it all together start with adhering the twine from the cluster placement at the top of the card to the top of the circle. Arrange the elements in a cluster where the twine begins as seen in the photo, adhering with the clear drying adhesive and the hot glue gun. Do the same for above the circle letting the elements fall to both sides of the circle.


Visit Here or HERE for a printout of this project from the Heartfelt Creations site


HEARTFELT CREATIONS AND OTHER PRODUCTS SOLD ON THEIR WEBSITE: Found Here.

HCDP1-2132 Seasonal Wreath Paper Collection , HCD1-7375 Seasonal Wreath die set, HCPC-2132 Seasonal Wreath Accents cling, HCD1-7372 Seasonal Wreath Accents die, HCD2-7371 Letters and Numbers die set, Deluxe Flower Shaping Paper Pads pack of 50-white, Deluxe Flower Shaping kit, Clear Card Stock 8.5 x 11, Color in Watercolor Brush fine, Archival Ink Library Green, Designer Dries Clear Adhesive, Metal For Adhesive Bottles, Scor-pal Measuring and Scoring Board, 3D Double Sided Foam Dots, Hydra sponges, Crystal Ultrafine Transparent Glitter ½ oz Glitter, 3-D Crystal lacquer  4oz, Quickstik Tool

OTHER PRODUCTS USED: Inks used: spectrum Noir aqua pencils: Mango, Bison. Pesto green, Cypress, Parakeet, Spinach, Cheery, Iris, Aqua, Soft Red, Sky Blue, Persimmon. Other: Paper trimmer, Hot glue gun, Double sided tape, Double sided 3D foam tape, Bling stones or sequins (for the shaker elements) White and silver bakers twine, Glitter.


Till next time...scrappy inky hugs.


Wednesday, October 13, 2021

We all like wreaths...here we have it in a card.

 ...using the adorable elements in this collection you can make this...


INSTRUCTIONS:

To make the card base and front. Take the white cardstock, the basic centres hexagon die set die cut the card base. Use the outer and the third in die sizes for this. Do the same for the mating using the design paper sheet 12b from the Seasonal Wreath collection paper pad. Using the paper trimmer, cut a little away from each edge of the hexagons from the design paper so they will be a little smaller than the bases. Adhere to the white card bases using the foam 3D tape or dots then both bases together using the double sided tape to form the card front. Die cut another large sized hexagon from the white card stock then score a 1 / 2 “ line across on of the edges. Apply double sided tape to this then adhere to the card front to form a tent fold card.

Taking the white card stock die cut the Wreath base, the bow and twice the holly leaves from the Seasonal Wreath die set. Using the Winter and Autumn seasonal Accents stamp sets and the library green ink, stamp onto the white card stock all the elements needed for this card, colour the stamped elements using the colours listed below then die cut using the matching die sets.

Bring shape to the elements by using the flower shaping tool kit. Adhere in place in layers using the hot glue gun and clear drying adhesive. Apply a little diamond stickles as seen to the apple granites, leaves and flowers. To finish, apply the crystal lacquer to the bow and berries.


Taking the sentiment  and stamp this with the sepia ink onto the white card stock. Trim to size then both the  ends to make a banner. Curl this so you will have an arching banner. Adhere this in place across the card front.

COLOURING LIST: Archival inks:-Seasonal Wreath background- Library green, Sunflower and Red Geranium. Seasonal Wreath background Holly- Library green and Olive. Bow- Library green and Sunflower. Wheat- Sunflower. Berry twigs- Red Geranium. Granite Apples- Red Geranium and Leaf Green. Sentiment: Sepia

 PRODUCTS USED:

Products used from the Heartfelt Creations collections and products sold on their website

HCDP1-2132 Seasonal Wreath Paper Collection 

HCD1-7375 Seasonal Wreath die set

HCPC-3967  Winter Seasonal Wreath Accents cling stamp set

HCD1-7374 Winter Seasonal Wreath Accents die set

HCPC-3966  Autumn Seasonal Wreath Accents cling stamp set

HCD1-7573 Autumn Seasonal Wreath Accents die set

 HCD1-7367 Simple Centre Piece die set

HCPC- 3846 Thank You Sentiments cling stamp set 

HCPP1-475  -Deluxe Flower Shaping Paper Pads pack of 50-white              

HCST1-401- Deluxe Flower Shaping kit

HCDA1-449- Stack and Store Daubers pack of 6

RACP475 Archival Ink Library Green 

RACP505 Archival Ink Sepia

RACP962 Archival Ink Leaf Green

RACP962 Archival Ink Fern Green

RACP482 Archival Ink Olive

RACP993 Archival Ink Red Geranium

RACP005 Archival Ink Sunflower

159723 Designer Dries Clear Adhesive

352954 Metal Tip For Adhesive Bottles

173842 Scor-pal Measuring and Scoring Board

DDOTS- 3D Double Sided Foam Dots

3D1844 3D Crystal Lacquer 4oz

359848 Spellbinders Tool N’ One

Other Products used:-Paper trimmer, Hot glue gun, Double sided tape, Double sided 3D foam tape, Diamond stickles

 Another fun card....till next time, inky hugs.


This Wednesday we have a new Heartfelt Creations release


...it's all about adorableness! 

So, so cute and the whole new collection is wonderful to play with.

HEARTFELT CREATIONS PRODUCTS USED LISTED BELOW:

Seasonal Wreath Paper Collection 

Seasonal Wreath die set

Winter Seasonal Wreath Accents cling stamp set

Winter Seasonal Wreath Accents die set

 Autumn Seasonal Wreath Accents cling stamp set

Autumn Seasonal Wreath Accents die set

Simple Centre Piece die set, Iron Work Sentiments die set, Deluxe Flower Shaping Paper Pads pack of 50-white, Deluxe Flower Shaping kit, Stack and Store Daubers pack of 6, Color in Watercolor Brush fine, Archival Ink Library Green, Leaf Green, Sunflower, Designer Dries Clear Adhesive, Metal For Adhesive Bottles, Scor-pal Measuring and Scoring Board, 3D Double Sided Foam Dots, Quickpick tool

NON HEARTFELT PRODUCTS USED:-Inks used: spectrum Noir aqua pencils:- Oregano, Bison, Mango, Orange. Other: Paper trimmer, Hot glue gun, Double sided tape, Double sided 3D foam tape.

INSTRUCTIONS:

To make the card base and front. Take the white card stock, the basic centers hexagon die set die cut the card base. Use the outer and the third in die sizes for this. Do the same for the mating using the design paper sheet 12b from the Seasonal Wreath collection paper pad. Using the paper trimmer, cut a little away from each edge of the hexagons from the design paper so they will be a little smaller than the bases. Adhere to the white card bases using the foam 3D tape or dots then both bases together using the double sided tape to form the card front. Die cut another large sized hexagon from the white card stock then score a 1 / 2 “ line across on of the edges. Apply double sided tape to this then adhere to the card front to form a tent fold card.

Using the white card stock die cut the Wreath base, the bow and twice the holly leaves. Taking the Winter and Autumn seasonal Accents stamp sets and the library green ink, stamp onto the white card stock all the elements needed for this card, colour the stamped elements using the colours listed below then die cut using the matching die sets.

Using the white card stock die cut the bow from the Seasonal Wreath die set. Using the Iron Sentiment die set, die cut from the white card stock 5 layers of the Thank You sentiment. Die cut also one more from the design paper sheet 12b .Taking the Autumn seasonal Accents stamp set and the library green ink, stamp onto the white card stock all the elements needed for this card, once for the owls. Six of the sunflowers. Five of the leaf sets. Colour the images using the colours listed below then die cut using the matching die sets.

COLOURING LIST: Archival inks:- Bow- Leaf Green and Sunflower. Aqua pencils:- Leaves-Oregano,Sunflowers-Bison, Mango, Orange. Owls-Bison

Bring shape to the elements by using the flower shaping tool kit. Adhere in place across the card front as seen in the photo, using the hot glue gun and clear drying adhesive to do this. To finish the card, apply a little diamond stickles to the leaves and flower centers, apply also the crystal lacquer to the bow and owl eyes.


Saturday, October 2, 2021

Being thankful and saying you are thankful is a wonderful thing...

 here's another way of saying it...


For a print out and all the details go to:
https://www.heartfeltcreations.us/gallery/today-i-m-thankful
There you get all the details of what has been used to make this card.

The size of this card measures 6 “ x 6 “  

Using a ready made 6 “ x 6 “ white card base, make the card front by cutting a 6 “ x 6 “ of design paper, sheet 4A, from the Rustic Sunflower collection paper pad. Ink this paper cut around the edges with the sepia ink then adhere it to the card base using double sided tape. Using the Elegant Hearts Center Piece die set and the white card stock, die cut the outer lacy frame and the center lace frame. With the middle simple frame in the set, die cut the shape from the design paper, sheet 4A. Ink the edges of this also with the sepia ink. Adhere all the frames to the card front using the 3D foam dots or foam tape and clear drying adhesive. Using the white card stock and the sepia ink, stamp all the embellishments needed for this card. Twice the freezer cans, four times the small sized sunflowers with a stem, twice the sunflower clusters and six times the medium sized sunflower petals. First make the freezer cans, use the gravel color for these. Die cut the freezer can lid from one of the freezer can images and adhere in place on the other freezer can with the 3D foam dot. Adhere both cans together as seen in the card photo, then adhere in place on the card front using the 3D foam dots. Then make the sentiment by stamping with the sepia ink the “Today I’m thankful for…” onto the white card stock. Fussy cut the words then ink the edges of the card stock with the sepia ink. Adhere in place to the right of the freezer cans using 3D foam dots. Next make the 3D sunflowers by coloring them with the mango color, shaping them by using the matching mold and the deluxe flower shaping tool kit. Adhere two flower petal layers together for each flower. For the flower centers, apply adhesive to the centers then sprinkle the sand over the adhesive. Put aside until dry. When dry apply to each petal tip using the hydra sponge a little adhesive then dip the petal points into glitter. When the adhesive is dry tap away the excess glitter. Adhere the flowers to the card under the freezer cans. Make a triple bow from the ribbon and adhere this in place using the hot glue gun. Making the flat sunflower clusters and the sunflowers with the stem, use the mango color for the flowers, the parakeet and the spruce colors for the leaves. Die cut all with the matching dies. Apply a blob of clear drying adhesive to the flower centers and sprinkle the black sand on top. When dry, tap away any excess sand. Once the sunflower clusters are colored and die cut, adhere these to the top and under the Elegant Hearts center Piece frame above the freezer cans. Adhere the sunflowers with the stem in place at the side of the freezer cans and the right side of the 3D sunflowers also as fillers to the clusters. To prepare the word YOU, die cut five layers from the white card stock using the larger sized dies from the Letters and Numbers die set. Stack and adhere all the letter layers together using the clear drying adhesive. Apply another layer of adhesive to the top of each letter then dip or sprinkle glitter on each letter. When dry, tap away any excess glitter then adhere the word to the right foot of the card. Finishing the card, apply the crystal lacquer to the words in the sentiment and the details on the freezer cans.

Till next time have a happy scrappy week.
Inky hugs