Friday, November 27, 2020

It's here! The long awaited BLACK FRIDAY!

 ..yes it's that Friday everyone has been waiting for.

These wonderful dies and ready made card bases...to die for...lol.

Showing you a few ideas on how you can use these dies and card bases.

Today I have two posts to share with you, this is one of them. 

Enjoy.


HCPC-2121 Dazzling Dahlia paper collection

HCFB1-494 3D Dazzling Dahlia mold

HCPC-3928 Dazzling Dahlia cling

HCD1-7323 Dazzling Dahlia die

HCPC-3929 Dahlia and Leaves cling

HCD1-7324 Dahlia and Leaves die

HCD2-7327 Elegant swirl Gateway die

HCPC-3930 Elegant Gateway Sentiments cling

HCCB1-495 5 “ X 7 “ Gateway Fold Card-White

RACP500 Ranger Archival Ink Pad- Sepia

RACP436 Ranger Archival Ink Pad- Leaf Green

RACP663 Ranger Archival Ink Pad- Tea Rose

RACP475 Ranger Archival Ink Pad-Library Green

159723 Designer Dries Clear Adhesive

HCDP1-475 Deluxe Flower Shaping paper pack of 50

HCDA1-449 Stack and Store Daubers- pack of 6

ANC814 Lettuce-Entertain-You Prills

 OTHER PRODUCTS USED:

Hot glue gun, Foam Inking tools, Double sided 3D foam tape, Double sided tape, Ranger Archival Ink Pads-Saffron, Fussy cutting scissors, Cardboard (cereal box), Glitter

INSTRUCTIONS:

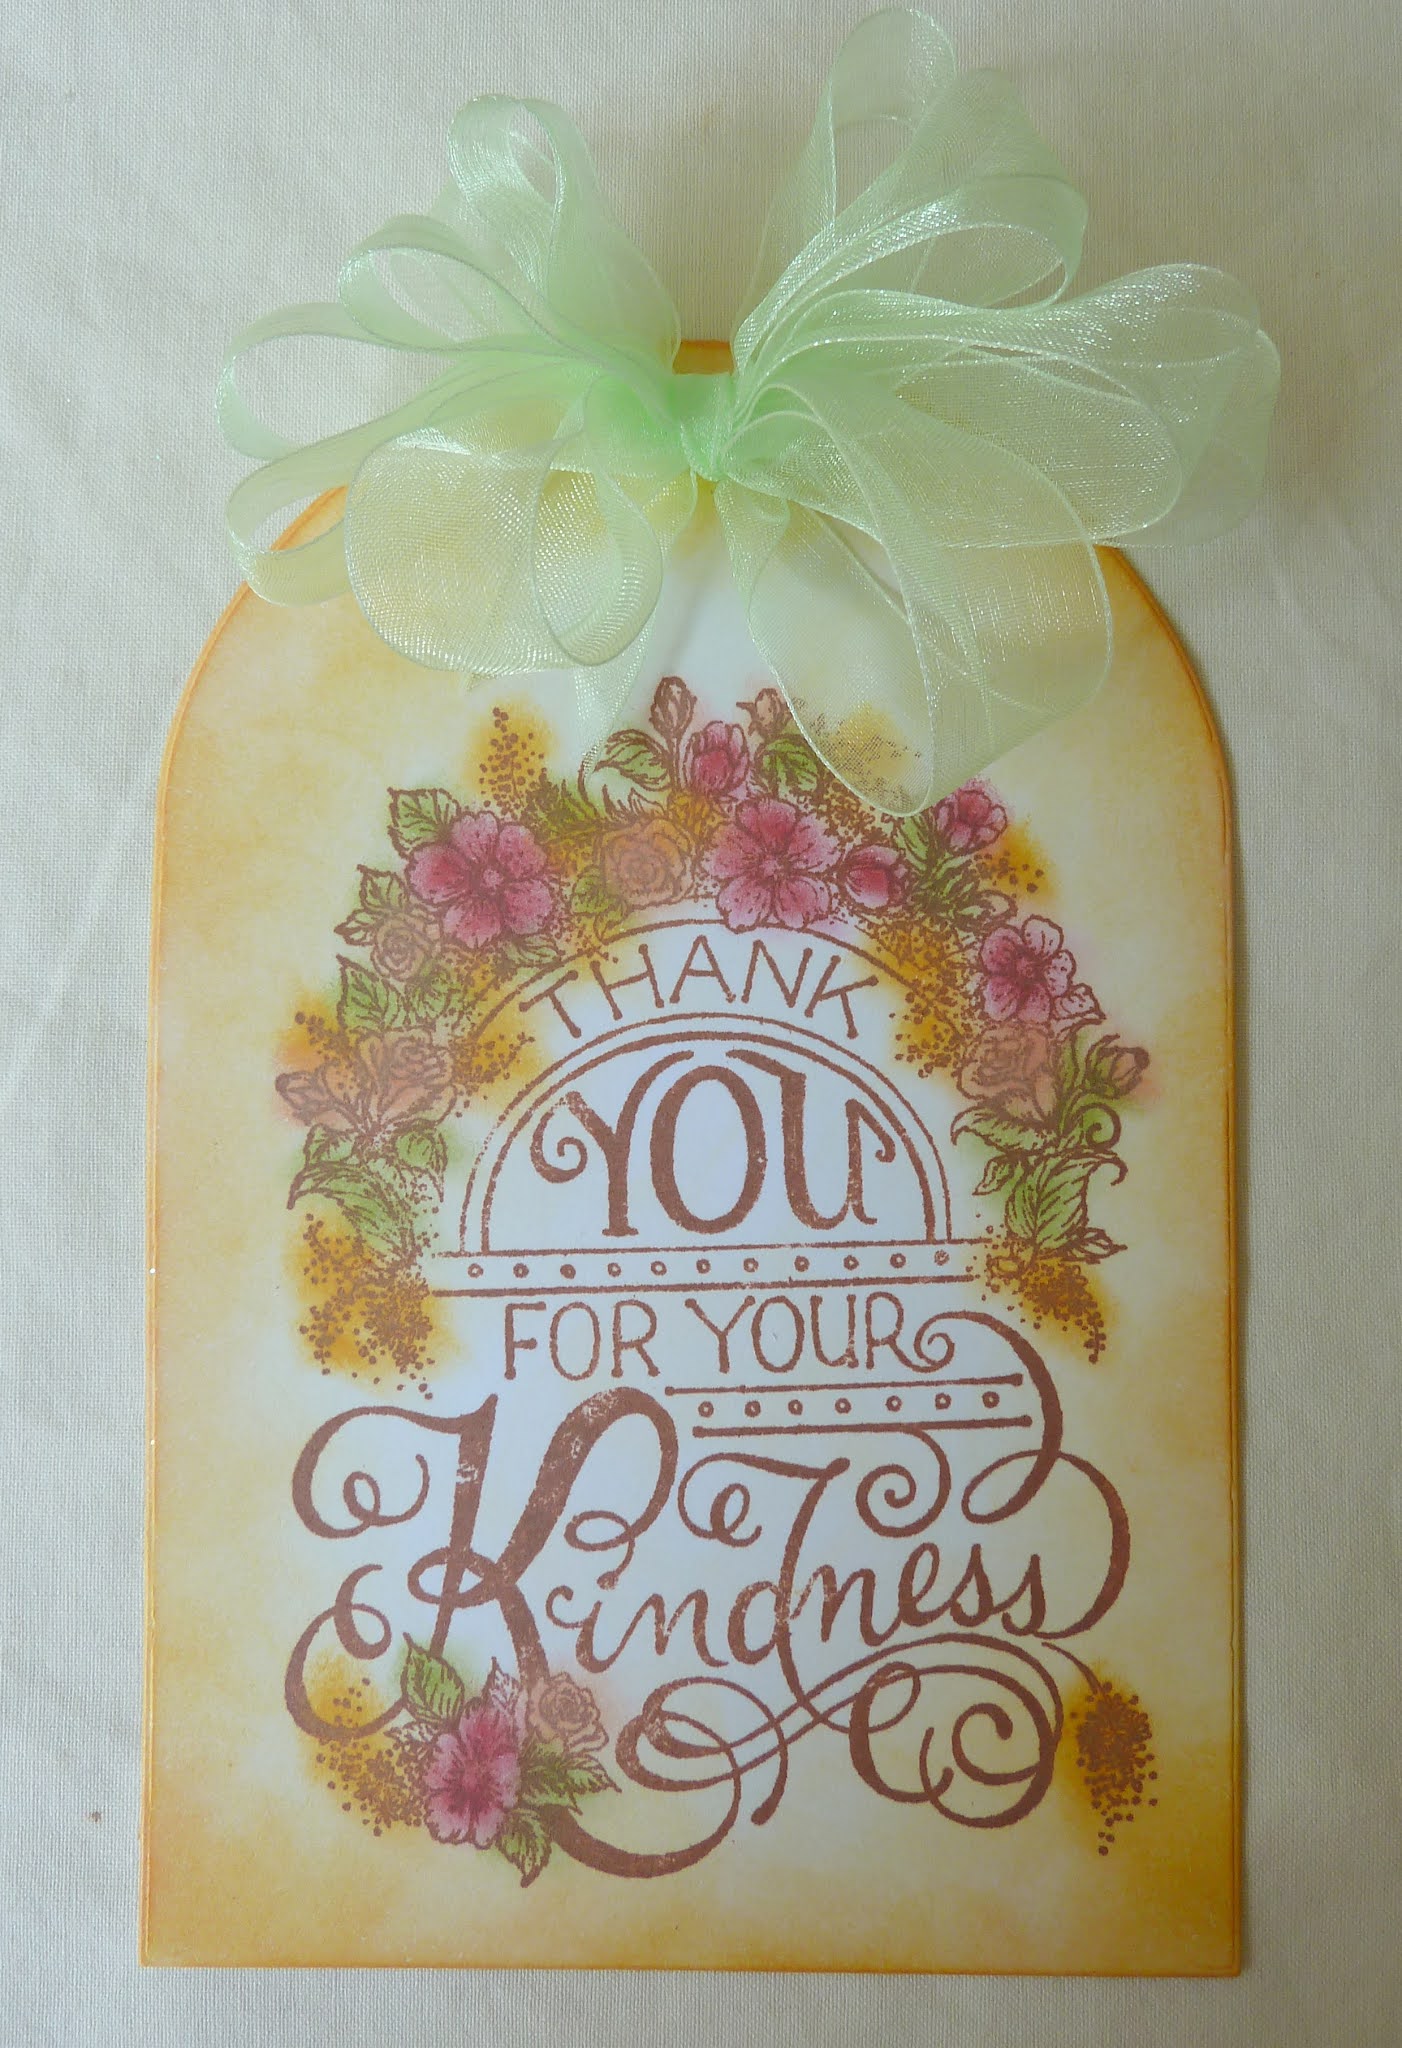
Using the gate fold ready made ready to use card base. The size: 5 inches x 7 inches. Ink the outer edges of this card base using the Tea Rose ink and inking tools.

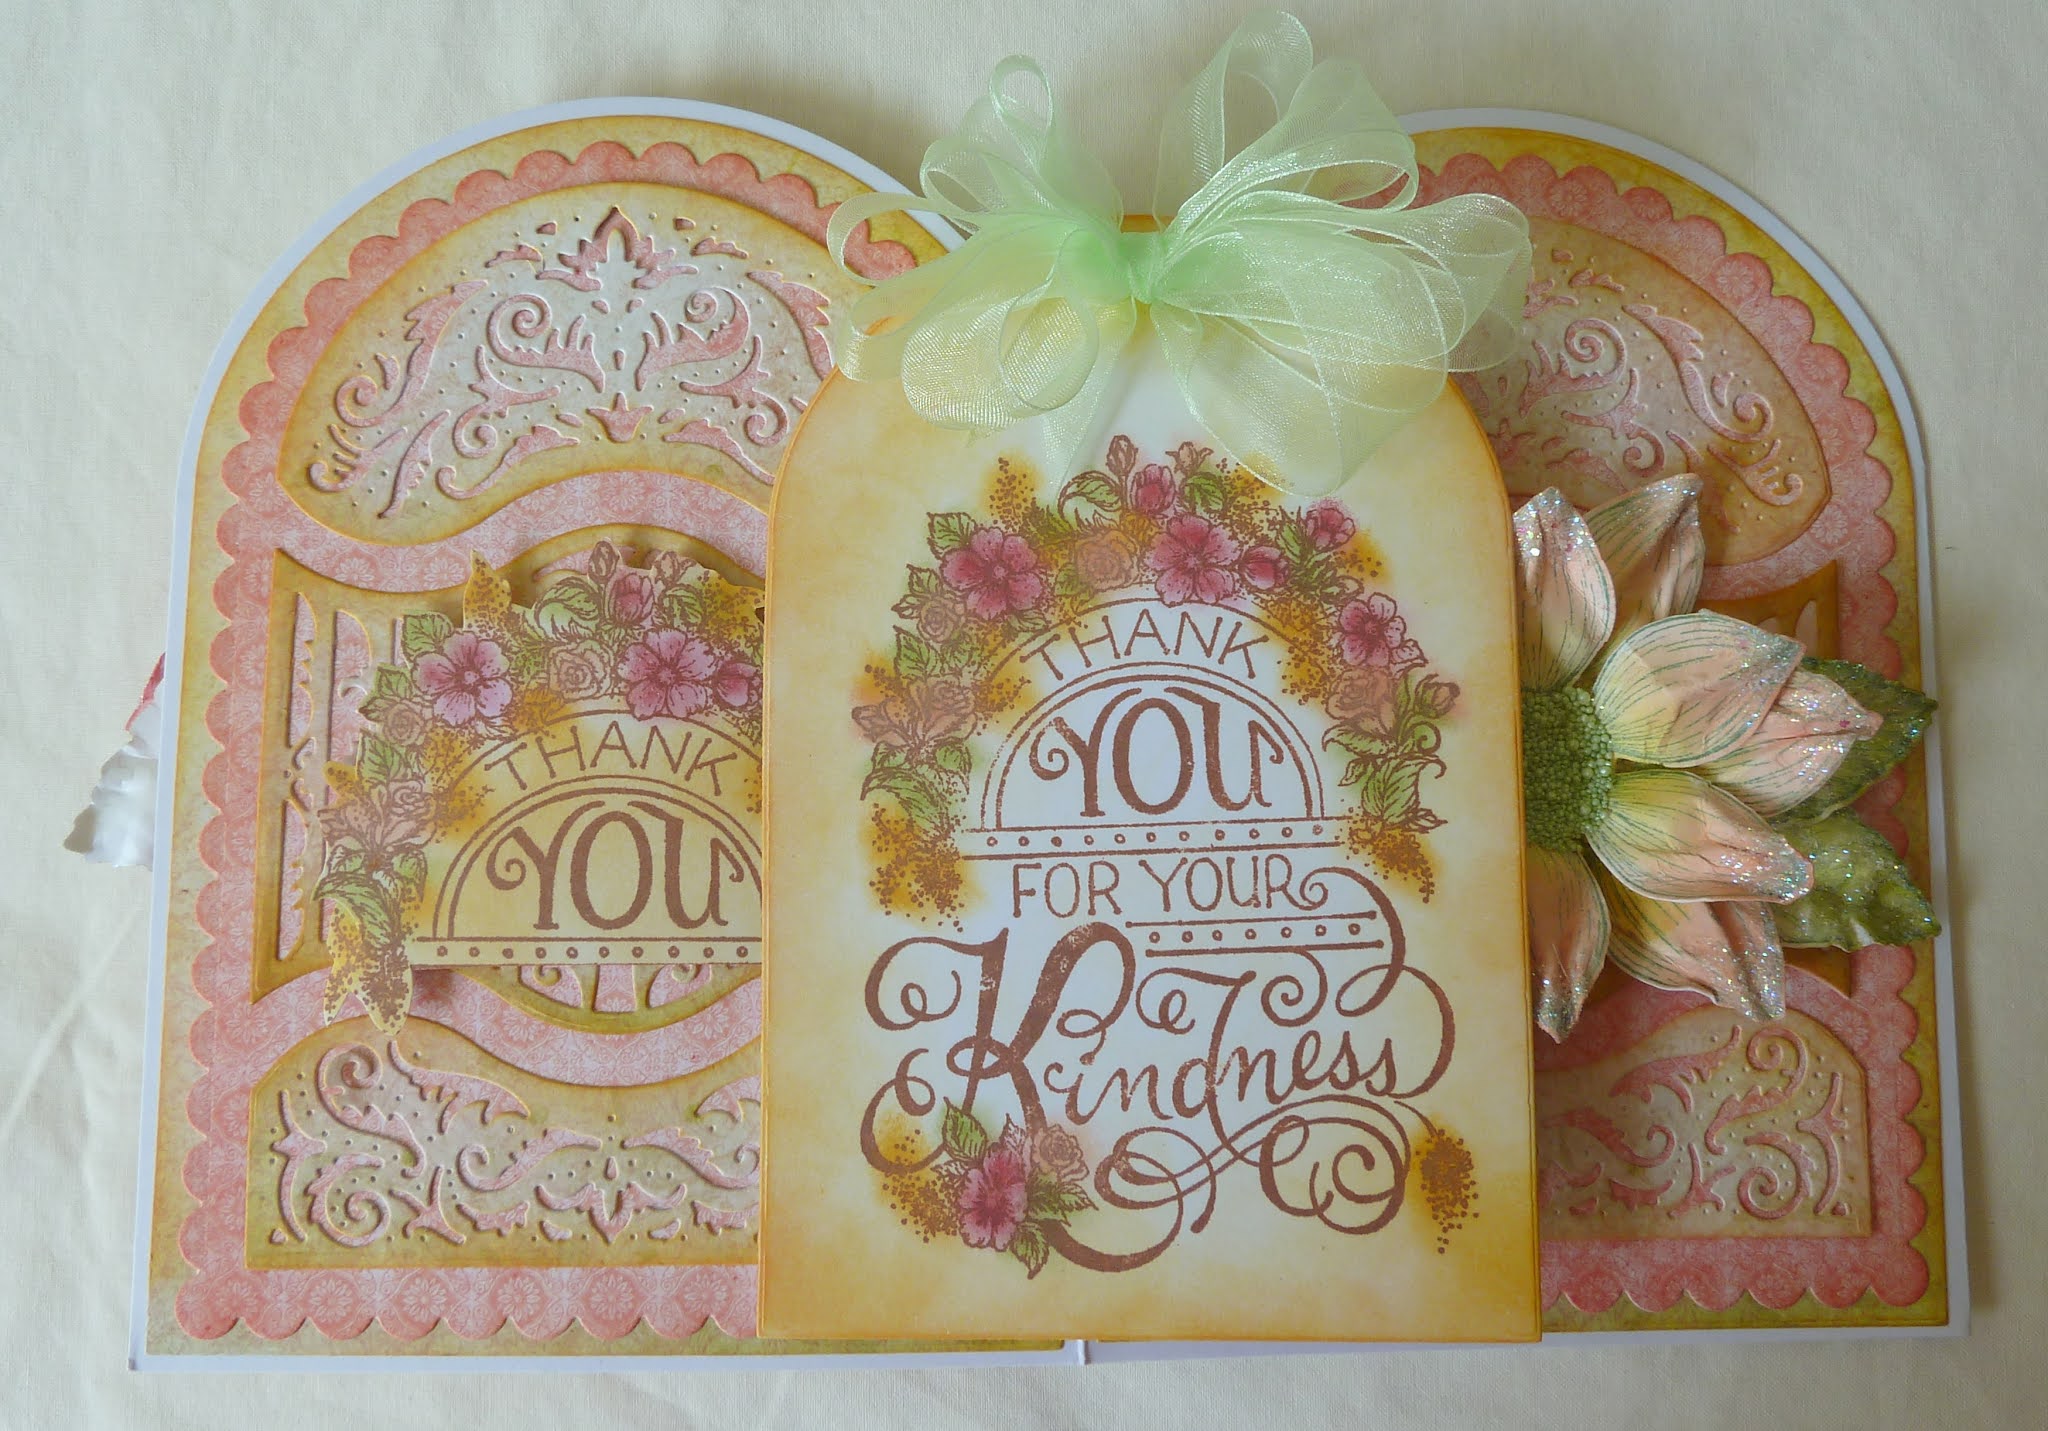
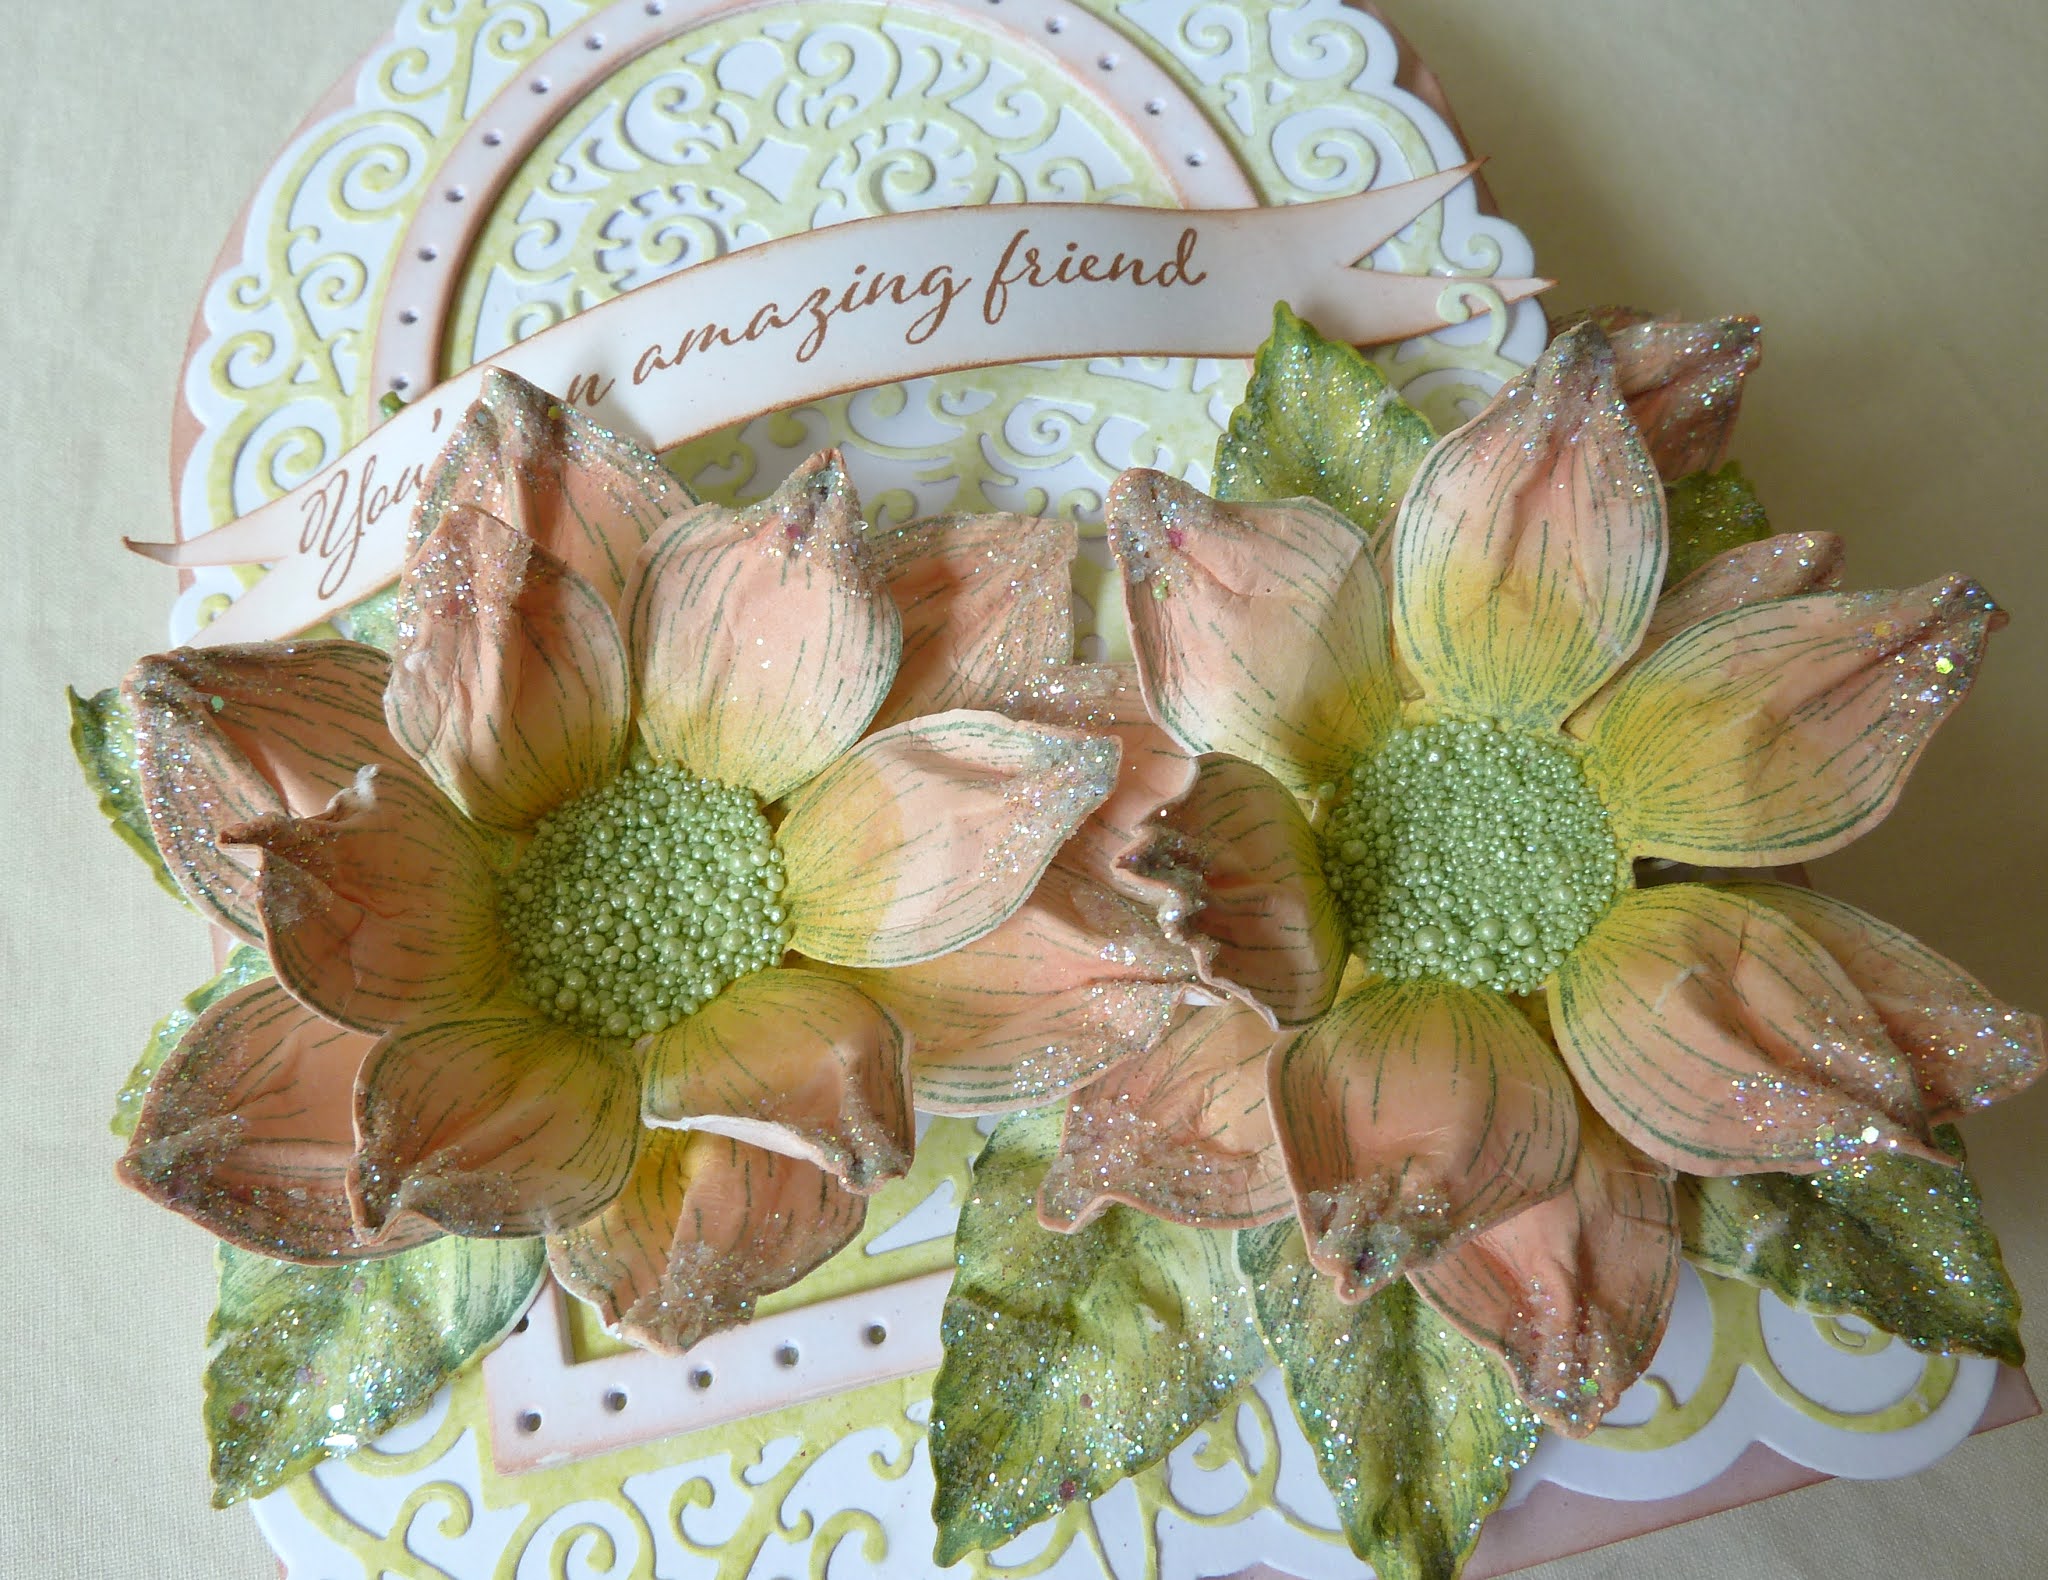
Taking the white card stock and the outer frame from the die set Elegant Swirl Gateway, die cut a frame. Taking the inner frame with the doted holes in it, die cut this four times and adhere the four layers together. From one of the off cuts from the  frame just cut, stamp the sentiment “Thinking Of You Today” from the Sentiments set. Making the sentiment banners by stamping the “You’re An Amazing Friend” then trim the points as seen in the photo. This is stamped in Sepia ink. Color the sentiment with the archival inks and use the Tea Rose for the edges.

Using the frames and the paper from the sheet 12b and 5a die cut the rest of the cuts needed for the card. Adhere all the die cuts in place including the previous frames made.

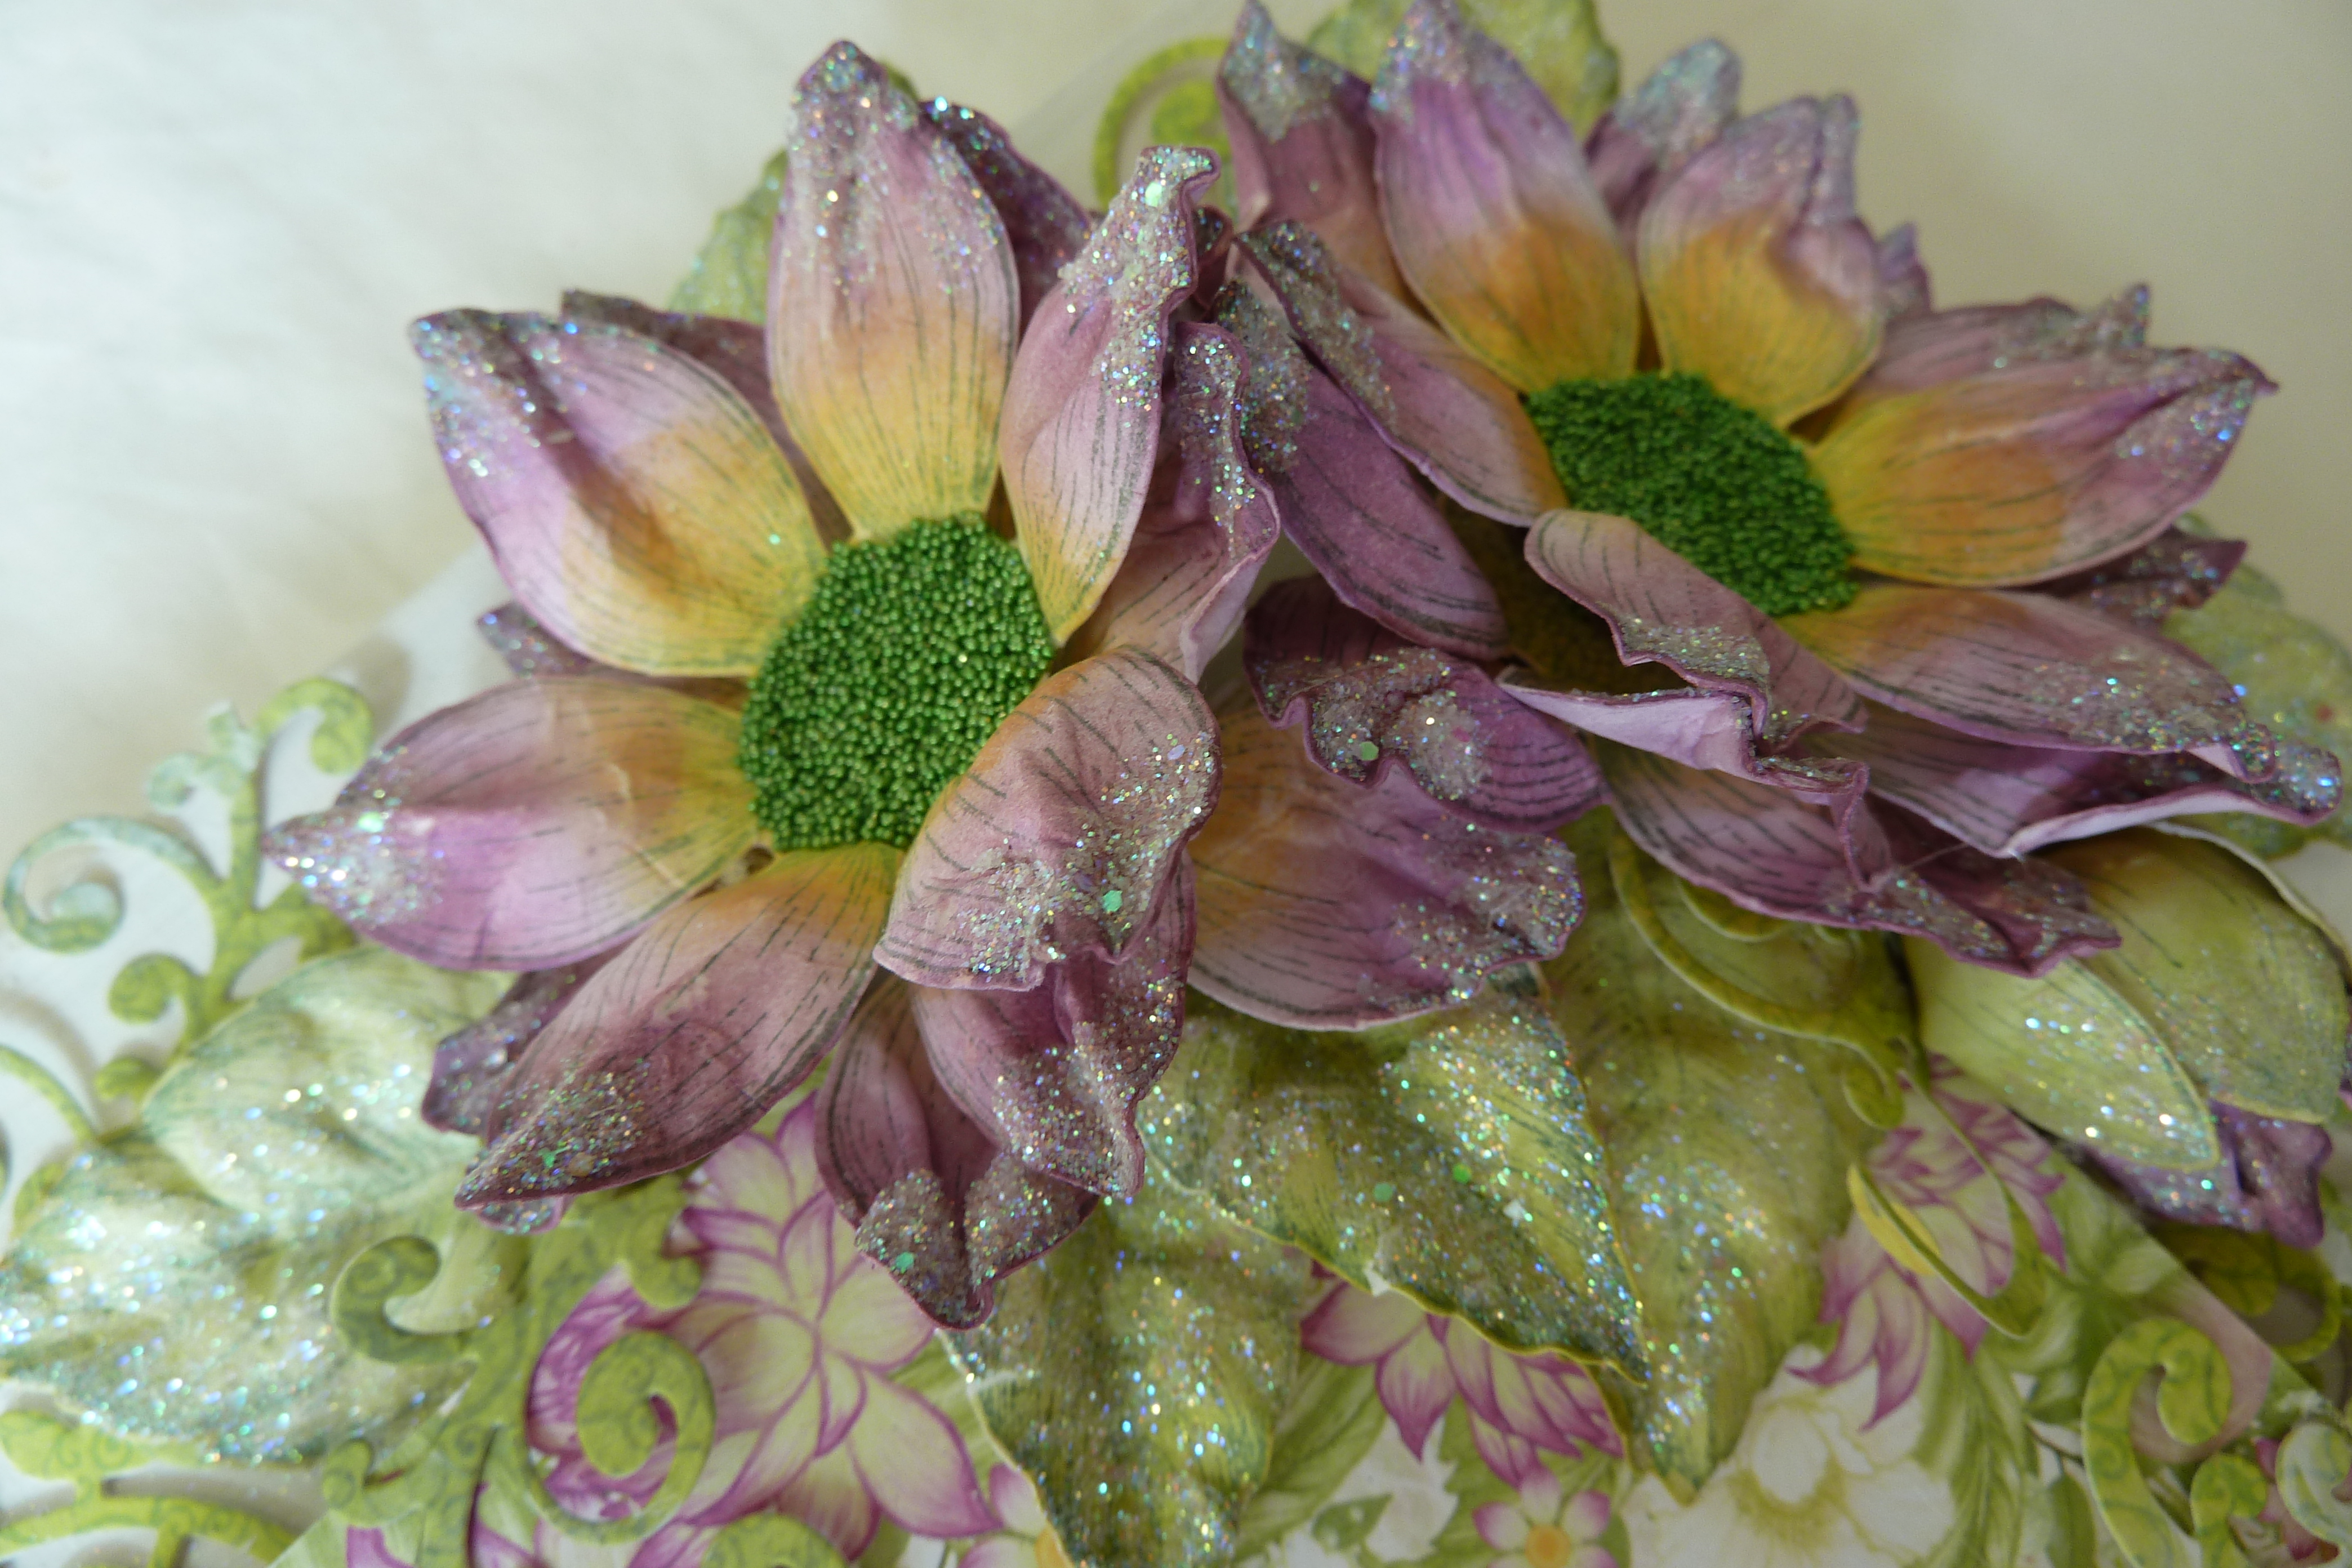
To make the Dahlia’s and leaves: The stamping is done with the Library Green ink, the color used for the leaves is the Leaf Green ink and the colors Saffron and Tea Rose for the Dahlia’s. Bring shape to the Dahlia’s and leaves using the matching molds and the shaping tools. Pinch or pleat the ends of the petals to make them look more like a Dahlia petal. The petal ends and the leaves are finished with glitter, apply clear drying glue then dip into the glitter, put aside to dry before using. The Dahlia's have two petal layers, the centers are filled first with clear drying glue then the prills.

Cluster the Dahlia’s and leaves to the front of the card and adhere in place. Adhere the sentiment banner across the card front. Adhere the sentiment banner across the foot of the frame in the second card section. Adhere a Dahlia to the right of the sentiment on the third section of the gateway card. Add leaves as needed to finish. Take note this Dahlia will pop out of the card when the card is closed and will not lay flat but it is adorable when standing.


If you had fun with this...you will also like to see the rest of the show at the
Till next time, have a scrappy happy time. Inky hugs
Sussi Poppins

Heartfelt Creations BLACK FRIDAY release....

'
Wonderful 'GATEWAY' card bases and matching dies and stamp...what a treat!
Here is some Black Friday eye candy for you.
This is one of two posts for this adorable collection.
Enjoy the journey.


HCPC-2121 Dazzling Dahlia paper collection

HCFB1-494 3D Dazzling Dahlia mold

HCPC-3928 Dazzling Dahlia cling

HCD1-7323 Dazzling Dahlia die

HCPC-3929 Dahlia and Leaves cling

HCD1-7324 Dahlia and Leaves die

HCD2-7325 Scalloped Flourish Gateway die

HCD2-7326 Ornate Flourish Gateway die

HCPC-3930 Elegant Gateway Sentiments cling

HCCB1-495 5 “ X 7 “ Gateway Fold Card-White

RACP500 Ranger Archival Ink Pads-Sepia

RACP993 Ranger Archival Ink Pad-Red Geranium

RACP436 Ranger Archival Ink Pad-Leaf Green

RACP663 Ranger Archival Ink Pad- ea Rose

RACP475 Ranger Archival Ink Pad-Library Green

159723 Designer Dries Clear Adhesive

HCDP1-475 Deluxe Flower Shaping paper pack of 50

HCDA1-449 Stack and Store Daubers- pack of 6

ANC814 Lettuce-Entertain-You Prills

 OTHER PRODUCTS USED:

Hot glue gun, Green organza ribbon, Foam Inking tools, Double sided 3D foam tape, Double sided tape, Ranger Archival Ink Pad-Saffron, Glitter.


INSTRUCTIONS:

The gateway pre-made ready to go card base measures 5 inches x 7 inches. Fold the card so you can make a pocket with two of the sections. Apply a thin layer of clear drying adhesive to the three straight edges then close to make a pocket, leaving the rounded edge open. NOTE: Check to see how big the opening is before making the tag.Using the sheets 5A , 9B and the die sets Scalloped Flourish Gateway and the Ornate Flourish Gateway, die cut the frames and elements needed for this card. Ink the edges with the Saffron, Tea Rose inks and the foam inking tools. Adhere in place using the clear drying adhesive and the foam 3D double sided tape.To make the Dahlia’s and the rest of the embellishments: The Dahlia’s have each, two layers. Stamp the leaves and Dahlia’s with the Library Green ink then use the colors Leaf Green, Saffron Tea Rose and Red Geranium to bring color to them. These colors are also used to color the sentiments. Bring shape to the flowers and leaves by using the matching molds. The tips of the petals are pinched and pleated to make them more realistic. Clear drying adhesive is applied to the petal tips and leaves then dipped into glitter. Put aside to dry before using. Adhere all together and to the card base.To make the tag: Die cut the plain frame from the Scalloped Flourish Gateway set, trimming on both sides if needed to fit into the pocket. Stamp the sentiment from the Elegant Gateway Sentiment set. Color with the inks and use the Saffron ink for the edges. Adhere a triple bow to the top of the tag. Slide into the pocket. The bow will pop out above the card top so this makes the card fun when open or when it is closed.Make a sentiment banner for the front of the card and adhere this so it comes out from under the flower cluster. This card does not close flat. If you wanted it to close flat, all you need to do is not shape the petals of the inside flower as much or flatten it after shaping put a heavy book on it overnight. Then you will have shape but not the height. Have fun with that.

I absolutely adore this sentiment (below), actually both the sentiments in the stamp set. A worth while investment to the stash. Enjoy the rest of the show. till next time, have a happy scrappy week.

 Keep safe and well....don't forget to sprinkle some glitter in your world.

Inky hugs


Wednesday, November 18, 2020

Inspiration Wednesday with a baby Girl Lay out,


featuring these adorable Dahlias and cuddly critters....enjoy.


 HEARTFELT CREATIONS PRODUCTS AND PRODUCTS CARRIED IN THEIR WEB STORE  USED IN THIS PROJECT:

HCPC-2121 Dazzling Dahlia paper collection

HCFB1-494 3D Dazzling Dahlia mold

HCPC-3928 Dazzling Dahlia cling

HCD1-7323 Dazzling Dahlia die

HCPC-3929 Dahlia and Leaves cling

HCD1-7324 Dahlia and Leaves die

HCD2-2191 Intricate Swirl Frames die

HCPC-3915 Welcome Baby cling

HCD1-7300 Welcome Baby die

HCPC-3916 Baby’s Friends cling

HCD1- 7301 Baby’s Friends die

HCDP1-475 Deluxe Flower Shaping paper pack of 50

HCDA1-449 Stack and Store Daubers- pack of 6

RACP500 Ranger Archival Ink Pad-  Sepia

RACP436 Ranger Archival Ink Pad- Leaf Green

PACP663 Ranger Archival Ink Pad- Tea Rose

RACP475 Ranger Archival Ink Pad-Library Green

159723 Designer Dries Clear Adhesive

ANC818 Go Man Go Prills

 OTHER PRODUCTS USED:

Cardboard (empty cereal box), Hot glue gun, Green organza ribbon, Foam Inking tools, Double sided 3D foam tape, Double sided tape, Ranger Archival Ink Pad- Saffron, Sanding paper,Glitter.

INSTRUCTIONS:

Using the sheet 2b from the paper collection, trim away the white strip ready for use. Find the sheet 9b and the die frame from the Intricate Swirl Frames die set. Cut the frame out and if needed trim the frame and join it to fit the photo. Using the cardboard make a backing for the photo and sand the edges of the photo. Adhere in place both the frame and the photo to the LO base.To make the embellishments for this LO: Stamp the baby’s friends with the sepia ink and the flowers and leaves with the library green ink. Bring color to the elements using the Saffron, Tea Rose, Green Leaf inks and the inking tools or the daubers. Bring shape to the Dahlia’s and leaves by using the matching mold and the shaping tools. Pinch the petal ends or pleat them so they look more like a Dahlia petal. Apply clear drying glue to the ends of the petals and the leaves then dip then into the glitter and put aside to dry. The larger flower has three petal layers, two large and a smaller layer. The smaller Dahlia’s also have three layers but only from the small sized petals. The centers of the Dahlia is made using the prills and clear drying adhesive.  The title is made using the stamp from the Welcome Baby sets. Stamp onto the white card stock using the sepia ink, color with the Leaf Green ink then die cut the words. Die cut four extra from the cardboard then adhere all the layers together. Ink the edges with the Tea Rose ink. Using a green organza ribbon, make a triple bow.

Putting it all together: Arrange a cluster of Dahlia’s and leaves then adhere in place- Under the photo at the printed line in the paper so the printed flowers show from under the cluster. Add the bow then arrange and adhere the Baby’s Friends in their place. Do the same for the flower cluster above the photo. Last adhere the title to its place.


 Till next time, with more eye candy...and that will be BLACK FRIDAY.

So that means lots of fun goodies...here is something of a appetizer of what is to come..


Wednesday, November 11, 2020

Inspiration Wednesday brings you a new release from Heartfelt Creations....

...the 'Dazzling Dahlia' collection.
A flower that is always welcome in my garden and now I can put them on paper...oh what fun this can be. Today I give you a LO made on canvas so you can use a dear bare photo to treasure.


One could also adjust this to make a frame to place on a table. The Dahlia's are wonderful to cluster. Have fun with your journey


The products used List: 

 Heartfelt Creations and products carried in their web store:

HCDPC-2121 Dazzling Dahlia paper collection

HCFB1-494 3D Dazzling Dahlia mold

HCPC-3928 Dazzling Dahlia cling

HCD1-7323 Dazzling Dahlia die

HCPC-3929 Dahlia and Leaves cling

HCD1-7324 Dahlia and Leaves die

HCD2-7190 Frame a Card Leafy Borders

HCD1-7263 Swirly Accent Spray die

RACP436 Ranger Archival Ink Pad- Leaf Green

PACP663 Ranger Archival Ink Pad- Tea Rose

RACP475 Ranger Archival Ink Pad-Library Green

159723 Designer Dries Clear Adhesive

HCDP1-475 Deluxe Flower Shaping paper pack of 50 -white

HCDA1-449 Stack and Store Daubers- pack of 6

RLHS100 Hydra Sponges

HCST1-401  Deluxe Flower Shaping Kit


OTHER PRODUCTS USED:

Cardboard box (corrugated), Cardboard (empty cereal box), Hot glue gun, Canvas (50cm x 50cm),Foam  Inking tools, Gesso, Double sided 3D foam tape, Double sided tape, foam inking tools, Green Micro beads, Glitter, Fussy cutting scissors or a paper cutting knife, Photo, Fine Sandpaper, Ranger Archival Ink Pads-Saffron, Thistle.


INSTRUCTIONS:

Prepare the canvas by using the hydra sponge to apply the gesso to cover the whole front and sides. Find the papers used in the paper collection sheet 10b and 4a. 4a is used for the frame and the back ground. Using the scissors or paper knife, cut the frame out. Using the corrugated cardboard box, cut strips for the frame. About 2-3 layers to give the frame height. Apply gesso to the sides of the corrugated cardboard strips. When dry adhere to the back of the frame. Adhere this to the canvas.

 Prepare the photo. Back the photo with a piece of cardboard (cereal box) then sand the edges of the photo. Taking the sheet 10b to make the frame a card leafy borders and the dies. Cut the frame s to fit the photo and for the border strips to go at the side of the frame, this will be five longer borders. Cut also four layers for each border from the cereal card board. Adhere all the layers together before gluing down. Once you know how large your photo and border frame will be, you can stamp the flowers with the library green ink that you see popping up behind the photo onto the cut away paper from the frame. (At this stage you can chose to use a second paper sheet 4a and adhere the frame back onto the frame on the second sheet, then you won’t see any cut away shapes. It is a choice) Colour the stamping with the thistle and the saffron ink and the foam inking tools. Adhere this paper back into the frame then adhere the phot and border frame to the left corner. You can raise the photo to as high as you want by adhering corrugated cardboard behind the photo. Play around with it till you get what you want.

To make the flower clusters:  Prepare six large petals, nine small petals, ten large leaves, eight smaller leaves, four butterflies and six swirls, nine leafy boarder frames. The Dahlia flowers are made using three layers. Two large and one smaller petal shapes. Stamp the dahlias with the library green ink onto the white card stock. Use the saffron for the centers and the thistle for the outside. Use the matching molds to bring shape to the flowers then pinch or pleat the petal ends. Apply clear drying glue to the petal ends then dip into the glitter. Adhere the layers together using the hot glue gun. The centers are filled with the clear drying glue then the micro beads are poured on to the glue, pressed in then put aside to dry. The leaves are done the same way, stamped, inked, shaped then glittered. The buds are made using two flower petal shapes one green and the other thistle. Shaping the petals into a ball using the flower shaping tools. Use the hot glue gun to secure the shape, first the thistle then the green, this also has been finished with glitter. Once the leafy borders are glued down in place you can arrange the Dahlia and leaf clusters. You can adhere these with the hot glue gun or the clear drying glue. Taking the sheet 10b again and the Swirly accent die, cut six. Adhere as fillers in the clusters. Colour the butterflies and cut extra from the cardboard so they will be raised when glued in place.


Next week I have more delightful 'Dazzling Delia's, till then inky hugs and keep on keeping safe.
OXO


Wednesday, November 4, 2020

Heartfelt Creations inspiration Wednesday brings you...


 a card for the men in our lives, 'Best Guy Ever'


Heartfelt Creations products and products carried on their website: 

HCDP1-2120  Home On The Farm paper collection

HCPC-3925  Home On The Farm cling stamp set

HCD1-7316  Home On The Farm die set

HCPC-3926  Happy Meadows cling stamp set

HCD1-7317  Happy Meadows die set

HCPC-3626  Classic Sunflower cling stamp

HCD1-753  Classic Sunflower die

HCPC-3846 Thank You Sentiments cling stamp set

HCD2-751  Cut-Mat-Create

HCD2-749  Cut-Mat-Create

HCST1-401 Deluxe Flower Shaping Kit

RACP451 Ranger Archival Ink Pad- Coffee 

Other Products Used:

Inks: Derwent Intense 72 water colour pencils- Chilli Red-0500, , Sienna Gold-0240, Saddle Brown-1740, Carmine Pink-0520. Other: Double sided tape, Fussy cutting scissors, Foam inking tool, White stamping card stock, Misti stamping tool, Card board ( used cereal box) Micro beads: black, brown and gold.

Instructions:

The card measures 8 1/2 inches by 6 1/4 inches when completed.

Taking the white card stock, make a tent fold card to the measurements. Find the sheet 1b and trim this to a little smaller than the card base. Ink the edges with the coffee ink and foam inking tool. Glue this to the card front. Find the sheet 3b in the paper collection and the cut-mat-create dies, cut the three backgrounds for the card. One of each 3.75 x 5.75 (cows and sentiment block), 1.75 x 3.5 (flowers block), 3.75 x 3.75 (the barn block) and 1.75 x 1.75 (the sentiment block) Taking the card board, cut four layers for each of the blocks. When all the layers are adhered together then ink the edges with the coffee ink. Adhere in place as seen in the card photo. Before gluing the sentiment block in place , first stamp this with the sentiment.


Make the flowers using the sunflower stamp and die. Use the sheet 2b for the stamping with the coffee ink. Shape the flowers with the flower shaping tools and the micro beads for the flower centers.

Using the white card stock and coffee ink, stamp the cows, milk can, barn and dog. Bring colour to these by using the coloring list:

Dog: Carmine Pink-0520.

Milk can: Neutral Grey-2120, Sienna Gold-0240

Barn: Chili Red-0500, Sienna Gold-0240.

Cows: Carmine Pink-0520, Saddle Brown-1740

Die cut these out by using the matching dies. Cut extra layers from the card board and glue all the layers together. Fussy cutting as needed. Glue all the images in place and add the flowers to finish the card off. 


 Something different to what I usually do when making a card. It was fun to go out of my box....but I had to do the flowers 3d...somethings don't change..lol.

A sneak peak for next week. A brand new release...if you love flowers...it will be areal treat. Such fun to play with. You are going to love this one.


Have a great week and keep on keeping safe.

Inky scrappy hugs, till next time.

Susan XOX