Thursday, May 30, 2019

'Sending You A Hug' The Heartfelt Creations May Alumni Team Hop...

This hop starts today, Friday, May 31st and closes Monday June 3rd at 11:55 EDT
The winner will be announced on the Heartfelt Creations face book page on the Wednesday June 5th 2019
 A randomly chosen blog comment from a mystery blog will receive a $25.00 gift certificate to shop at Heartfelt Creations store. To claim your prize please email Heartfelt Creations at socailmedia@heartfeltcreations.us with “Winner of the April Hop” in the subject line.
The hop list is at the bottom of the page. Have fun.


"Sending You A Hug"
Heartfelt Creations Products And Products Carried On Their Website: 
HCDP1-2102 Purr-fect Posies paper collection
HCPC-3874 Purr-fect Posies cling stamp set
HCD1-7238 Purr-fect Posies die set
HCPC-3877 Playful Miss Kitty cling stamp set
HCD1-7241  Playful Miss Kitty die set
HCD1-7202 Album Tags And Accents die set
HCD1-7247 Regal Pocket Accents die set
HCPC-3848 Cheerful Note Sentiments cling stamp set
HCS1-457-1 Pastel Pearl Stamens small
HCS1-457-2 Pastel Pearl Stamens medium
HCPP2-451 White cardstock 14.5 oz.
HCDA1-449 Stack and Store Daubers pack of 6
HCST1-401 Deluxe Flower Shaping Kit
HCDA1-449 Daubers
DDOTS  Double Dots-3d foam circles
159723 Designer Dries Clear Adhesive
173842 Score-Pal Measuring and Scoring Board
359848 Spellbinders Tool N’ one
31510 Funnel tray
85-glitter Crystal Ultrafine Transparent Glitter
3D1844 Crystal Lacquer
359848 Spellbinders Tool N One
478455 Zigg Clean Color Real Brush Makers
RACP451 Coffee Archival Ink
OTHER PRODUCTS USED:
SUP Woodland embossing folder, Diamond stickles, Crafters Companion hint of gold card, Hot glue Gun, Fussy cutting Scissors, Mellissa Frances glass glitter-metal pink, Double sided Tape, Double Sided Foam Tape, Misti Stamping Tool, Spectrum Noir Harmony Inks: Pine Green and Sand Storm, Inking tool

INSTRUCTIOONS:
This finished card measures 13cm x 21cm    (5. 5/16” x 8.¼”)
Taking the white card stock make a tent fold card measuring 13cm x 21cm    (5. 5/16” x 8.¼”)
Make the card front base matting by taking the boarder print from the paper pad and cutting to 13cm x 20.5 cm (5 3/8” x 8 2/16”)
For the second matting find the polka dot print from the paper collection and cut to 10.3cm x 17.2cm (4 1/6” x 6 ¼”)
Taking the Pine Tree ink and inking tool, ink the edges.
Adhere to the card base using the foam tape/dots. Taking the pocket die and white card, cut x2 lacey pockets. Bring color to these by using the Pine Tree ink and the inking tool.
Use the embossing folder, the tag die and the Hint of Gold card to make the card front background. Make x2 and adhere together with double sided tape the length wanted to fit on the card.
Slip the lacy pockets over the tag ends and adhere with glue or tape. Adhere the front to the card base using 3D foam squares or dots.
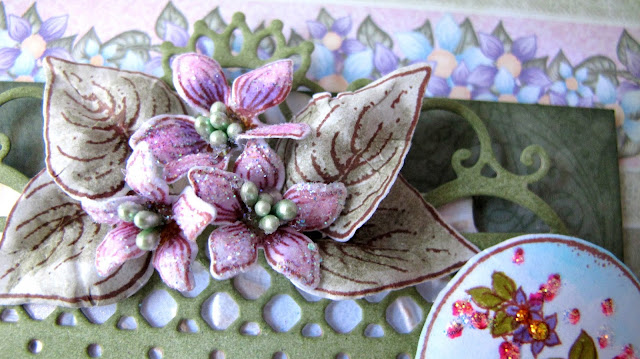
Make the flowers and leaves and the cat holding onto the balloons. Use the Zigg markers for the colouring. Use the flower mold and the shaping tolls to bring shape to the elements. Adhere to the card front with 3D foam dots or squares and the hot glue gun.
To make the sentiment , find the sentiment wanted and stamp it with the coffee ink. Trim to the size wanted. Curl the card then adhere to the flower clusters. To finish the card, add the diamond stickles to the balloon and crystal lacquer to the cats eyes and bird.

GOOD NEWS!

For those that don't know....I can now share this....
I am back into the team for Heartfelt Creations for the 2019-2020 Design Team! ...Yay...
I am doing the happy dance.
Got to get down to hard core creating and playing...lol...so till next posting,
 inky hugs and love.
Sussipoppins

Here is the hop list:

Monday, May 27, 2019

'With Love'

Hi,
 today I have for you a cute card using the adorable silhouette dies from the Gemini Elements by Crafters Companion. Enjoy the journey. 
CRAFTERS COMPAINION PRODUCT LIST:
Gemini die cutting machine
Gemini Elements: Silhouette Rabbit GEM-MD-ELE-SRAB
Centura Pearl-snow white hint of silver A4 300gm
Gemini clear stamp: Love always GEM-ST-LOA
Centura Pearl-snow white hint of gold A4 300gm
Sheena Douglas white stamping card SD-STCARD
3DA6 embossing folder: Blossoming Lace GEM-EFA6-3D-BL
Gemini Elements: Torn edge oval GEM-MD-ELE-TEOV
Peony collection: Layered Peony NG-PEO-STD-LAYP
Tag from the Gemini starter kit
Spectrum Noir Harmony inks: plum Jam, Pine Tree
Spectrum Noir alcohol markers: DG3, DR1, GB5, MG3, LV2.
Water Brush Pens CC-WTBRSH-M3PC
Rock-A-Blocks
3D foam tape
Double sided tape
Scoreboard
Rock-A-Blocks 
OTHER PRODUCTS USED:
Heat gun, Hot glue gun, Clear drying glue, Fussy cutting scissors, Ruler, Flower shaping tools and mat, Brads (flower centers), Diamond stickles, Pink organza ribbon, Archival coffee ink.
A lot of the above products you can find here Hobbidee-breda.nl
MEASUREMENTS FOR THIS CARD: 19.6cm x 13.6cm
Make the card base to the above measurements. For the card matting, take the hint of gold card cut the card a little smaller than the card base. Using the embossing folder, emboss the card matting. Taking the torn edge oval die and cut 2 ovals. Use the lager sized dies. Emboss both ovals but apply color only to the larger oval. Adhere all to the card base using double sided tape and 3D tape or squares. Make the tags, ink the edges with the Plum Jam ink and stamp the sentiments from the Love Always stamp set. Add the ribbon to the tags. Adhere the tags with 3D tape to the side of the ovals. Taking the Rabbit silhouette die and the hint of silver card. Die cut this x2. Pricking out the cuts of only one of the rabbits, leaving the other intact. The rabbit that is intact apply color to the flowers and leaves using the blending pens listed. Adhere both rabbits together with the pricked out flowers on top. Adhere to the center of the white oval with 3D tape. Taking the ribbon, tie a triple bow across the card.  Taking the Layered Peony stamp and die set and make x4 flowers and x5 leaf sets. Use the brads for the centres, also to secure the peonies together after shaping them. Adhere to the sides of the bow as seen in the photo using the hot glue gun. To finish the card, add stickles to the brads and  around to the paper flower canters to pop the flowers, also to the flower centres on the rabbit.
Don't you just love the rabbit....and there is many more to the collection!
For all the animal lovers.
Till next time, scrappy happy days and inky hugs.
Sussipoppins. 
OXO

Monday, May 20, 2019

'Oceans of Happiness'

Hi, this card is featuring the Nautical collection from Crafters Companion. 
'Wishing You Oceans Of Happiness'
Who would not want that?
CRAFTERS COMPAINION PRODUCT LIST:
Gemini
Scoreboard
Crafters Companion Mirror Card
Flutterby collection glitter card S-F-GLITTER (Turquoise)
Rock-A-blocks
Nautical collection:
Ships Anchor embossing folder CC-ST-SWI
Nautical collection 8” x 8” paper pad
Seas The Day S-NAUT-ST-SEA (stamp)
Jute Twine S-NAUT-TWINE
Metal Charms S-NAUT-CHAR
Sea Life Accessories S-NAUT-MD-SEAC (die)
Crafters Companion Donna Ratcliff stamp: Swim Free CC-ST-SWI
Sheena Douglas white stamping card SD-STCARD
3D foam tape
Double sided tape
Spectrum Noir Harmony ink: Smoked Pearl
Inking foam tool

OTHER PRODUCTS USED:
Versa-Mark, Heat gun, Hot glue gun, Clear drying glue, Clear embossing powder, White Crafting foam A4, Fussy cutting scissors, Ruler, Diamond stickles.

Most of the above products you can find at https://www.hobbidee-breda.nl

MEASUREMENTS FOR THIS CARD: 21cm x 16cm

INSTRUCTIONS:
Make the tent fold card base to 21cm high x 16cm wide. Taking the mirror card and cut a little smaller than the card base. Taking the design paper from the paper pad, cut to 19.5cm high x 14.5 cm wide. With the embossing folder, emboss the anchor into the design paper. Using the smoked pearl ink, bring color to the anchor. Using the same ink, stamp the swimming fishes from the Swim Free set. Apply the clear embossing powder to the sentiment to get it to pop. Adhere all to the card base. Taking the Sea life accessories die set, the glitter card and the white craft foam and cut 3x sea horses, 7x the seaweed and 5x the sea coral. Adhere together then adhere to the card front Apply stickles to the sea horses and the sea floor. Taking the twine wrap this around the card, add the charm then tie a bow.

I love sea horses, so this was such a thrill to make. Unfortunately the photo's don't do this card justice....thats life.
Till next time I post...you know it....
have a scrappy happy day.
Sussipoppins inky hugs.


Thursday, May 9, 2019

'LIVE' and may your wishes come true.

Hello, to day I have for you a card featuring one of the new Silhouettes from Crafters Companion,
enjoy.
CRAFTERS COMPAINION PRODUCT LIST:
Gemini mini machine.
Gemini Elements-Stitched Edge Circle GEM-MD-EMESTC1.
Silhouette Butterfly GEM-MD-ELE-STCI.
Butterfly Mask Imagination Crafts C121-STENCIL.
Delicate Dandelion (sentiment) S-EF-MDS-DD.
Sheena Douglas white stamping card.
Spectrum Noir Harmony ink-Honey pot.
Scoreboard.
Stamp rockers.
Fancy design card-stock.
Foam inking tool.
3D foam tape.
Double sided tape.
Centura Pearl hint of gold card stock. 
OTHER PRODUCTS USED:Versa-Mark, Heat gun,
Clear drying glue, Enchanted gold embossingpowder-Papermania, Platinum Stickles
 MEASUREMENTS FOR THIS CARD: 
1. 16cm x 16cm – card base
2. 15.5cm x 15.5cm – fancy card, matting.

INSTRUCTIONS:
1. Make the tent fold card base. 
2. Cut the matting and ink the edges with the honey pot ink. 
3. Stamp the sentiment using the embossing powder. Adhere to the card base.
4. Cut the circle and use the mask and the honey pot ink to bring on the pattern.
5. Ink the edges of the circle also with the honey pot ink. 
6. Die cut the silhouette twice using the pearl card stock. 
7. From one of the silhouettes trim away the butterfly.
8. Ink the silhouettes with the honey pot ink.
9. Adhere all to the card base matting with the 3D foam tape.
10. Apply the platinum stickles to the butterfly body.