One word....adorable!


Heartfelt
Creations products and products carried by Heartfelt Creations used in this
project:
HCDP1-2115
Cascading Petals Paper Collection
HCPC-3911 Wisteria Petals cling stamp set
HCD1-7295 Wisteria Petals die set
HCPC-3912 Cascading Wisteria cling stamp set
HCD1-7296 Cascading Wisteria die set
HCPC-3913 Floral Song cling stamp set
HCD1-7297 Floral Song die set
HCD1-7298 Decorative Cage die set
HCD1-762 Eyelet Hearts die set
HCD1- 779 Regal Borders-Pockets die set
HCD1- 7203 Ornamental Tags (shield & Tag)
HCD1-7202 Album Tags and Accents die set (photo plate)
85-glitter Crystal Ultrafine Transparent Glitter ½ oz.
409311 Color In Watercolor Brush-Fine
159723 Designer Dries Clear Adhesive
352854 Metal Tip for Adhesive Bottles.
HCDA2-450 Stack and Store Daubers-Pack of 30
Hydra sponge
Flower Shaping Tool Kit
RACP475 Ranger
Archival Ink Pad- Library Green
359848 Spellbinders Tool N’ One
368771 Score-Tool
DMCT4185 Groove Golf Tool Set
173842 Score-Pal Measuring & Scoring Board
OTHER
PRODUCTS USED:
Fussy
cutting scissors, Hot glue gun, Inks: Spectrum Noir- Pale fig, Pine tree,
Crushed velvet, Spring meadow, Grasshopper. Creative Artist water colour box (a
local brand of water colour blocks). Double sided 3D foam tape, double sided
tape. Diamond stickles, inking tools White card stock, Inking tools. Prima
Marketing ½ Pearls

INSTRUCTIONS:
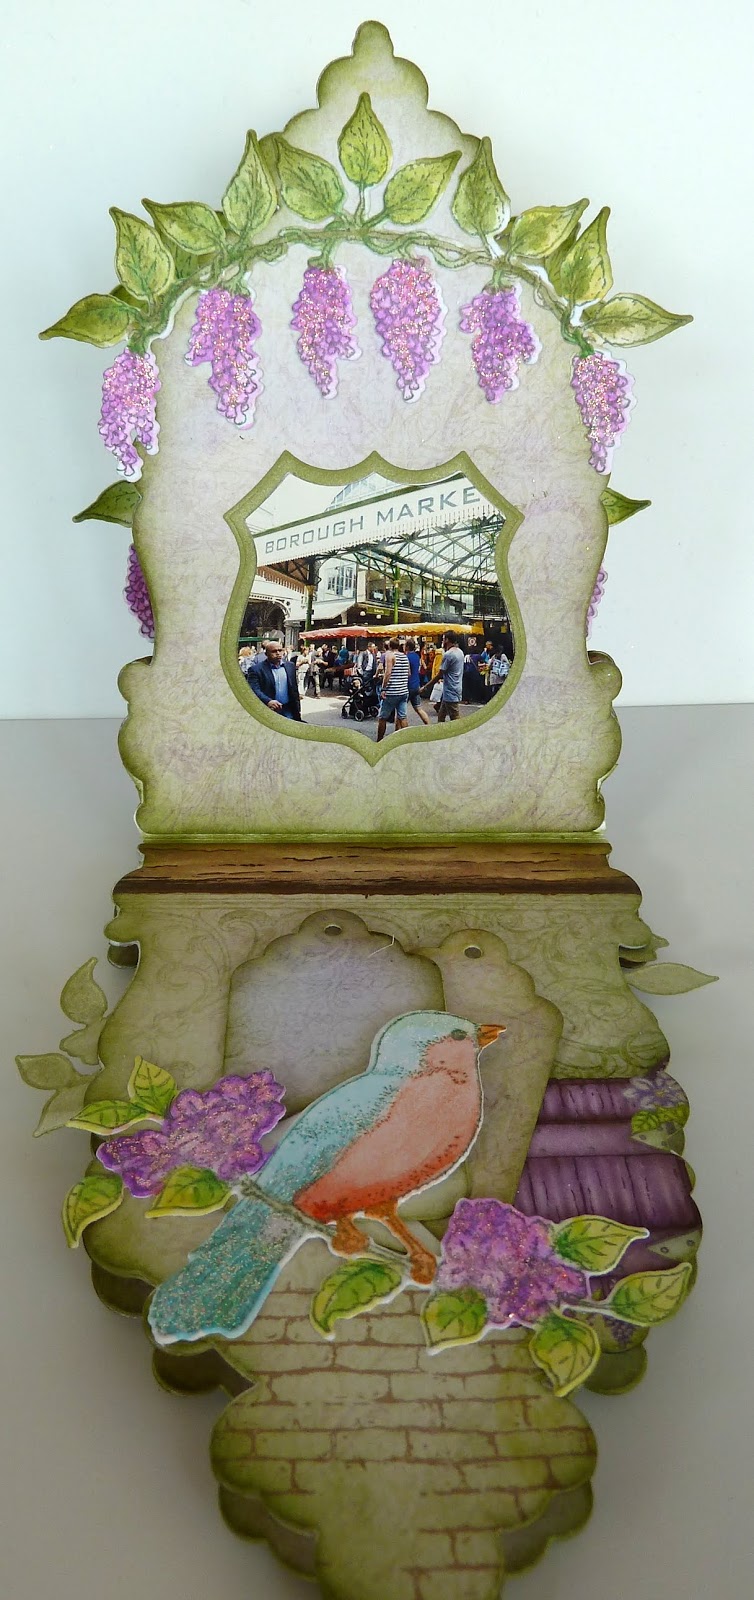
This mini
book measures 5 “ x 6 ¼” (12.5cm x 16cm)-
Taking the
whit cardstock and the cage die cut 9x the cage background. Cut also hinges for
each page. To do this cut strips of card 4” x 1”. Make a fold at ½” along the
long edge. Apply double sides tape to the cage base edges. Adhere the cage base
to the hinge one for one. Trim to the shape of the cage bottom as you go. Find
the design paper you would like to use for this mini book from the collection
and die cut enough to cover all the pages. Taking the Green ink and inking
tool, ink all the edges of the die cuts. Adhere the design paper cuts to the
book pages. Taking the Pocket dies and the white cardstock cut enough for the
pages wanted. Ink the borders with the green ink. When adhering in place, apply
clear drying glue only to the sides and bottom edge so you will get a pocket. Use this same method when adhering the bird
in place so you get a pocket to slip a tag behind the bird.
Taking the
design paper, white cardstock and the tag die, cut enough so you have two tags
for each pocket made.
The shield die is used for the matting and the inner de is
used for the photos. The picture tag plate is placed for the journaling in the
mini book. Adhere the ½ pearls to each side of the plate.
To decorate the book front, take the white cardstock and the
inner lace cage die. Die cut 1x. Bring color to this using the green ink and
inking tool. Apply clear drying glue using the hydra sponge. Dip or sprinkle
glitter over this and leave to dry. When dry, adhere to the book front. Die cut
a heart from the Eyelet heart die set that fits with the wisteria heart stamps.
Color this with the Pale fig and Crushed velvet inks. Adhere to the cage front.
Make the wisteria hearts, apply the glue to the wisteria flowers then dip into
the glitter. When this is dry adhere to
the heart on the book front.
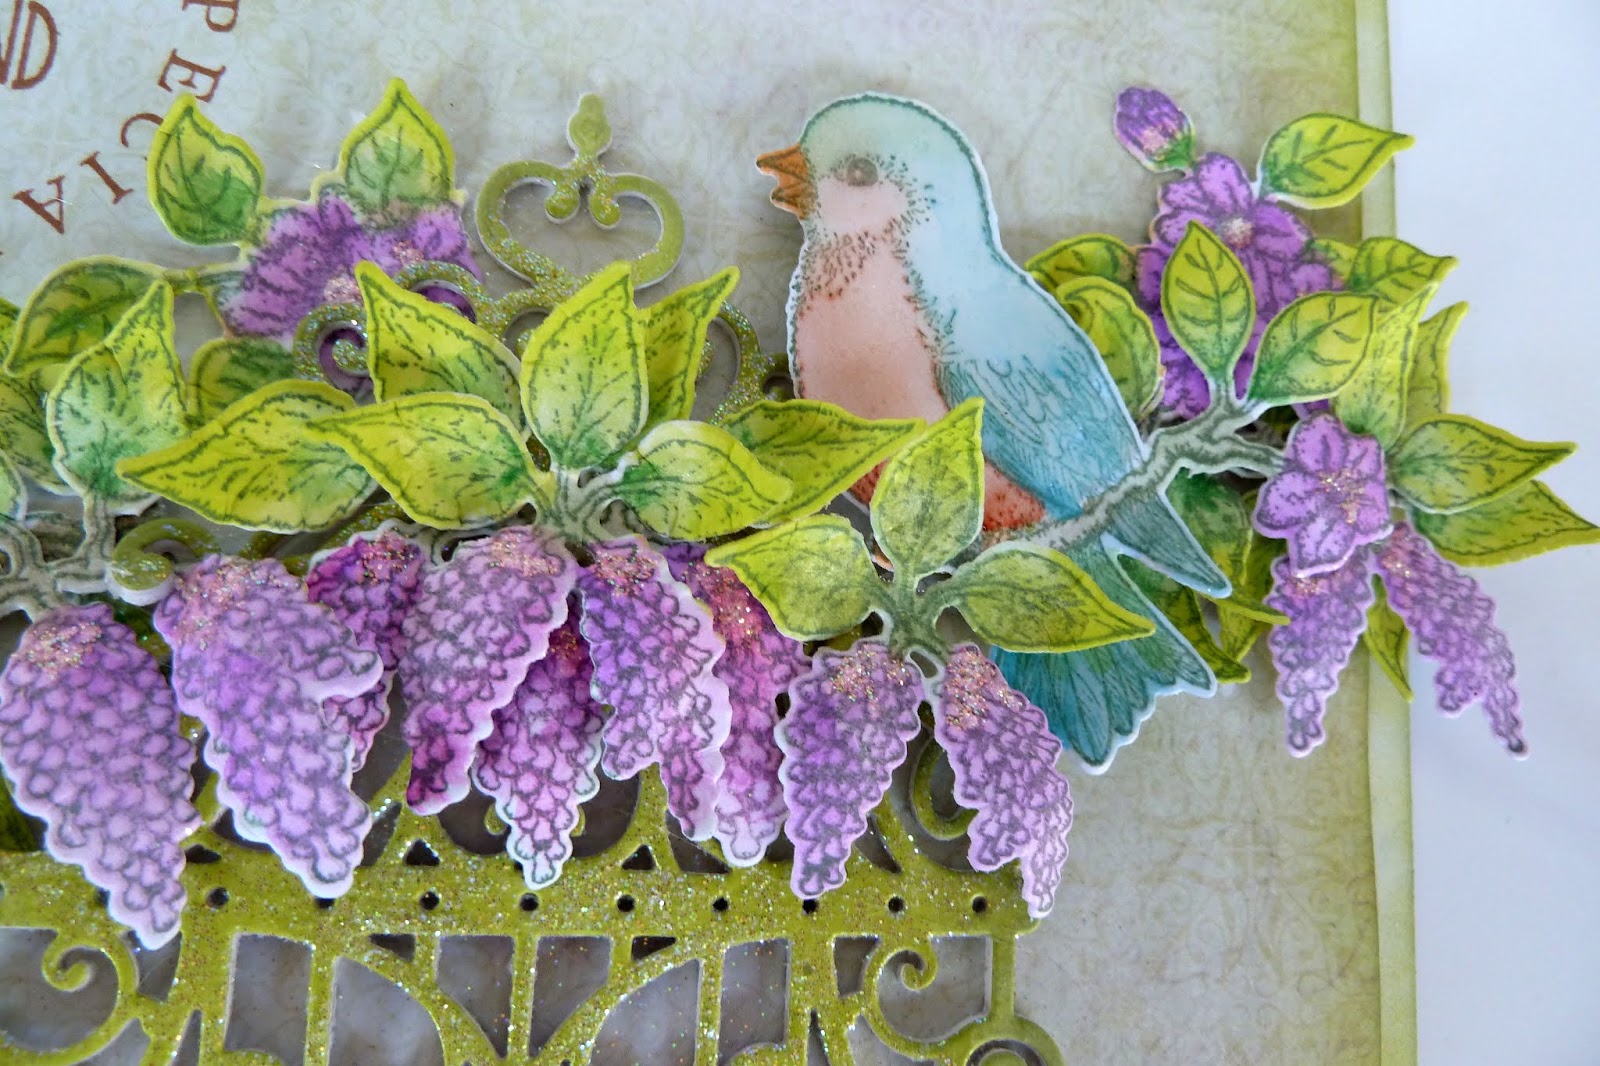
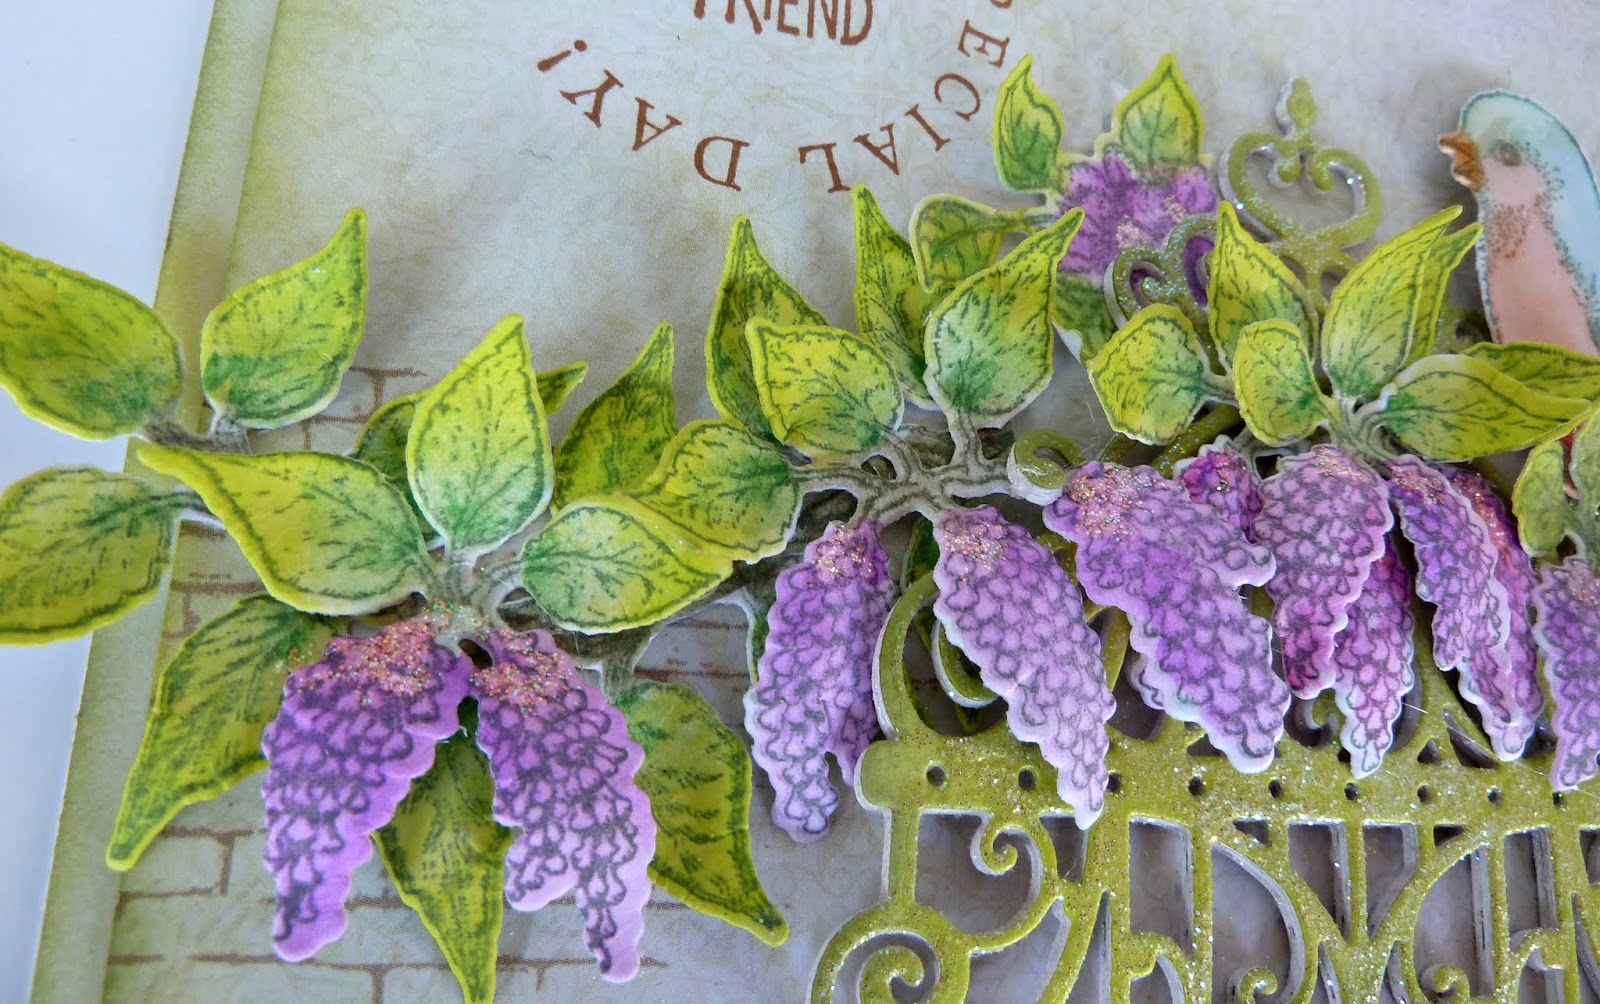
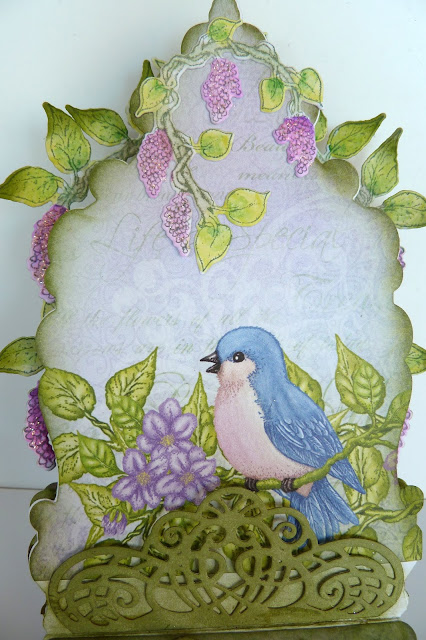
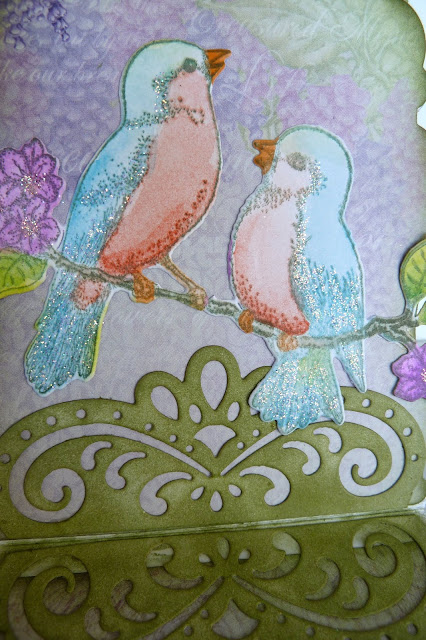
To decorate the book pages, make elements from the
collection and adhere across the page so the leaves peek out. Birds x3,
Wisteria heart sets x3, Heart X1, Wisteria branch x3, Branch x1, Tags x8,
shield for photos x4, journaling photo plates x 4.


That was alot!
I needed to show you how the book was made from the inside. I hooe you had fun veiwing this. I am off to unpack at my new house today....getting all the wiring done is first on the list....internet and all.
Have a happy scrappy week Inky hugs, Susan
XXXX