Wednesday, June 29, 2016

White Orchid 'FLOWER HANGER'


'Flower Hanger'

Heartfelt Creations Products Sold And Carried By Heartfelt Creations

Other Products Used:
Card Stock: White, Apricot, Black
Ranger: Golden rod stickles, Heat gun, Water coloring brush, Water mister, Inking foam tool, Bone folder, Inks: Peeled paint, Dusty concord, Forest moss, Bundled sage, Mustard seed, Spiced marmalade distress inks, Archival black ink, Lindy’s Stamp Gang Moon Shadow-Landlubber Green,. Other: ? Polystyrene ball 8 cm, painted green. Spellbinders circle S4-114, Green acrylic paint, Paint brush, Hot glue gun, Satin ribbon, ? pearls, Versa-mark, Fussy cutting scissors, Tonic paper cutter, Tonic die cutting machine

Click HERE to see the video on the Botanic Orchids
Click HERE or HERE or HERE to see  the video on the Lilies


Instructions:
The finished size of this flower hanger is 19.5 cm x 13.5 cm
Please note: The Lily’s are stamped in black ink, the Orchids are stamped in gold embossing powder.
Taking the Apricot cardstock and the window die, cut x 6 windows. Cut away the center strip on each window. Fold each window in half, adhere the folded windows together to form a dome support for the flowers. Using the versa-mark pad, ink the edges of the window edges, apply gold embossing powder then heat the edge to melt the powder. Add more if needed. Adhere the ? pearls to the wholes on the flowers in the cut. Die cut and adhere a circle to fit the top of the dome. Place and adhere with the glue gun the ? polystyrene ball to the top of the dome. Adhere the ribbon to the top center of the ball. Using the Lindy’s stamp gang misters and a water mister spray the window dome. While the dome is drying, stamp, color, die cut and shape the flowers leaves, vines etc. Once shaped you can arrange and adhere with the hot glue gun. Add ? pearls to the Orchid centers Apply golden rod stickles to the Lily stamens.


I did not make enough close ups this time...I know. But you get the idea and thats the main thing. I adore this and am planning to make many more to hang in my window.
Have a inky scrappy week...wishing you lots of craft ideas.
OXO
sussipoppins

Wednesday, June 22, 2016

'FOR MY FRIEND'


‘For My Friend’

Heartfelt Creations Products Sold And Carried BY Heartfelt Creations
Other Products Used:
Cardstock: A4 Crafters Companion-Centura Pearl-snow white hint of gold 300 gm, Green Bazzill. Aquarelle paper. Tonic: Paper cutter, Die cutting machine. Ranger: Icicles stickles, Heat gun, Paper distressing tool, Water coloring brush. Derwent-inktense 72 pencils: Fern-1560, Cadmium yellow-0210, Tangerine-0300, Fuchsia-0700. Other: Versa-mark, Yellow-gold crystal stones, Hot glue gun, Foam tape.

Click HERE see the video on the Botanic Orcid collection
Click HERE to see the video on using the Deluxe Flower Shaping Tool Kit
Click HERE if you are having problems with detailed dies.
Please Note: All the stamping is done with the gold embossing powder.
This tent fold card when finished measures 20.9 cm x 14.7 cm.
Instructions:

Take the A4 sheet of card stock and fold in half, this becomes your card base. 
Take the green cardstock, cut this to, 21.7 cm x 14.3 cm. 
Distress the edges. Find the design paper from the paper pad, cut this to 19.9 cm x 13.8 cm. Stamp the Elegant word background on this paper then distress the edges.


Stamp the sentiment to the right lower corner of the card front.


 Adhere with foam tape or foam dots, both the green matting and the paper front to the card base. Using both together, the two outer window frame dies, cut twice. Trim to make these two die cuts into an oval. Adhere to the card front. 


Adhere the crystals to each end of the oval. 


Isn't this little guy the cutest...a lot of fun bringing colour to him.


Stamp, color, die cut then shape the Humming bird, orchid swirls and orchids with the shaping tool kit.


Adhere in place so you will not see the join in the oval. Apply stickles to the orchid centers and buds on the orchid swirl.


Above, a close view of the application of the stickles.
I hope you have enjoyed this weeks posting....such a fantastic collection. The Botanic Orchid Collection can be applied to any occasion.
*****
You all have a inky scrappy week...till next Wednesday oxo
sussipoppins

Sunday, June 19, 2016

'You never know when you are making a memory ' LO


Hi, doing a show and tell today.... 
A LO made using the Scrap-berry paper line.


A work shop given yesterday at Handmade hobby store in Holland/Nederland by myself.


If you have not got a photo....use a preprinted...Sepia goes with everything...lol


Close shot of those fun sugars berries and ...yes...you see Lindy's sprays used. All that yum dripping down the page.


Wired ribbon is always a winner with me...it is so forgiving....lol


Love the break in the papers...distressing...may be not the trend at the moment...but it is timeless and here to stay for me.


fussy cutting and layering....love it!


The flowers are made from the Tim Holtz movers and shapers...


Inked of course, with Tim's distress inks


Brads placed...got to have some bling somewhere...right...


Another close shot of those sugar berries again....and yes...you see some masking and gold embossing....we all know how addicted I am to the gold powder....lol


A special thank you to all the girls that took part in the work shop Saturday....I really enjoyed meeting you all and catching up with a few I have already met a few times before. Everyone finished their flowers before 4pm...bar one...our delightful full of fun, but that was a choice...lol. Sweet Thea, wanted to extend the enjoyment even more, so she decided to finish the LO later with the 3 craft divas accompanied her for the day....secretly she just wanted the best of both worlds, I saw her looking over every ones shoulders....lol...love you Thea! So looking forward to meeting you again.
You can see we all had a lot of fun Saturday at Handmade hobby store.
Any one wanting to book in for a all day fun flower work shop, make contact with Handmade and put your name forward.
I wish you all a inky scrappy time...till next posting...
xox

Tuesday, June 14, 2016

'SYMPATHY' card


A few words about this elegant collection....
Showy, elegant and graceful, the divine orchid flower is one that is most certainly recognizable for its unique shape and known for taking center stage all on its own!  Heartfelt Creations presents to you their newest collection…The Botanic Orchid.  Overflowing with stunning floral images enveloped in soothing moss like greens, soft sky blues, creamy whites and flowery pinks, alongside rich burgundies and vibrant teals this collection is sure to appeal to any flower enthusiast.  Intricate illustrations and die cuts of orchid blossoms and bouquets, accompanied by delightful hummingbirds and scripted sentiments will have you creating your very own botanical experience with hand shaped orchid flowers bringing a realistic touch to all of your paper creations!  Preprinted sentiments along with those in the stamp collection are ideal for covering a wide range of occasions including weddings, friendship, sickness, encouragement and sympathies.  As one of the oldest flower species in the world, this unusual blossom native to rainforests and jungles has also taken on beautiful meanings relating to each specific orchid color including innocence, grace, joy, respect, admiration, health, happiness and passion, making this the perfect flower to convey a silent but special message for friends and loved ones on any paper creation!

‘SYMPATHY’

PRODUCT LIST

Other Products Used: 
Derwent-inktense pencils 72:Fern-1560, Cadmium yellow-0210, Tangerine-0300, Fuchsia-0700. Paper and cardstock: Crafters companion-snow white hint of gold 300 gm, Water aquarelle paper, Gold card stock. Tonic: Paper cutter, Die cutting machine
Other: Water brush pen, Heat gun, Versa-mark. Spellbinders S4-448-Victorian tags.Tonic paper cutting machine, Tonic die cutting machine.

Click HERE to see tips on the Window Frame die
Click HERE for tips on this collection

Instructions
This finished card measures 20.8 cm x 14.6 cm. Take the A4 cardstock and fold in half for the card base. Choose the design paper from the paper pad and cut 14 cm x 20.4 cm. 
With the Elegant word background stamp, stamp the background on the design paper. Adhere to the card base with foam tape or foam dots. Stamp, color and die cut the orchids and humming bird, using the water aquarelle paper. 


Cut with the gold cardstock the window frame and tag. With the design paper stamp and die cut the sentiment.  


Adhere one of the orchid sprays, trimming on the left side to fit the shape of the window.
 Adhere the window in place. 


Using foam dots adhere the 2nd orchid spray and tag. 
Above you can see how the die cut is placed over the window.
Under you see all the layering.


Adhere the cut away pieces of the orchid spray to the left of the tag. 


Place and adhere the sentiment and humming bird.
 Sorry the lighting was not that great on the gold, but you get the idea. The real life card is much better than shown in the photo....but that is always the case...2nd...can't be good at everything...lol
Hope you had fun and got some inspiration while visiting my place today.
Inky hugs 
sussipoppins

Wednesday, June 8, 2016

Introducing the new Botanic Orchid collection with a card....


Introducing the new Botanic Orchid collection
Showy, elegant and graceful, the divine orchid flower is one that is most certainly recognizable for its unique shape and known for taking center stage all on its own!  Heartfelt Creations presents to you their newest collection…The Botanic Orchid.  Overflowing with stunning floral images enveloped in soothing moss like greens, soft sky blues, creamy whites and flowery pinks, alongside rich burgundies and vibrant teals this collection is sure to appeal to any flower enthusiast.  Intricate illustrations and die cuts of orchid blossoms and bouquets, accompanied by delightful hummingbirds and scripted sentiments will have you creating your very own botanical experience with hand shaped orchid flowers bringing a realistic touch to all of your paper creations!  Preprinted sentiments along with those in the stamp collection are ideal for covering a wide range of occasions including weddings, friendship, sickness, encouragement and sympathies.  As one of the oldest flower species in the world, this unusual blossom native to rainforests and jungles has also taken on beautiful meanings relating to each specific orchid color including innocence, grace, joy, respect, admiration, health, happiness and passion, making this the perfect flower to convey a silent but special message for friends and loved ones on any paper creation!

‘Warmest Wishes’


HCDP1-267 Botanic Orchid Paper Pad
HCPC-3741 Botanic Orchid Cling Stamp
HCPC-3742 Regal Humming Bird Cling Stamp
HCPC-3743 Botanic Orchid Bouquet Cling Stamp
HCPC-3744 Botanic Orchid Wishes Cling Stamp
HCD1-7100 Botanic Window Die
HCD1-7101 Botanic Orchid Die Set
HCD1-7102 Regal Humming Bird Die Set 
HCD1-7103 Botanic Orchid Bouquet Die Set


Other Products Used:
Cardstock: A4 Crafters Companion Centura pearl-snow white hint of gold 300 gm, , Bazzill Fuchsia Cardstock. Aquarelle paper. Tonic: Paper cutter, Die cutting machine. Ranger: Icicles stickles, Heat gun. Derwent Inktense 72 watercolor pencils: fuchsia-0700, Dusky Purple-0730, Fern-1560, Cadmium yellow-0210. Pink wired ribbon, Foam tape, Zutter bow maker, Foam tape, Versa-mark, Hot glue gun, Tonic paper cutting machine, Tonic die cutting machine.

Instructions:
Click HERE to wet your appetite
Click HERE to see the video on using the Deluxe Flower Shaping Tool Kit…
Click HERE to see tips on this collection


This tent fold card measures when completed, 20.9 cm x 14.7 cm. Please note: All the stamping is done with the gold embossing powder. Using the A4 Crafters companion card stock, fold in half to make the card base. From the Fuchsia cardstock, cut 14.3 cm x 20.3 cm, adhere to the card base with foam tape. 


Find the paper from the paper pad with the diamonds design, cut all the diamond shapes out. Gold emboss the edges of the diamonds with the orchid spray on it, trimming as needed to fit the card matting. Adhere to the matting with the foam tape or foam dots. This was a fair bit of work...but well worth it, you can get 2 cards out of 1 design paper. The diamonds are already printed so this cuts all the measuring part out of the equation.


Die cut the frame using the Fuchsia cardstock and the two outer dies from the window frame. Adhere to the card front. 


Make a triple bow and adhere to the card.


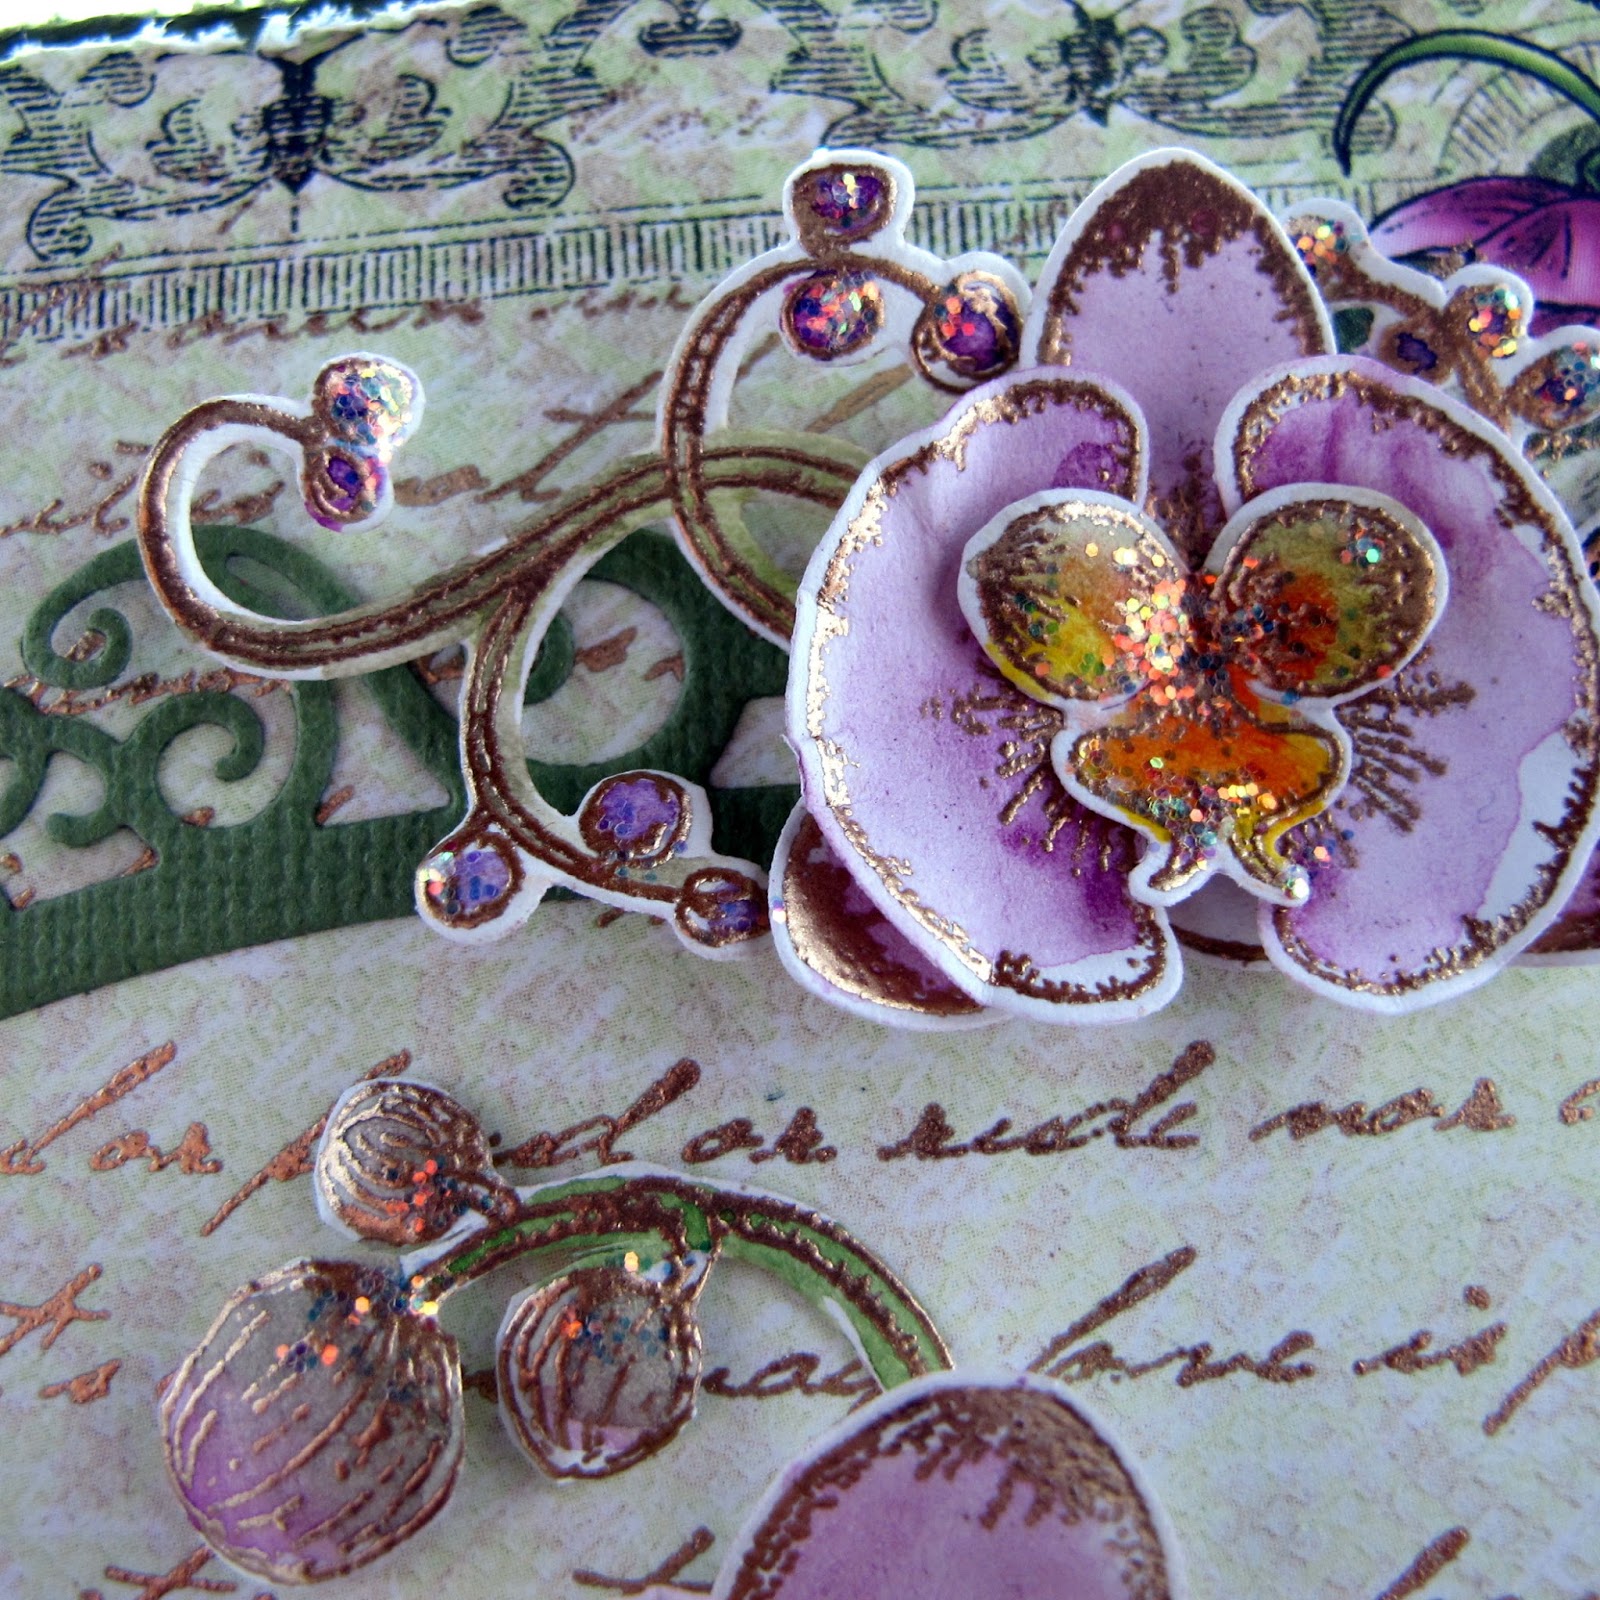
Stamp, color and die cut the orchid, orchid swirl and the orchid trail from the Botanic orchid bouquet sentiment. Mask and stamp the sentiment, ‘Warmest wishes’ from the same stamp. 


Trim the sentiment then apply embossing powder to the edges. If extra embossing powder gets on the tag...that looks even better. So don't greek out, if you think it is too much brush the powder off a little before bringing heat to the banner


Here you can see all the water colouring, I think it brings texture to the Orcid...so yum with the gold embossing powder....I am so addicted to this....thats if you have not already guessed....hahahaaha

Adhere to the card. Bring shape to the elements with the flower shaping tool kit. Apply stickles to the frame. 
Below you can see the layers..the humming bird tucked between the ribbon makes a subtle finish to the embellishment. He is so cute! You could add stickles to him if you wanted him to pop more.


When dry arrange and adhere the elements in place. 
Another view of the finished card, you could change the sentiment for a card for any occasion.


I hope you love this card as much as I do....so love this collection!....Always falling in love with what Heartfelt Creations brings out.... Till next week...inky hugs and wishing you all scrappy sunshine,
sussipoppins love...oxo


Wednesday, June 1, 2016

Under the Sea...SLASH! LO

Hi, this week another Under the Sea creation....but this time a LO. Have fun.....

Heartfelt Creations Products and Products Carried by Heartfelt Creations:
DDOTS -Double Dots/3d foam squares
159723- Art Institute Glue
359760-Gold Embossing powder

Other Products Used:
Ranger: Icicles Stickles, Heat Gun, Water Coloring Brush, Water Mister, Distressing tool, Sanding tool. Distress Inks: Mustard Seed, Tumbled Glass, Crushed Olive, Broken China, Dried marigold, Weathered wood, Peeled paint, Green bough, Tea die, Tattered rose, Dusty concord, Fired brick, Forest moss. Other: White cardstock, Versa-mark, Fussy Cutting Scissors, Cardboard from a packing box/pizza box, Tonic paper cutter, Viva crackle medium-901, Spatula, Dutch Doo-ba-doo wavy stripes mask-407-715.037, Pearl beads-pink, Tonic paper cutter

Click HERE to see the flower shaping tool kit in use
Click HERE to see the introduction of this collection.


INSTRUCTIONS:
Please note: All the stamping is done with gold embossing powder.
The finished size of this lay out is 30.5 cm x 30.5 cm. The photo size used; 4x 5.7 cm x 4.4 cm. 
 Cut a LO backing from cardboard or grey board 30.5 cm x 30.5 cm. Find the pink design paper from the paper pad. Cut ay 15 cm, twice. Distress the edges.


Cut 1 strip at 30.5 cm x 6 cm and 2 strips 30.5 cm x 3.7 cm from a blue paper from the pad. The 3.7 cm strip edges are distressed then adhered to the 15 cm paper edges. The 6cm strip is used to join the 15 cm papers together to make the 30.5 LO base. Spray the open ends with water so you can curl the edges open.


While the LO base is drying you can stamp, color, die cut and shape all the images. Cut the photos to size and back with cardboard. Sand the edges.

Apply the medium with the mask to the LO base. This crackle medium does not take long to dry.


Make the matting for the photos with the pink design paper and the pocket border dies. The paper size used for this is 17 cm x 15.5 cm.


Adhere the photos to the photo matting paper.  Taking the versa-mark, apply a little to the border edges then add the embossing powder. Adhere the photo matting to the center paper join line so the lower border falls just under the line. Add cardboard to the back of the matting to get the needed height.

Place and adhere the jellyfish


seahorse first then the flowers.


Add the leaves, swirls and coral borders as fillers.


Adhere the fish to their place.


Add the stickles for the finishing touches.


Add the sentiment/title.


Thanks for dropping by today....next week we have another new collection release....can't wait. You can get a sneak peek by going back to the Heartfelt Creations Blog....thats if you have not already seen it....hahaha

Scrappy inky hugs,
Sussipoppins