Wednesday, July 27, 2016

What fun....a Candy Sleigh in July!

 Hi, something yummy today. Enjoy the calories...lol


Heartfelt Creations Products And Products Sold On Our Website:


Other Products Used:
White cardstock
Ranger: Star dust stickles, Heat Gun, Water coloring brush, Water mister, Inking foam tool. Bone folder, water mister. Distress Inks: Forest mist, Pine needles, Dusty concord, Seedless preserves, Ground espresso, Barn door.
Other: Versa-mark, Thin cardboard , Glitter glass.


Instructions:
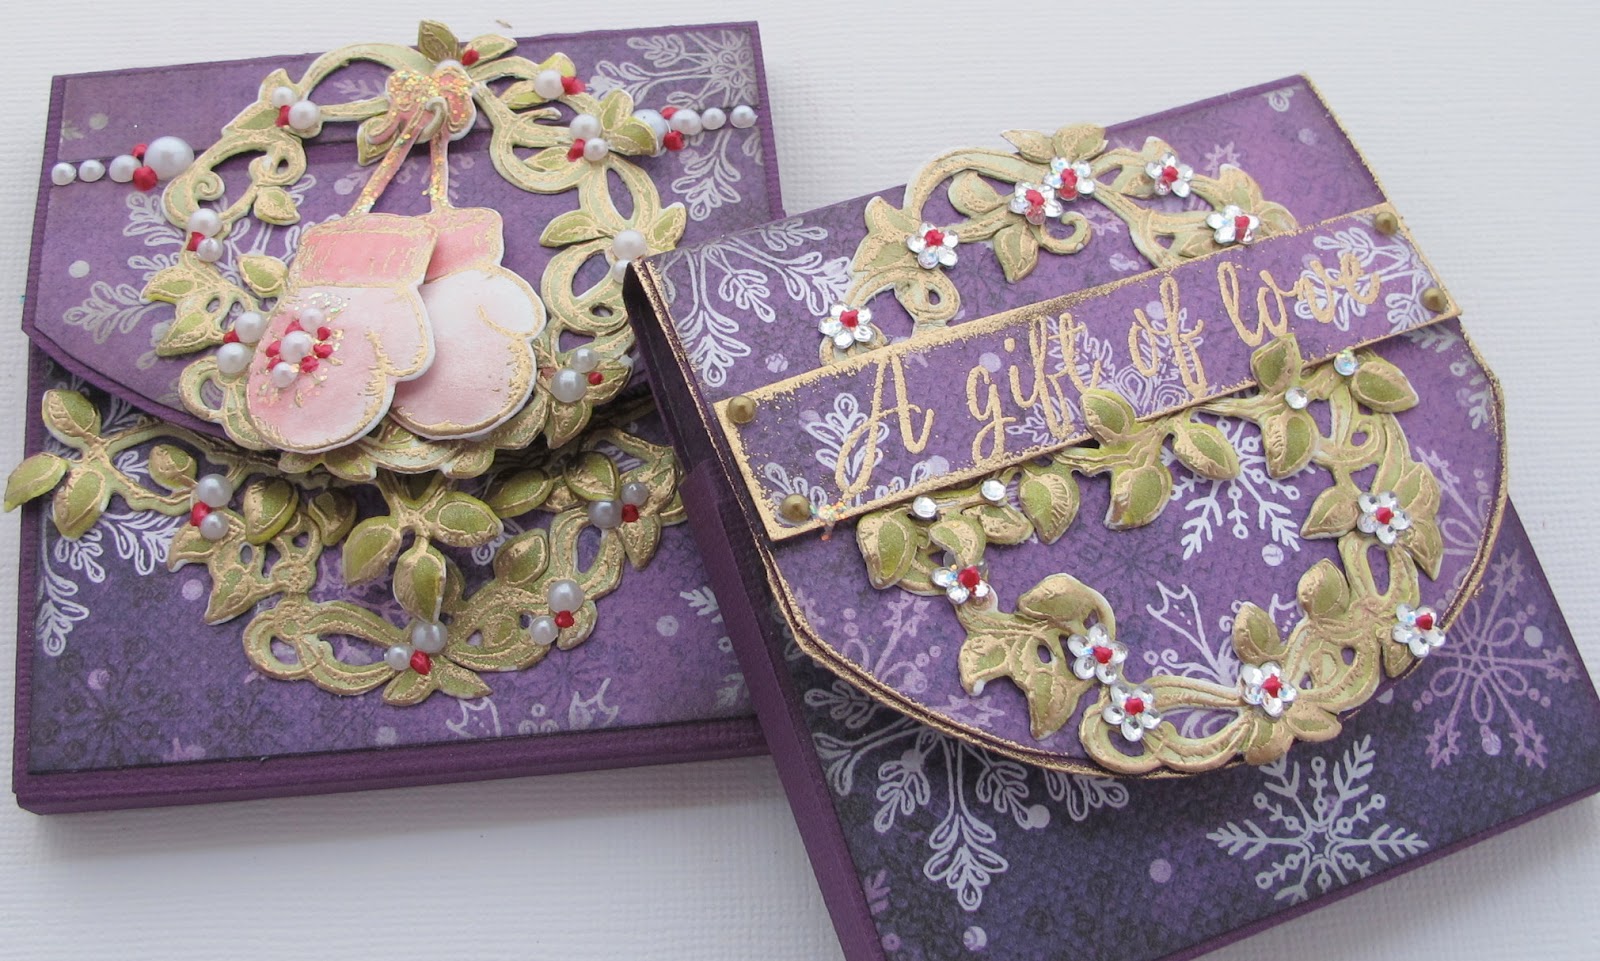
The finished size of this project is 14 cm  x  10.5 cm.


Taking the sleigh stamp and die, stamp on the white card stock x 2. 
Die cut, plus cut 4 extra from the thin cardboard or x 8 from the card stock. 
Adhere together so you have 2 sets the same.


Bring ink onto the embossed sleigh fronts. 


Make the box to size 4 cm x 8 cm x 2.5 cm. 
Ink the box edges then adhere the leaf banner across the box front and back. Below you see the back.


 Adhere the box between the sleigh shapes as seen above.


Apply glue to the bottom of the sleigh gliders / skates, then apply the glitter glass.


Make the wreath and poinsettias. The barn door distress ink is added to the glitter glass flakes once they are dry.


Adhere the flowers to the sleigh and hang the wreath on the sleigh front. 

Add stickles once all is dry and secure. 
Fill with sweets or chocolate bars. This can be given with love as a gift or placed as a table centrepiece.
Told you this weeks posting was going to be yum! You can change the flowers then this will change the whole look of the Candy Sleigh....should really do one and show you...on the round to it list.....
with that thought...wishing you a happy scrappy day.
sussipoppins inky hugs!


Wednesday, July 20, 2016

'You're the best' card

 Hi, 
Thinking out of the box with.....using the Celebrate the Season and Under the Sea collection from Heartfelt Creations...yes...I am using two collections together...nothing new for me...but you can not have a sleigh with out horses...even if they are sea-horses. 
I could not resist! 


Heartfelt Creations Products And Products Sold On Our Website:
Other Products Used:
Memento Inks: Pistachio, Pear tart, Dandelion, Grape jelly, Angel pink, Tangelo.
 Card Stock: Crafters Companion-snow white hint of gold. Ranger: Paper distressing tool, Star dust stickles, Heat Gun, Water Coloring Brush, Water Mister, Inking Foam Tool. Gold , Bone folder, water mister, Water coloring brush, distressing tool, Distress Inks: Mustard Seed, Seedless preserves. Other: Versa-mark, Fussy cutting scissors, Double sided foam tape, Red micro beads, Martha Stewart Turquoise flakes, Needle and gold thread, Pink pearls. Gold mini string of pearls.  

Instructions: 
Click HERE to see the  Deluxe Flower Shaping Tool Kit .
Click HERE for tips on making the Hibiscus flowers…
The finished size of this tent fold card is 21 cm x 4.8 cm. Please note all the stamping is done with the gold embossing powder. Cut and fold the cardstock to make a tent fold card to the above measurements. 
Cut from the paper collection 2 matting layers. 1st 20.5 cm x 14.3 cm 2nd 19.7 cm x 13.4 cm Stitch the edges with the gold thread. 


Distress the edges of these papers with the paper-distressing tool. Adhere to the card base with foam dots or tape. 


Stamp, color, die cut and shape the embellishments for this card. The seahorse is cut a few times extra to make chipboards. 


The sleigh is attached from the base, the flowers are tucked and glued, into the sleigh then the leaves are added from behind. 


Make the sentiment and adhere with the coral swirl peeking from behind.


The mini gold string of pearls,  are adhered to the seahorse’s neck and sleigh front swirl. 


Cut the shell corner border in 2, then adhere in a line. 


Add a flower to hide the join. 


Apply crystal lacquer or clear glue in thin lines along the border then sprinkle the Turquoise flakes.  This makes it so... yum!


Add the pink pearls to the flower centres. The pearl centres makes the under water scene so much more appealing and luxurious.


To finish, as always, apply a layer of stickles to the flower stamens, swirls on the sleigh and to the seahorses. Can't not have any bling!


A close, close up of the stickles placement...and this wonderful sea-horse....love sea-horses!


You can see how the stickles, follows the swirl lines. You also get a angled close up of the gold string of pearls connecting to the sleigh front.
******
Well, I hope you had fun on this visit, seeing how it can be so much fun thinking out of the box. This sleigh can be used in so many ways in combo with other collections...another reason why getting each collection can be a wise investment....hahaha.
I ask you.....do we really need an excuse?

With that thought in mind I wish you all a very inky scrappy week. 
Till next Wednesday, Inky hugs,
sussipoppins


Wednesday, July 13, 2016

A new collection from Heartfelt Creation! 'Celebrate the season'

 Let me show you in the next few weeks what you can do with this release....thats out of the box....lol...starting this week with a...Chocolate Gift box


Heartfelt Creations Products And Products Sold On Our Website:


Other Products Used:
Card Stock: White, Purple. Ranger: Icicle stickles, Red liquid pearls, Heat gun, Water coloring brush, Water mister, Ink foam tool. Bone folder, water mister, Water coloring brush. Distress Inks: Barn door, Mustard Seed, Crushed Olive, Black Soot, Forest moss. Other: Crystal flowers and stones, Gold ? pearls. Versa-mark. Fussy cutting scissors. Double sided Tape. DUTCH DOOBADOO 470713017-box art merci


Instructions: 
The finished size of this box is 9 cm x 8.8 cm x 1.8 cm. Please note, all the stamping is done with the gold embossing powder. Taking the purple cardstock trace and cut the box from the DOOBADOO pattern. 


With the design paper from the collection cut matting for the box. 


Both boxes gets the attention...lol


Cut a strip 2 cm x 8.3 cm and stamp the sentiment. Apply gold embossing powder to the edges. 


Adhere the gold pearls to the sentiment, then adhere to the box lid.
Above you can see where the pearls are added.


Stamp, die cut, color and shape the wreath and leaf strip. Cut the wreath in 1/2, adhere to each side of the sentiment. Taking the leaf banner, trim to size then adhere to the under side of the sentiment. Adhere the flower stones to the wreath and apply stickles to the flower centres.


To the inside of the box adhere a strip of the leaf banner across the opening. 


Add the crystal stones to the center of this banner. 


For the second box, 


make it in the same way only there is no sentiment, instead a pair of mittens are hanging from the wreath. 


Pearls are used instead of crystals. 


Place Merci chocolate bars or such like in the box as a little something for some one special.


I hope you will get a chance to make this. It was so fun!
Inky hugs

Wednesday, July 6, 2016

HEARTFELT CREATIONS WEDNESDAY...

BOTANIC ORCHID ' lay out' 


Heartfelt Creations Products Sold And Carried BY Heartfelt Creations


Other Products Used:
Card Stock: White, Blue.
Ranger: Star dust stickles, Heat Gun, Water Coloring Brush, Water Mister, water mister, Water coloring brush, distressing tool. Distress Inks: Crushed Olive, Dusty concord, Chipped sapphire. Spellbinder dies:S4-572 wreath, S4-541 Majestic oval, S4-388 Standard Circles sm, S4-531 Romantic Vines. Other: Versa-mark, Fussy Cutting Scissors,
Double Sided Foam Tape, Cardboard from a packing box, Tonic paper cutter, Tonic die cutting machine, Grey ? pearls,

Click HERE to see the video on using the Deluxe Flower Shaping Tool Kit…
Click HERE to see the video on this collection….


Instructions: 
The finished size of this LO is 30.5 cm x 30.5 cm. The photo/ paper print is a 6.5 circle.
All the stamping is done with gold embossing powder.
Distress the edges of the LO base. 


Tear the edges in to form tears in the sides. Adhere to the blue card stock. Taking the window die and the vellum paper, cut x 7 windows. Cut away all the strips in the window frame.


 Adhere the ends together to form an oval shape. Adhere on the LO base in a circle.


Make 14 Orchid swirls, trim and adhere between the vellum windows. Make x 6 med Orchids, adhere these in the center of the window. 


Make x 7 Orchid swirls x 1 large Orchid and x 7 small Orchids to place later. 


Cut the Large wreath x 2, the small wreath from the blue design paper using the S4-572 die. Trim to fit the inner circle. Adhere.


Make the vellum frames from S4-541 cutting x 2. Trim to fit the circle.


Using card from a cardboard box to raise the frames. Cut and adhere the stately circle. Add the blue small wreath. Place the photo. 


You can see...I did not use a photo...I used a 3d cut out of a vintage child. Of course a photo of a loved one is much better.


Using the rest of the leaves Orchids and swirls, arrange and adhere as seen in the photo. 


Add the 1/2 pearls to the Orchids and window points. 


When all is dry and secure, apply stickles to finish the LO. Below give a birds eye view on the layering.


A few more close ups


I absolutely loved making this LO....so much layering. The velum makes it so light and airy. This LO would look fantastic on a canvas...defiantly not in a book...it would get crushed!


 Thats it for today. I hope you have enjoyed your visit today at my place. See you next time....
Don't forget to return to Heartfelt Creations to take a look at all the eye candy over there today. 
Have a scrappy inky good one,
xoxoxox