
Hi, This week....doing a bit of catching up...a gate fold card I made for the Blazing Poppy Collection, but did not get round to posting..... it got lost in the getting on with life list...LOL....I thought it was too good to be overlooked...I hope you think so too
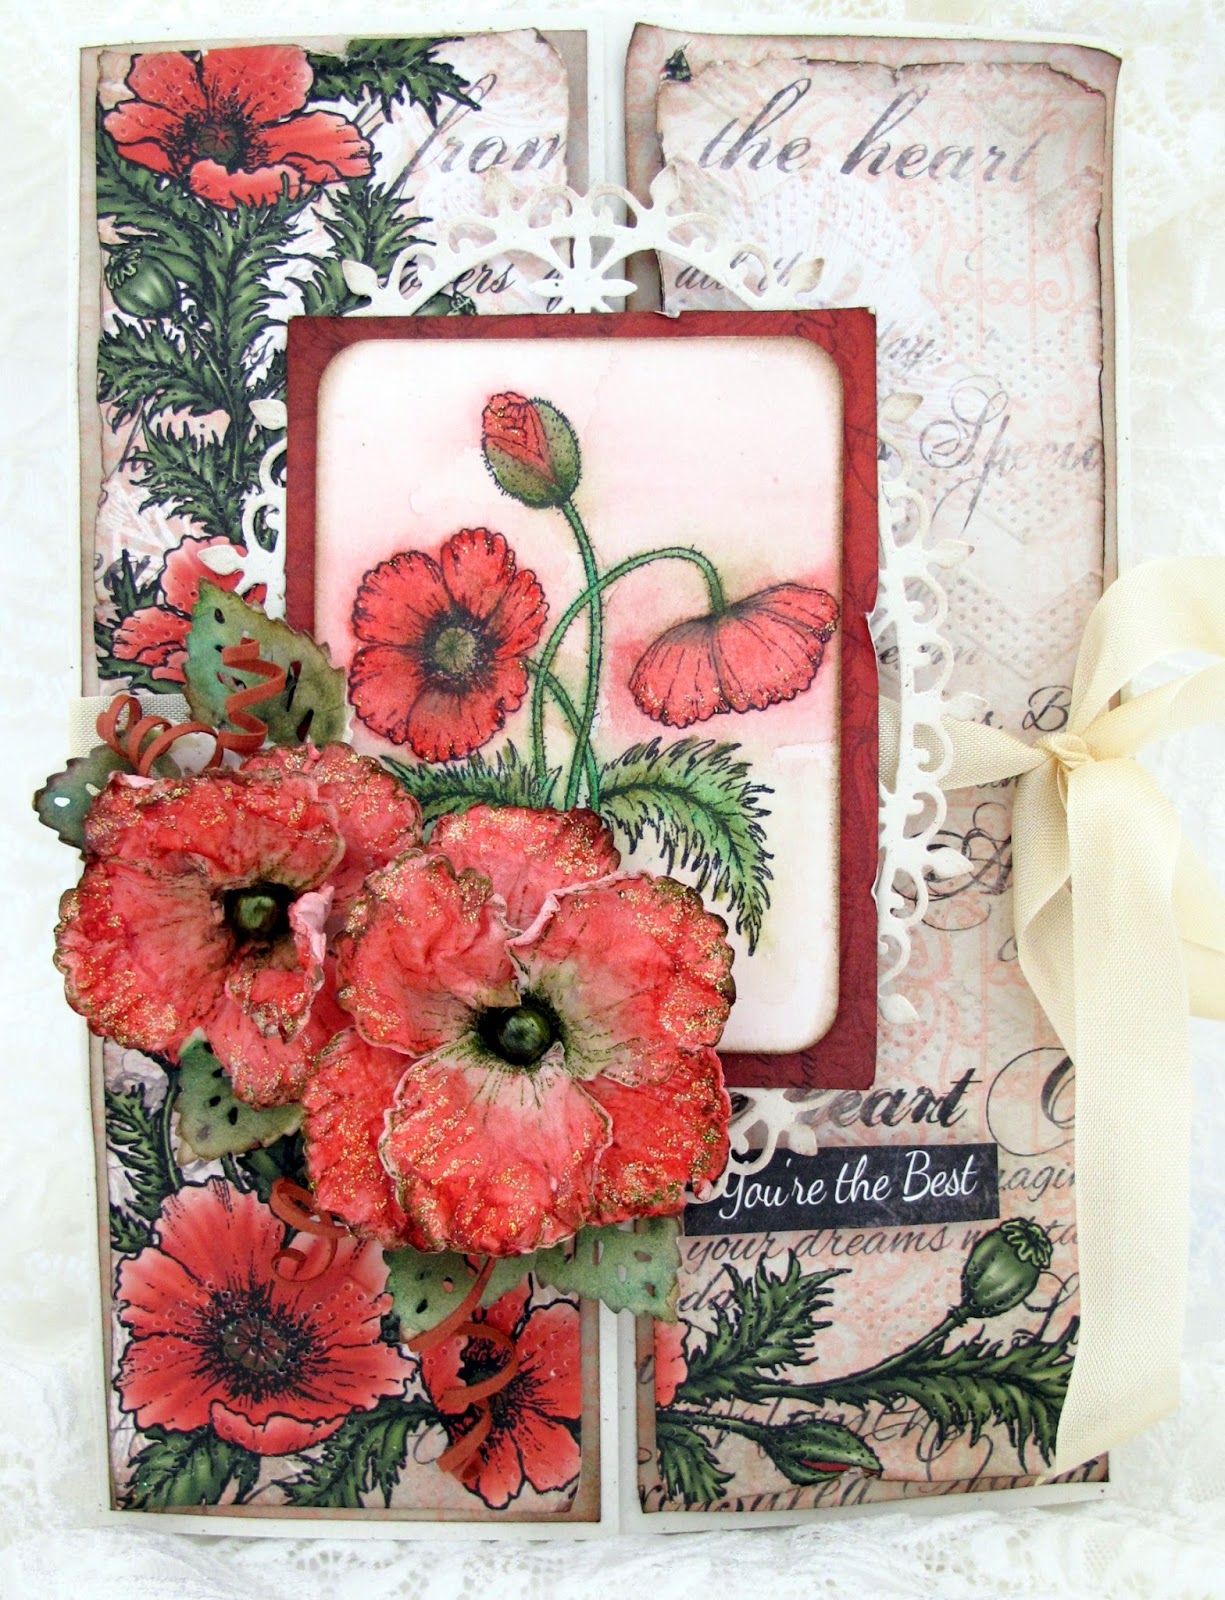
‘YOU’RE THE BEST”
Heartfelt Creations Products and Products carried by Heartfelt Creations:
Other Products: Ranger: Green distress embossing powder, Water coloring brush, Water mister, Walnut Stain distress ink, Ink foam tool, Bone folder, Heat gun,
Derwent-Inktense water color pencils: 1600 leaf green, 0500 chilli red,
Paper: SUP A4 natural white, Bazzill Brick card stock, Watercolor paper, Sketching paper. White cardboard. Seam-binding ribbon, Double sided tape. Versa-mark, 2 x pearl beads.
Green copic marker pen, E Boss embossing folder: Dotted chevron

Directions: The finished card measures 21 cm x 14.8 cm.
Take the A4 card stock, score at 7.5 cm and 22.3 cm. Sharpen the folds with the bone folder. This is your card base. For the card fronts find the papers from the Blazing poppy paper collection. Cut the card front matting 20.5 cm x 7 cm twice. Cut the card fronts 20 cm x 6.5 cm twice. Taking the embossing folder and emboss the card fronts. Water mist the papers and curl up the sides. When dry, apply the Walnut Stain ink to the edges.
With the Brick card stock cut 10.3 cm x 7.8 cm. From a SUP A4 card stock die cut the Decorative Oval and 5 leaves from the All Geared Up die set. Using the sketch paper, Blazing Poppy stamp set, stamp with the versa-mark and embossing powder, die cut with the matching Blazing Poppy die set. Color the poppies and leaves using the Derwent pencils. Mist the Poppy die cuts with water. Carefully scrunch the flowers into a ball. Gently open the Poppy. Leave to dry, checking the shaping as it dries. The Poppy will dry hard. Ink the edges with the Walnut Stain distress ink. Use the tools in the Deluxe Flower Shaping kit to make a deep dent in the center of the Poppies. This will raise the flower. Color the pearl with the green copic pen, adhere the pearl to the center of the top Poppy layer.
Adhere the layers together.
More tips on making the poppies and the whole Blazing Poppy collection click HERE
More tips on making the poppies and the whole Blazing Poppy collection click HERE

Make a screw swirl by cutting 1.5 mm – 2 mm strips of brick card stock. Quell the strips with the quelling tool in the Deluxe Flower Shaping Kit.

Taking the Poppy Corner stamp set, find the Poppy image and stamp with the Tuxedo Black ink onto the watercolor paper. Color the image with the Derwent pencils and a watercolor brush. When you have finished coloring, add a color wash over your work, dragging the colors to the background. Adding more ink if needed.

Using the Cut Mat Create die size 2.75 “ x 3.75 “ die, cut the stamped image paper to size. Cut enough white cardboard to back this paper. Ink the edges with the Walnut Stain ink. Adhere together with wet glue. Find the sentiment from the paper collection, cut to size.

Putting the card together:
Adhere the card front papers to the card base with wet glue or double sided tape. Wrap and adhere with double sided tape the seam binding ribbon around the middle of the card.

Center the Decorative Oval frame to the front of the card, adhering swirls. Adhere the sentiment with 3d squares. To finish your card add stickles to the Poppy edges on the image and the 3d Poppies, only the left side of the frame to the card front with wet glue. Do the same for the stamped image and it’s frame. Arrange and adhere the Poppies, leaves and screws.
Goes to show this is a real timeless collection!
Like all the collections....what do I invest in? We can not all do the " I want it all " thing....although we would all like to. As you have no doubt seen from all the yummy postings last month...this sure is a stayer...you can use it in so many ways.
A little hint for the next release for August....sssssst.....a few stamps and dies are a must have for the embellishments to finish any card off. When you see it, you will understand.....till then sleep well....lol...7 sleeps.
Till then you will have to get all inky and scrappy with the toys you already have,
Inky hugs, sussipoppins.
Absolutely gorgeous.
ReplyDeleteOH my giddy aunt! What glorious poppies! They look so lifelike, and the petals look so delicate. You have magic in your fingers, my dear!
ReplyDeleteWhat a gorgeous card! Love the poinsettia!!
ReplyDeleteSussi, this card is amazing! Your poppies are incredible...the blended colors and the sparkles just push them over the top! Brilliantly done!
ReplyDeleteHugs,
Tracey
Sussi I love how you shaped your poinsettias! Great design! Hugs, Robin
ReplyDeletei love how you shape your flowers, they are always stunning, and the mix of stickles/glitter adds an elegant touch
ReplyDeleteAbsolutely gorgeous in every way!!!Your flowers are stunning!!!
ReplyDelete