This week...something special from a past Heartfelt Creations release...'All Glammed Up'
Such a girly collection, I love it! I hope you enjoy all the close ups I have for you. I hope this gives a life to your inspiration for this year...with the crazy month behind us...we can get into our crafting mode again...lol....
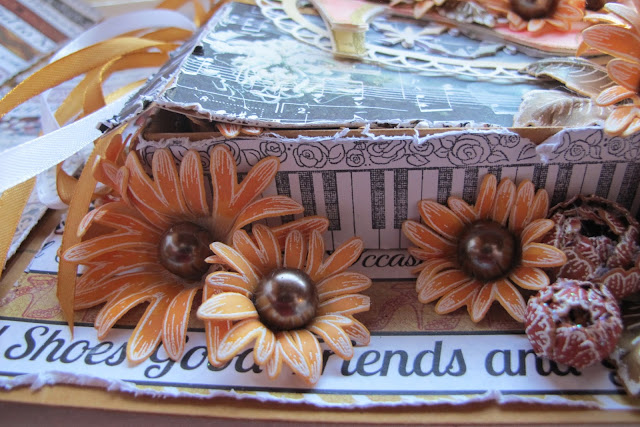
A side view of the folder
All Glammed Up Folder
Heartfelt Creations Products and Products Carried by Heartfelt Creations:
Other Products used:
30 cm x 30 cm Mustard cardstock x 4 (for the folder, box and some flowers), White cardstock (for flowers and die cutting)
Gesso, Brown pearl beads, Satin ribbon, Organza ribbon, Double sided tape, 3d foam tape,
Prim marketing lace mask, Scrapberry’s bird stencil, SUP white embossing powder, Hot glue gun, Fussy cutting scissors, Cardboard. Tule netting
Ranger: Diamond stickles, Heat gun, Water coloring brush, Distressing tool, Foam inking tool, Water mister, Netting
Inks: Archival jet black, Distress inks: Forest moss, Barn door, Mustard seed, Aged mahogany, Victorian velvet, Broken china
As promised lots and lots of close ups for you to follow. Enjoy.
A view of how royal the bow ties are.
Here you can see the ties tucked bend and under the dress form.
See how the netting and ribbon finishes the dress form.
You can see the join in the skirt to make it fuller. Apply the stickler before the netting is adhered with the glue gun.
A butterfly always needs to be fluttering by the flowers.
A front on view of the dress
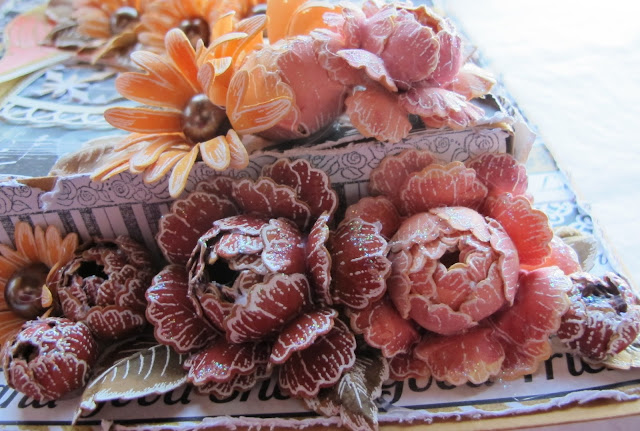
Close up of a few buds
The beads make the mums that much more a delight.
Not to for get this wonderful shoe stamp and die...love it!
Another shot of the ribbon placement. Adhered with the glue gun.
Now we open the book and look what is inside....
Sorry the colour is not perfect, but you get the idea....lol
Right lower corner flower cluster.
Top left corner flower cluster
Lower left butterfly placement.

Showing the inside spine and the right side of the inside folder.....
Lots more flowers, ribbons and plain out right yum with all that gesso!
This shoe opens out to a card. The flowers support the closure of this card.
Here you see the gesso and medium work with the stencils.
Framse stacked and glued down to frame this wonderful shoe and flower clusters.
A side view of the inner box closure.
A view of the flower placements for the inner box left lower side wall.
Showing the flower clusters on the lower right box wall and base.
We are getting there....a few more to go....the inside of the box.
Open the box....and this is what you get!
The dress form skirt is extended by adding a few more skirt layers.
Add netting and a ribbon....becomes a Cinderella dress
...and Cinderella lost her shoe...
Here you can see the raised background eyelet oval.
The corner is finished with a few beaded mums.
A post comment: I have used the heat gun to adhere all the flowers etc. This makes life very easy and quick...but you got to watch out for those hairy fairy tails...I call them....you can not see them with the naked eye...well at least I can't. So clean them as soon as you see them...not a job for later! Use tweezers to get them out. The camera picks them up very well. I had to take the shots 3 times and still had the hairy fairy tails....life happens......lol
Now for the know how instructions for this folder.
Tips on how to make flowers using the flower shaping tool kit HERE
Instructions:
This folder when completed, measures 23.5 cm x 23.5 cm x 6.5 cm.
Make the base folder using the tan card stock, 23.5 cm (front)- 6.5 cm (spine) -23.5 cm (back). Make a box for the inside of folder measurements, 16.5 cm x 16.5 cm - 3cm deep. Make the box lid measuring, 1.5 cm - 16.5 cm - 3.2 cm- 3cm x 16.8 cm. Using the design paper from the paper pad, cover the outer and inner of the folder, sides of box, box lid inside and out. Use the masks and gesso to decorate the inside spine, box and lid. Distress all the edges of the papers before adhering to the folder and box base. Cut a piece of cardboard to fit inside the box base, 16.4 cm x 16.4 cm, this will be the base for your mixed media work. Make a mask using the eyelet die and use this with gesso to give the cardboard base a white background. Use the eyelet frame for the back ground behind the dress. Raise the frame by adhering cardboard to the back of the frame. Stamp and cut the shoe. Cutting extra to make chipboard from the shoe. Stamp and die cut the dress x 3. Cut away the bodice and adhere the dress together so the skirt will be fuller. Add color and stickles to the shoe and dress. Adhere in place. Add the netting and ribbon to the dress waist. Make the flowers and adhere in place as seen in the photo. For the front lid of the box: make the following, eyelet frame, shoe card and flowers then add color to these. For the shoe card, use both shoe stamps, one for the out side and the other for the inside of the card. Make the card then adhere to the box lid on top of the oval die cut.(see the close up photo) When adding the flowers, use them as a stop for the opening of the card. Adhere in place as shown in the close ups. Adhere the box and box lid to the folder. Adding the ribbon ties as you go. Once the box is attached you can further decorate the lid and side of the box with the flowers. The photo on the folder is been given height by backing it with cardboard. Make the flowers and decorate the corners of the photo. Stamp and die cut the butterfly, dress hanger and then adhere in their place as shown. The front of the folder: make the flowers, shoe, dress and butterfly. Arrange and adhere. With the glue gun, adhere the ribbons in place under the flowers. Cut enough ribbon to make a large double bow, using 2 colors and 2 lengths for each tie.
*************
I hope you had fun scrolling down my blog today. This was such fun to make and fun to look back and relive the moment with you.
Wait till you see what Heartfelt Creations have for you in the new release...talk about fairy tale land. Even my DH was taken aback with the release.....go Heartfelt!
Got some exciting news of my own....
I am flying TODAY....a day earlier than planed..... in the wee am's to the CHA!!!!!! YAY...
Staying for a full on 9 days! wow....going to come back all scrap crazy I know! So we know my addiction is only going to get worse...no hope..one way of starting the new year...lol. I will be taking a all day to visit Disney....so may be I shall work off the crazy and leave it there. I am so looking forward to meeting other design team members....who knows may be I might fit some creating time in with them?
either that or get some shopping done..hahaha...have I room in my bag?
The only time I talk about excess weight or being over weight and not talking about my self...is when I am jet setting around the world....had to get that one in...lol
You all have a scrappy time, inky hugs till I get back
Sussipoppins hugs


WOW this is a show stopper!! hugsxx
ReplyDeleteWow Sussi! This is a fairy tale project fit for only a princess! Such beautiful detail work and all those stunning flowers! You have outdone yourself...simply amazing!
ReplyDeleteHugs,
Tracey
I so LOVE your flowers! You've used the same dies as everyone else, but how you've chosen your layers and shaped the fibers is several steps higher. Choosing to use just one layer of the Mum die really drew my attention. Beautiful! I like that other flowers appear to be opening buds, rather than full blooms. Again, beautiful! Thanks for creating this gorgeous project! Well done!
ReplyDeleteOh my word this is absolutely out of this world amazing Ms. Sussi P!! Just look at all that embossing and the gorgeous flowers! I love to pop in to see what you're up to!! Hugs, Anne
ReplyDelete