
Hi, this week a pretty elegant slider card using the Classic Wedding collection again....
this truly is a classic! Can't get enough of this collection!
I hope you enjoy your visit as much as I did creating this card.
Have fun.

Heartfelt Creations Products And Products Carried On Their Website:
359760 Gold Embossing powder
Other Products Used:
Card Stock: A4 Crafters Companion Whit-hint of gold 300gm and Peach card stock.
Ranger: Diamond stickles, Heat Gun, Water Mister, Inking tool, Bone folder, Water colouring brush, Scissors, Ruler, Black Archival Ink, Paper distressing tool, Distress Inks: Victorian velvet, Forest moss, Black soot, Aged mahogany, Faded jeans. Other: SUP Always Artichoke marker, Hot glue gun, Versa-mark, Fussy Cutting Scissors, Double sided Tape, Double Sided Foam Tape, Peach organza and lace ribbon, Misti, Crop-a-dile
Instructions:
Click HERE to find a photo tutorial on how to put this card together.
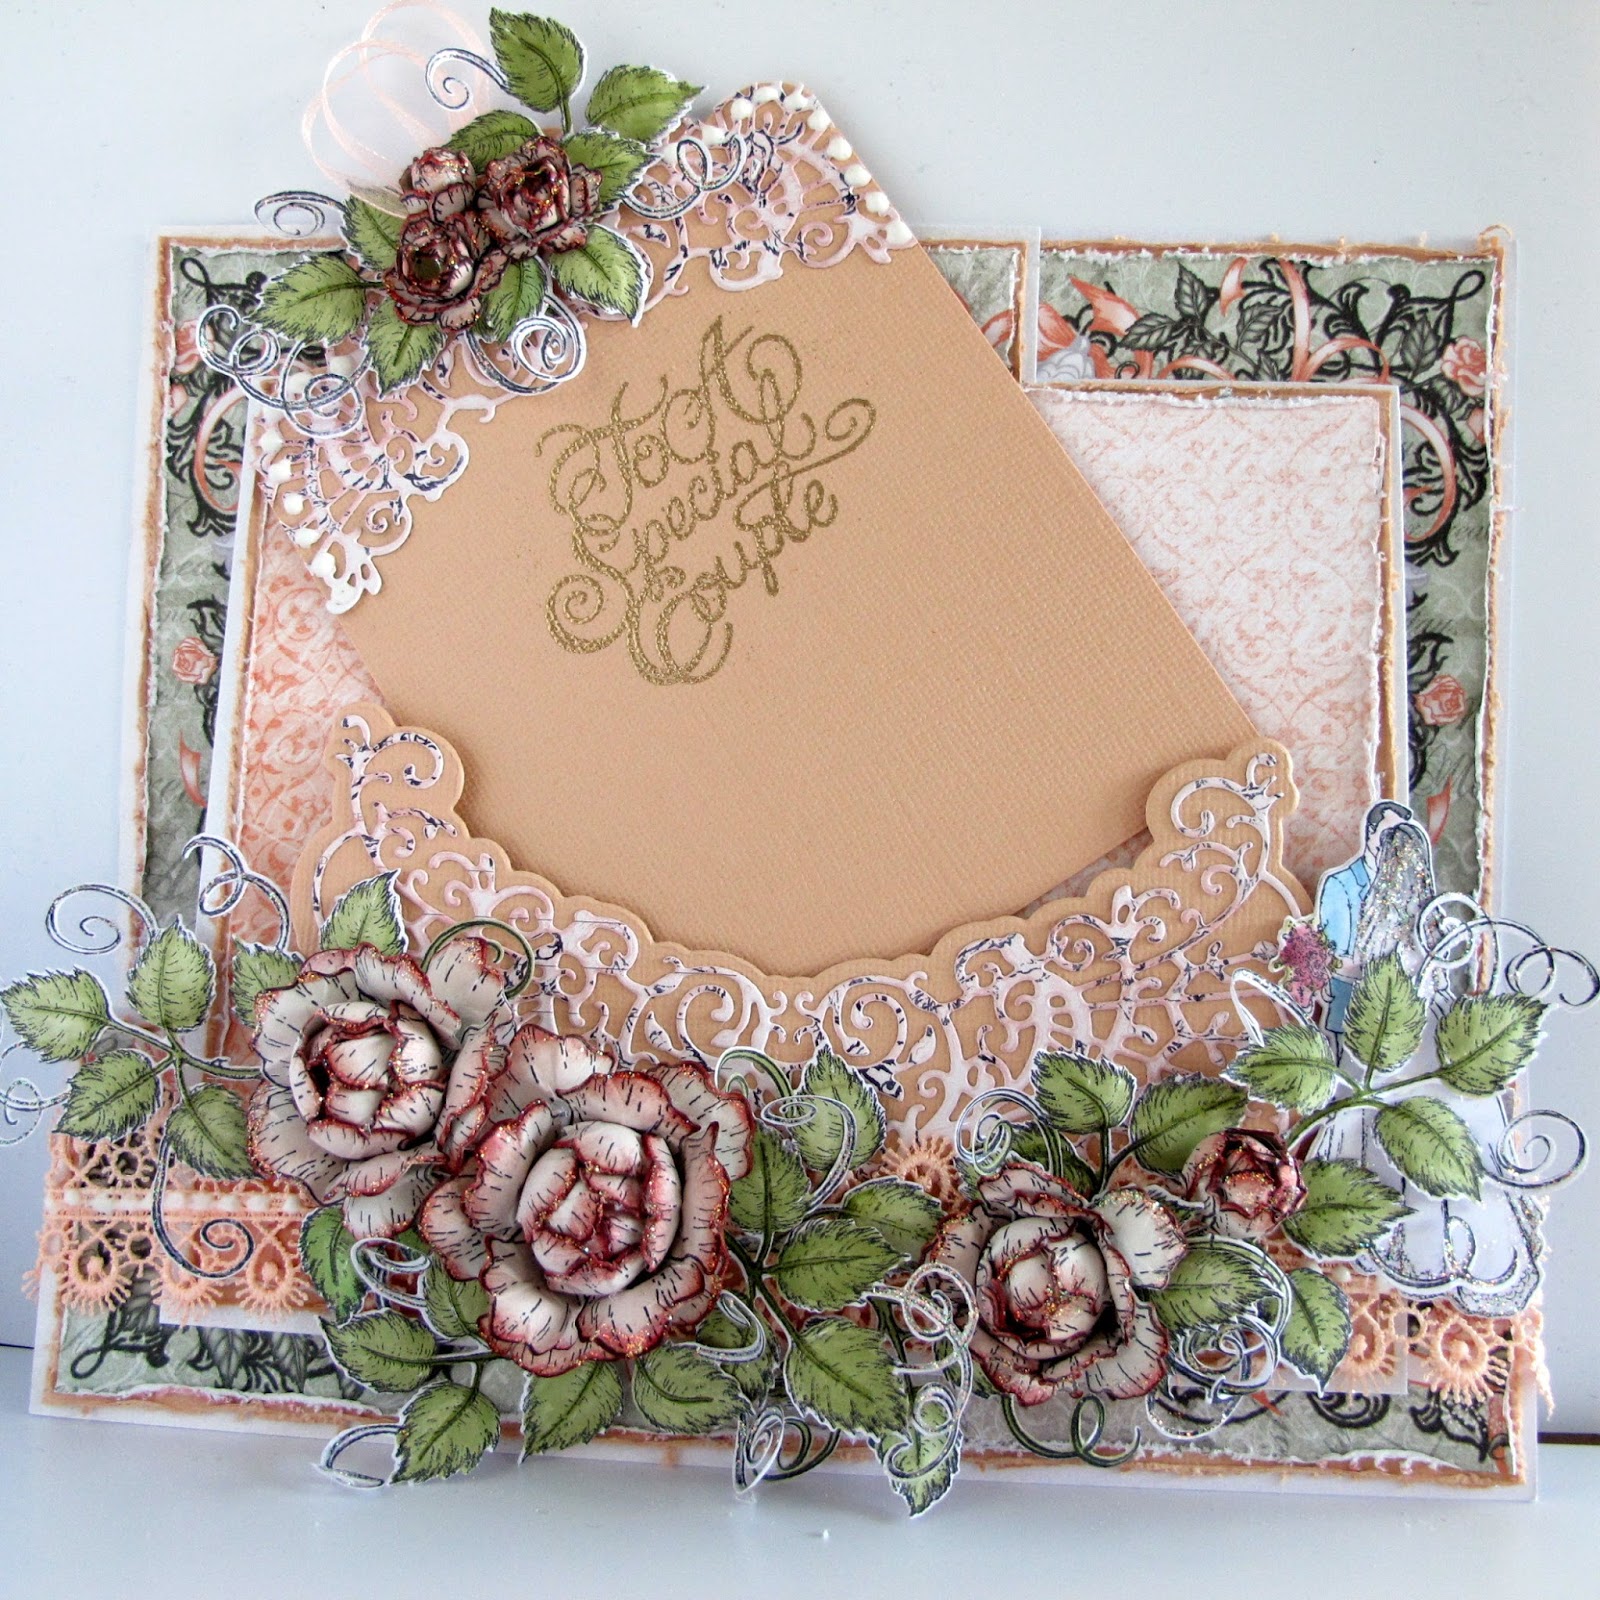
Click HERE to see the video on making the rosesThe finished size of this card: 8.2/16” x 7.1/2 (19 cm x 21 cm )
Taking the A4 300gm card-stock and make the card base, first making 2 folds, being 2.1/4” ( 6 cm ) along the long side to form the foot of the card. Fold this to a hill and valley fold.
Cut the card front base at 5.9/16” x 6.12/16” ( 14. 2 cm x 17. 1 cm )
The card slider at 2.10/16” x 4.1/2”( 6. 7 cm x 11. 5 cm )
Cut the peach card stock as matting a little smaller for the card-background, card-front, card-foot and card slider. Do the same for the design paper. Taking the paper-distressing tool, distress all the edges of the design papers. Make the tag by taking the out side die of the half round medallion lace die and use it to cut the top for the tag background. Where the die stops cut both side straight. The tag when finished measures 4” x 5.1/2” ( 10. 2 cm x 14 cm ) Taking the other lace die in the same set, use this to make the tag head. Trim away any excess at the top of the tag once adhered together. The paper lace is die cut from the white card-stock then inked with Victorian velvet, then stamped with black archival ink using the small rose heart from the Classic wedding rose stamp set. Make a hole for the ribbon using the crop-a-dile. Insert the organza ribbon in the hole and make a loop. Stamp the sentiment using the gold embossing powder.

To make the tag pocket, take the out side die of the pocket lace design and the peach card stock,
cut out.

Cut the lace part by doing the same as above. Adhere with the clear drying glue. Attach the double dots to both outside sides and foot of the back of the pocket ready to adhere later. Put aside. Adhere the card-stock and design paper for the card-background in place also the slider and card-foot. Put the card front together by adhering the design paper to the peach card stock card-front.

Apply double sided tape to all sides except the top part of the card front peach card stock layer, as this will be the opening for the slider. Adhere, now to the white card-front base. Adhere the slider to the centre top of the card background. Slide the slider into the card front opening.
With the double sided tape and wet glue adhere the card front to the card foot. Adhere the peach ribbon lace across the foot of the card where the tag pocket ends.
( this was done with the hot glue gun )

Stamp, colour, die cut and shape the Bride and groom image, the roses and at least 6 leaf swirls.
Arrange the swirls and roses across the foot of the card and head of the tag.
Add a row of drops using the Nuvo crystal drops gloss white along the out side of the tag head and the lace across the foot of the card. To finish apply diamond stickles to the Brides veil and dress lace, to the rose petals and all the leaf swirls.

Another card made with those wonderful roses. Whats so wonderful is that Heartfelt Creations have made new sets to complement what we already have ...or want. I love it that I can mix and match with the Heartfelt Creations stamp and die sets....can't wait till the next release! You will all have to wait till the 2nd Wednesday of the month for that one.
Till then, next week a lot more yum from the Heartfelt Creation Blog and of course my palce.
I got some good news too.....won't be sharing totally till after July 6th...but a new door has opened for me and I am very excited about it! So till then all is zipped up.
Inky scrappy hugs
Sussipoppins
There are no words...this is beyond gorgeous Susan!!! WOW!!!
ReplyDeleteAbsolutely beautiful!!
ReplyDeleteSo gorgeous!
ReplyDeleteWow, so beautiful Susan! I love how you did the medallion from print paper, it gives such a cool look! Gorgeous!
ReplyDeleteThis is just gorgeous!!! Hugs xx
ReplyDeleteStunning design...love the tag pocket. The flowers are ooh la la!
ReplyDeleteThe details are just exquisite Suzzi.
ReplyDeleteStunning. Your card is totally elegant!
ReplyDeleteHugs, Marie