

HCFB1-494 3D Dazzling Dahlia mold
HCPC-3928
Dazzling Dahlia cling
HCD1-7323
Dazzling Dahlia die
HCPC-3929
Dahlia and Leaves cling
HCD1-7324
Dahlia and Leaves die
HCD2-7325 Scalloped Flourish Gateway die
HCD2-7326
Ornate Flourish Gateway die
HCPC-3930
Elegant Gateway Sentiments cling
HCCB1-495 5
“ X 7 “ Gateway Fold Card-White
RACP500 Ranger
Archival Ink Pads-Sepia
RACP993 Ranger
Archival Ink Pad-Red Geranium
RACP436
Ranger Archival Ink Pad-Leaf Green
RACP663
Ranger Archival Ink Pad- ea Rose
RACP475
Ranger Archival Ink Pad-Library Green
159723
Designer Dries Clear Adhesive
HCDP1-475
Deluxe Flower Shaping paper pack of 50
HCDA1-449
Stack and Store Daubers- pack of 6
ANC814
Lettuce-Entertain-You Prills
OTHER PRODUCTS USED:
Hot glue gun, Green organza ribbon, Foam Inking tools, Double sided 3D foam tape, Double sided tape, Ranger Archival Ink Pad-Saffron, Glitter.

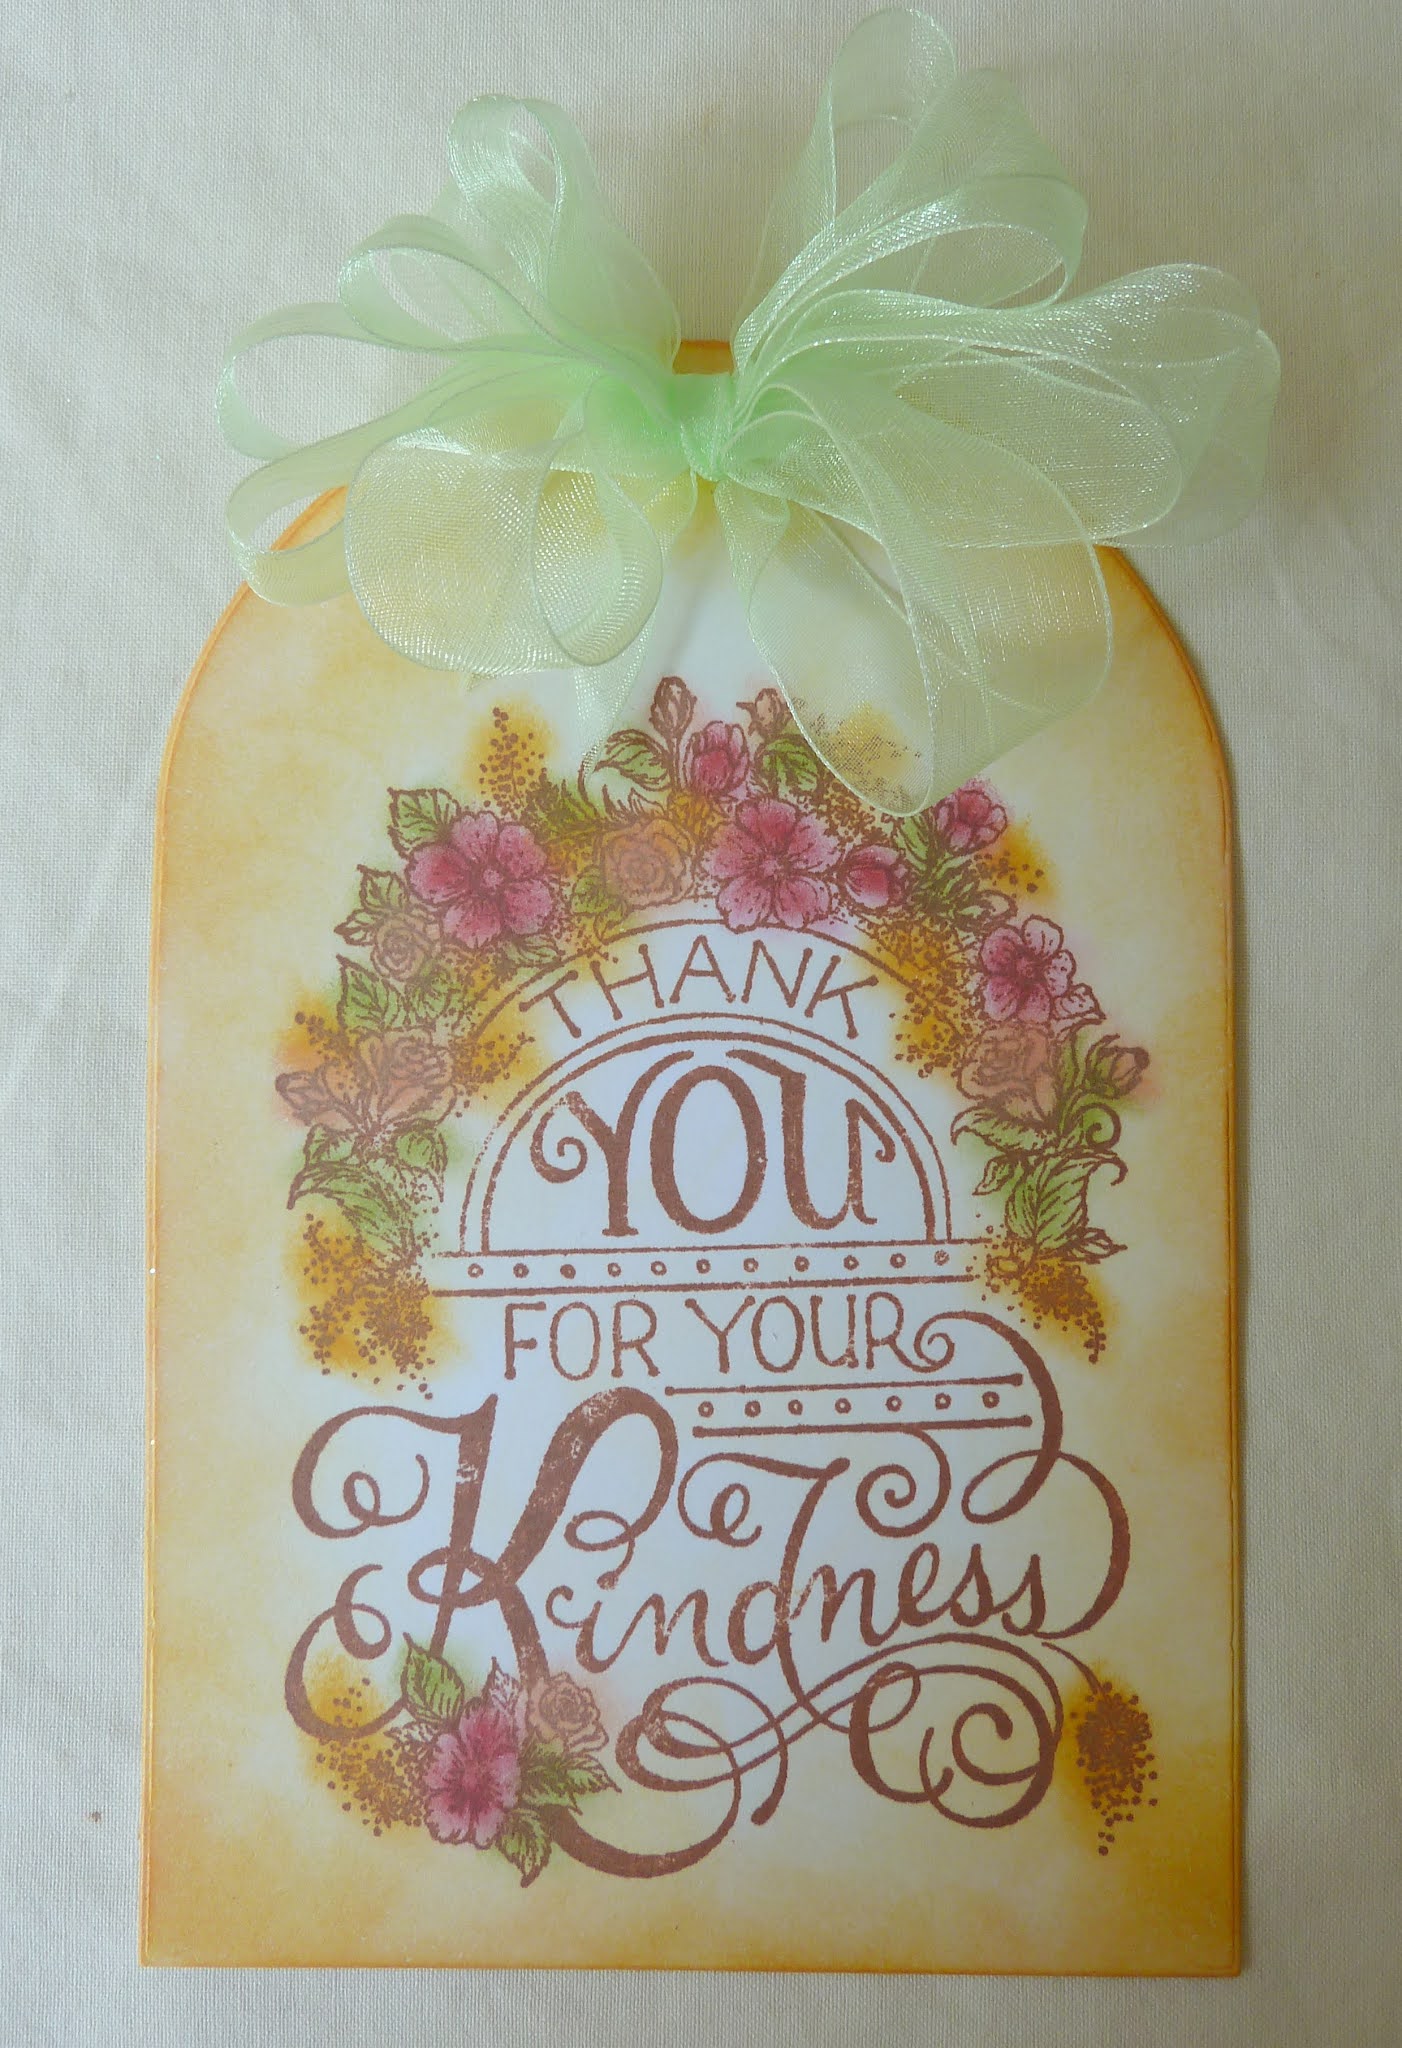
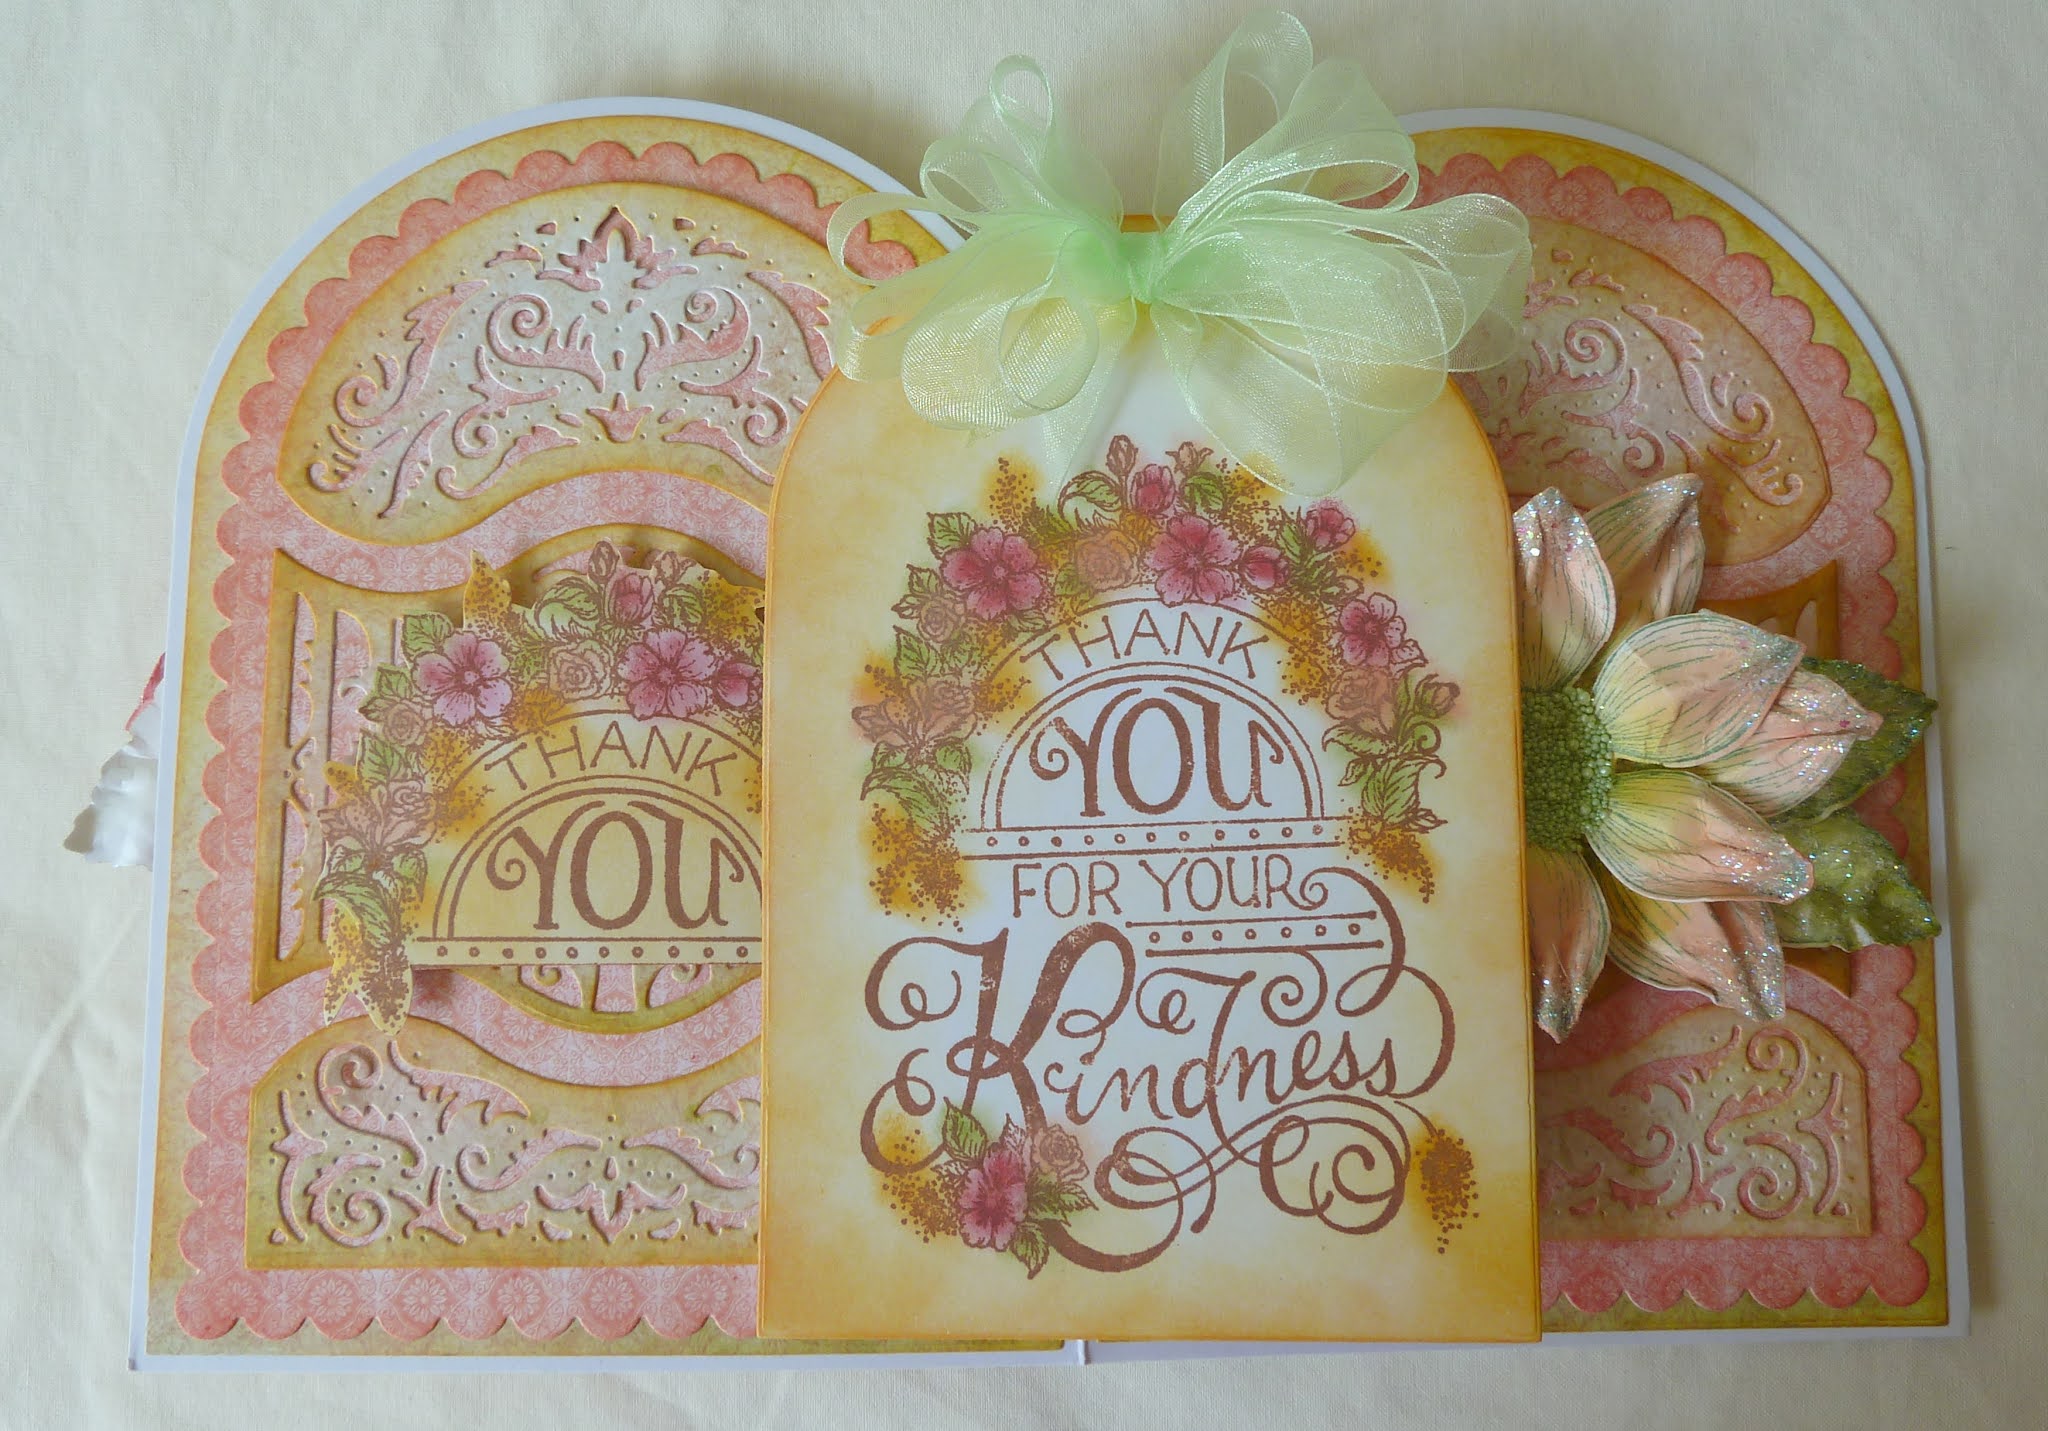
The gateway pre-made ready to go card base measures 5 inches x 7 inches. Fold the card so you can make a pocket with two of the sections. Apply a thin layer of clear drying adhesive to the three straight edges then close to make a pocket, leaving the rounded edge open. NOTE: Check to see how big the opening is before making the tag.Using the sheets 5A , 9B and the die sets Scalloped Flourish Gateway and the Ornate Flourish Gateway, die cut the frames and elements needed for this card. Ink the edges with the Saffron, Tea Rose inks and the foam inking tools. Adhere in place using the clear drying adhesive and the foam 3D double sided tape.To make the Dahlia’s and the rest of the embellishments: The Dahlia’s have each, two layers. Stamp the leaves and Dahlia’s with the Library Green ink then use the colors Leaf Green, Saffron Tea Rose and Red Geranium to bring color to them. These colors are also used to color the sentiments. Bring shape to the flowers and leaves by using the matching molds. The tips of the petals are pinched and pleated to make them more realistic. Clear drying adhesive is applied to the petal tips and leaves then dipped into glitter. Put aside to dry before using. Adhere all together and to the card base.To make the tag: Die cut the plain frame from the Scalloped Flourish Gateway set, trimming on both sides if needed to fit into the pocket. Stamp the sentiment from the Elegant Gateway Sentiment set. Color with the inks and use the Saffron ink for the edges. Adhere a triple bow to the top of the tag. Slide into the pocket. The bow will pop out above the card top so this makes the card fun when open or when it is closed.Make a sentiment banner for the front of the card and adhere this so it comes out from under the flower cluster. This card does not close flat. If you wanted it to close flat, all you need to do is not shape the petals of the inside flower as much or flatten it after shaping put a heavy book on it overnight. Then you will have shape but not the height. Have fun with that.
I absolutely adore this sentiment (below), actually both the sentiments in the stamp set. A worth while investment to the stash. Enjoy the rest of the show. till next time, have a happy scrappy week.
Keep safe and well....don't forget to sprinkle some glitter in your world.
Inky hugs


Beautiful card Susan! Your flowers are stunning!
ReplyDelete