
‘LOVE’ slider CA

Are you ready to change the world one paper craft at a time?
Spread love and encouragement wherever you go with the new Heartfelt Love Collection by Heartfelt Creations! Filled with uplifting sentiments for all occasions, you will find that this assembling of heartwarming papers, cling stamp sets and die cuts will allow you to brighten the days of friends, loved ones and those you meet along the road of life needing a little pick me up or celebrating a special day! What better way to spread smiles than through one of a kind creative projects and handmade art from the heart! The amazing assembling of decorative papers in this love themed compilation has been created of bits and pieces featuring many previously released collections and will coordinate perfectly with many of the stamp and die combinations and decorative papers from past releases already residing in your craft room. The stunning color palette incorporates every color imaginable…from deep reds, pretty pinks, lush lilacs, to chocolate browns, sky blues and gorgeous greens, while beautiful eye catching backgrounds are filled with bold stripes, zig zag chevrons, delicate hearts, petite polka dots and dainty florals. Three lovely cling stamp sets filled with images of decorative banners, beautiful carnation like florals, and a wide assortment of love sentiments are ideal for use on cards, scrapbook layouts or altered art pieces. Two delicately patterned die cuts resembling elegant eyelet lace are ideal to bring a soft look perfect for adding a dreamy and romantic feel to any paper crafting project! Lastly, an adorable gift box die rounds out this love themed collection and creates quaint treat boxes ideal for quick packaging and makes a charming way to let those in your life know how special they are. So come alongside and join us as we share love, joy, and encouragement with everyone we meet through crafty passions one paper craft at a time!
Spread love and encouragement wherever you go with the new Heartfelt Love Collection by Heartfelt Creations! Filled with uplifting sentiments for all occasions, you will find that this assembling of heartwarming papers, cling stamp sets and die cuts will allow you to brighten the days of friends, loved ones and those you meet along the road of life needing a little pick me up or celebrating a special day! What better way to spread smiles than through one of a kind creative projects and handmade art from the heart! The amazing assembling of decorative papers in this love themed compilation has been created of bits and pieces featuring many previously released collections and will coordinate perfectly with many of the stamp and die combinations and decorative papers from past releases already residing in your craft room. The stunning color palette incorporates every color imaginable…from deep reds, pretty pinks, lush lilacs, to chocolate browns, sky blues and gorgeous greens, while beautiful eye catching backgrounds are filled with bold stripes, zig zag chevrons, delicate hearts, petite polka dots and dainty florals. Three lovely cling stamp sets filled with images of decorative banners, beautiful carnation like florals, and a wide assortment of love sentiments are ideal for use on cards, scrapbook layouts or altered art pieces. Two delicately patterned die cuts resembling elegant eyelet lace are ideal to bring a soft look perfect for adding a dreamy and romantic feel to any paper crafting project! Lastly, an adorable gift box die rounds out this love themed collection and creates quaint treat boxes ideal for quick packaging and makes a charming way to let those in your life know how special they are. So come alongside and join us as we share love, joy, and encouragement with everyone we meet through crafty passions one paper craft at a time!
Heartfelt Creations Products And Products Carried On Our
Website:
Other Products Used:
Card-stock: Crafters Companion Pearla Hint of Gold a4 300gm,
Pink Card Stock.
Pan Pastels: 470.8 Violet Tint, 680.8 Bright Yell. Green Tint.
Other: Water coloring brush, Scissors, Ruler, Hot glue gun, Versa-mark,
Scissors, Double Sided 3d Foam Tape Misti stamping tool, White organza and dark
pink silk ribbons, pink embossing powder, Paper distressing tool,

Instructions:
Click HERE to see the video on using the Art Foam Paper to
make flowers
Taking the A4 Crafters companion cardstock, from the long
edge make two hill and valley folds 2.36in (6cm) to form the card foot. This
will be the card background and card foot. Cut the card front from another A4
cardstock measuring 6.70in x 5.52in (14cm x 17cm) This will be the card front
base. From the remaining cardstock cut the slider 1.78in x 3.94in (4.5cm x
10cm)

To decorate the slider card base: Find the design paper from
the Heartfelt Love collection the same as the background stamp, which is red
and pink. Cut this to fit all the card base pieces. Which is the card back
ground, 8.27in x 6.89in (21cm x 17.5cm)), card foot 2.36in x 8.27in (6cm x 21cm) and card front 3.94in x
5.12in ( 10cm x 13cm). Distress the edges of all the design papers with the
paper-distressing tool. Adhere the design paper to the card base. Leaving the
design paper open at the top of the card front base, so there will be a gape between the design paper and the card
stock. This is so, the slider can slide in and out so the card can stand on
it’s own. To decorate the slider card front: Taking the pink cardstock and the
design paper from the collection with the pink and white flower pattern, cut
the large leafy lace border and it’s matching boarder background. Cut both 2 x.
Adhere top the bard front and card foot as seen in the photo of the card. From
the same design paper used for the covering of the card base back, front and
card foot, cut 4 x the lace borders with the lace boarder die found in the
Sweetheart Borders die set. This will be adhered across the card front to form
a lace boarder, the ribbons will be placed and adhered between the two borders
as seen in the card photo. Taking the reminder of the same design paper used, make
the two scalloped hearts from the Eyelet Hearts die set. Cut 4 extra hearts
from the white cardstock in the same size of each heart. Adhere all the hearts
together to their size to form heart chipboards. To make the smaller heart, do
the same but find the heart without the scalloped edge that is a little smaller
than the second heart and using the pale pink paper with the white leaf and
flower print. The sentiment is stamped with the gold embossing powder. Apply
the pink embossing powder to the edges of all three hearts. Adhere all three
hearts together.Taking the white card-stock, pink embossing
powder and the stamp, die set Banners of Love, find the word ‘LOVE’ and
make the letters. Cut x4 extra of each letter, adhere all together to make
chipboard letters. Taking the dark pink ribbon, make x2 triple bows. Fold the
bow back on it self and secure with the hot glue gun, do this to both bows.
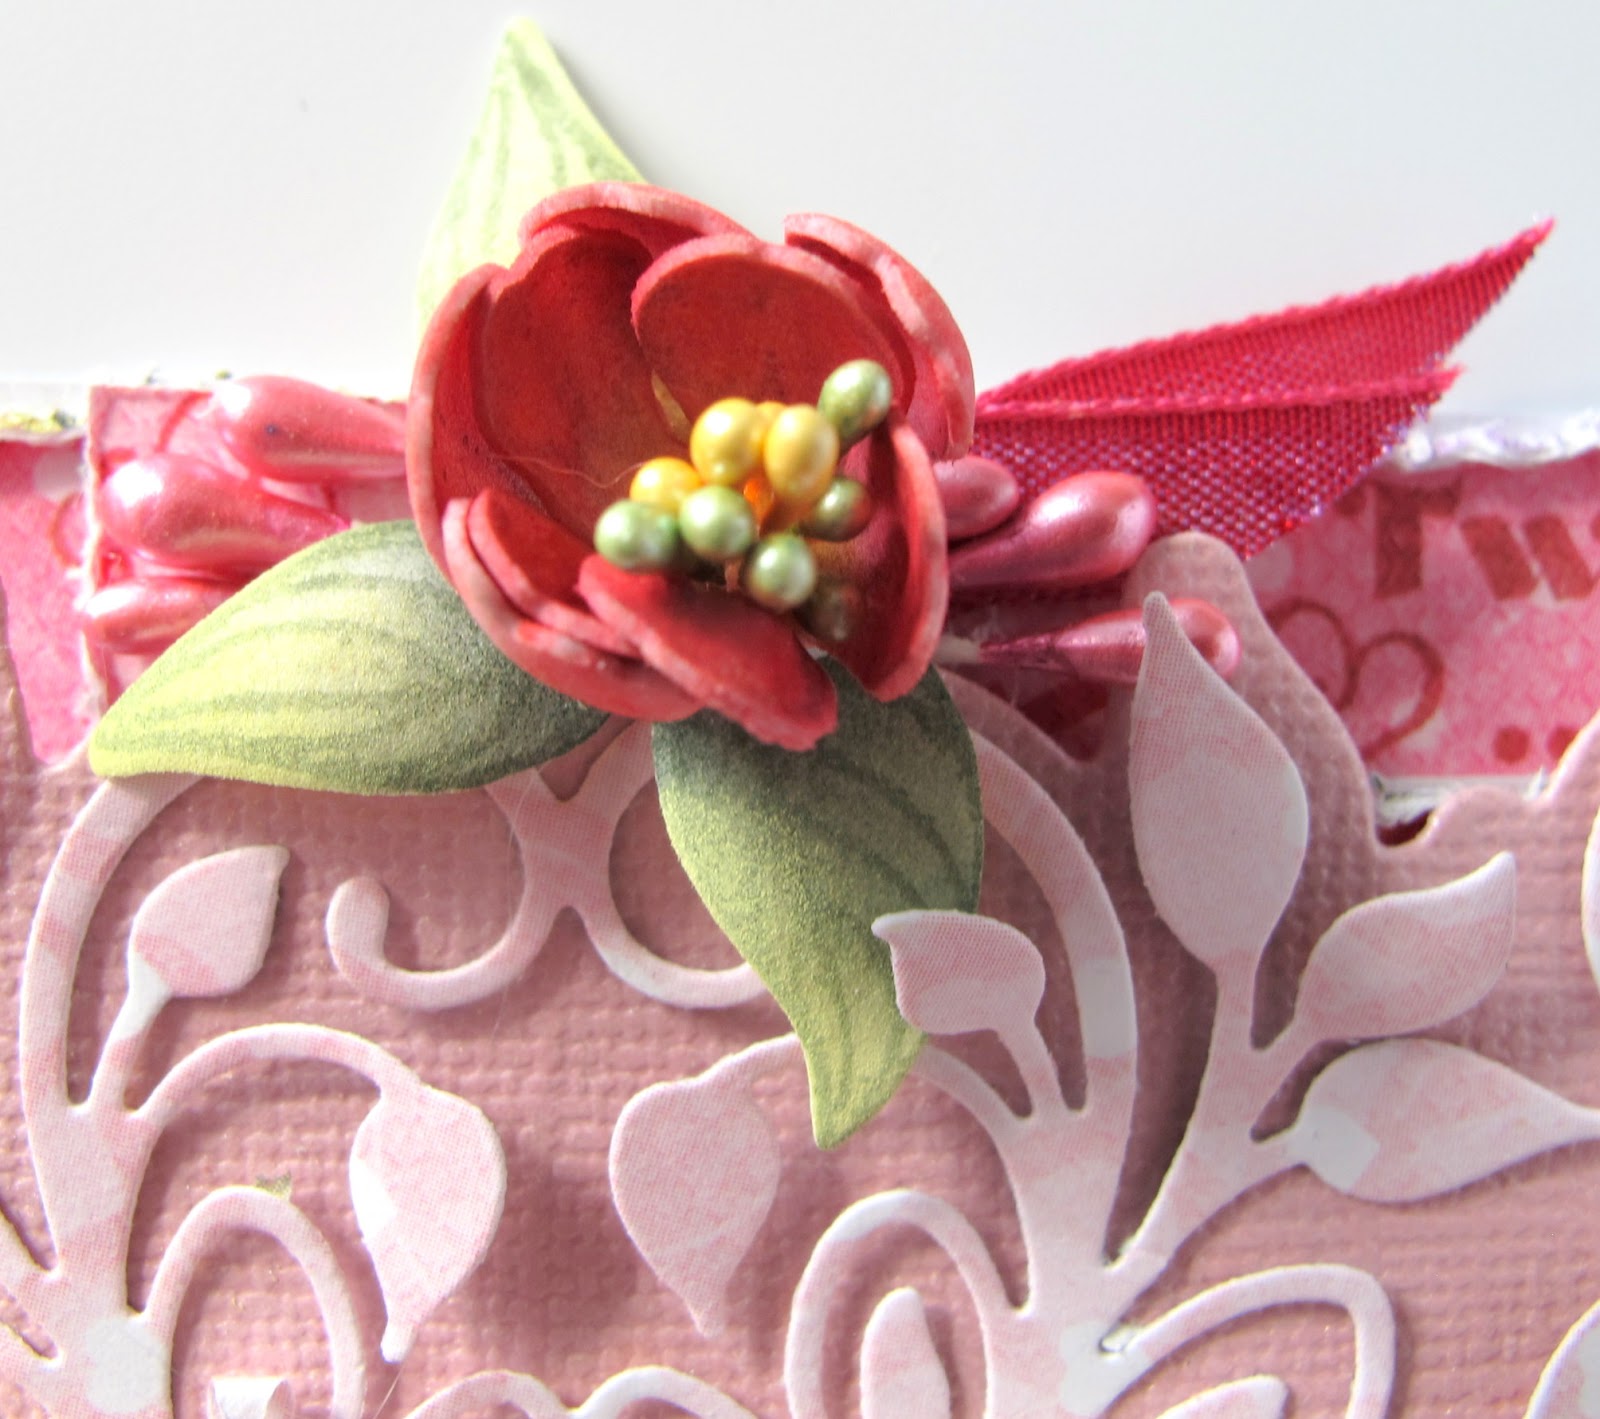
Make the flowers and leaves from the art foam paper and using the pan-pastels
to give colour to the foam flowers. Placing the stamens in the flower centres
when the foam is formed. Arrange and adhere in place with the hot glue gun. Add
a few stamens between the leaves and flowers to give more interest to the
arrangement.


What do you think of this new collection?
Isn't it wonderful!
Those foam flowers are a great asset to any collection. This collection is full of romantic dies to use for any occasion.
See you next week...sending happy scrappy inky hugs,
Sussipoppins
OXO
Gorgeous! Love your flowers and pretty ribbon!
ReplyDeleteGorgeous!
ReplyDeleteThis is just beautiful Susan!! I love all the layers!! Love the beautiful papers and colors as well!
ReplyDeleteAnother beautiful creation!! Love it!
ReplyDelete